Thanksgiving is one of my favorite American holidays, because — well, that’s easy. It involves cooking!
It took me a long time to warm to the taste of turkey. But having married into an American family that loves their annual turkey dinner, I didn’t really have a choice. It was a love-it-or-leave-it type of deal…well, maybe never quite that harsh. But I was certainly scared straight. I began to not only enjoy that once bland, inscrutable meat, but also crave it. And on the years that we are away from family (like this one), my husband demands a ‘proper’ American turkey meal. In other words, no garam masala in the pumpkin pie, like the White House chef once did¹. No chilies in the cranberry sauce either!
I’ve had a lot of learning to do, but now I can pull off a decent-sized turkey meal with each item made from scratch (naturally). Here is my cheat sheet for my future self, and perhaps any other Thanksgiving seekers for 2015 onward.
Of course, make-ahead prep is integral to Thanksgiving. Here are the dishes that I made, in order of how early I made them.
pumpkin pie

Pumpkin pie
For the crust, I used lard that I had rendered years ago and saved in the freezer. It makes a nice flaky crust with a hint — just a tiny, imperceptible hint — of gaminess. I did add a couple tablespoons of butter for the flavor. Instead of regular old all-purpose flour I used white whole wheat from King Arthur for the added fiber. Just as good and twice as healthy. (Recipe source: Joy of Cooking.)
The filling came from a decent sized pumpkin that I baked for 45 minutes, halved. It gave me enough filling for two pies plus some extra. Of course, evaporated milk and eggs were added to it, plus some spices. Cloves, allspice pulverized in a mortar and pestle. Nutmeg grated. Ginger grated to pulp using one of these handy-dandy doodads dripping with Japanese know-how. Maple syrup and brown sugar, but quite a bit less than the recipes demanded. Topped with additional cloves and brown sugar. I filled it up as high as I dared, almost to the brim, because the filling collapses as it sets. (Recipes adapted from: Alton Brown and from the Pick Your Own website.)
[11/24/16 Update: Used one medium kabocha squash for one pie. One 14 oz can of evaporated milk and 4 eggs. No sugar needed.]
cranberry sauce:

Cranberry sauce
Cranberries have that lovely earthly grape-peel flavor that they share with wine…so adding wine to my cranberry sauce seemed appropriate. Three cups of cranberries (whole), half as much red wine. Brown sugar added by the quarter-cup-fulls until I deemed it sweet enough. Boil, simmer for a while, popping the berries if they have not popped already. Turn off, cool, and that’s done. The natural pectin in the cranberries will make it gel as it cools.
stuffing-that-you-don’t-stuff-with
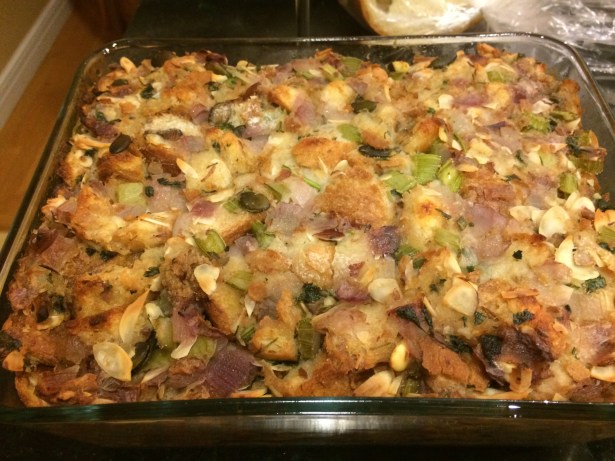
Stuffing baked outside the turkey
So one thing that I have learnt is that the mixture that one makes for stuffing the turkey with — which I love, by the way — is better baked separately in a casserole than in the body cavity of the turkey. The reason for this is that it actually takes longer to cook the stuffing all the way inside the turkey than it does to cook the turkey itself. So you either have under-cooked stuffing or overcooked turkey.
So…if you cook the stuffing outside, then…it is not really ‘stuffing’, is it? Of course it is, are we going to think up a new word for it? But…why not call it…bread-cubes-soaked-in-chicken-broth-with-onion-and — wait, are you going to name every single ingredient? Stuffing it is. Stuffing you don’t stuff with.
For this, I used 12 cups of stale, cubed French bread. Sauteed 2 chopped onions and 3 chopped celery ribs and some crimini mushroom stems ribs in a quarter cup of butter. Added parsley and fresh sage from the garden. A cup of slivered almonds and a few raw pumpkin seeds. Toss with the bread cubes, drench the whole thing in warmed chicken broth until it is all nicely moistened — this took more than three cups.
Just before serving, stick it in a 400 oven for about 45 minutes. Covered at first, uncovered later to brown the top. (Recipe source: mother-in-law.)
[11/24/16 Update: Do not add mushrooms, instead add sliced radicchio and sundried tomatoes.]
mashed potatoes

Mashed sweet potatoes
Instead of the regular potatoes my husband requested sweet potatoes because of their richer flavor. Important trick — these can be done ahead of time and saved in the fridge in a baking dish, all ready to go. On the day you want to serve it, they just go into a medium oven (covered) for about 30 minutes. All you have to do is add a little extra milk than you normally would. The texture has to be more runny than you would want; by the time it has reheated in the oven (along with the stuffing above) it will have dried a bit.
To boil the four large sweet potatoes (I refuse to call them yams, because the yam is actually this vegetable), I pressure-cooked them for 20 minutes. Peeled; then added some butter and salt and milk while mashing.
bread rolls
I used my own recipe for laadi pav, but used sourdough starter instead of yeast. This was primarily because I had no room in the fridge, and sourdough takes so long to rise that it could be left outside the entire day. Worked out great! (Recipe forthcoming one of these days.)
giblet gravy
So by the time the turkey comes out of the oven and is carved, people are ready to eat and I get too distracted to make a gravy from the pan sauce. The solution? Pre-make a gravy from the innards of the turkey, that either have too little meat to count (like the neck) or make most Americans cringe (like the gizzard and the liver). So pull those out of the turkey before you set out to dress it, cook them with some onions until they leave a deep, rich fond on the pan surface. Add wine, broth, some flour, and you have yourself a gravy. (Recipe source: Joy of Cooking.)
roasted math broccoli

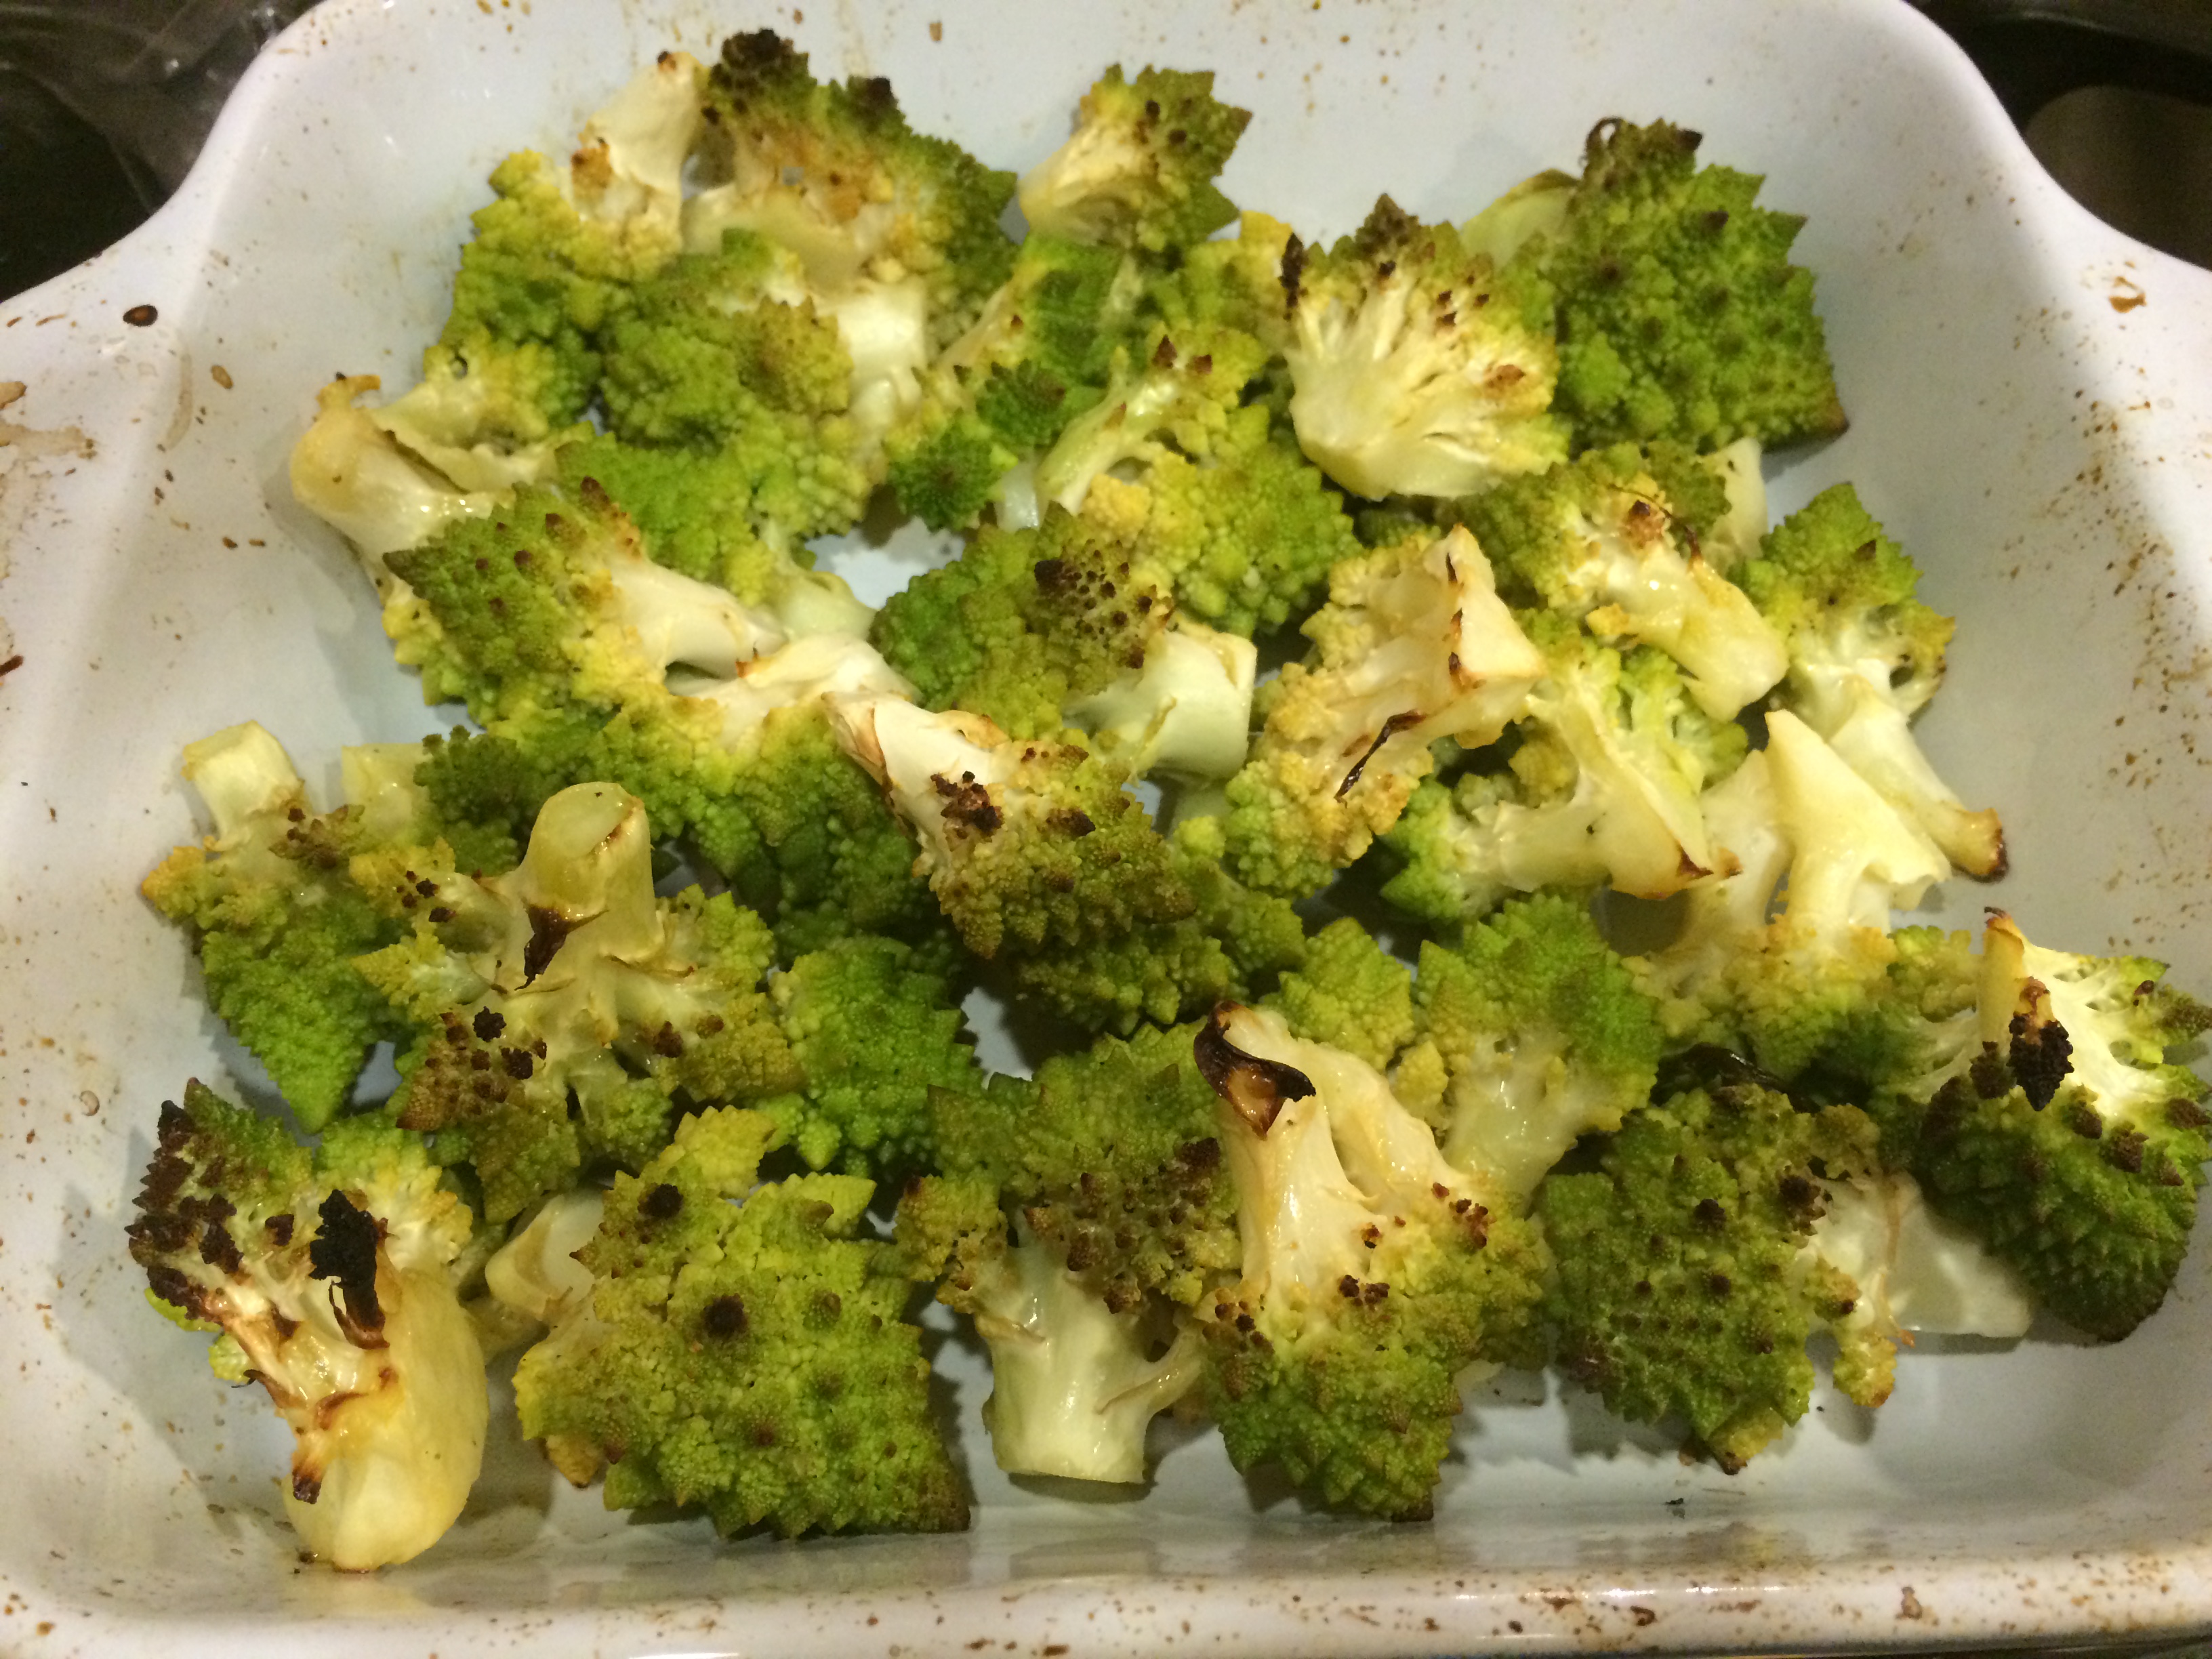
Romanesco broccoli
Here is a vegetable for math geeks. Romanesco broccoli is a variant that was found in Italy. The number of spirals on its head is from the Fibonacci sequence. Each little flower-head has the same shape as the entire head — so it approximates a fractal. Don’t care about the math stories your vegetables are trying to tell you? Well it tasted great and is a particularly festive looking vegetable. I microwaved them to cook them lightly, then stuck them under the broiler for a few minutes to brown them.
vegetables roasted with turkey

Vegetables roasted with turkey
I roasted the turkey with vegetables strewn around it cut up in big chunks. Not only are they delicious when they are done cooking, but make for a lovely pan drippings gravy. As a matter of fact that was the highlight of the meal. Here are the vegetables I used — turnips quartered; cipollini onions quartered; celery ribs, cut up in stalks; carrots cup up few inch long; crimini mushroom caps; small bunches of parsley.
turkey
Lately wild turkeys have made a comeback in our corner of Northern California. Driving down windy hill roads, one sees small flocks of them along the sides, oblivious to human habitation. I feel a deep satisfied thrill upon seeing them, as though our generation has reclaimed a bit of wildness that had been lost forever. Then, I turn my thoughts to the domesticated turkey that is raised for food, and how lacking a life it has compared to its wild cousins. I did the best purchase I could, finding a turkey that the makers claim has had a decent life. So when it comes to being thankful, I would like to thank the turkey.

Turkey before roasting
Here are the tricks I used for roasting (recipe sources: this Tools and Resources forum on Gardenweb):
- Take it out of the fridge a few hours early to bring to room temperature.
- Leave it overturned in the sink to drain the cavity as much as you can. The rest of the liquid must be dried with paper towels.
- Lately brining has become very popular, where the entire turkey is soaked in a salt water bath overnight. While this makes for moister flesh, we don’t prefer this in our family because the meat then tastes ‘brined’. Hard to explain, but we have never taken to it. Also the pan drippings simply can’t be as rich and caramelized, I’m guessing, because of the salt water that would be dripped out of the turkey.
- To prep, rub about one and half tablespoons of kosher salt all over the inside and outside of the bird.
- Rub about a quarter cup of softened butter all over also.
- Rub some butter in between the skin and flesh of the breast. This skin is really quite easy to slip one’s hand under. I also deposited some fresh sage leaves under the skin in various places. The point of doing this is to keep the breast meat moist and allow the skin to brown.
- Leave it unstuffed. I didn’t. I did put some big chunks of vegetables into the cavity because I could not resist filling it. But ultimately, it just slowed down the cooking, and it never achieved safe temperatures, and we just discarded it. The vegetables strewn around the sides were much better.
- Use the ‘convection’ setting in your oven if you have it, and if you have a ‘roast’ versus ‘bake’ use the ‘roast’. Use the meat probe if you have one, and stick it into the deepest part of the thigh. Set it to 165ºF.
- Pour about half a cup of chicken broth or water in the roasting pan.
- Choose a wide, sturdy pan with a low brim. This is to allow air to circulate around the turkey. Also set the bird on a rack for the same reason.
- Start the roasting high — at 425ºF. Turn it down to 325ºF after 15 minutes. This will allow it to brown right away, and come to the correct internal temperature more slowly. Once the meat probe shows about 140ºF, tent the entire turkey under foil, so it does not burn.
- The vegetables strewn around will deepen in color right away, and soon start frying in the fat that drips from the turkey. If any of the pieces threatens to char, lift it out of the pan.
- Baste the breast once every half hour or so.
- It will take about 3 hours for a 15 pound turkey, unstuffed.
Roasted turkey
pan drippings gravy
This was the highlight of the meal, and I needed to do almost nothing to make it happen. Have a look at the rich brown drippings on the roasting pan above. All that needed to be done was to lift the turkey out, lift the large chunks of vegetables out to serve with the turkey, and scrape the rest into a little pot. Over time, the fat cooled and rose to the top, so it was easy enough to spoon it off. The rest of the caramel brown liquid made for an excellent rich gravy.

Pan drippings gravy
¹Of course, since garam masala is not a fixed recipe but uses ‘warm’ spices like cloves, nutmeg, ginger, and allspice, you could say that I did indeed use garam masala in my pumpkin pie filling.
(Click here to find me on Facebook and here on Twitter.)