Roasted tomato sauce For the Win

img_9063Nature made tomatoes delicious but She also drenched them in unappealing wateriness. All tomato sauces are based on rescuing the flavor out of the swamp. It is simply a matter of technique.

Some insist that the skin and seeds must be removed. Some put great stock in canned tomatoes as opposed to fresh; others swear by long cooking. These are all fine techniques; but the one that works in my kitchen is one that I haven’t seen other recipe writers talk about much. This is surprising, because there is literally no way to describe how deep and dark is the flavor that results.

It is more of a technique than a single recipe, though I will give you a couple of variations that I often make. It involves long-roasting in the oven instead of long-cooking on the stove-top: four hours is ideal, but three hours can work too, at a slightly higher temperature.

Since it takes no fussing over, you can set it in the oven and leave the house, or putter about your other household duties. Long-cooking is no strain if your appliances do all the work. Yes, it does take a bit of planning and it does take about 5-8 nice plump medium tomatoes.

The basics

As to why this technique results in flavor so much deeper than the traditional method of cooking in a pot, I can offer some educated guesses.

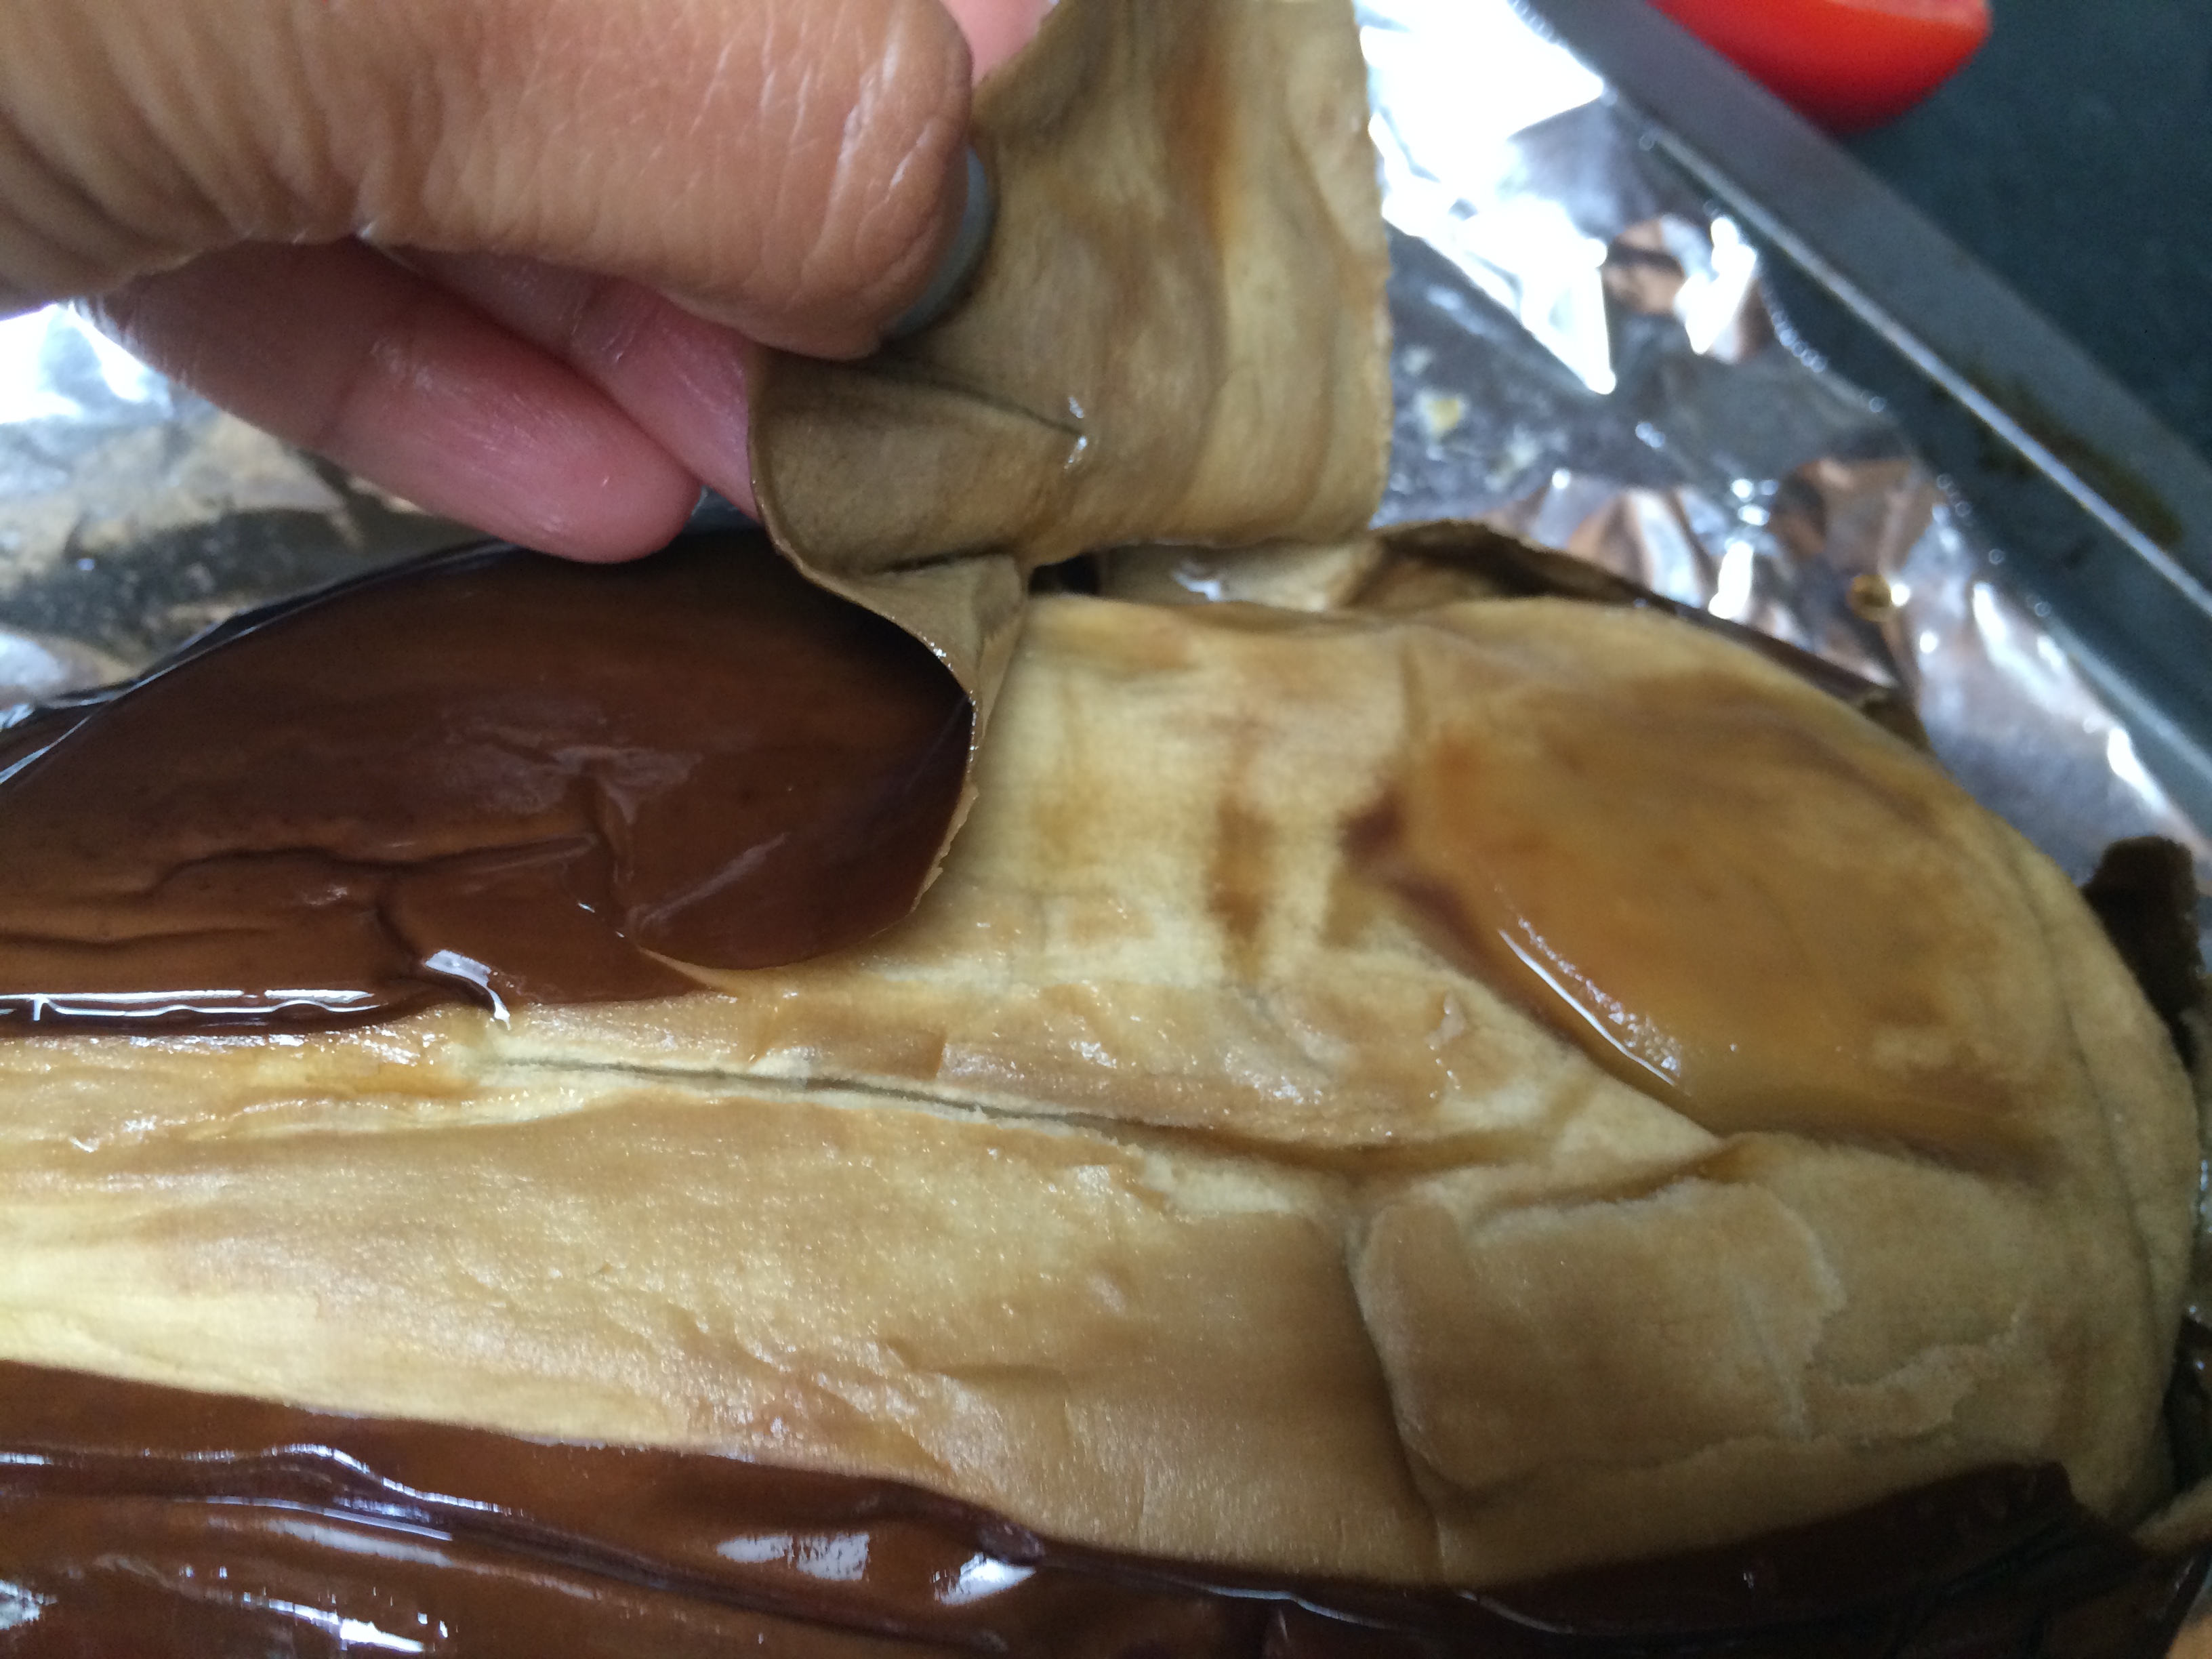
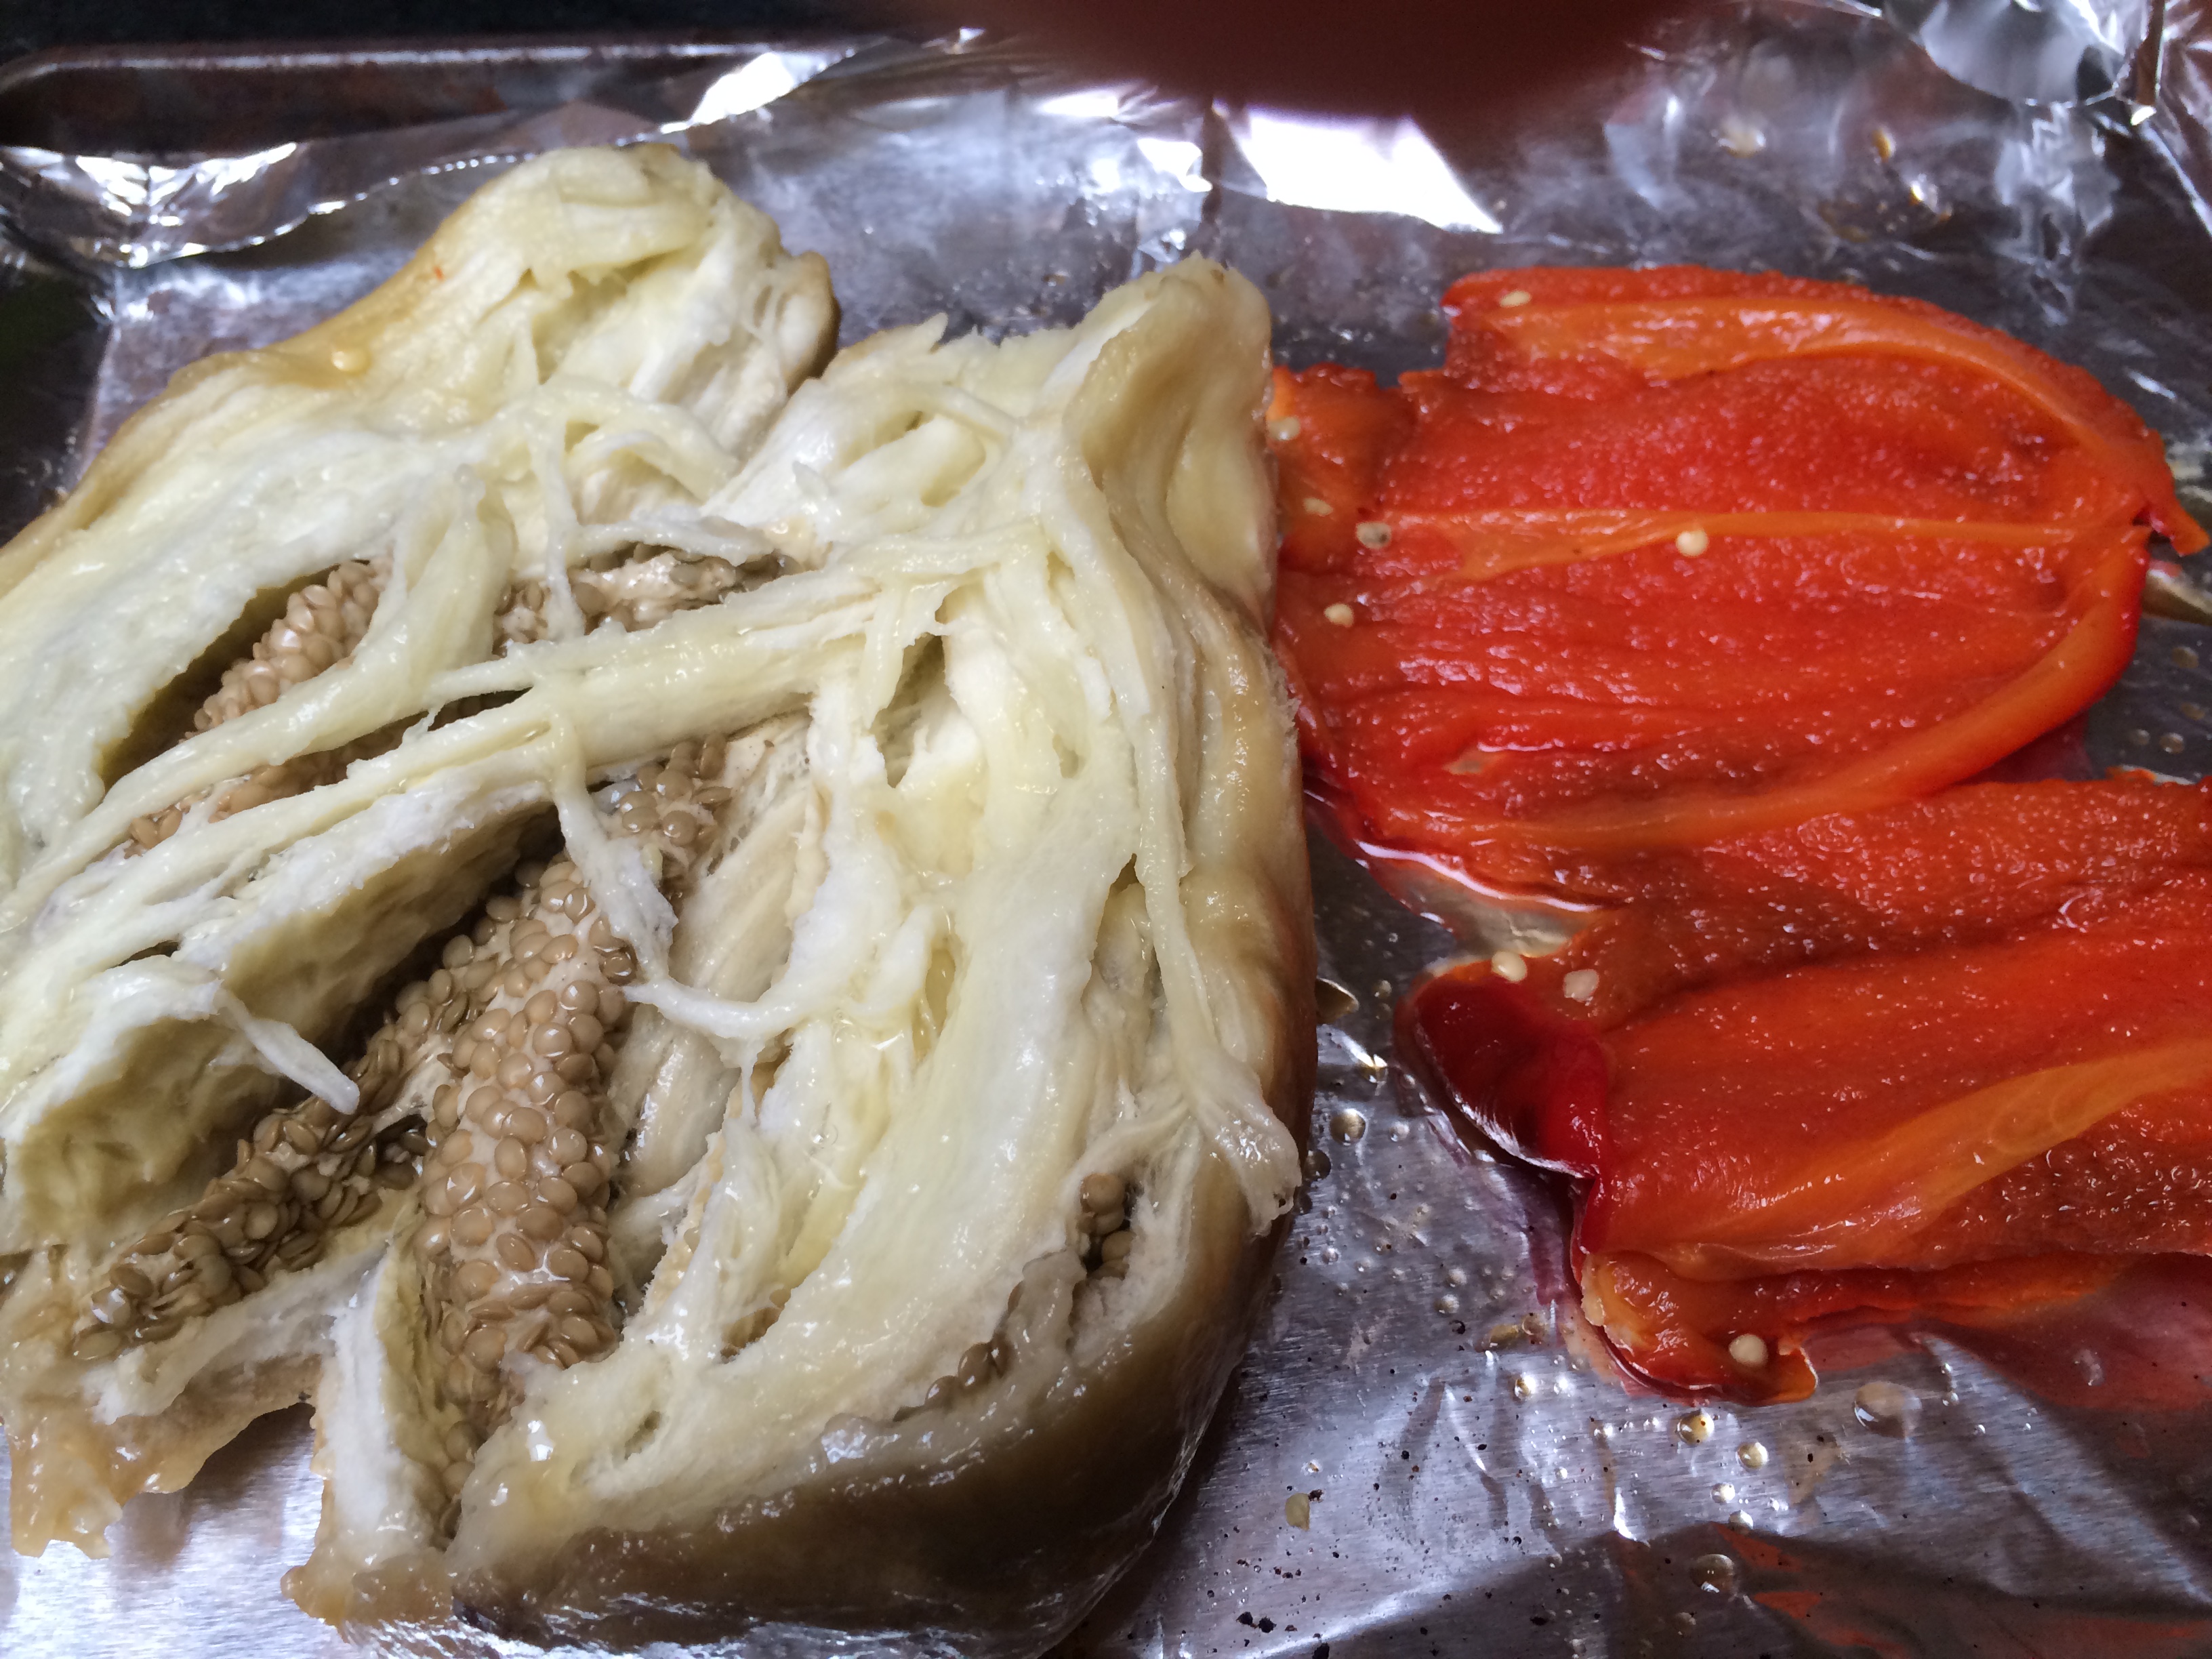
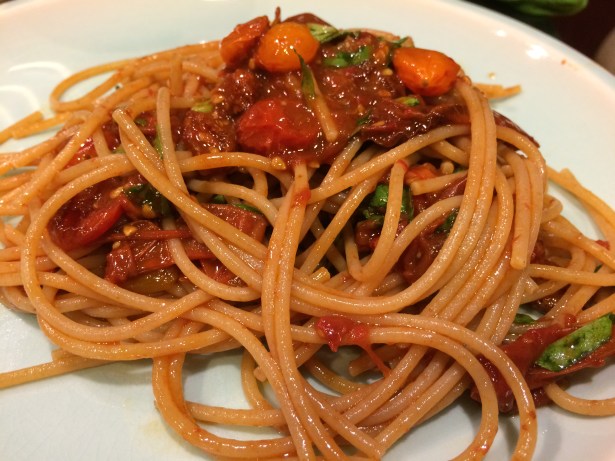
One of the components of the flavor is the deep caramelization of the cut surfaces of the tomatoes as they are exposed to the dry heat of the oven. The juiciness ensures that they do not burn, but you can see the chocolaty color on the edges in the pictures below. This color shows that the Maillard reaction has occurred, imparting a welcome depth.

Nor does the the tomato liquid dry out evenly, as it would on the stove-top. I have often tried long-cooking simply chopped-up fresh tomatoes in a pot; and while the flavor certainly intensifies, the waxiness of the peel and the bitterness of the seeds stand out, diminishing the flavor. Of course one could peel and seed the tomatoes, but if one is to remove all the fiber from a thing, why even bother?

The great advantage of the long-roasted sauce is that the peel and seeds all go in, impart a caramelized edge, and yet, deep pockets of juiciness are left behind; as the oven has not dried out the fruit indiscriminately. The residue one is left with is approximately like a hybrid of sundried tomatoes on the cut-surfaces, and deep juice bombs inside.

The basic steps are these. Cut up the tomatoes either in halves, quarters or eighths. Place them cut-side-up, salted, drenched in olive oil in the oven, in a single layer, at a low temperature for up to 4 hours. At the end, a simple dressing of fresh olive oil, vinegar, garlic or herbs are necessary. Mashing them roughly with the back of a wooden spoon or a potato masher produces a sauce that will cover long pasta like linguini or spaghetti.

Variation with red wine vinegar and garlic

Roast tomato sauce with garlic and red wine vinegar

Ingredients:
  • 6 medium tomatoes
  • 1 fat clove garlic
  • Few tablespoons extra virgin olive oil
  • A splash of red wine vinegar
  • Salt to taste
Method:

Spread a bit of oil in a flat ceramic dish and start the oven at 250ºF  (if you have 4 hours) or 300ºF (if you have 3). Meanwhile halve the tomatoes and remove the stem. Place them cut side up in the dish, as crowded as you can, so they hold each other up. Sprinkle with salt and squirt more oil on the surface. Place them in the oven and set the time for either 4 hours (if set to the lower temperature) or 3 hours (if set to the higher).

Meanwhile crush the garlic and mix in some salt. This will liquefy and cook it, which will take about half hour.

At the end of the roasting time, mash the tomatoes a bit with the back of a wooden spoon. Stir in the garlic and the splash of red wine vinegar.

Cook and drain spaghetti or other long pasta; stir to combine thoroughly with the sauce.

Variation with fresh basil and olive oil

Roast tomato sauce with fresh basil and olive oil

Ingredients:
  • 6 Kumato or other tomatoes
  • a handful of cherry tomatoes
  • 6 tablespoons extra virgin olive oil
  • salt to taste
  • about a dozen leaves of fresh basil
Method:

Spread some oil on a flat ceramic dish. Quarter the Kumato tomatoes and halve the cherries. Spread them tightly crowded on the dish, tucking the cherry halves into the gaps between the others. Sprinkle with salt and more olive oil. Reserve about 3 tablespoons of olive oil for later.

Roast at 250ºF  (if you have 4 hours) or 300ºF (if you have 3).

Slice the basil leaves into ribbons.

Once the tomatoes are done, take out of the oven, mash and taste for salt. Add the reserved olive oil and the basil. Toss with pasta.

Variation with infused oregano and black pepper

Roasted tomato sauce with oregano and black pepper

Ingredients:
  • 7 or so medium tomatoes
  • quarter cup of olive oil
  • a few sprigs of fresh oregano
  • several twists of black pepper
  • salt to taste
Method:

Prepare the roasting dish with some olive oil spread on the base.

This time cut the tomatoes into eighths. Spread them tightly in the dish, cut sides up. Since the pieces are smaller, use the higher oven setting (300º F) and the shorter time (3 hours). Cover with salt to taste and olive oil. The sprigs of oregano are to be tucked into the dish and black pepper sprinkled onto the tomatoes. As the roasting proceeds, a savory aroma will filter through the kitchen.

When done, remove the oregano sprigs. Mash gently, add more olive oil and toss with freshly cooked long pasta.


I would love to hear your thoughts in comments below. Follow me on Twitter, like my Facebook page, or email me at aneela -at- theoddpantry.com. You can also subscribe to this blog here:

Enter your email address to subscribe to this blog and receive notifications of new posts by email.

Advertisement

The parable of food preservation; an Indian carrot pickle

IMG_7128Once upon a time, the dark cold months were months of deprivation. No green shoots appeared in the ground, no fruit swelled on the trees. The young ones went without, or raided the underground cellars for the grains and husks that they shared with their rodents. But the old ones said no, look, here’s what you do. You collect your bounty in the sunlit months; then you preserve it to feast on in the dark months.

“Preserve?” said the young ones, reflecting that perhaps dementia had claimed the old ones. “We have no fridges, nor vacuum packs. Surely, microbes will feast on our bounty before our clumsy hands are able to tear off a single chunk of it to place at the hungry lips of our babes. Surely a week, perhaps two, is how much one can hope to prolong the lives of these frilly delicate vegetables, whose very fronds seem infused with the light of Solis. But all season long? Respectfully, winter is long and harsh.”

“You fools,” said the old ones then, “have we taught you nothing?” They might have cuffed them with an open hand, I’m not sure. Then they drew out jars and jars of fruits and shoots they had taken the trouble to preserve many moons ago. The glass shone with the still preserved colors of the sun’s bounty.

IMG_7143
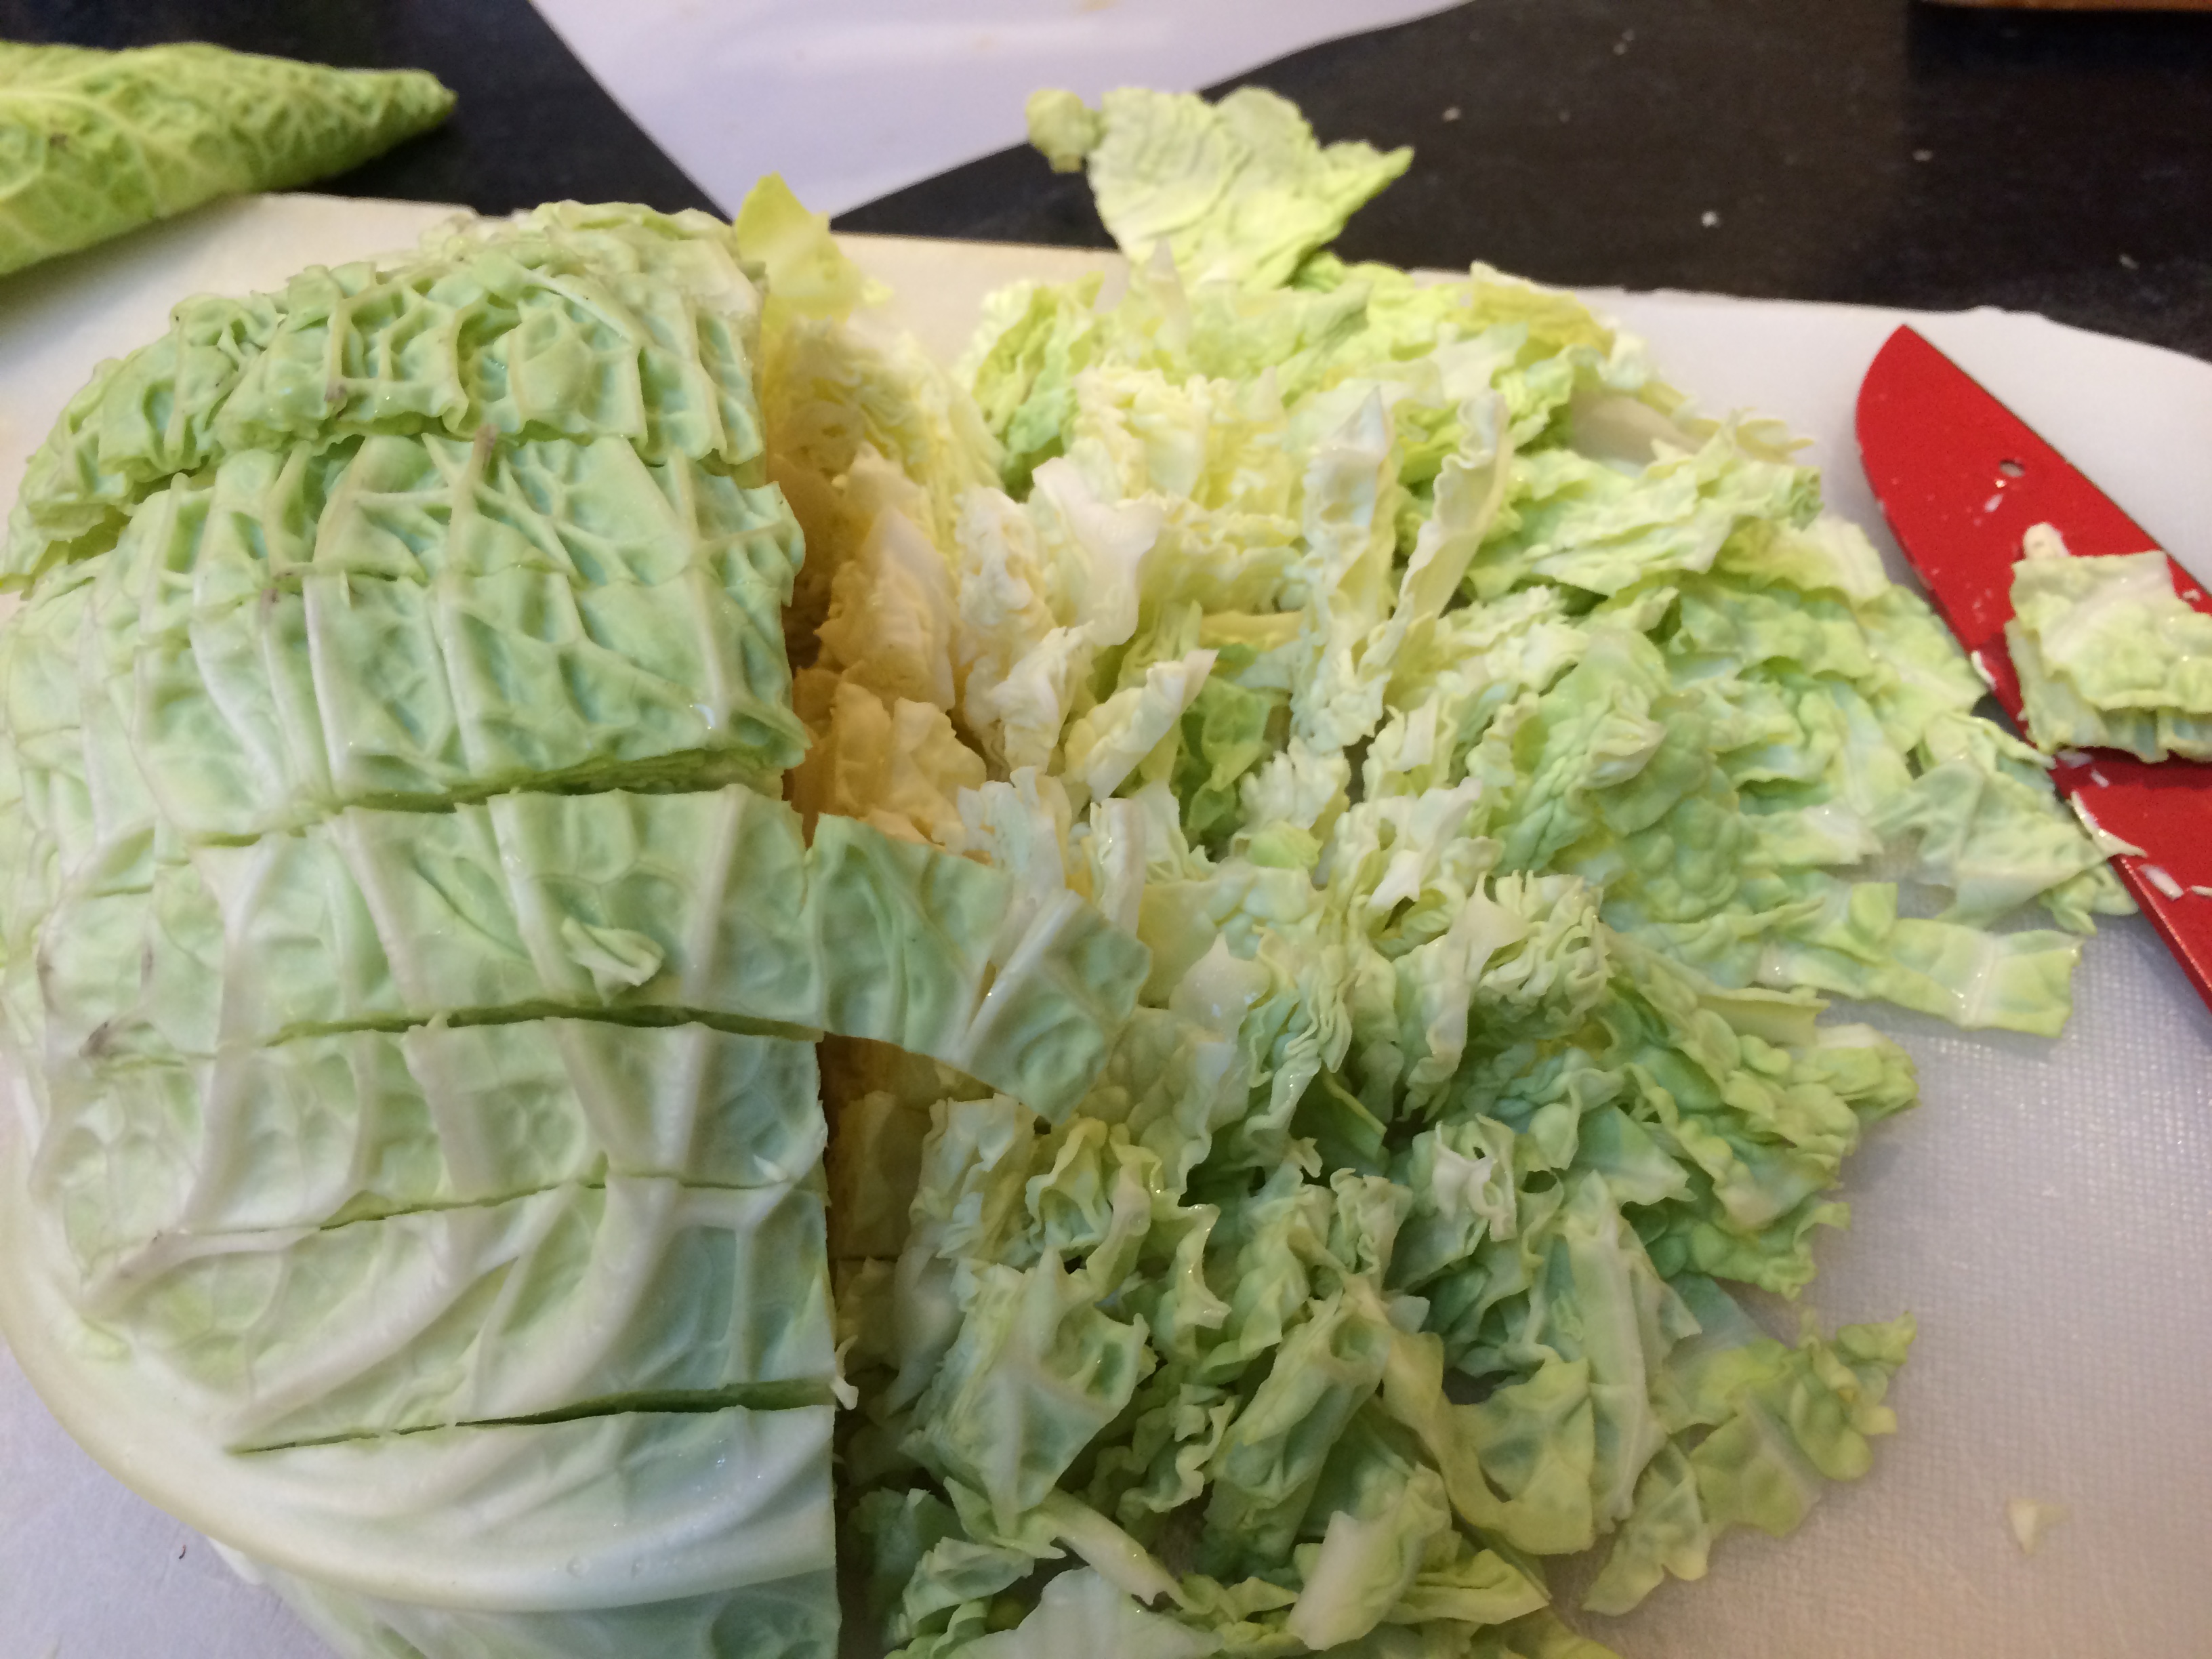
But at first, the young ones shrank from the taste. “Pooh!” they said. “We see that this is imbued with the deep orange of a carrot, but the saltiness scours our tongue. And the mango—did you have to preserve it when green and sour? Could you not have waited for its velvety sweetness to emerge? Ah, we would give our firstborn for the taste of a sweet mango now! That clay jar under the ground—could that be cabbage? But heed the fumes—did a dog die in there?”

“Your trouble,” said the old ones, snatching the kimchee from their hands, “is that your noses are underdeveloped. Look. All of creation loves a good vegetable. You do, and so do the microbes. Food preservation is a race—who shall get to eat the bounty first? The microbes, or the apes known as humans?”

“We are not apes,” the young ones said, with dignity.

“You certainly are,” the old ones returned, “but moving on. Now not all microbes are created alike. Some sicken and extinguish us; others concoct healthful compounds in our foods. Let us call them (because thou hast simple minds, and thy understanding is shallow) the good microbes and the bad microbes. Some of food preservation is nothing but allowing the good microbes to build their colonies in our foods; by their own mysterious devices, the good microbes then form barricades to prevent the bad microbes from entering. Not only that; the guts of these little ones start to break down the foods, thus do our guts get a head start.”

“Shall we then eat microbe-infested foods?” the young ones queried. “Your brains are going soft, perhaps the good microbes have fomented trouble in them.”

“The word is ‘fermented’,” the old ones said, “and you need to understand, your bodies are suffused with microbes at all times. Be not childishly fearful. In fact, in the age of our descendants, fermentation will be thought of with glamour and books and websites shall celebrate the advent of the good microbes in our food, and our partnership with them.”

The old ones then explained how salting the food created a happy place for the good microbes, but instilled fear in the hearts of the bad ones. And how sourness also chased away the bad ones, so one could add to the food an acid-making elixir, such as lemon or vinegar; but if one wanted to be specially tricky, one could have the good microbes produce their own sourness from the depths of their bowels, as they feasted on sugars. Such sourness, the old ones further explained, went by the name of lactic acid, but had little to do with the food of the mammal babes.

IMG_7131
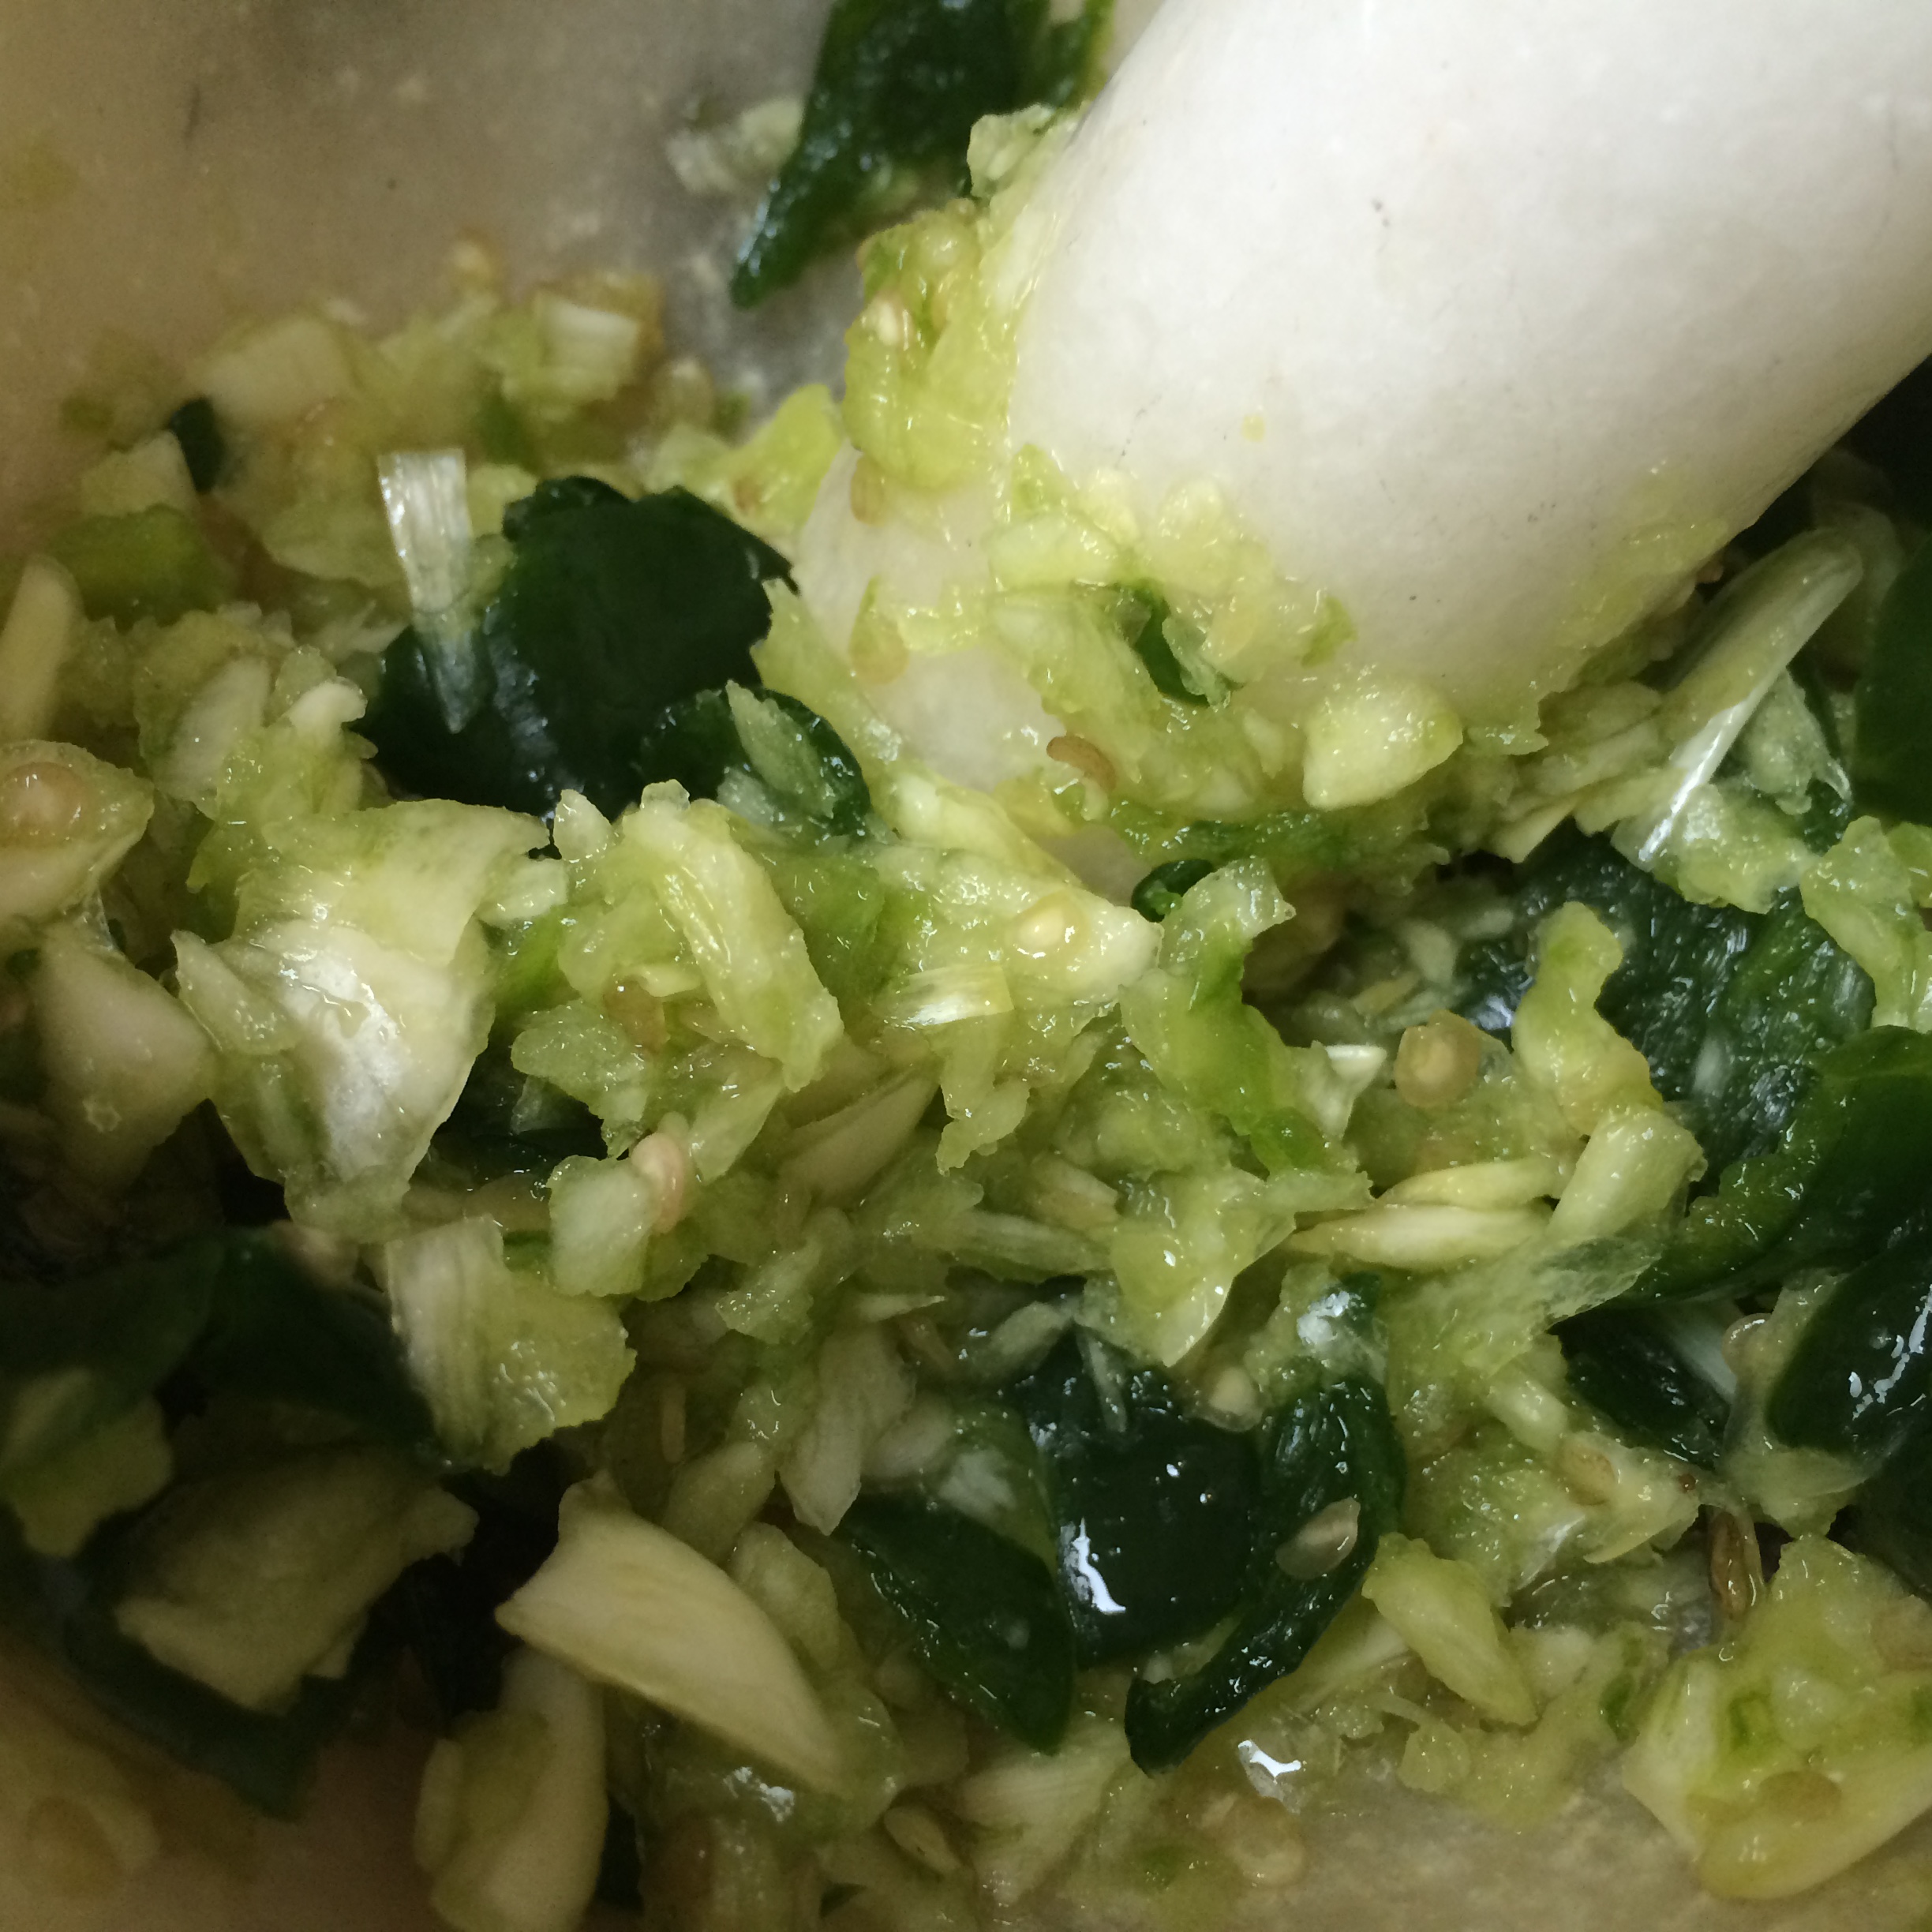
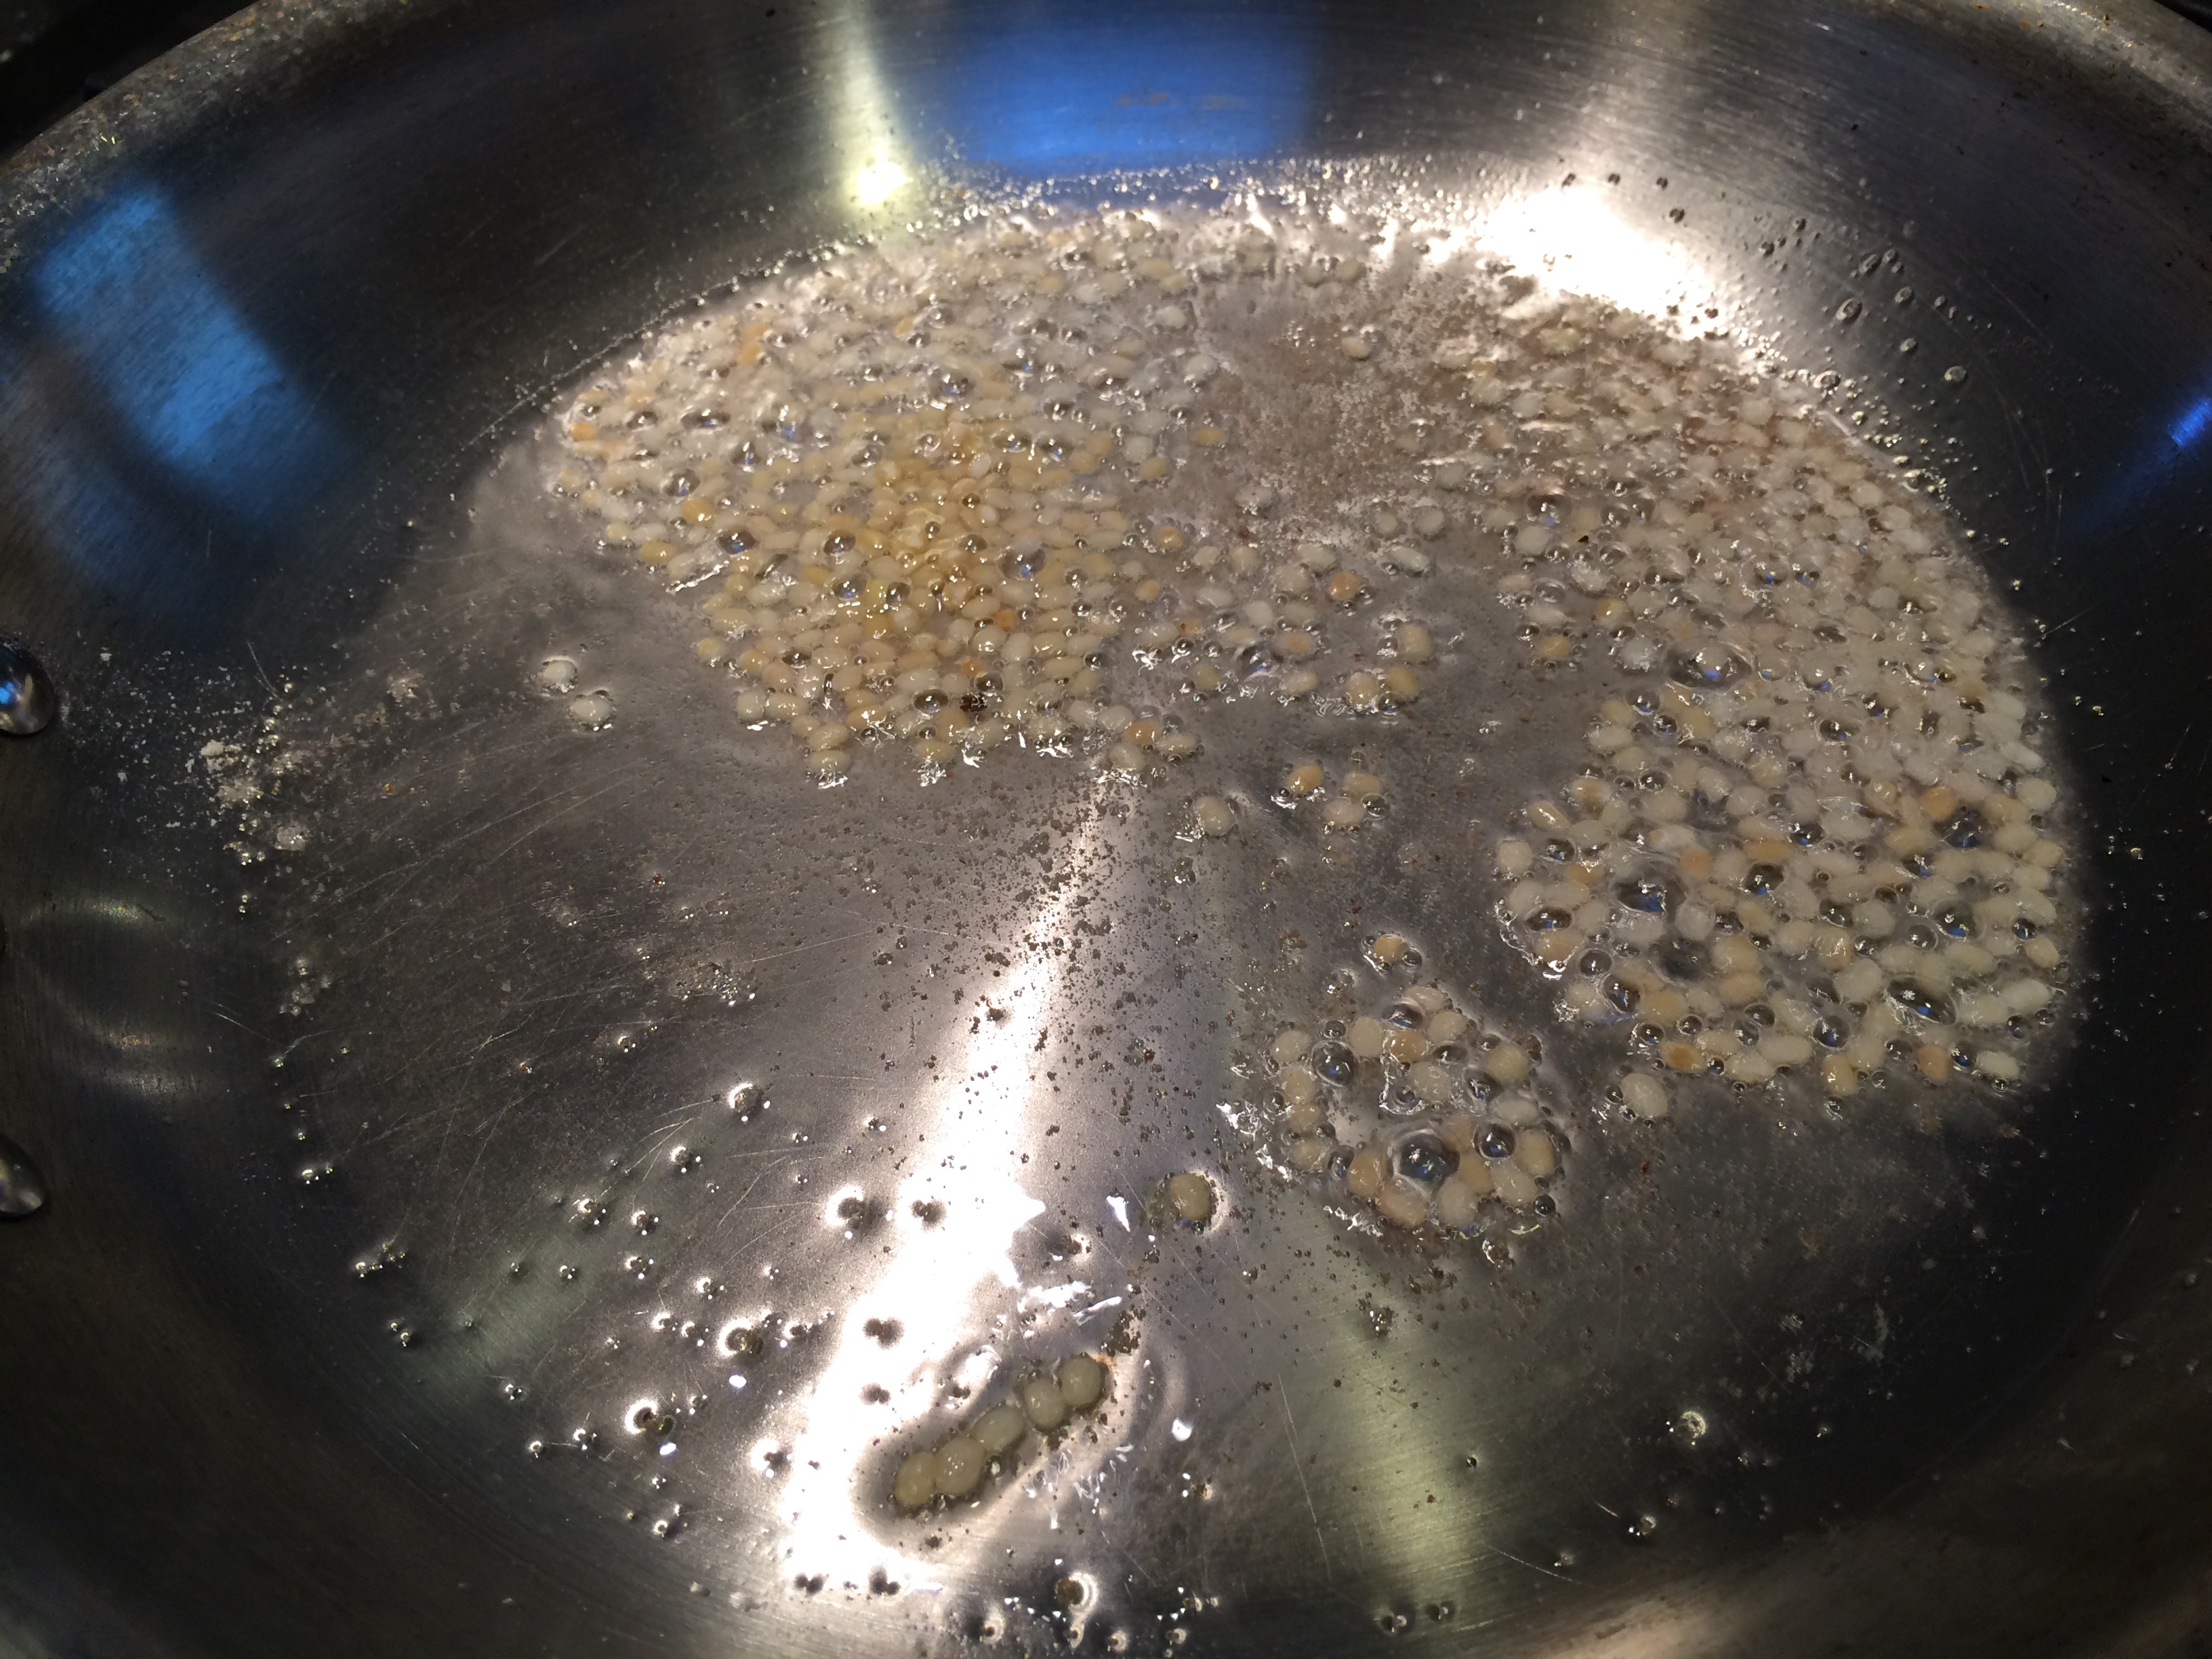
“But heed,” the old ones intoned, “while fermentation is hip, do not forget, it is not the only way. Remember, water is needed for all of creation, and all of creation harbors it; the bad microbes desire it with a thirst so deep that it might be a thirst for life itself. What if one were to draw the water out of our foods, and leave it shrunken and dry; the microbes would find it as bare as a moonscape and would not deign to enter. Then: what if one were to cover the whole thing in oil, perhaps an oil such as from the mustard plant, that is practically a warrior against microbes itself, what then?”

What one has, then, is an Indian pickle.

Indian pickles (achar)

It has been a persistent mystery in the minds of some interested parties as to whether Indian pickles are fermented, or not. Among these, I count myself, and also my dear blogger friend Annie Levy from Kitchen Counter Culture. Well, by applying the powers of my mind deeply to the question in a Holmesian sort of way, I think I have my answer. Indian pickles—the typical kind, that are preserved in mustard oil—are not.

Now there are certainly Indian pickles that are fermented, but those are not the norm and the ones that I am familiar with do not use oil at all. But we will talk about those another time.

The typical pickles use a pretty standard method. First, salt the food: salt wants to reach equilibrium, and if the food isn’t salty already, it wants to enter the food from its surroundings. As it enters, it draws out the moisture and takes its place inside the food.

Next, allow the moisture to dry out by placing it in the sun. Once the pieces are much shrunken, jar it up and pour mustard oil over.

IMG_7127
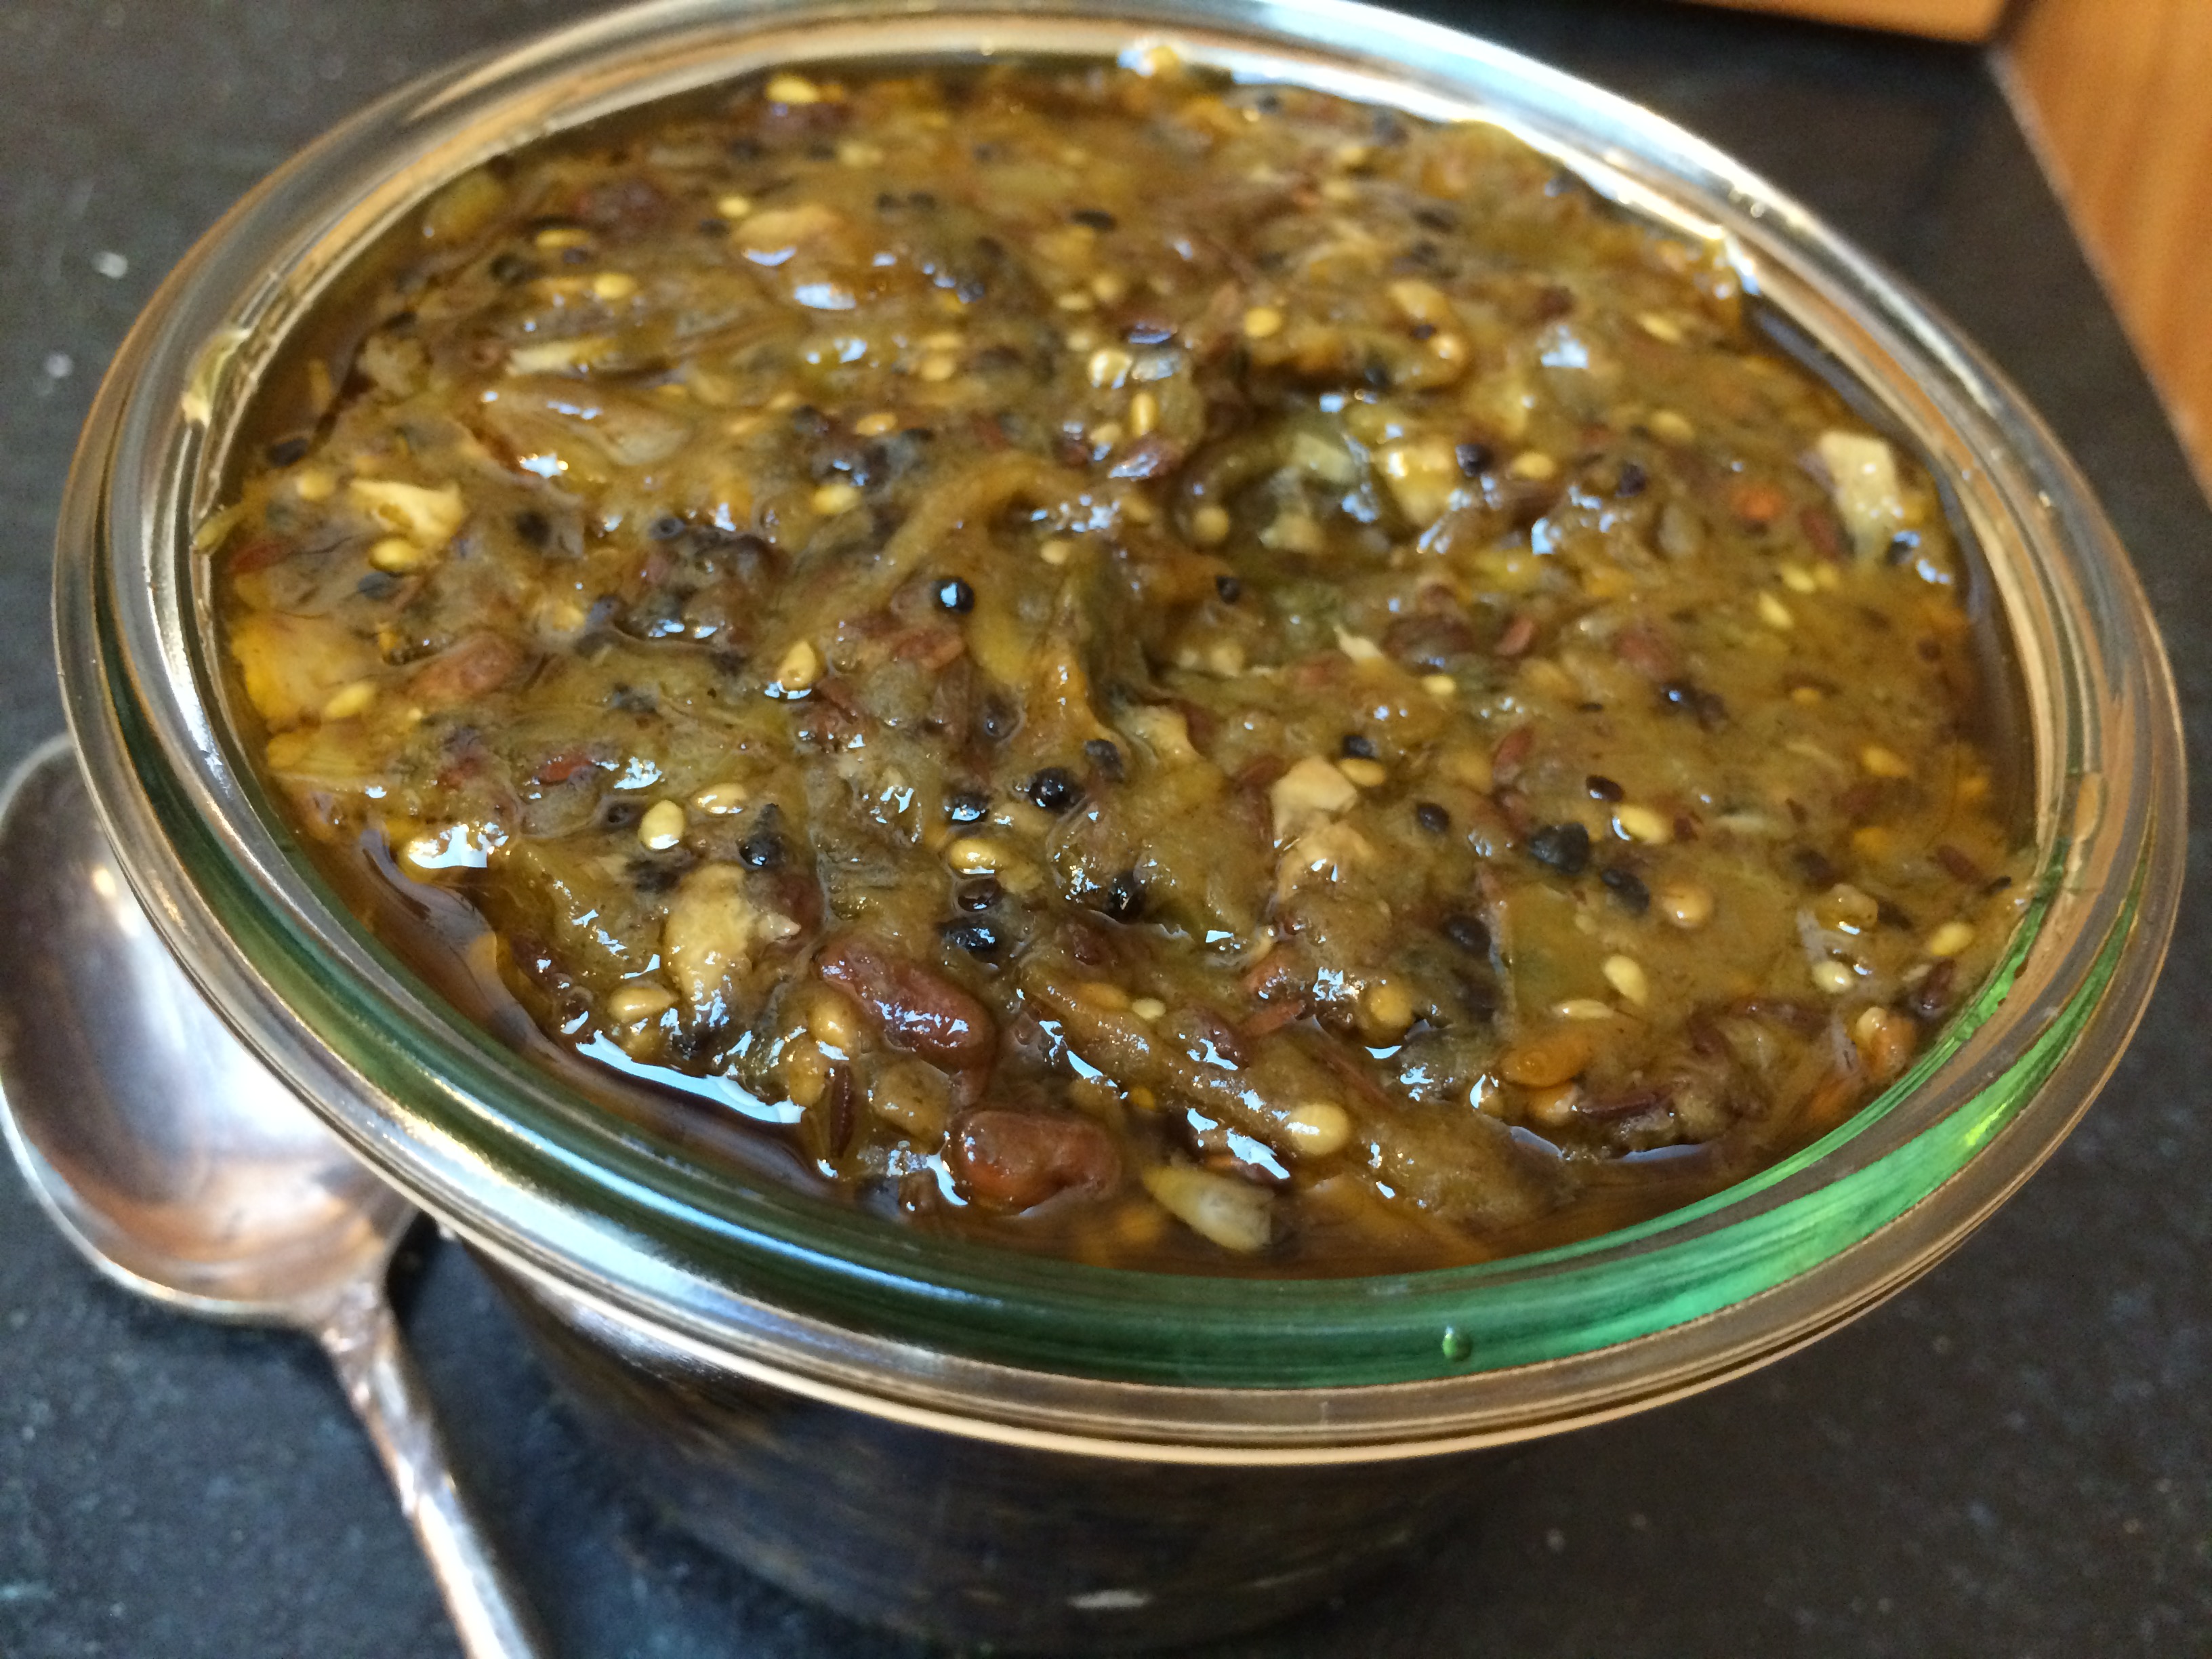
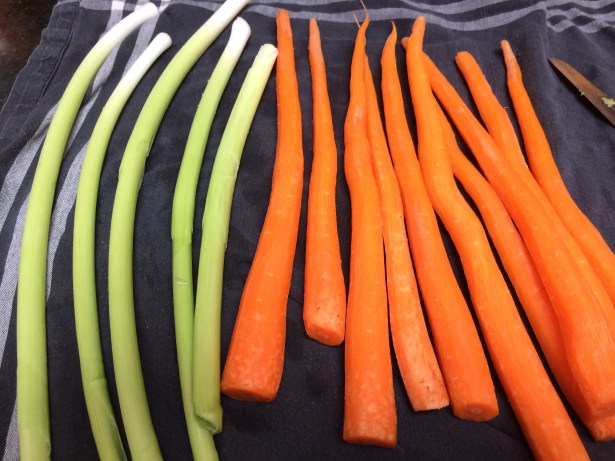
This is the basic method I have used with such disparate ingredients as cranberries and sour mango. This time, we have carrots and some green garlic.

The spices tend to be a similar set. Fennel seed is congenial, and so is the use of nigella seed. Turmeric powder has antiseptic properties so that is always used, and the heat comes from red chilies. Usually, the spices are left whole, this time, I chose to pulverize them a bit. They went from looking like this to this:

Of course, a lot of salt is used, and the carrots and green garlic are thoroughly mixed with the spices and salt and laid out on a wide, flat surface. Cover with cheesecloth, place in the sun, and allow the salt and the sun to perform their magic. Watch the slow shriveling of the carrots over the period of a week:

Once the pieces look pretty dry, it is time to mix in some lemon juice, jar it up and pour mustard oil over. Some like to heat the oil to smoking point and then cool it before using, but I don’t see the point because I want the oil to be at peak pungency.

Carrot pickle

  • Servings: 1 pint jar
  • Print

Ingredients:

  • About 10 carrots, washed, scraped, and dried completely
  • About 5 full stalks of green garlic, washed, trimmed and dried completely
  • 3 tablespoons fennel seeds
  • 1.5 tablespoons nigella seeds (kalonji)
  • 1.5 tablespoons fenugreek seeds (methi)
  • 2 tablespoons mustard seeds
  • 3 tablespoons sea salt
  • 0.5 tablespoons red chili powder
  • 0.5 tablespoons turmeric
  • 3 tablespoons lemon juice
  • About half a cup of mustard oil

Method:

Once the vegetables are completely dry, slice them up in smallish segments, the exact shape does not matter. You could do longish sticks or smallish dice, as I did.

Pulverize the whole spices (fennel, fenugreek, nigella and mustard) slightly using a mortar and pestle. You can skip this step if you like.

Place the vegetables in a wide platter and cover with the pulverized spices, the salt, turmeric and red chili powder. Give it a thorough mixing so all the pieces are evenly covered with the salt and spices.

Cover the platter with cheesecloth and place at a sunny window. My window only gets sun for about an hour in the mornings and that seemed to be enough. Every couple days, give it another mixing with a scrupulously clean spoon.

In about a week the vegetable pieces will look much shriveled, darker and more leathery. Stir in the lemon juice.

Transfer to a scrupulously clean glass jar (you can sterilize it in boiling water first if you like, I didn’t). Pack it down. Pour some of the mustard oil over it and wait for it to settle; pour more. Do this in a few stages, until a thin film of oil shines over the very top of the jar. For me, it took about half a cup. Cover and store in the pantry.

Your pickle (achar) is done. It is great as a side in minuscule portions (since it is highly spiced). It should last for a good long time, even up to a year.


(Click here to find me on Facebook and here on Twitter.)

Four exotic fruits: in which I eat them so you don’t have to

IMG_5854

The other day I went to the grocery store looking for fruit with a pretty standard shopping list. On it were such stalwarts as apples, bananas, perhaps a basket of berries or so.

But that is not what I walked out with: not at all. Instead, my eye was drawn to a particular shelf where some odd shapes sat next to each other. There was the horned one. The spiny one. The dried up purple shell caving in to its hollow center. The one that looked painfully familiar, and yet I couldn’t place (it turned out to be a nightshade).

Like eccentric back-benchers, these oddities sat side-by-side casting baleful glances at the mainstream fruit around them. Well, I never could resist the call of the eccentric back-bencher; and there is no reason to start now.

The apples and bananas had to wait for another day. Here is what I came home with: a shopping bag filled with horned melon, passion fruit, pepino melon, and rambutan. We happened to have a friend over, so we spent a pleasant afternoon cutting open these oddities and chronicling the experience.

Rambutan (Nephelium lappaceum)

At first, one is not sure if one is safe approaching a rambutan — it looks like a ruby-toned porcupine with pointy quills. But when you pick it up, you find it fits neatly inside your palm, as big as a ping-pong ball. The spines feel like plastic bristles that fold under pressure.

So far so good. But how is one expected to eat it? The peel offers no clues. It turns out that it takes a rather sharp paring knife to poke a hole in it and keep going. The skin is leathery and tough. You jab with the knife and peel off chunks, revealing smooth, wet, translucent white flesh .

Interestingly, in biological terms, the white flesh is not a fruit part at all, but rather, a thickened seed coat, known as aril. Some plants grow edible and sweet arils, for the same reason that others grow fleshy fruit — to tempt eaters on legs to eat them and thus spread them. Another example of such an aril-based fruit is the pomegranate, where each little seed grows red juicy pockets around it.

The single, oval seed is rather large with a papery exterior. In fact, a note for the squeamish — the taste of the translucent flesh always comes with a hint or two of the papery seed coverings. I don’t mind that at all, but some might.

Rambutan and the closely related lychee are both from the same family as the maple, of the flavorful sap. If I scrunch up my forehead enough I can imagine a maple-like sharpness to the taste of the flesh. It is sweet, resilient, and cool. When overripe, the peel becomes almost as hard as rock, while the pulp develops faintly pineapple notes. Go eat it: you have my blessings. The Odd Pantry rating:FourApple

Horned melon or kiwano (Cucumis metuliferus)

Don’t let those protuberances that make it look like a stegosaurus egg fool you — the horned melon is nothing but a cuddly cucumber inside. With a difference.

It looks rather alike, as you can see from the picture. But the flesh is lime green instead of pale, and much pulpier, so that it needs to be scooped out with a spoon. The seeds that sit inside each little polyp are chewier. With each bite, one notices the chewiness of the seeds, that remains in your mouth once the pulp is eaten. They taste a bit like very thin and small cantaloupe seeds. Some people, I hear, attempt to spit the seeds out, but here’s what I say: why bother?

Mildly sweet with a hint of tartness, the taste is still somehow very close to the watery freshness of cucumber. Unlike a cucumber though this is not a possible salad ingredient at all. Really there seems to be no better way to eat it than with a spoon directly off the cut halves.

So is it actually related to the cucumbers and the cantaloupes? Very closely — about as close as a raspberry to a blackberry (the same genus). Though native to sub-Saharan Africa, it is now grown all over the place from California to Australia. My feeling though, about why it hasn’t caught on, is that it is hard to place it in a food group. Neither a vegetable, nor a hearty fruit that could work as dessert, nor even in a fruit salad — the kiwano is a fruit without a convenient slot to fit into. Nothing that a bit of directed breeding couldn’t fix! The Odd Pantry rating: ThreeApple

Pepino melon (Solanum muricatum)

Sigh. One wants to be polite (and I always, always do) but I don’t see what the point of the pepino is. Perhaps a reader will come along and enlighten me.

It has the shape of a golden eggplant with purple streaks. This is not surprising since the pepino melon is neither a pepino (cucumber) nor a melon — but rather closely related to eggplant and other nightshades. Now this family is known for producing toxins, such as nicotine and capsacain (chili heat), but is also known for its tasty edibles. Eggplants have a unique taste, as do tomatoes and the swollen stems known as potatoes.

But the pepino, alas, is bland. Well, let’s start at the beginning. Cutting it open is easy, because the peel is very thin and presents no barriers. The specimen I got had no seeds. Cut into quarter wedges, as you can see, the flesh was easy to get to.

That’s the good part. There is barely a smell at all, though our friend detected faint notes of nicotine (he used to be a smoker). If you could imagine a barely-sweet cantaloupe with most aromas removed, then enhance that with the blandness of lettuce — that is basically what the pepino tasted like. Perhaps cooking it like a vegetable might lead to a better experience.

One hates to do this, like I said, but I won’t be buying this again. The Odd Pantry rating: TwoApple

Passion fruit (Passiflora edulis)

I have never eaten anything quite like a passion fruit. I didn’t know what to expect from just seeing the shell, which feels like a hard, textured globe with a tendency to collapse inward as it ripens. ‘The oysters of the fruit world’, our friend called it, and I could not understand what he meant at all.

When we cut it open I understood right away. Passion fruit pulp is loosely attached to the shell, much like an oyster is attached to it’s, and lies in a gelatinous mass. Each little black seed is surrounded by pulpy aril (that word again), giving the entire pulp the appearance of a different aquatic object — frog spawn.

The taste is intense: sour, a little sweet, tropical. The seeds are like grit in your teeth, but you can crunch through them. A couple scoops with the spoon and the entire fruit is eaten. This is not the kind of fruit one goes to for calories, but rather, the experience.

tumblr_m3zq3bJ7Fw1rrutr7o1_500

Passionflower

It isn’t surprising that passionfruit is such a unique eating experience, because the flower it springs from — the passion flower — is rather unique too. Most flowers have a row of green sepals beneath the petals; the passion flower alternates a sepal and a petal in a single whorl of ten. Plus, it has a set of purple rays that emanate from the center, called the corona, that look much like the rays of cartoon suns. When early Christian missionaries discovered this plant, they thought its unusual appearance made a perfect teaching aid for the crucifixion of Christ, with each part representing a different aspect of the story. This, by the way, is what the ‘passion’ in the name refers to — the Passion of Christ. It is not a synonym for lust or ardor.

Heavy stuff. In any case, this is a fruit that is worth trying for the experience if nothing else. The Odd Pantry rating: FiveApple

(Click here to find me on Facebook and here on Twitter.)

Green tomato chutney, and the Talented Mr. Late Blight

Green tomato chutney

Green tomato chutney

If you read my last post, you know that I am trying to rescue my harvest of green tomatoes. I made salsa verde out of some of them, but the question naturally arises—how much salsa verde can one family reasonably eat? The answer is—not much. So on we go to other ideas.

Late Blight

But first, I threw out in my last post that my crop was threatening to be swallowed up by late blight. I did not know this at the time, but my tomatoes were brushing up against history. This is the same disease that once struck potatoes in Ireland, in 1845 precisely, and loosed famine upon the land. The cause of the disease is a pathogen known as water mold. An unassuming name, but it hides some points of interest, as Sherlock Holmes might say. You know the game that kids play where the first question asked is: “animal, vegetable or mineral?” Well, a similar first question to ask about lifeforms is: is it an animal, or a plant? Or a fungus (like mushrooms and yeast), or perhaps a bacteria? So which of these is the water mold?

Neither, it turns out. It is not an animal, nor a plant, nor a bacteria, and not, also, a fungus, though it superficially resembles one. Its is in fact from a separate kingdom of life entirely, known as the oomycetes.

Regardless of its pedigree, it has killer intent when it is found on tomatoes. First brown spots appear on leaves, and they dry and fall. The fruit remains relatively untouched pretty late in the game, which is why I was able to rescue most of them. But eventually greasy dark spots appear on the stem side first, and soon the entire tomato is covered with it. San Francisco’s coolness and fog is quite congenial to Late Blight, so much to my regret, this foe might always be dogging my heels.

Tomato chutney

You know that a foreign vegetable has been completely accepted into Indian cuisine when it undergoes chutneyfication. By this metric, the tomato has become a quintessential Indian vegetable since the Portuguese brought it over in the 16th century. The number of recipes for tomato chutney is immense. Here, though, is one that draws from Bengali cuisine.

Garlic and chili

Garlic and chili

Pulverised

Pulverised

Spice seeds

Spice seeds

In oil

In oil

Frying spice paste

Frying spice paste

Green tomatoes enter

Green tomatoes enter

Tossed with oil and spices

Tossed with oil and spices

After a while

After a while

Done

Done

Green tomato chutney

Green tomato chutney

Bengali green tomato chutney

Ingredients:
  • 4 large garlic cloves
  • 4 green serrano chilies
  • 4 cups of sliced green tomatoes
  • 1/2 cup olive or other oil
  • 2 teaspoons cumin seeds
  • 2 teaspoons mustard seeds
  • 1 teaspoon fenugreek seeds
  • 1 teaspoon fennel seeds
  • 1 teaspoon nigella seeds
  • 1 teaspoon asafetida
  • 1 teaspoon red chili powder (optional)
  • 2 teaspoon salt
Method:

Pulverize the garlic and chili in a mortar and pestle until it is a paste. Heat the oil in a wide, thick-bottomed pan on a medium-high flame. When it shimmers put in the five types of seeds (cumin, mustard, fenugreek, fennel, nigella). When they sizzle and pop, the asafetida and red chili powders. When they foam up, the garlic chili paste. The paste will cook in a few minutes, but make sure it does not burn. Now the rough-chopped tomatoes go in along with the salt. Toss to combine with oil and spice.

Cook on medium-low for a whole hour, turning occasionally and mashing with the back of the spoon. In an hour, it will have dried quite a bit, and the oil will be gleaming through. Mash once again, let it cool, and empty into a jar.


(Click here to find me on Facebook and here on Twitter.)

Salvaging my tomato crop: salsa verde

Green tomatoes

Green tomatoes

Folks, I love my adopted city San Francisco, I really do. I love its hills, its fog, its MUNI and its BART, its rolling jagged windy roads, even its urinaceous sidewalks (with reservations). But really, if there is one thing San Francisco simply cannot pull off, it is ripening a frigging tomato.

And yet, in a textbook example of insanity, I keep growing them year after year, hoping that this will be the year when a perfect storm of global warming and sheer willpower will turn those multitudes of green globes red. Wouldn’t that be nice. But no, San Francisco does not oblige. First, the bush grows wildly, flowers and fruits luxuriantly, and the little berries grow into globes. But they stay green. Even my backyard squirrels sniff at them.

So I have a bush full of green tomatoes, and an impending case of late blight nipping at my heels. If I don’t rescue my green tomatoes now (some with a faint blush on them), I will lose them to the greasy blackness of blight.

So I harvest them, and now I have a basket full of green tomatoes. What do I do with them? So now we come to the fun part. There are certain options. Here is Salsa Verde, in my next post I will explore another one.

Tomatoes, sorted

Tomatoes, sorted

Salsa Verde

California is replete with Latin American culture and food, for which I am very grateful. It is hard to describe the tastiness of pairing earthy rice and beans with these ‘sauces’ or salsas — some cooked, some fresh; some red, some green. One of my favorite ways to dress a Mexican meal is with the triumvirate of guacamole, salsa fresca and salsa verde. The ‘verde’ means green, and usually the color is imparted by the tomatillo, which is a cousin of the tomato, but green tomatoes do just as well.

IMG_5716 IMG_5723 IMG_5726 IMG_5736 IMG_5737 IMG_5744 IMG_5747

Salsa verde

Ingredients:
  • 2-3 cups diced green tomatoes
  • 3 big cloves garlic minced
  • 2-3 green serrano chilies minced
  • 1/2 cup onion cut into small dice
  • 1 teaspoon salt
  • 2 tablespoons minced cilantro
  • 2 tablespoons lime juice
Method:

Put everything except the cilantro and lime into a pot and bring to a boil. Cover and cook on medium-low heat for about 10 minutes. Uncover and check if it looks mostly liquefied, if not, cook for another 5-7 minutes. Mash roughly, add cilantro and lime, cook covered to meld flavors for another 5 minutes.

Serve as a side with chips or any Mexican meal.


(Click here to find me on Facebook and here on Twitter.)

A global stew from my San Francisco kitchen

Global Stew

Global Stew

Once you learn a new method of cooking it can lead to a bit of an explosion of ideas. The new method in this case is the one I wrote about in this post about red kidney beans—it is about cooking beans in a slow cooker or low oven, over six hours. It has all the virtues of crockpot cooking, which is that you set it and forget it; and requires no prep such as soaking, sautéing, except stuffing all ingredients into the pot. Even tough beans that one normally soaks overnight and then pressure-cooks succumb to the slow but steady blandishments of the oven.

Well, there is no reason, obviously, to limit oneself to that one recipe. Here I experimented with a set of ingredients drawn from a variety of regions of the world, that all came together in my Bay Area kitchen.

Global stew with polanta

Global stew with polanta

There is the black-eyed pea, ancestrally African, which itself is a bit of a global traveler, having found its way to Northern India as an occasional character actor, and to the New World on slave ships.

There is the cranberry, that Native Americans first explored the use of and now is a staple of the American Thanksgiving feast.

Pine nuts are a staple of Italian cooking, but the pine is a pretty widespread tree, so their use is known all over the globe. In the Americas, there are treaties that protect the right of Native American tribes to harvest them. In China, a certain species of pine nut has been known to ‘disappear’ your taste (temporarily) and leave a bitter metallic one in its place.

The use of the bay leaf I learned at my mother’s knee; while the use of tomato paste came from my mother-in-law. Butternut squash is my husband’s favorite, and happens to be one of those vegetables that were made by humans by crossing two of nature’s somewhat problematic products—in this case, the gangly gooseneck squash and the ginormous Hubbard.

Spinach on the other hand is just spinach.

On we go. Notice how short the ‘method’ part of the recipe is.

Global Stew

This can be eaten as a hearty soup, or a stew, with some soft rolls or crusty bread on the side. We enjoyed it with polenta. It would also make a very nice all-in-one side for a steak or chicken for a paleo type of meal. None of the beans or the squash turn completely into mush, which is nice; but they are completely tender and cooked through.

butternut squash layer

butternut squash layer

More ingredients

More ingredients

All ingredients layered on

All ingredients layered on

After six hours in the oven

After six hours in the oven

Yum....

Stirred. Yum….

Global stew

Ingredients:
  • 1/2 cup black-eyed peas (dried beans)
  • 1/2 butternut squash, peeled and cubed
  • 4 cups spinach
  • 1/2 onion, diced small
  • 3 cloves garlic, smashed
  • 1/4 cup tomato sauce or 1 tbsp tomato paste (optional)
  • 1/4 cup pinenuts
  • 1/3 cup cranberries
  • 1 bay leaf
  • 1 teaspoon paprika
  • 1.5 teaspoon salt
  • 2 tablespoons olive oil
  • 2 cups water
Method:

Layer all the ingredients (order not important) in a dutch oven with a tight-fitting lid. Put it in an oven heated to 250ºF for six hours. Take it out, give it a gentle stir, and serve.


(Click here to find me on Facebook and here on Twitter.)

Spice is a state of mind: cabbage thoran

Cabbage thoran

Cabbage thoran

Sometimes spice is just a state of mind. Plants don’t come with Dymo-printed labels that say ‘Spice use recommended’.

Now you might think I’m making an issue out of nothing. Obviously, plants that produce a strong appetizing smell can be used as spices, and others not, right? No mind tricks necessary.

But consider what happens during the process of blooming spices, otherwise known as tempering, or tadka. A sequence of spices are thrown into hot oil. They may be seeds — like cumin or black mustard, dry leaves like the bay, or even bits of bark — like cinnamon.

If the temperature is too low, nothing particular happens, while if the temperature is too high, the spice burns. But if the temperature is just right, two things happen. One, the outer surface of the spice browns. This browning, known as the Maillard reaction, is the perfect state of cooked food sought after by chefs, whether it is grill marks on meat or the browned crust of bread or cookies: Golden Brown and Delicious. Each spice produces its own browned flavor, which is reminiscent of its regular flavor, but sharpened and deepened.

The other thing that happens during blooming/tempering/tadka is that the oils inside the spice, those that carry the aromatic compounds, escape into the pool of oil in which they are cooking. As the oil slithers and smears all over the food, as it is wont to do, it carries the essential oils of the spice around with it too.

Tadka is such a powerful method that it has become a standard way to either begin or finish off most dishes in Indian cooking. But now, listen carefully, because this is the most important part. Once the key to unlock flavor known as tadka/tempering/blooming has been found, one can really excavate flavors from non-spices, from seeds that no one would particularly think of as a spice.

Don’t believe me? What would you say about split lentil beans used as spice? Well, in the south, two kinds of lentils, the urad dal and the channa dal are both used during tempering; they each create a characteristic roasty flavor.

Not impressed? How about rice? One of the unique things about the state of Kerala, which just happens to be the home of such stalwarts as pepper, ginger and cinnamon, is the use of raw rice as part of tempering, usually in coconut oil. Used in this way, bland old rice acquires a golden roasty flavor that permeates subtly throughout the food.

Thoran

i’m also having fun learning about one of Kerala’s signature dishes known as thoran. A simple and soothing preparation, it involves any vegetable cooked with some grated coconut, tempered simply with mustard seeds, curry leaves and possibly a couple other things. In my attempt, I left out the grated coconut, choosing instead to cook it in coconut oil to provide a similar sweetness.

This is the perfect kind of simple background where the use of raw rice in tempering can be shown off. So here we go — cabbage thoran.

cabbage 003

Tempering spices including rice

Tempering spices including rice

Coconut oil

Coconut oil

Urad dal in oil

Urad dal in oil

The rest of the spices

The rest of the spices

Cabbage in

Cabbage in

Cabbage cooking

Mixed with dry spices

Cabbage cooked

Cabbage cooked

Cabbage thoran with roti and dal

Cabbage thoran with roti and dal

Cabbage thoran

Ingredients:
  • Half a head of cabbage, shredded
  • 1 tablespoon coconut oil
  • 1/2 teaspoon asafetida
  • 2 teaspoons split and skinned urad dal
  • 1 teaspoon black mustard seeds
  • 2 teaspoons raw rice
  • 5-7 curry leaves
  • 3 small dry red chilies
  • 3/4 teaspoon salt
  • 1/4 teaspoon turmeric
  • 1/4 teaspoon red chili powder (optional)
Method:

Heat the coconut oil in a wide, thick-bottomed pan on medium heat. When completely melted, add the spices in the following order: first, the asafetida; wait for it to foam up, then the urad dal; wait for it to start turning reddish, then, the mustard seeds; wait for them to start popping, then the raw rice; wait for it to all turn opaque and start to toast, then the dry red chilies; wait for them to darken, then the curry leaves.

Once the leaves crisp up, throw in the cabbage and stir to combine with the oil. Add the salt, turmeric and red chili powder and mix it nicely with the cabbage until it is evenly covered.

Cover the pan, turn the heat to a simmer and let it cook this way, in its own steam, for about 10 minutes more.

Serve with white rice, or, as I did, with chapati / roti and another side.


(Click here to find me on Facebook and here on Twitter.)

Unpopular ideas collide in Baba Ganoush

Baba Ganoush

Baba Ganoush

My love affair with eggplant continues. Any confirmed eggplant haters would be wise to click away now. This blog has become nothing but a vehicle for eggplant worship — maybe I should rename it ‘The Odd purple vegetable in your Pantry’.

In any case. The other love affair I have is with mashing things. Now the very word ‘mash’ arouses deeply unfashionable images in the foodie mind. Perhaps images of an eater who has lost their teeth or not yet grown any; or of overcooked and limp strands; or perhaps images of hospital trays with their scanty TV dinners.

But it is time for mashes, and their French cousins, the purées, to get some respect. There is no other method that combines flavors as well; and if some fat is added, as it is in this recipe, the mash gets a sheen and a nice mouth feel. If the ingredients that go into a mash marry well, there is no reason to scorn it. Plus, there is the thrill of pulverizing ingredients together — many adults have attested that their early love for cooking came from the thrill of mixing things up just to see what would happen.

Or, you can call it a ‘dip’ and feel fashionable again.

Pampered Father

Now for the pampered father, or, ‘Baba Ganoush‘ in Arabic. Apparently a sultan in some ancient royal harem in the middle east came up with this particular eggplant mash…or perhaps he just enjoyed it very much, the OED is not clear on this point. Somehow, this pampered, coy father achieved culinary fame that reached across the centuries and empires, all the way to food trucks in contemporary San Francisco.

What is this pampered father? Roasted, pureed eggplant, flavored with ground sesame seeds (tahini), olive oil, lemon, and other flavorings. It can be eaten as a snack with pita points, or as a dressing in a felafel sandwich.

There is a certain amount of freedom on what other flavorings to add; and here I have chosen a rather unusual addition — that of roasted red pepper. Not only does it add a subtle sweetness, but also little flecks of red. Plus — eggplant and pepper being nightshade cousins, it is a bit of a family reunion.

Roasting sesame seeds

Roasting sesame seeds

Roasted sesame seeds

Roasted sesame seeds

Ground sesame seeds

Ground sesame seeds

Roasted eggplant and bell pepper

Roasted eggplant and bell pepper

Peeling eggplant

Peeling eggplant

Peeled flesh

Peeled flesh

Pureeing

Pureeing

Done

Done

Baba Ganoush with red bell pepper

Ingredients:
  • 2 tablespoons white sesame seeds
  • 1 large globe eggplant
  • 1 red bell pepper (optional)
  • Quarter cup extra virgin olive oil
  • Juice of half to one lemon
  • 1 teaspoon salt
  • Parsley for garnish
Method:

Heat the oven to 450ºF. Rub a bit of oil all over the eggplant and bell pepper and place them on a tray and into the oven. Bake them for half hour to forty-five minutes, turning once or twice during that time. At this point, the vegetables will have completely collapsed and be soft inside.

Meanwhile, heat a small thick-bottomed pan on medium-high heat. Roast the sesame seeds on it, keeping them moving once in a while. Soon an aroma will arise and the color will darken one shade. Turn off the heat. After cooling them for a few minutes, grind them in a clean coffee grinder.

When the eggplant and bell pepper are cool enough to handle, peel them. The skin should come off quite easily due to the baking. Put the flesh, along with the sesame seed powder, salt, olive oil and lemon juice into a food processor and pulse till smooth.

Taste for salt and lemon juice, add parsley for garnish.


(Click here to find me on Facebook and here on Twitter.)

Slow-cooked red kidney beans (rajma) with spices

Slow-cooked red kidney beans (rajma)

Slow-cooked red kidney beans (rajma)

If you walked down the street around where I grew up in Bombay, say, around noon, you would hear the sonorous pressure cooker whistle sounding out of multiple windows. It being lunchtime, every household had their lunchtime dal or beans going in the pressure cooker. Some might be cooking pigeon pea (tuar), some mung beans, or garbanzo beans (channa), or something else.

But the pressure cooker was a must. It is so much part of kitchen life in India that sometimes two or three layers of pots go in at the same time, so your potatoes or peanuts can be boiled at the same time that the cauliflower and peas dish cooks, both of which cook together with your lunchtime dal. Cooking time is measured in whistles – most dishes take two whistles. The tough ones go on for three.

In my new home though, here in America, I found that the pressure cooker is considered a strange and scary beast. It screams! It is under pressure, it looks like it wants to explode! Most can’t believe the speed with which it does its job, being used to ovens and their longer times. The small, family-sized pressure cooker which can hold two quarts is hardly found in shops, all you find is the industrial-sized seven-quart behemoth that politely raises a tiny yellow hand when ready instead of whistling.

Given the new interest in non-meat protein sources, many evince an interest in the hundreds – possibly thousands – of ways of cooking dal that one sees all over India. The use of the pressure cooker stops many, as well it might, since most people don’t own one. Cooking on the stovetop is possible, but takes so long, and requires so much management, that it isn’t often practical.

Well, there goes that excuse. You may not have the two hours to actively manage a stovetop dal, but surely you have seven hours to not manage dal cooking in the slow cooker? When I heard of this method from my friend Daljit, I had to try it. It dispenses with all the usual steps: you do not need to pre-soak the beans, nor do you need to temper it. Put it in, cover it, forget it. Come home in the evening to a wonderful aroma and dinner.

One note: slow-cookers are great to have, but the oven can do the job as well. The conversion I use is: six to seven hours in the oven in a sturdy, well-sealed pot (dutch oven) at 250ºF for a slow-cooker set to low, for the same amount of time.

Black gram, red kidney beans

Two of the whole beans most often used by Punjabis are the whole black gram (otherwise known as maa ki dal or urad dal), and red kidney beans (rajma). The two are also often mixed, with three times as much black gram as the red beans. The recipe below can be used for either of these beans, or for that matter garbanzo beans as well; though those sometimes like to be more highly spiced.

Mix of black gram and red kidney beans

Mix of black gram and red kidney beans

Red kidney beans

Red kidney beans

Added spices and aromatics

Added spices and aromatics

Sealed pot, substitute for dutch oven

Sealed pot, substitute for dutch oven

Out of the oven after six hours

Out of the oven after six hours

Cilantro added

Cilantro added

Slow-cooked red kidney beans (rajma) with spices

Ingredients:
  • 1 cup whole red kidney beans (rajma), 1 cup whole urad beans (black gram), or a mix of both
  • 1 tablespoon ghee or oil
  • Half onion, diced small
  • 3 – 4 cloves of garlic, smashed
  • 1 fresh green chili
  • 1 teaspoon coriander powder
  • 1 teaspoon cumin powder
  • quarter teaspoon red chili powder
  • quarter teaspoon turmeric
  • 3 cups water
  • quarter cup tomato sauce, or 1 medium tomato, diced (optional)
  • quarter bunch cilantro, minced (optional)
  • 1 teaspoon salt
Method:

Preheat the oven to 250º F. Alternatively, get your slow cooker hooked up.

Put all ingredients except the salt and the cilantro into a pot or dutch oven with a tight-fitting lid. There is no need to presoak the beans. Cover the pot tightly — if the seal is not perfect, you can jury-rig a pretty good one by putting a sheet of aluminium foil between the lid and the pot, and then crunch up the foil edges to block the opening.

Soon a lovely aroma will spread in the kitchen. Leave it in the oven / slow cooker for 6 to 7 hours. At the end of it, take it out, add salt and cilantro and stir them in. Garnish with more cilantro if desired.


(Click here to find me on Facebook and here on Twitter.)

Truly Tabouli

Tablouli

Tablouli

We are on a middle-eastern kick here at The Odd Pantry, and when I say ‘we’ of course I mean ‘me’. When last seen, your loyal correspondent was flipping falafels like a fiend; this time, let’s take a freshly-scented walk through the tabouli trails, a whiff of mint here, a whiff of parsley there, the tingling freshness of lemon all over.

Tabouli is a salad. Originally from the mountains of Lebanon and Syria, it is adopted all over the middle-east now. Unlike most salads here in the West (slaw being the exception), every ingredient is minced to fineness. For body and bite, it uses bulgur wheat that has been plumped up in hot water; I’m not aware of any Western salad that uses grain in a similar way. The dressing is not premixed, but rather, each ingredient is poured on and mixed in thereafter. And parsley — that sprig that is pushed to the side of every restaurant meal in America — that parsley plays a starring role.

I called it a salad, but it in the middle-east it is considered part of mezze, a kind of smorgasbord of appetizers. When it is part of a mezze platter it may be served on lettuce leaf boats. Or it might be considered a side or condiment to be stuffed inside pita bread along with other ingredients. I personally can eat a plateful all by myself.

Things to watch for

Tabouli is the descendant of an ancient Arab love of herbs, which they called qadb. And the very word tabouli comes from the word taabil meaning seasoning. What I am trying to say is, do not skimp on the herbs. The bulgur grain plays an essential but minor role, while the parsley and mint take center stage. Make sure to salt well, and lemon juice is your friend.

Also, make sure to dry each ingredient scrupulously. The herbs might be washed, then spun-dry, then laid flat on a towel to air-dry. The bulgur must be drained well. Tomatoes can be finely chopped, salted lightly and placed in a strainer to drain for ten minutes.

Armed with these notions, we are ready.

Bulgur and salt

Bulgur and salt

Bunch of parsley

Bunch of parsley

Mincing parsley

Mincing parsley

Mint

Mint

Minced mint

Minced mint

Scallions

Scallions

Herbs piled up

Herbs piled up

Squeezing  a lemon

Squeezing a lemon

Bulgur added

Bulgur added

Pouring EVOO

Pouring EVOO

Tabouli

Ingredients:
  • 1/4 cup bulgur wheat + 1/2 teaspoon salt + 1/2 cup very hot water
  • 4 loosely packed cups parsley
  • 1/2 cup to 1 cup mint leaves
  • 4 scallions, or 1/4 onion, or 1/2 shallot
  • 1 small roma tomato
  • 1/4 cup lemon juice (about one and a half lemons)
  • 1/4 cup extra virgin olive oil
  • Salt to taste
Method:

Before you begin, soak the bulgur and salt in half a cup of very hot water. Leave it covered, undisturbed, for half an hour. The grains will slowly swell up to the water line.

While the bulgur is soaking, rinse and spin-dry, then air-dry the herbs. Chop the tomatoes, lightly salt them and place them on a strainer to drain. Squeeze lemons for the juice.

Finely mince the parsley, mint and scallions and collect them in a big round bowl. Add the tomatoes and the drained bulgur wheat. Pour on the olive oil. Toss to combine. At this point, stop to taste for salt and add the required amount.

Pour on the lemon juice and mix nicely. Serve on lettuce leaf boats or as a side in a falafel meal.


(Click here to find me on Facebook and here on Twitter.)