The Sourdough Starter Challenge

IMG_6358

The interwebs are full of advice on how to create sourdough starter at home. The air is teeming with wild yeast (so we hear) and it’s just an issue of coaxing it to come eat your flour-water mixture.

But one can’t see the wild yeast. So that process requires a bit of blind faith and blind ritual; to keep feeding the unseen guests daily, without knowing if they are there, is a bit more…shall we say…devotion than most people can muster.

This is why, I think, a Twitter thread from yeast geneticist (or “local frumpy yeast geneticist” as he calls himself) Shoe Laces 3 (Sudeep) went viral. It is because he taught us how to see the wild yeast. The white powder on the skins of grapes? That’s yeast. The whitish dusting on the skin of raisins, or dried apricots? That’s yeast. So it is a matter of introducing that yeast to some flour+water, and they will eat it. As they eat it, they will breathe out carbon dioxide. That will make your flour+water full of bubbles and it will rise. It’s as simple as that.

And yes, the local frumpy yeast geneticist made it sound simple. The yeast are just like anyone else—they want to eat, dammit. I mean, they aren’t quite monks. Just bring them to food, they will eat.

So here we go—let’s try this out. Each day, I will post the progress of my wild yeast starter. That will include bubbleage, rise, smell, and so forth. If you want to follow along, go grocery shopping, get ready. Each day I will update this post.

Day 0: Grocery shopping

  1. Flour (bread flour or all purpose)
  2. Grapes (the skin will look a bit powdery)
  3. A clean glass jar that can be closed
  4. A wooden chopstick for stirring (a fork will do)
  5. A small spatula

Day 1: Create the mixture

8 pm

  1. Put 1/4 cup of water in a clean glass jar
  2. Add 2-3 grapes without washing them
  3. Stir it around
  4. Add 1/4 cup of flour
  5. Stir it around till you make a paste
  6. Scrape down the sides of the jar with a spatula
  7. Cover and keep it at room temperature (around 70-72 F)

Day 2: Look for bubbles, first feed

7 am

No bubbles to be found. Place inside oven with the oven light turned on for warmth. Do not turn the oven on.

5 pm

IMG_6983

We have….bubbles! The mixture has risen to double. There is condensation on the sides of the jar. The surface looks frothy. It smells mildly alcoholic, mildly fruity, and a bit yeasty. There is some separated liquid at the bottom.

7 pm: Discard and feed

IMG_6985

  1. Discard most of the mixture, including the grapes. Leave about a tablespoon or so.
  2. Add 1/3 cup flour
  3. Add 1/4 cup water
  4. Stir with a wooden chopstick
  5. Scrape down sides with a spatula
  6. Cover and leave on the countertop overnight (not in warm oven this time)
  7. My starter now has a name: it shall be called Bertie.

Day 3: Feed twice a day

8 am:

IMG_6986

Bertie was left on the countertop overnight. Not quite doubled but there is bubbleage. Some liquid separated at bottom. Smells deeper than yesterday, more cheesy/yeasty, but also fruity.

  1. Stir the liquid in.
  2. Discard most of it, leaving a tablespoon or two.
  3. Add 1/3 cup flour
  4. Add 1/4 cup water
  5. Stir with a chopstick or fork
  6. Scrape down sides with a spatula
  7. Cover and leave on counterop.

5 pm:

IMG_6989

Similar yeasty, fruity, alcohol smells. Bubbly and frothy, but not really risen. There is some liquid separating out once again.

Apparently the liquid is called “hooch” and is a sign that the starter is “hungry”. The yeast has eaten the flour and the alcohol it releases is collecting up top. If it is hungry, I should feed it! But this is also when the sour bacteria start their activity, so in my book that is a plus. Same routine:

  1. Discard all except about a tablespoon or two
  2. Feed fresh flour, 1/3 cup
  3. Add 1/4 cup water
  4. Stir & scrape down sides with a spatula and leave on the counter.

Day 4: All hooched up

Well I have sad news to report about Bertie. After I let it go a bit too long without feeding, it got some hooch floating on top, and…died. No more bubbles.

No matter I will start a new one tomorrow.


Follow this post for daily updates!!

(Follow me on Twitter at @TheOddPantry and on Facebook at The Odd Pantry)

Advertisement

Bagels in the time of Corona

We are now living through a pandemic. Going to the bakery involves masks, gloves, strict social distancing ballets, and disinfectant. It feels apocalyptic. Creating bagels at home requires being covered in flour, messiness, kneading, the smell of baking in the morning. It feels…homey.

How to decide?

Bagels are pretty unique in the bread family in two ways: one is their torus (donut) shape, with a hole in the middle. This shape gives the bagel as much surface area as possible for their size, so that the dense insides can cook all the way through. The other is the curious step of picking up the risen torus entire, tender and fluffy from the bubbles trapped inside, and slipping it into boiling water for a minute before baking.

It’s odd, I tell you. I’ve made a wide variety of breads, from multigrain loafs baked in 9 by 4s to free-standing sourdough loafs to chapatis roasted on a griddle to pooris fried in oil. The step of boiling is completely unique. Generally, when you boil dough, you get dumplings, not bread.

And yet, here we are. Is a matter of fact, the boiling gives the bagel a sheen—and more importantly, a smooth soft shell, that preserves the shape and density during baking. That’s how you achieve the chewiness that for some reason is a match made in heaven (or “match made in leaven” perhaps) with cream cheese.

The method

Bagel dough is pretty standard, if perhaps drier and denser than a standard loaf bread destined to turn into slices and sandwiches. You have the option to add as much whole wheat flour as you like up to about 50%—I generally go with a third whole wheat, two-thirds not.

The list of toppings and flavorings that can be added, either to the dough, or on the surface of the boiled torus before baking, are endless: from cinnamon, to onions or garlic, to seeds like poppy, sesame, caraway. But I’m going to focus on the bagel recipe as a basic template, for you to experiment with on on your own dime.

Just like standard bread, there is a first rise. Depending on the amount of yeast added, and the temperature around your countertop, this can go from an hour to overnight in the fridge.

Just like standard bread, there is a shaping and a second rise. But rather than shape into a loaf, one breaks the bagel dough into pieces, rolls each piece into a snake about a foot long, and joins the snake head to mouth into a torus shape.

Then, of course, there is the boiling and the baking.

Sugar: this recipe is ideal for people who get tired of the amount of added sugar in commercially available food; it has no sugar at all. If you want to add some, you can add a teaspoon to a tablespoon or sugar or honey dissolved in the water.

IMG_6717

Flour + water

IMG_6718

Mixing the dough

IMG_6719

Dough

IMG_6721

After first rise

IMG_6722

Break into six pieces

IMG_6723

Start shaping each

IMG_6724

Rolled out to snake shape

IMG_6725

Join at ends

IMG_6726

Start second rise

IMG_6727

Risen

IMG_6730

Boil

IMG_6732

Toppings

IMG_6734

Done!

Bagels

Ingredients:

  • 3 cups flour (up to a third whole wheat, the rest bread flour or all-purpose)
  • 1 tsp instant yeast
  • 2 tsp salt
  • 1.25 cups water
  • 0.5 onion, sliced, for onion bagels (optional)
  • 2 tbsp mix of sesame and poppy seeds, for seeded bagel (optional)
  • other topping ideas:
    • garlic
    • shredded cheese
    • jalapenos
    • caraway seeds

Method:

Collect your flours in a wide bowl. Sprinkle the instant yeast over and stir it into the flour with a fork. Then sprinkle the salt over and stir that in as well.

Make a well in the center of the flour with a chopstick. Pour the water in. Start mixing the flour into the water with your chopstick (a wooden one works best because it won’t stick to the mixture). Once most of it is mixed in, turn the dough onto a counter to knead.

Continue to knead for a few minutes, until you have a smooth ball of dough. Cover with oil and plastic wrap, and leave it to rise for about an hour or two, or until puffy and almost doubled.

Divide the dough into six approximately equal pieces, using a pastry scraper to make neat cuts, rather than pulling it apart. Cover all the pieces with a kitchen towel or plastic wrap while you work on shaping each piece.

To shape a piece into a torus shape: gently roll into a foot long shape with some stretching, some rolling, some flattening, resting it for minutes at a time. Moisten the two ends with some water and connect end-to-end in a bagel shape.

Place them side by side on a well-floured cookie sheet, with at least a couple inches between them. Cover with a kitchen towel or plastic wrap to avoid drying out. Leave to rise for another hour or two.

Pre-heat oven to 425° F.

Set a large pot of water to boil. When it comes to a rolling boil, lower the heat to just above a simmer. One by one, gently scoop up each bagel by teasing it onto a slotted spoon and lower into the boiling water. Boil each side for 30 seconds and leave to drain. This is the time to put toppings on, such as fried onions or sesame seeds.

Place the tray with the boiled bagels into the oven for 20-25 minutes. Wait at least half hour before slicing them.

They go very well with butter, or cream cheese, or my idiosyncratic favorite: cream cheese and jam.

I’d love to hear in comments or on Twitter/Facebook if this worked for you. I would love to see pictures of your bagels!

(Follow me on Twitter at @TheOddPantry and on Facebook at The Odd Pantry.)

When it comes to no-knead breads, I am a believer

20 Vanity

For the longest time, all those recipes that promised you could make bread without kneading seemed to me simultaneously a cop-out and an oxymoron—like nut milks with no dairy, or vegan hamburgers or, for that matter, working holidays.

Why leave out the most kinetic, fun part of the entire process, that allows you to playact blue-collar labor, work out your aggression, and show the gluten who’s boss, all at once?

But I realized recently that I had missed the point. I had missed the import of one word: autolysis.

Bread starts with gluten. Flour has the potential of turning some of its proteins into gluten, that stretchy, strandy thing that binds the air into webs as it rises. Gluten is the cause of the elasticity of dough and for the spongy, soft interior of bread. Gluten is the reason bread doesn’t turn into either a pancake or a brick.

Flour, while it is dry and powdery, contains the ingredients to make gluten, but no gluten itself. But as soon as flour particles come in contact with water, a couple things happen. One, in the presence of water, two of the flour’s proteins start to come together to form gluten. And two, some of the starches break down into sugar. If the flour-water mixture is ‘infected’ with yeast, the little yeasties can feed on the sugar and multiply. This process is known as ‘autolysis’.

Now most of the wise bread teachers, like Rose Levy Berenbaum and the bakers at King Arthur Flour, have always recommended a period of ‘walking away‘ once you have mixed water and flour before the kneading begins. This walking away, whether it is for ten minutes or an hour, gives the gluten formation a head start, and makes the subsequent kneading a much easier task.

Call it walking away or call it autolysis, it is the time for the flour to spontaneously do the gluten-formation that kneading is usually called upon to do. But what if you took this principle to its logical conclusion, and allowed the flour-water to do all the work? What if you never had to knead at all?

What you have then is no-knead bread. It takes longer than kneaded bread, because the folding and squeezing that the dough is subjected to while kneading speeds up the process. But as a home cook, I plead—no, I demand—that you develop patience. It will take you a day, or more. But you will be proud of your loaf.

Wetness

Now here’s another advantage that no-knead breads can give you that kneaded breads simply cannot. The dough can be very, very wet. So wet in fact that they are impossible to handle, because touching it with your whole hand as you would have to in order to knead would make a sticky mess. No-knead bread is never handled (with one exception, as I’ll go into next). So it can have a lot more water by proportion than regular breads; and a wetter dough makes for a softer, more risen, more holey crumb.

Now the dough is so wet that one even foregoes the usual ‘freeform’ baking of the crusty loafs, where they sit in the oven all by themselves. The dough is simply too wet! This is why the standard way to bake this kind of bread is in a covered dutch oven or a loaf pan. (I’ll show you both by-and-by). The added advantage of this method is that in the closed, wet, hot environment of a dutch oven, you essentially create a steam sauna for the bread, and get a simply remarkable final rise—while baking.

Folding

Now while kneading is not called for, here’s a step that can lengthen and stretch the gluten strands and thus improve the final crumb. This is a step that Rose Levy Berenbaum specifies in all her crusty loaves. It involves laying out the flaccid dough in a gently stretched rectangle, folding both sides in to overlap in the middle, turning 90° and repeating it. So,

Step One: Fold in the left third of the rectangle in order to cover the middle third, then fold in the right third of the rectangle in order to cover the previous flap.

Step Two: Rotate the dough 90° and repeat the two folds above.

Steps

Mixing flour, water, yeast, salt

Folding

Shaping for final rise

Misting and scoring

Baking

No-knead bread

A note on ingredients:

You have considerable flexibility regarding ingredients. Where the flour is concerned, you can go up to one third whole wheat. I’ve used high protein bread flour, but all-purpose will work too, though the result will not be as chewy, but rather, softer. A single teaspoon of salt will be just enough for the bread to taste ‘normal’ but you can go up to even two teaspoons for a saltier crumb. Using less yeast then a quarter teaspoon will make it rise slower, more will make it rise faster. Though I would not recommend more than a half teaspoon because remember, you want this process to be slow.

Ingredients:
  • 3 cups flour (I used 2.5 cups King Arthur bread flour and 0.5 cups King Arthur whole wheat flour)
  • 1-1.5 tsp salt
  • 0.25 teaspoon instant yeast
  • 1.5 cups + 2 tbsp water
  • Dry flour for sprinkling
Time:
  • 5 minutes to mix.
  • 8-18 hours first rise.
  • 10 minutes folding and shaping.
  • 1 hour final rise.
  • Bake at 450°F for 45 minutes
Method:

Combine the first three ingredients in a large bowl and combine thoroughly with a fork. Make a sort of well in the center and pour a cup and a half of water into it, reserving the two extra tablespoons to add if needed. Roughly combine using a chopstick till ALL the flour is moistened. Add in the extra water if needed to make sure there is no more dry powdery flour in the bowl. A wet, sticky mess is what one is aiming for.

The resulting mixture will be very, very rough and sticky. Scrape down the sides of the bowl with a spatula, wrap tightly with plastic wrap and leave aside.

In about an hour or two, you are ready to fold the dough as described above. Sprinkle the counter with plenty of flour and scrape the dough out of the bowl onto the counter. Sprinkle dry flour on the dough as well as on your fingers, as this will help you handle it without it sticking. Perform the two folds as described above. Now the dough will be a much smoother, tighter roll than the mass you started with. Place it back in the bowl, covered with wrap, to rise.

This rise can take anywhere from 8 to 18 hours. If it is rising too quickly and you are not ready to proceed with the next steps yet, put the bowl in the fridge to retard it. Take it out the next morning and let it come to room temperature, about an hour or two.

At the end of this period, the dough should have more than doubled, and the surface should show some large bubbles. If you tap the bowl, it will shiver like jelly.

Sprinkle the counter with more dry flour and place the dough on it and proceed to shape it into a round. This is done by pretending you are making a cloth bundle with the dough: so gather the edges into the middle, tighten, and do it some more.  Not only is the dough turning into a tight ball, the outer skin is also getting stretched.

Place it seam side down on some floured parchment paper. Cover with plastic wrap once again and leave to rise. You can leave it to rise free form, but it is better to place it in a bowl or basket or, as I did, an empty tortilla container. This is so that the vertical sides of the container constrain the dough from spreading outwards, and it is pushed to rise upwards instead. The dough will take about an hour or hour and a half for this second rise.

About half hour before you are ready to bake, turn the oven up to 450°F and place the dutch oven, uncovered, and its lid, in the oven to get it hot.

At the end of the hour, remove the plastic wrap off the dough. Mist the top of the dough with a fine spray of water. Use a sharp serrated knife to score it: gently, with a slicing motion and barely any pressure at all, make a half inch cut in the top of the dough. A lip will open up, showing all the glorious webbing that has developed under the skin. Scoring in this way helps the crust, as it bakes, to open up along that line instead of haphazardly.

Lift up the dough ball, parchment and all, and place in the dutch oven and cover with the lid. Bake for 30 minutes covered and 15 minutes uncovered.

At the end of baking, the crust should be golden brown and the bread dramatically risen. When thumped on the bottom it will sound hollow. Let it cool for an hour before slicing.

(Find me on Twitter at @TheOddPantry)

Roasted tomato sauce For the Win

img_9063Nature made tomatoes delicious but She also drenched them in unappealing wateriness. All tomato sauces are based on rescuing the flavor out of the swamp. It is simply a matter of technique.

Some insist that the skin and seeds must be removed. Some put great stock in canned tomatoes as opposed to fresh; others swear by long cooking. These are all fine techniques; but the one that works in my kitchen is one that I haven’t seen other recipe writers talk about much. This is surprising, because there is literally no way to describe how deep and dark is the flavor that results.

It is more of a technique than a single recipe, though I will give you a couple of variations that I often make. It involves long-roasting in the oven instead of long-cooking on the stove-top: four hours is ideal, but three hours can work too, at a slightly higher temperature.

Since it takes no fussing over, you can set it in the oven and leave the house, or putter about your other household duties. Long-cooking is no strain if your appliances do all the work. Yes, it does take a bit of planning and it does take about 5-8 nice plump medium tomatoes.

The basics

As to why this technique results in flavor so much deeper than the traditional method of cooking in a pot, I can offer some educated guesses.

One of the components of the flavor is the deep caramelization of the cut surfaces of the tomatoes as they are exposed to the dry heat of the oven. The juiciness ensures that they do not burn, but you can see the chocolaty color on the edges in the pictures below. This color shows that the Maillard reaction has occurred, imparting a welcome depth.

Nor does the the tomato liquid dry out evenly, as it would on the stove-top. I have often tried long-cooking simply chopped-up fresh tomatoes in a pot; and while the flavor certainly intensifies, the waxiness of the peel and the bitterness of the seeds stand out, diminishing the flavor. Of course one could peel and seed the tomatoes, but if one is to remove all the fiber from a thing, why even bother?

The great advantage of the long-roasted sauce is that the peel and seeds all go in, impart a caramelized edge, and yet, deep pockets of juiciness are left behind; as the oven has not dried out the fruit indiscriminately. The residue one is left with is approximately like a hybrid of sundried tomatoes on the cut-surfaces, and deep juice bombs inside.

The basic steps are these. Cut up the tomatoes either in halves, quarters or eighths. Place them cut-side-up, salted, drenched in olive oil in the oven, in a single layer, at a low temperature for up to 4 hours. At the end, a simple dressing of fresh olive oil, vinegar, garlic or herbs are necessary. Mashing them roughly with the back of a wooden spoon or a potato masher produces a sauce that will cover long pasta like linguini or spaghetti.

Variation with red wine vinegar and garlic

Roast tomato sauce with garlic and red wine vinegar

Ingredients:
  • 6 medium tomatoes
  • 1 fat clove garlic
  • Few tablespoons extra virgin olive oil
  • A splash of red wine vinegar
  • Salt to taste
Method:

Spread a bit of oil in a flat ceramic dish and start the oven at 250ºF  (if you have 4 hours) or 300ºF (if you have 3). Meanwhile halve the tomatoes and remove the stem. Place them cut side up in the dish, as crowded as you can, so they hold each other up. Sprinkle with salt and squirt more oil on the surface. Place them in the oven and set the time for either 4 hours (if set to the lower temperature) or 3 hours (if set to the higher).

Meanwhile crush the garlic and mix in some salt. This will liquefy and cook it, which will take about half hour.

At the end of the roasting time, mash the tomatoes a bit with the back of a wooden spoon. Stir in the garlic and the splash of red wine vinegar.

Cook and drain spaghetti or other long pasta; stir to combine thoroughly with the sauce.

Variation with fresh basil and olive oil

Roast tomato sauce with fresh basil and olive oil

Ingredients:
  • 6 Kumato or other tomatoes
  • a handful of cherry tomatoes
  • 6 tablespoons extra virgin olive oil
  • salt to taste
  • about a dozen leaves of fresh basil
Method:

Spread some oil on a flat ceramic dish. Quarter the Kumato tomatoes and halve the cherries. Spread them tightly crowded on the dish, tucking the cherry halves into the gaps between the others. Sprinkle with salt and more olive oil. Reserve about 3 tablespoons of olive oil for later.

Roast at 250ºF  (if you have 4 hours) or 300ºF (if you have 3).

Slice the basil leaves into ribbons.

Once the tomatoes are done, take out of the oven, mash and taste for salt. Add the reserved olive oil and the basil. Toss with pasta.

Variation with infused oregano and black pepper

Roasted tomato sauce with oregano and black pepper

Ingredients:
  • 7 or so medium tomatoes
  • quarter cup of olive oil
  • a few sprigs of fresh oregano
  • several twists of black pepper
  • salt to taste
Method:

Prepare the roasting dish with some olive oil spread on the base.

This time cut the tomatoes into eighths. Spread them tightly in the dish, cut sides up. Since the pieces are smaller, use the higher oven setting (300º F) and the shorter time (3 hours). Cover with salt to taste and olive oil. The sprigs of oregano are to be tucked into the dish and black pepper sprinkled onto the tomatoes. As the roasting proceeds, a savory aroma will filter through the kitchen.

When done, remove the oregano sprigs. Mash gently, add more olive oil and toss with freshly cooked long pasta.


I would love to hear your thoughts in comments below. Follow me on Twitter, like my Facebook page, or email me at aneela -at- theoddpantry.com. You can also subscribe to this blog here:

Enter your email address to subscribe to this blog and receive notifications of new posts by email.

One weird trick to make pumpkin death-defyingly delicious

IMG_7296Just think—what is pumpkin, but a combination of excrutiatingly delicious orange pumpkin matter, and water. Water is water. It’s great. Stuff of life, 90% of the body, et cetera, et cetera. But it isn’t where the deliciousness lives. In fact, it mingles with the deliciousness of pumpkin flesh and—waters it down.

Who wants something that is watered down? No—one seeks the emphatic, the bold, the pure. Right?

So the trick to making delicious pumpkin and other winter squash is to remove the water. How to do that. Let’s see…there’s this thing that water does…I know, don’t tell me…it requires heat, but not center-of-the-sun heat…just normal, household-appliance-level heat…starts with ‘e’, ends with ‘e’…yes! It evaporates. Water evaporates when applied heat. Pumpkin flesh, on the other hand, does not.

Therein lies the secret. You’re welcome. Water just ups and leaves when things get hot enough. Pumpkin stays for the long haul.

Here’s what I’m trying to say. Imagine you roast a pumpkin (or other winter squash) so the flesh is easy to scoop off the peel. Then, you cook the pumpkin flesh in a pan for a good long time, stirring, stirring; till the steam rises and keeps rising and rising and eventually most of the water becomes the steam and leaves; and what you are left with is an increasingly pasty, gummy, reduced, deeply orange mass.

This takes only a couple ingredients to become one of India’s famed concoctions, to be had as dessert, or as a side with roti, or snuck in between meals from the fridge. Midnight snack? You wouldn’t dare? Done. Pumpkin halwa is great in all these ways.

Pumpkin halwa

Halwa is a general name for Indian desserts that are pastes. Sorry. What that description lacks in glamour it makes up in accuracy. It can be made of a number of widely disparate foods; wheat farina, whole wheat flour, carrot; and pumpkin. When I say ‘pumpkin’ of course I’m using it as a term of endearment for all winter squashes, those with the hard shell and sweet orange flesh. I used kabocha, which is known by foodies to out-pumpkin even the standard autumn pumpkins in terms of taste.

Made sweeter, it is a nice finish to a meal, served in tiny confection bowls; made a little less sweet, goes great as a side with deep-fried puffed breads, i.e. pooris.

Pumpkin halwa

Ingredients:
  • One medium sized kabocha squash or sugar pumpkin
  • 2 tablespoons ghee or butter
  • Seeds of 6 green cardamoms
  • 1 teaspoon sugar or to taste
  • Pinch of salt
Method:

Preheat the oven to 425ºF. Slice the kabocha/pumpkin through the equator and scoop out the seeds with a sharp-sided spoon. I have found it really helps to pick a spoon that matches the curve of the hollow where the seeds are.

Lay the halves cut side down on a foil-lined cookie sheet along with 2 tablespoons water. Bake in oven for 45 minutes.

At that point the squash should be completely soft and easy to prick through with a knife. Bring them out and scoop out all the flesh.

Heat the ghee or butter in a non-stick, thick-bottomed pan. When melted, add the squash and cook on medium-high, mashing it down into the fat and stirring occasionally.

Meanwhile, grind the black inner seeds of the cardamom in a mortar and pestle.

In about 30 to 45 minutes, the flesh should be much drier and also look smoother, as the rough grain disappears with the water content. At this point, add a pinch of salt, the sugar, and the cardamom. Add more sugar after tasting if it is not sweet enough.

Garnish with ground pistachios, slivered almonds, roasted cashews, raisins or any combination.


(Click here to find me on Facebook and here on Twitter.)

The parable of food preservation; an Indian carrot pickle

IMG_7128Once upon a time, the dark cold months were months of deprivation. No green shoots appeared in the ground, no fruit swelled on the trees. The young ones went without, or raided the underground cellars for the grains and husks that they shared with their rodents. But the old ones said no, look, here’s what you do. You collect your bounty in the sunlit months; then you preserve it to feast on in the dark months.

“Preserve?” said the young ones, reflecting that perhaps dementia had claimed the old ones. “We have no fridges, nor vacuum packs. Surely, microbes will feast on our bounty before our clumsy hands are able to tear off a single chunk of it to place at the hungry lips of our babes. Surely a week, perhaps two, is how much one can hope to prolong the lives of these frilly delicate vegetables, whose very fronds seem infused with the light of Solis. But all season long? Respectfully, winter is long and harsh.”

“You fools,” said the old ones then, “have we taught you nothing?” They might have cuffed them with an open hand, I’m not sure. Then they drew out jars and jars of fruits and shoots they had taken the trouble to preserve many moons ago. The glass shone with the still preserved colors of the sun’s bounty.

IMG_7143But at first, the young ones shrank from the taste. “Pooh!” they said. “We see that this is imbued with the deep orange of a carrot, but the saltiness scours our tongue. And the mango—did you have to preserve it when green and sour? Could you not have waited for its velvety sweetness to emerge? Ah, we would give our firstborn for the taste of a sweet mango now! That clay jar under the ground—could that be cabbage? But heed the fumes—did a dog die in there?”

“Your trouble,” said the old ones, snatching the kimchee from their hands, “is that your noses are underdeveloped. Look. All of creation loves a good vegetable. You do, and so do the microbes. Food preservation is a race—who shall get to eat the bounty first? The microbes, or the apes known as humans?”

“We are not apes,” the young ones said, with dignity.

“You certainly are,” the old ones returned, “but moving on. Now not all microbes are created alike. Some sicken and extinguish us; others concoct healthful compounds in our foods. Let us call them (because thou hast simple minds, and thy understanding is shallow) the good microbes and the bad microbes. Some of food preservation is nothing but allowing the good microbes to build their colonies in our foods; by their own mysterious devices, the good microbes then form barricades to prevent the bad microbes from entering. Not only that; the guts of these little ones start to break down the foods, thus do our guts get a head start.”

“Shall we then eat microbe-infested foods?” the young ones queried. “Your brains are going soft, perhaps the good microbes have fomented trouble in them.”

“The word is ‘fermented’,” the old ones said, “and you need to understand, your bodies are suffused with microbes at all times. Be not childishly fearful. In fact, in the age of our descendants, fermentation will be thought of with glamour and books and websites shall celebrate the advent of the good microbes in our food, and our partnership with them.”

The old ones then explained how salting the food created a happy place for the good microbes, but instilled fear in the hearts of the bad ones. And how sourness also chased away the bad ones, so one could add to the food an acid-making elixir, such as lemon or vinegar; but if one wanted to be specially tricky, one could have the good microbes produce their own sourness from the depths of their bowels, as they feasted on sugars. Such sourness, the old ones further explained, went by the name of lactic acid, but had little to do with the food of the mammal babes.

IMG_7131“But heed,” the old ones intoned, “while fermentation is hip, do not forget, it is not the only way. Remember, water is needed for all of creation, and all of creation harbors it; the bad microbes desire it with a thirst so deep that it might be a thirst for life itself. What if one were to draw the water out of our foods, and leave it shrunken and dry; the microbes would find it as bare as a moonscape and would not deign to enter. Then: what if one were to cover the whole thing in oil, perhaps an oil such as from the mustard plant, that is practically a warrior against microbes itself, what then?”

What one has, then, is an Indian pickle.

Indian pickles (achar)

It has been a persistent mystery in the minds of some interested parties as to whether Indian pickles are fermented, or not. Among these, I count myself, and also my dear blogger friend Annie Levy from Kitchen Counter Culture. Well, by applying the powers of my mind deeply to the question in a Holmesian sort of way, I think I have my answer. Indian pickles—the typical kind, that are preserved in mustard oil—are not.

Now there are certainly Indian pickles that are fermented, but those are not the norm and the ones that I am familiar with do not use oil at all. But we will talk about those another time.

The typical pickles use a pretty standard method. First, salt the food: salt wants to reach equilibrium, and if the food isn’t salty already, it wants to enter the food from its surroundings. As it enters, it draws out the moisture and takes its place inside the food.

Next, allow the moisture to dry out by placing it in the sun. Once the pieces are much shrunken, jar it up and pour mustard oil over.

IMG_7127
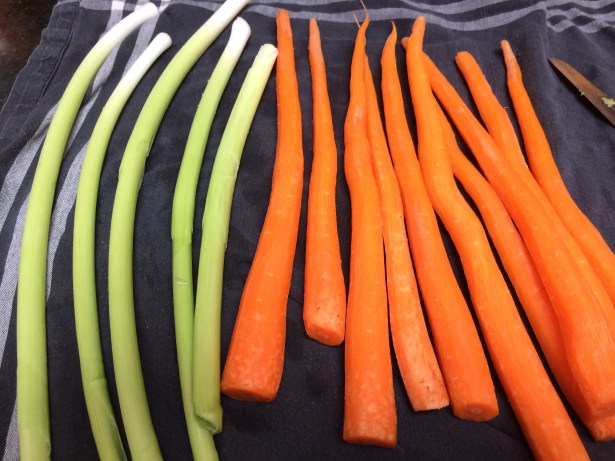
This is the basic method I have used with such disparate ingredients as cranberries and sour mango. This time, we have carrots and some green garlic.

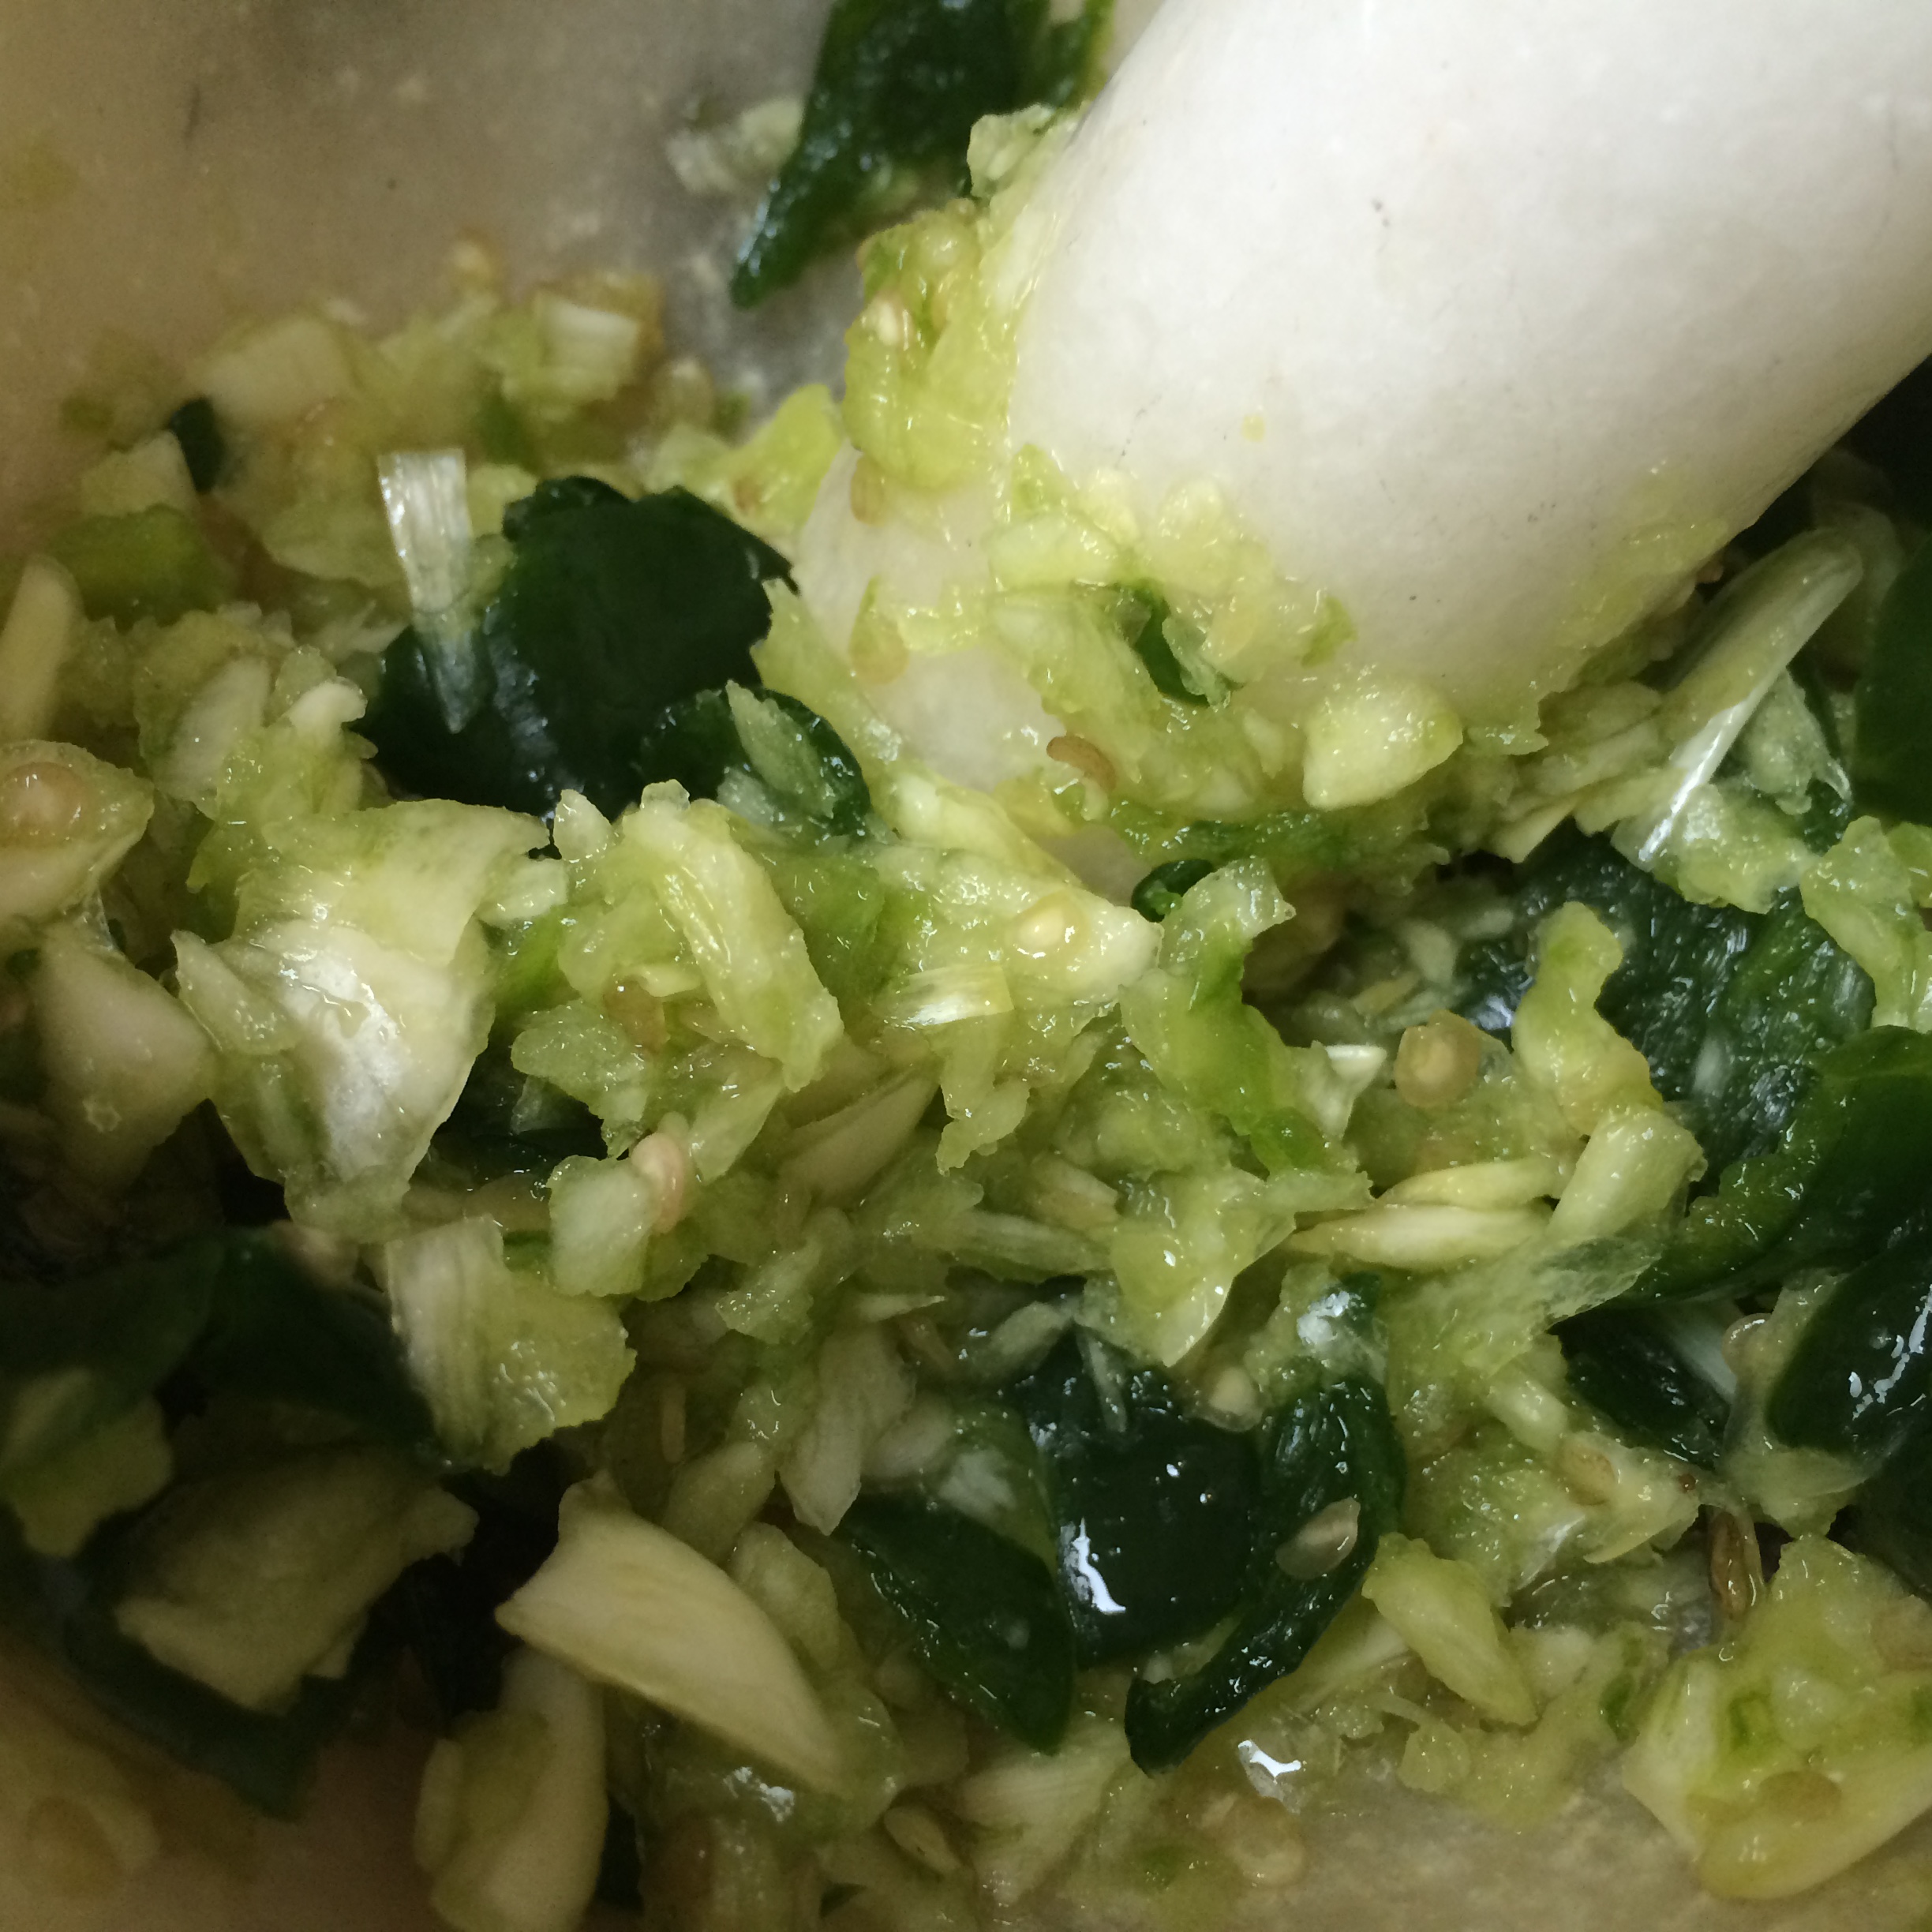
The spices tend to be a similar set. Fennel seed is congenial, and so is the use of nigella seed. Turmeric powder has antiseptic properties so that is always used, and the heat comes from red chilies. Usually, the spices are left whole, this time, I chose to pulverize them a bit. They went from looking like this to this:

Of course, a lot of salt is used, and the carrots and green garlic are thoroughly mixed with the spices and salt and laid out on a wide, flat surface. Cover with cheesecloth, place in the sun, and allow the salt and the sun to perform their magic. Watch the slow shriveling of the carrots over the period of a week:

Once the pieces look pretty dry, it is time to mix in some lemon juice, jar it up and pour mustard oil over. Some like to heat the oil to smoking point and then cool it before using, but I don’t see the point because I want the oil to be at peak pungency.

Carrot pickle

  • Servings: 1 pint jar
  • Print

Ingredients:

  • About 10 carrots, washed, scraped, and dried completely
  • About 5 full stalks of green garlic, washed, trimmed and dried completely
  • 3 tablespoons fennel seeds
  • 1.5 tablespoons nigella seeds (kalonji)
  • 1.5 tablespoons fenugreek seeds (methi)
  • 2 tablespoons mustard seeds
  • 3 tablespoons sea salt
  • 0.5 tablespoons red chili powder
  • 0.5 tablespoons turmeric
  • 3 tablespoons lemon juice
  • About half a cup of mustard oil

Method:

Once the vegetables are completely dry, slice them up in smallish segments, the exact shape does not matter. You could do longish sticks or smallish dice, as I did.

Pulverize the whole spices (fennel, fenugreek, nigella and mustard) slightly using a mortar and pestle. You can skip this step if you like.

Place the vegetables in a wide platter and cover with the pulverized spices, the salt, turmeric and red chili powder. Give it a thorough mixing so all the pieces are evenly covered with the salt and spices.

Cover the platter with cheesecloth and place at a sunny window. My window only gets sun for about an hour in the mornings and that seemed to be enough. Every couple days, give it another mixing with a scrupulously clean spoon.

In about a week the vegetable pieces will look much shriveled, darker and more leathery. Stir in the lemon juice.

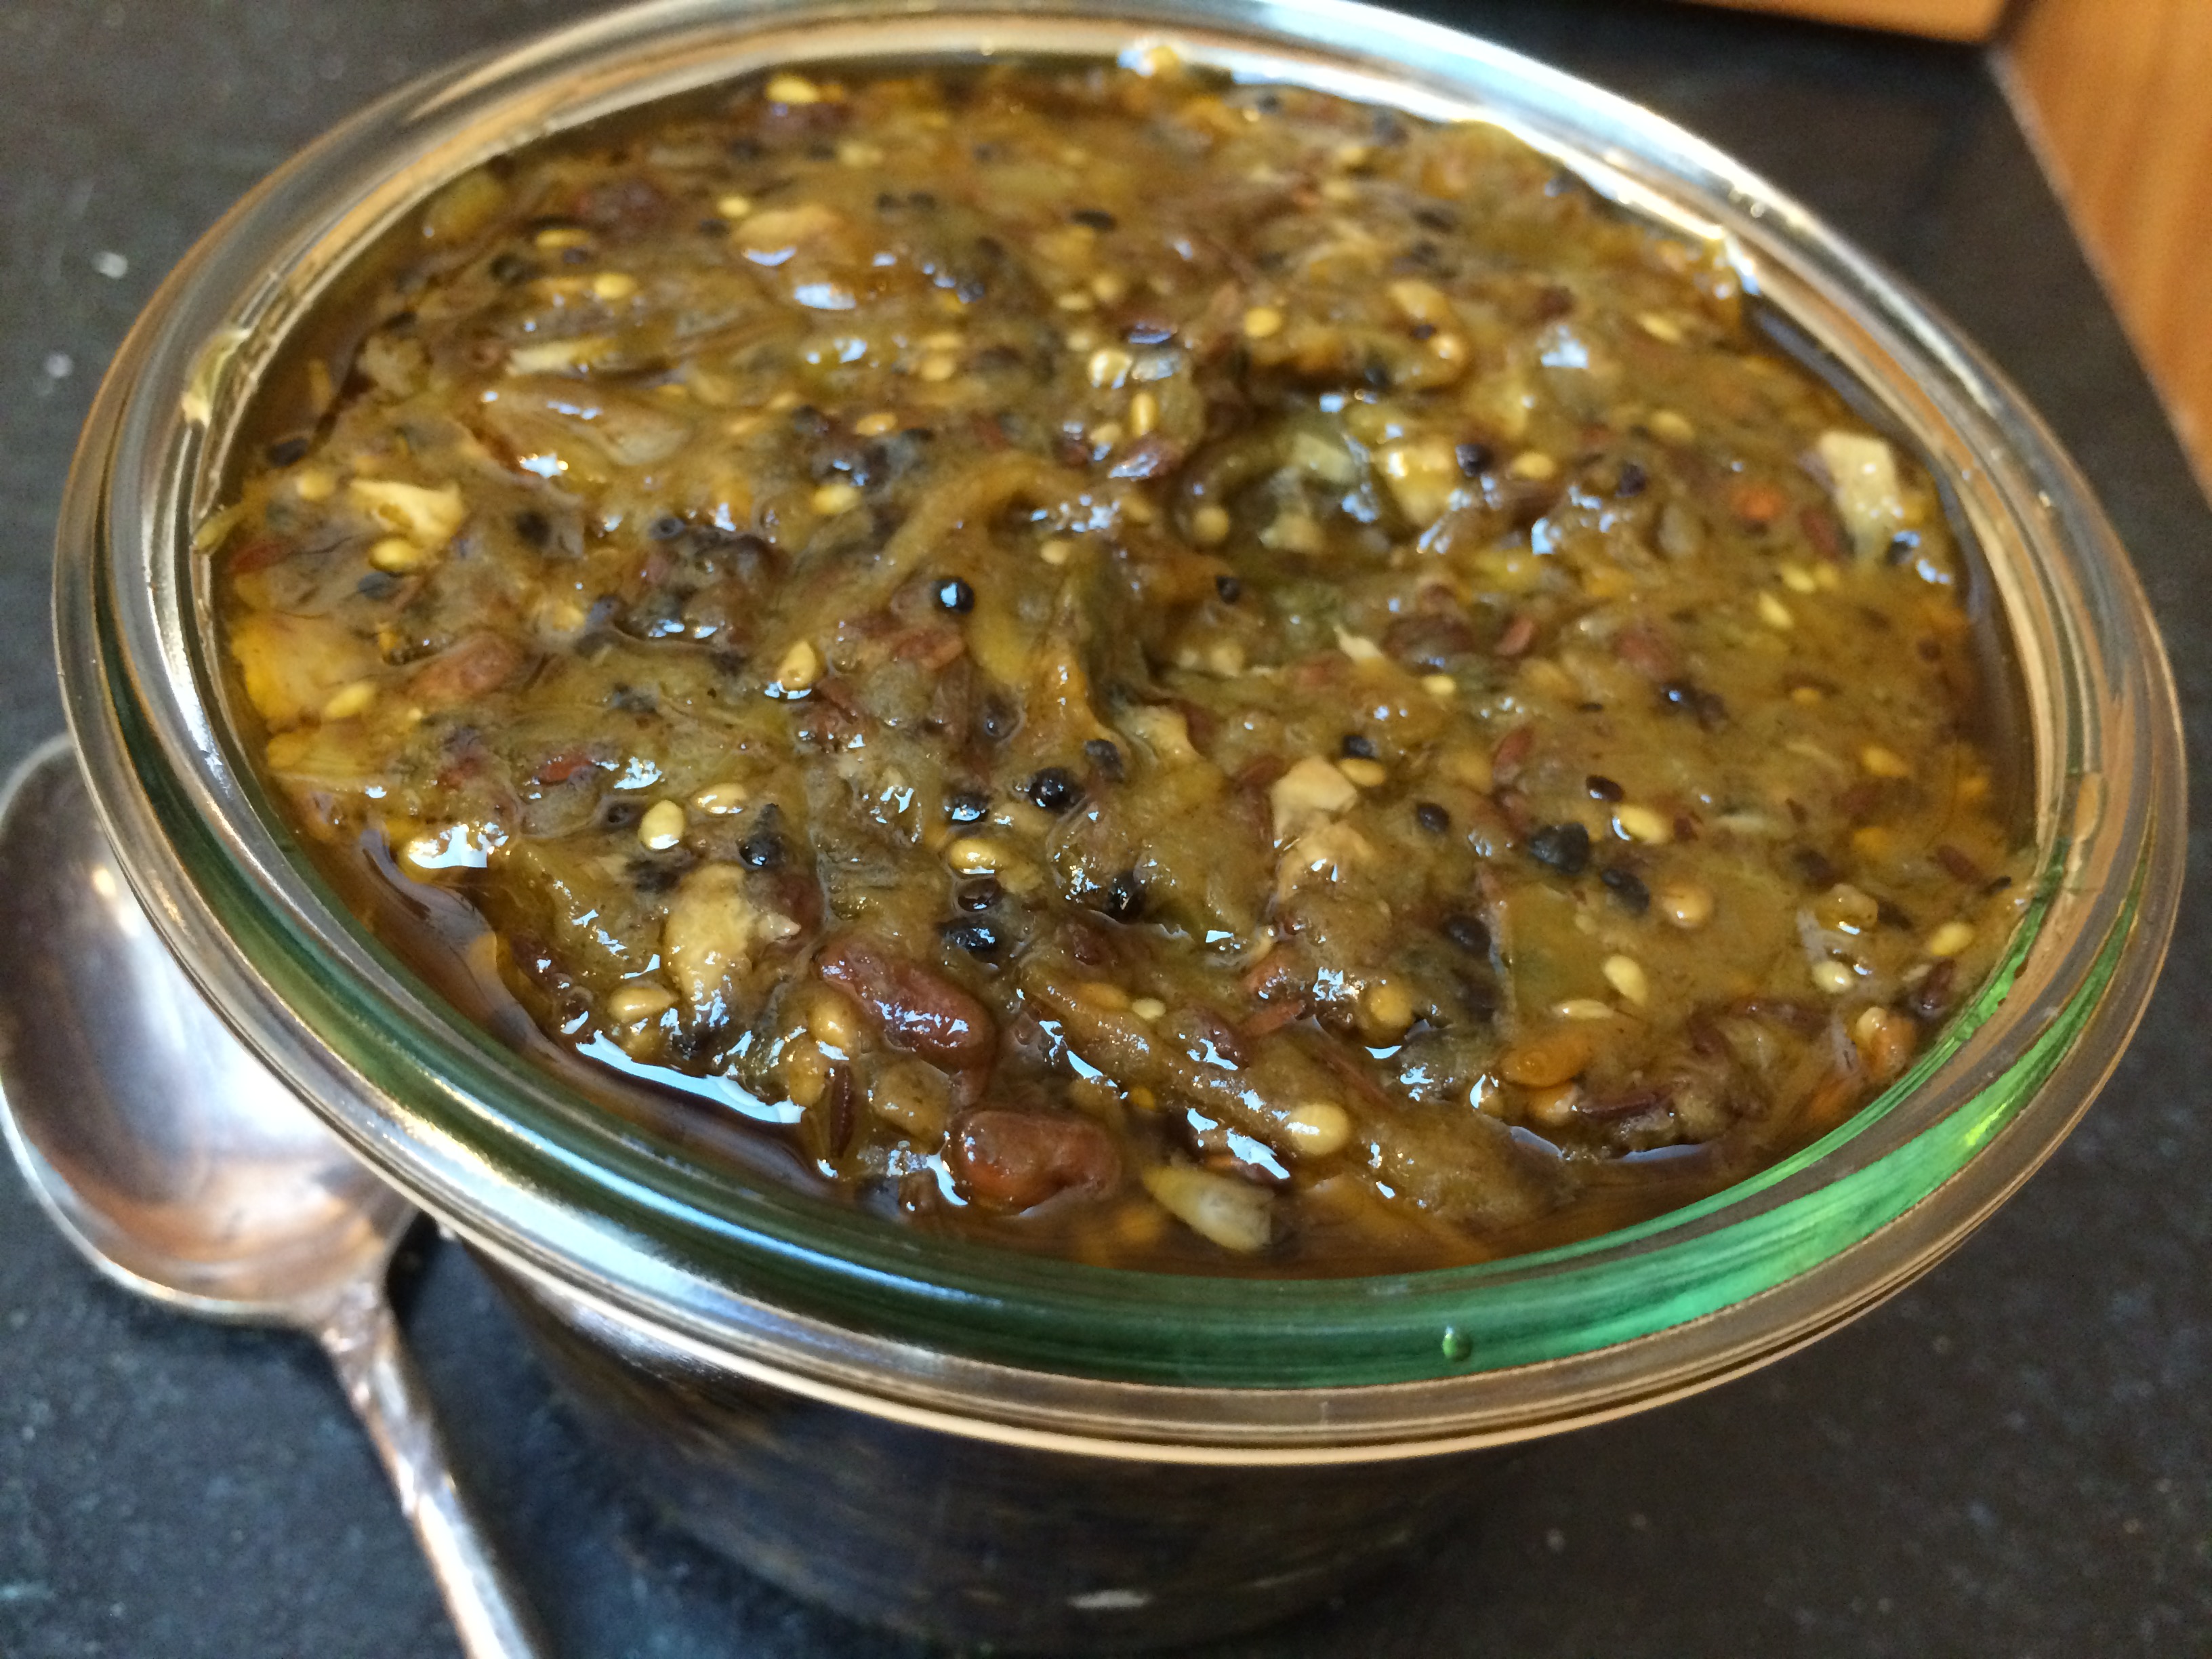
Transfer to a scrupulously clean glass jar (you can sterilize it in boiling water first if you like, I didn’t). Pack it down. Pour some of the mustard oil over it and wait for it to settle; pour more. Do this in a few stages, until a thin film of oil shines over the very top of the jar. For me, it took about half a cup. Cover and store in the pantry.

Your pickle (achar) is done. It is great as a side in minuscule portions (since it is highly spiced). It should last for a good long time, even up to a year.
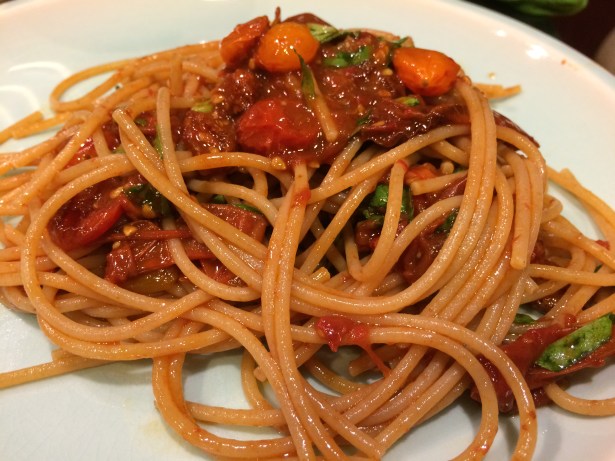

(Click here to find me on Facebook and here on Twitter.)

The galloping bean: cooking with horse gram

IMG_6504
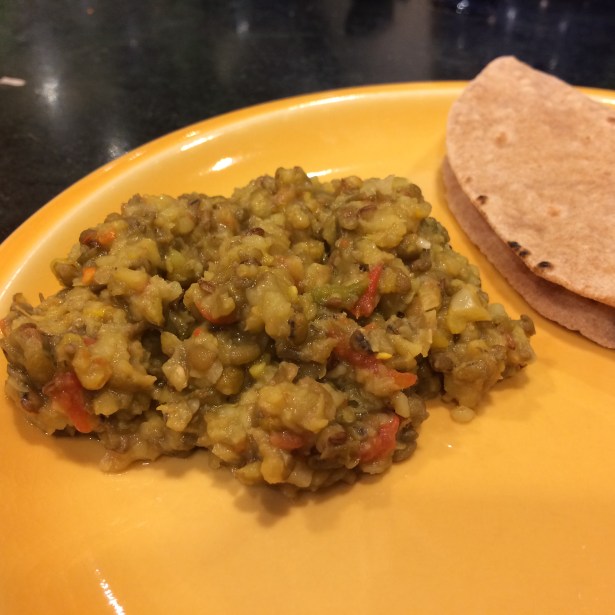
I’m guessing that not many of you will have heard about the dal or bean I’m about to write about today. I certainly hadn’t. It is a small flattened bean, multicolored in a spectrum that goes from beige to dark coffee brown. It is commonly known by the rather picturesque name of ‘horse gram’; and if you think that a word like that harks back to a time when crops were named after farm animals, while animals were named for their use on the farm, you’ve got horse gram pinned.

In more ways than one this is an ancient grain. Grown in South India since the Neolithic, any knowledge of its wild progenitor is lost, though its cousins are found growing wild in the African savannas. It is the kind of grain that families grew in order to feed their cows, and then partook of the excess. Some lovely recipes were created around it nonetheless, particularly in the states of its origin: Karnataka and Andhra Pradesh, where it is known by the names of huruli, kulith, kulthi, ulavalu, kollu. Invariably it is soaked for a long time, then often left whole, and often sprouted. Its cultivation slowly trickled north over the Eastern ghats to the plain around the Ganges, where it is known as gahat; and they conceived of a way to mash it down with spices. Since I have a batch, I will be exploring a few different ways to cook it in these pages.

It never made it to the chic world of Indian restaurant cuisine (yes, I’m being sarcastic), nor really to urban households. But out there in the villages, this tough little herbaceous legume grows in conditions of utter deprivation, with no irrigation and no fertilization to speak of. Being a legume, it enriches the soil instead of taking from it.

Most other pulses that humans have favored, we have cultivated in our own image, to go soft. They cook down to mush (not knocking mushes!) and take no long soaking. But horse gram, though a tiny thing, must be soaked overnight, then cooked for a while, and even so, still retains its bite. One has to imagine that a grain as tough as this, practically wild, imparts some of its wildness and toughness to the eater.

IMG_6488Some practical matters

Those out shopping for pulses in the US might often visit Indian groceries looking for them. But horse gram is rare even in Indian groceries, as far as I know. So you might turn to online stores. Here are some that claim to stock it:Patel Bros., Big Indian Store, and I Shop Indian.

Now when you have a batch, and are about ready to soak it—this is a good time to sift through it bit by bit, looking for rocks. I have forgotten this essential step a couple times, having been spoiled by the more ‘progressive’ pulses, and been subjected to the unpleasant sensation of my teeth grinding on grit. I will never forget this step again.

About the soaking. Generally an overnight soak in plenty of water is recommended; but what if you find yourself on the very day, the very evening of the meal, and must, simply must cook horse gram that very day and no other? Here is a trick I learned from Madhur Jaffrey’s books: soak in very hot water, near-boiling, covered, for one hour or up to three.

Substitutions: of course, the world of beans and pulses is just dripping with riches. So there is no reason to imagine that this recipe is fused-at-the-hip with horse gram only. Substitute any whole bean of your choice: French lentils will do (with no soaking), or black chickpea (with). Red kidney beans (rajma) would do as well.

Horse gram in tomato gravy

This is a nice simple preparation where the beans float in a mildly spiced gravy of tomatoes and garlic. It goes very well with a steaming hot bowl of white rice on the side. You could also try eating it as a sort of bean soup as part of a Western meal, in which case a garnish of some raw onions, lime and avocado might be nice.

Horse gram in tomato gravy

Ingredients:
  • 3/4 cup horse gram beans
  • 3/4 cloves garlic, crushed
  • 1/2 medium onion, diced small
  • 1-2 fresh green chilies, sliced
  • 1/2 teaspoon turmeric
  • 1/2 cup crushed tomatoes
  • 1-2 tablespoons ghee or oil
  • 2 teaspoons udid dal (split & dehusked black gram)
  • 1.5 teaspoons brown mustard seeds
  • Few shakes of black pepper, freshly ground
  • 1 3/4 teaspoon salt
Method:

Sift through horse gram to discard rocks. Soak horse gram in plenty of water overnight, or in hot water for one to three hours, covered.

Place the horse gram in a pressure cooker or large pot. Add the turmeric, onion, garlic, chilies, and two and a half cups of water. Pressure cook for about half hour, or, if you used a regular pot, bring to a boil, then simmer, partially covered, for about two hours.

Once the horse gram is cooked (it doesn’t turn to mush, but cooks through), add the salt, and keep it aside, covered.

Meanwhile heat the ghee or oil in a small thick-bottomed pan. When the ghee melts or the oil shimmers, add the spices in the following order: first, the udid dal, until it reddens; then the mustard seeds until they pop; then the black pepper shakes; finally, add the crushed tomatoes. After a few minutes of cooking—perhaps up to fifteen minutes—the tomatoes will have turned several shades darker and the oil will have separate. Turn off the heat and empty into the pot of horse gram. Stir it in and simmer gently for a few minutes to meld flavors.

Garnish with cilantro, avocado-onion-lime, or nothing at all. Serve with a hot mound of white rice on the side.


(Click here to find me on Facebook and here on Twitter.)

Easy-peasy split green mung dal

IMG_6395As I have said before, dals are such an integral part of food in India that each type may be used in four different ways: the whole bean, the split bean with the green peel left on, the split bean ‘cleaned’ of the green peel, and ground. And the amazing thing is, that at each of these stages, the cooked dal presents a different look, a different flavor, and a different meal entirely.

Let’s take mung dal. Now this is the most basic of the dals, the cheapest, and the earliest introduced in childhood. One dal, so many meals! The whole bean can be sprouted or boiled without sprouting; either way, it stays whole, earthy and chewy. The split-and-cleaned dal is yellowish and makes a creamy end-product when cooked. Ground, of course, it can be used to make crepes and pancakes, known as adai in the South.

The split-dal-with-green-peel occupies a place somewhere in between all of these methods. Creamy, though not completely mush; earthy but not entirely; a nice meal with roti for cold nights.

Sai dal

My family comes from Sindh which is now lost to Pakistan. If one were to ask me what sets Sindhi food apart from the rest of Indian food, I would say, that it is our extremely vague way of naming dishes. For instance, a gentle stew of split-green-mung dal with some garlic is known, simply, as ‘sai’ (green) dal. Everyone knows what you mean. What’s the point of being more specific?

In our family this was a very frequent lunch or dinner side, that went with chapati (roti) and a vegetable. If you want to add a pickle to the meal, I won’t complain.

The flavor is the very essence of savoriness, with a slightly ‘rough’ mouth feel due to the peel still being left on the mung bean. Plus, you get the fiber which is no small thing, especially in such a delicious way.

Split green mung dal (sai dal)

Ingredients:
  • 3/4 cups split green mung dal
  • 1/4 teaspoon turmeric
  • 1 medium tomato
  • 1 fresh green chili minced
  • 2-2.5 cups water
  • 1 teaspoon salt
  • 2 tablespoons oil
  • 1 teaspoon cumin seeds
  • 1 heaped tablespoon minced garlic
  • A few curry leaves (optional)
  • 1/4 teaspoon red chili powder (optional)
Method:

Wash and drain the dal. Empty it into a pot that is big enough to allow for expansion of the dal’s volume as it cooks. Add two cups of water along with the turmeric, the tomato, roughly chopped, and the minced green chili.

Bring to a boil with the lid mostly off to allow for surging of steam that usually happens when dals cook. After it comes to a boil and the surge is done (around ten minutes), cover and turn the flame down to a simmer.

In around 40 minutes the dal will be softened. Add the salt and turn off the flame, leaving the dal covered.

Meanwhile start the tempering process. Heat oil in a small thick-bottomed pan on medium-high heat. When it shimmers, add the cumin seeds. They should sizzle right away. Add the garlic, and wait until it shrivels. Add the curry leaves, if using. Add the red chili powder; this only needs to cook for a few seconds. Turn off the heat and pour the seasoned oil over the dal, and stir in to meld the flavors.

(Click here to find me on Facebook and here on Twitter.)

Poached fish with soy, sesame and ginger (and ginger)

IMG_5846There are people who like ginger, and there are those who don’t. Both are within the bounds of normalcy. But then there are people who like ginger beyond all reason and sense. My husband is one of them. He is not satisfied with a ginger-flavor suffusing the food; it must have that, and also ginger sticks in addition, so he can actually taste it.

It’s pathological, as Donald Trump might say.

So if there is anyone in your life with a similar addiction, here is a recipe to finally satisfy them. And stop them complaining! That alone is worth the price of a good piece of fish.

To everyone’s astonishment (and relief), this meal actually has more to it than just ginger. The base is a poached fish: it could be halibut, or cod, or other white fish. Most people recommend very subtle accoutrements for poached fish in order to not drown out its mild flavor; but that is not what I did. As is my wont, it is often the seasoning that is the highlight of a meal, and the poached fish performs the function here of a nice inoffensive background.

Now for the seasoning. For this dish, I used two dressings, layered one on top of each other. Both use elements from the sort of Pan-Asian cuisine that is popular here in California, with flavors of sesame and soy.

IMG_5834Both dressings use the same trio of scallions, chilies and ginger. The first dressing, which is simmered in soy, has these items minced fine (on the left). While the second dressing, which is fried in sesame oil, has the chilies whole and the ginger in long sticks (on the right).

The poached fish, with both dressings layered on, makes a wonderful side for rice.

The fish, as it poaches:

Here is what the soy dressing looks like, as it cooks:

IMG_5842

Frying ginger and red chilies

IMG_5849

Served with rice and a side of greens

Poached fish with sesame-soy-ginger dressing

Ingredients:
  • 1 lb fish fillet (halibut, cod, snapper, etc.)
  • Half a cup of water
  • Quarter teaspoon salt
  • Dressing 1 (soy-based):
    • 2 tablespoons soy sauce
    • 2 tablespoons white wine
    • 1 teaspoon sugar
    • white part of about 3 scallions, sliced thin
    • 2 small red chilies, minced
    • Half inch piece of ginger, minced
  • Dressing 2 (sesame oil based):
    • 1 tablespoon roasted sesame oil or plain sesame oil
    • 2-3 red chilies, whole
    • Half inch piece of ginger, cut into long sticks
  • Garnish:
    • Green part of about 3 scallions, sliced thin
Method:

Heat water with salt added to about 160ºF (a simmer, less than a boil). Place the fish in it and poach for about ten minutes.

Meanwhile prepare the soy dressing. In a small pot, combine the ingredients and bring to a boil. Lower to a simmer and let it reduce by about half.

Once the fish is done, place it in the serving platter. Pour the soy dressing over to cover it everywhere.

Heat the sesame oil until it shimmers. Fry the ginger sticks and red chilies until the chilies darken and the ginger sticks shrivel a bit. Pour the hot sesame oil over the fish evenly all over it. Cover with the green scallion garnish. Serve with rice on the side.

(Click here to find me on Facebook and here on Twitter.)

Green tomato chutney, and the Talented Mr. Late Blight

Green tomato chutney

Green tomato chutney

If you read my last post, you know that I am trying to rescue my harvest of green tomatoes. I made salsa verde out of some of them, but the question naturally arises—how much salsa verde can one family reasonably eat? The answer is—not much. So on we go to other ideas.

Late Blight

But first, I threw out in my last post that my crop was threatening to be swallowed up by late blight. I did not know this at the time, but my tomatoes were brushing up against history. This is the same disease that once struck potatoes in Ireland, in 1845 precisely, and loosed famine upon the land. The cause of the disease is a pathogen known as water mold. An unassuming name, but it hides some points of interest, as Sherlock Holmes might say. You know the game that kids play where the first question asked is: “animal, vegetable or mineral?” Well, a similar first question to ask about lifeforms is: is it an animal, or a plant? Or a fungus (like mushrooms and yeast), or perhaps a bacteria? So which of these is the water mold?

Neither, it turns out. It is not an animal, nor a plant, nor a bacteria, and not, also, a fungus, though it superficially resembles one. Its is in fact from a separate kingdom of life entirely, known as the oomycetes.

Regardless of its pedigree, it has killer intent when it is found on tomatoes. First brown spots appear on leaves, and they dry and fall. The fruit remains relatively untouched pretty late in the game, which is why I was able to rescue most of them. But eventually greasy dark spots appear on the stem side first, and soon the entire tomato is covered with it. San Francisco’s coolness and fog is quite congenial to Late Blight, so much to my regret, this foe might always be dogging my heels.

Tomato chutney

You know that a foreign vegetable has been completely accepted into Indian cuisine when it undergoes chutneyfication. By this metric, the tomato has become a quintessential Indian vegetable since the Portuguese brought it over in the 16th century. The number of recipes for tomato chutney is immense. Here, though, is one that draws from Bengali cuisine.

Garlic and chili

Garlic and chili

Pulverised

Pulverised

Spice seeds

Spice seeds

In oil

In oil

Frying spice paste

Frying spice paste

Green tomatoes enter

Green tomatoes enter

Tossed with oil and spices

Tossed with oil and spices

After a while

After a while

Done

Done

Green tomato chutney

Green tomato chutney

Bengali green tomato chutney

Ingredients:
  • 4 large garlic cloves
  • 4 green serrano chilies
  • 4 cups of sliced green tomatoes
  • 1/2 cup olive or other oil
  • 2 teaspoons cumin seeds
  • 2 teaspoons mustard seeds
  • 1 teaspoon fenugreek seeds
  • 1 teaspoon fennel seeds
  • 1 teaspoon nigella seeds
  • 1 teaspoon asafetida
  • 1 teaspoon red chili powder (optional)
  • 2 teaspoon salt
Method:

Pulverize the garlic and chili in a mortar and pestle until it is a paste. Heat the oil in a wide, thick-bottomed pan on a medium-high flame. When it shimmers put in the five types of seeds (cumin, mustard, fenugreek, fennel, nigella). When they sizzle and pop, the asafetida and red chili powders. When they foam up, the garlic chili paste. The paste will cook in a few minutes, but make sure it does not burn. Now the rough-chopped tomatoes go in along with the salt. Toss to combine with oil and spice.

Cook on medium-low for a whole hour, turning occasionally and mashing with the back of the spoon. In an hour, it will have dried quite a bit, and the oil will be gleaming through. Mash once again, let it cool, and empty into a jar.


(Click here to find me on Facebook and here on Twitter.)