The sweet potato’s diamond-shaped leaves

Sweet potato greens stir-fry

Sweet potato greens stir-fry

The next time you would like greens for dinner, look beyond spinach (the old stand-by) but also look beyond kale (the flashy rising star). You may not find these at a big grocery store, but the farmer’s markets and Asian stores are usually packed with leaves of all shapes and sizes bundled together with a trifling rubber band. Among them, here is what I found the other day — sweet potato greens. Sadly, I have never seen these for sale in any of the big stores, even ones that have piles of sweet potatoes all through the year. If one has any kind of relationship with the growers, one could ask vendors of the sweet potato to occasionally bring in some greens too; or if one has a garden one could try growing them. If all else fails, take a trip to lovely San Francisco for the Alemany farmer’s market on Saturday mornings.

Like its more famous root brother, the leaves are packed with nutrition. Each diamond-shaped leaf is about a few inches long, and the stems are green and look like hollow reeds. They take very little cooking. Once wilted, they are pretty much done, and the tender stems can be eaten too. Only the tougher ends (you can feel them resist as you try to snap them, much like one trims asparagus) must be thrown away. Once cooked this way, their taste is extremely unobjectionable; a slight sliminess is about the only thing that sets it apart.

You know what that means — it is all about the seasoning! A simple sauté will wilt them nicely. We needed a side for an Asian meal that centered around rice. Here is what I did.

Sweet potato greens with ginger, garlic and fish sauce

The ingredients here are so few that the details matter. The ginger and garlic are minced fine and cooked in oil in a slow sizzle. Fish sauce adds a wonderful aroma so I would suggest you don’t substitute with soy (though in pinch, I have).  The leaves and tender stems are cut in two-inch segments, which is large enough to have body and small enough to be bite-sized. And the sesame oil topping is just the thing.

A tip! There are other mild-flavored greens that would do just as well: pea shoots and chard come to mind. This goes very well with some plain white jasmine rice.

Diamond-shaped leaves of sweet potato

Diamond-shaped leaves of sweet potato

Trimmed

Trimmed

Ginger and garlic and greens

Ginger and garlic and greens

Gently saute

Gently saute

Sizzling

Sizzling

Piling greens in

Piling greens in

Wilted

Wilted

Sweet potato greens stir-fry

Ingredients:
  • 1 bunch sweet potato vines
  • 1 tablespoon oil
  • 3-4 cloves garlic, minced
  • 1 inch piece of ginger root, minced
  • Quarter teaspoon salt
  • 1 tablespoon fish sauce
  • Few squirts of roasted sesame oil (optional)
  • 1 teaspoon sugar (optional)
  • Red chili flakes or sesame seeds for garnish (optional)
Method:

Wash and trim the greens. Only remove the tough stems; this can be discovered by snapping them at the point where the tender stem ends and the tough stem begins, much like snapping asparagus spears. Mince ginger and garlic.

Heat the oil in a wide, thick-bottomed pan. When it shimmers, put the ginger and garlic in. Turn the heat to medium-low and allow them to cook slowly. This will ensure that all the aroma is released, but also that they do not brown. When they start to seem shriveled, pile in the leaves along with whatever drops of water cling to them.

Turning carefully with tongs, allow all the greens to be covered with oil. This will take a few minutes; as soon as the bottom ones wilt, turn it over, and shortly all the greens will have wilted. Add the small amount of salt and the fish sauce. If you are adding sugar, now is the time.

This barely needs covering in order to cook; once all the greens have wilted, remove to the serving dish. There will be some flavorful liquid left over, carefully pour that over the greens. Add a few squirts of sesame oil, and the cracked pepper and sesame seeds.


(Click here to find me on Facebook and here on Twitter.)

Burmese broth with bitter greens

Burmese broth with bitter greens

Burmese broth with bitter greens

Two things that I’m having a lot of fun discovering — one is Burmese cuisine with its fishy umami and floral flavors . The other is the leaves of the bitter melon. I can’t decide which to be more excited about; but when you combine them? An explosion of flavors!

So let me tell you what I know about both. I have always loved the bitter melon (karela). This is a cousin of your garden-variety cucumbers and cantaloupes, but its seeds are large and hard, its skin is bumpy, and its flesh is scanty and bitter. Certainly for special tastes; but once your tongue has learned to love it, you really love it.

Bitter melon grrens

Bitter melon greens

But then, I recently discovered that its leaves are edible too. One finds them at the farmer’s markets in San Francisco that serve an ethnic clientele. They are sold in giant bunches for a dollar. I leave with my wallet almost intact, and my shopping bag full to bursting with greens, the tendrils spilling over the top.

One of the most enchanting things about buying a bunch of bitter melon greens is the baby gourds one finds attached to some shoots. Normally the gourds are at least six inches long, but with every purchase you also get some baby gourds, some no bigger than your finger tip. These can be thrown into the pot along with the greens, they do not need much cooking.

A baby bitter melon compared to an onion

A baby bitter melon (karela) compared to an onion

Those of you who want to like dandelion leaves, but find that they are just a little too bitter to enjoy, might love the bitter melon leaves. They only have to be cooked long enough to wilt, and have a complex, grassy bitter-tinged flavor.

Now about Burmese cuisine. I admit I don’t know much about it but I’m starting to learn. I recently got a Burmese recipe book; but rather than make any recipe from it, I tried to understand the techniques and flavors and tried to imbue this particular broth with the Burmese gestalt. At the risk of causing derisive laughter among any Burmese readers, I made what I like to think of as a Burmese broth. Unlike Indian food, it only gently cooks onions; it uses lemongrass infusion; and it uses fish sauce instead of the more Chinese soy.

We loved it with some white rice. please let me know in comments if you did too.

Soften vegetables

Soften vegetables

Vegetables in pot

Vegetables in pot

Softened

Softened

Lemongrass

Lemongrass

Add greens

Add greens

Serve

Serve

Burmese broth with bitter melon greens

Ingredients:
  • Leaves and baby gourds from 1 bunch of bitter melon greens (about 4 cups)
  • 4 big cloves garlic finely minced
  • 2 medium tomatoes sliced
  • 1 chili sliced
  • half onion diced or sliced
  • 1 cleaned stalk of lemongrass (optional)
  • 2 tbsp oil
  • 1.5 cups chicken broth
  • 1 tablespoon fish sauce
  • salt to taste
Method:

Put oil, onions, tomatoes, garlic and chili all together in a thick-bottomed pot and cook gently until softened (about ten minutes). The tomatoes should have liquefied and somewhat dried by now, if not cook a few minutes longer. Now add the broth, the fish sauce, and the lemongrass. Bring to a boil and simmer for ten minutes or so. Add the greens, and allow them to wilt. Turn off the heat.

Serve in soup bowls, with soup spoons and chopsticks for lifting the greens, and some white rice on the side.

(Click here to find me on Facebook and here on Twitter.)

Beet parathas; a classic recipe book

Beet paratha

Beet paratha

Some years ago I found a book in a used bookstore that really spoke to me in the depths of my soul. It electrified me from the title alone, even before I cracked open the pages.

Now a few books have been known to be enormously influential in people’s lives. For some it may be ‘Thus Spake Zarathustra’ by Nietzche, or ‘Atlas Shrugged’ by Ayn Rand. For others it might be ‘War and Peace’ by Tolstoy. For me, it was this:

tasty dishes from waste items by Aroona Reejsinghani

tasty dishes from waste items by Aroona Reejsinghani

For the 1970’s in India, in the midst of famine, this book was quite apropos. I remember talk of the high prices of vegetables at every social gathering. Meat for many was simply out of the question. This book begins with an acknowledgement of the scarcity that every housewife has to deal with. It goes on to celebrate the leaves, stems, peels, leftovers that most of us throw away. The author painstakingly lists the vitamin content of each of these leaves and rinds, including the mysterious Vitamin P (?)

Not only is it completely impressive that she was able to do this research in the days before Google, it is astounding how many recipes she was able to come up with.

In here one finds 5 recipes that make use of banana peels (throw away the outer green part, she advises), 9 recipes that use turnip leaves, 2 that want you to fry up potato skins. Curdled milk, of course, is an industry, and the author dwells on that for a bit. Stale bread gets its own section with 36 recipes. Leftover fish, meat, chicken each get their own sections as well.

Now we no longer live in a world of food scarcity but quite the opposite. Most developed countries don’t spend over 10% of their income on food, in the US, where I live, it is around 7%. But the message of this book is more relevant than ever. The cost of food production remains very high, it just doesn’t come out of our paychecks, but instead we pay for it with depleted soils and poorer biodiversity.

I have to admit I don’t go scavenging around the thrown away peels for my next meal, but instead compost everything. Given my chunky waistline, I figure it is even better to feed the worms than me.

Beetroot

Beetroot from foodreference.com

Beetroot from foodreference.com

Now, about beets. Here is basically the entire beet plant from roots up to the leaves. Stare at the leaves for a bit. You all know that the greens are nothing but chard, right? Beetroot and chard are not even different species but simply different breeds. Just like a Dalmatians may be bred for running and bloodhounds for tracking a scent, but both remain dogs, chard is bred for fancy leaves and beetroots for fancy roots, but both remain Beta vulgaris. The roots of the first and the leaves of the second can be eaten. This website has more on this: Is chard root edible.

If you have no use for the greens, you could discard them I guess, but for goodness sake don’t throw them away and then go buy chard at the market!

Out of the bunch pictured, here are the parts I ended up throwing away for this recipe, the rest was all eaten. I threw away the long tails of the roots. I threw away the part where the roots turn into stems — that tends to be tough. I peeled the roots thinly with a vegetable peeler. Last, some stems have thick fibers that simply zipper all the way off; if I caught hold of some of those, I threw them away, otherwise I chopped them up along with the stems and leaves.

Parathas with beet root and greens filling

A reader might be forgiven for wondering if I’m going through the little-girl spectrum for my parathas; some time ago I did a recipe for purple parathas, this time they are pink.

Anyway, the idea of the stuffed paratha is simple — it is a whole wheat flatbread stuffed with filling inside. The filling for these consists of the grated root and the finely chopped leaves and stems, cooked together with seasonings. Parathas are great with some plain yogurt on the side.

Tails trimmed

Heads and tails trimmed

Greens finely chopped

Greens finely chopped

Grated, cooking with oil

Grated, cooking with oil

Cooked down and dry

Cooked down and dry

Uncooked paratha, pink showing

Uncooked paratha, pink showing

Cooked paratha, stacking up

Cooked paratha, stacking up

See the pink?

See the pink?

Parathas with beet root and greens filling

  • Servings: 8 parathas
  • Print

Ingredients for filling:
  • 3 medium beetroots with greens and stems
  • 1 teaspoon salt
  • 1 teaspoon red chili powder (or to taste)
  • 1 teaspoon chaat masala, substitute with dry mango powder, substitute that with lime/lemon juice
  • 1 tablespoon oil
Ingredients for parathas:
  • Roti dough made out of about 1 cup whole-wheat flour as in this recipe
  • Oil or ghee or butter for shallow frying on griddle.
Method:

Make the dough and set aside for half hour to rest. Make the filling: peel, trim and grate the roots. Rinse and finely chop the greens and stems. Heat the 1 tablespoon oil in a wide pan. When it shimmers, put in the beets, greens and all. Stir to coat with oil. They will very quickly start to cook down. Add the salt, the red chili, and the chaat masala and stir. The point is to dry out the filling. Once it looks pretty dry, turn off the flame and wait for it to cool. Taste for seasoning and adjust. I generally prefer the filling to be highly seasoned because the dough does not have any seasoning at all.

To make the parathas you can refer to this recipe, but I’m including most of the steps anyway. The dough is the same as used for rotis/chapatis. Roll out a thin circle about 5-6 inches wide. Place a couple tablespoons of the filling in the middle. Gather up the edges of the disk into a pouch. Flatten the pouch with your fingers, then roll it out again carefully so as to prevent the filling from escaping. Once it is a flat disk once again, about an eighth of an inch thick, it is time to shallow-fry on the griddle.

Heat the griddle on medium-high. When some drops of water thrown on it sizzle, it is time to put the rolled out paratha on. Wait for 30 seconds while the underside cooks; then flip it. Wait for another 30 seconds while the second side cooks. Now spread a few drops of oil or ghee on the top surface and flip it, to have the bottom shallow-fry in oil. A minute of this, now spread a few drops of oil on this surface and flip it again, letting it cook another 30 seconds. This way, each surface has been cooked twice, first roasted dry, then with oil, on the griddle.

Stack up the prepared parathas; enjoy them with some plain yogurt on the side. Greek yogurt is very popular nowadays, it would make a great dip for these.

I’m entering this in the Family Foodies challenge for May, which is to do with frugal eating. Perfect! Minds knitted together across the interwebs…that’s what blogging is all about.

This is hosted over at Bangers and Mash and Eat Your Veg…this is a link to the May challenge. May the cheapest skinflint win!


I love you, Alemany Farmer’s Market! Plus: what one does with Bitter Melon Greens

Bitter melon greens with paneer

Bitter melon greens with paneer

I do so love you, Alemany Farmer’s Market! I love all the other farmer’s markets too but you are soooo special.

I have found that there are two types of farmer’s markets in the Bay Area. There are farmer’s MARKETS and then there are FARMER’S markets. The former are a lot about marketing. They sell produce, sure, but a lot of it is overpriced, and more than half the stalls are filled with high-profit-margin goods like infused oils in precious glass bottles. I can do that for free at home in an emptied jam jar and no preciousness.

Alemany Farmer's Market (Copyright: Kurt Rogers, The Chronicle)

Alemany Farmer’s Market (Copyright: Kurt Rogers, The Chronicle)

But Alemany farmer’s market, you truly are a FARMER’S market. I love you because you tickle my fancy every time I visit. Where else can I find corn that is blue and smaller than my palm and sticky. Where else can I find a fleshy, hairy stalk that is labeled ‘wild potato’ (even Google flopped on that one). Where else would I see tiny blotchy eggs that were apparently laid by a quail. Where else would I find a prickly pink egg, and not only giant taro with their purple stem still attached but also taro leaves. Where else can I find not one, not two, but three or four choy-related greens.

And no matter how strange and unfamiliar the sight I see, there’s always a crowd of customers expertly assessing, holding, pressing, rifling through the produce. There I stand, mystified, in awe, only to be elbowed aside by a little old lady with her cloth bag who has zeroed in on the unnamed leaves and is tossing aside the rotten ones and snagging the good ones. She is gone before I can gasp — excuse me, lady, can you save some for me, and by the way, what on earth is it?

In this farmer’s market, advice abounds. As soon as I pick up a fruit or vegetable and stand there regarding it, someone or the other’s voice will speak up beside me — you chop it, you fry it with garlic. Or boil it with chicken. Or what have you. More often than not, the English is broken and heavily accented and the accents could come from any part of the world from Africa to Vietnam. If San Francisco is a microcosm, then Alemany Farmer’s Market is a micro-micro-cosm. Or a micro-cosm-cosm? Something like that.

Best of all is when this market reintroduces me to some childhood friends that I didn’t at first recognize. The other day this happened to me twice. First I see these pretty round leaves tied in a bunch. The person at the stall informs me that they are moringa leaves, grown all over the world from Africa to the Himalayas to South-east Asia, a miracle vegetable that can cure all sorts of ailments. Sounds familiar, but what is it? Hold that thought…a post on that will come next.

Bitter melon greens

Bitter melon greens

Next I see a stall with these simply humungus bunches of bright green leaves with tendrils sticking out all over. Turns out these are leaves from the bitter melon plant — bitter gourd, karela, call it what you will. Well. That is an old friend and I love it. I have cooked with it many times. But I didn’t know that the leaves were edible too.

Bitter melon greens with paneer

Turns out they are, down to the stems. They are certainly bitter though, so I tried cooking them with something creamy to smooth out the bitterness. I used ghee and paneer.

The other thing about this recipe is that it is more of a mindset rather than a fixed set of steps. If you don’t have paneer, you might substitute with ricotta. If you don’t have the bitter melon greens, either dandelion greens, radicchio or frisée would be a great replacement. Out of the spices used, if you don’t have one, just leave it out, although of course the character of the dish will morph. The cumin seeds in particular, I would try not to leave out. Heat can come from any source like the cracked red pepper that the Italians use. Ghee of course, can be replaced with butter. Mmm…now I can’t wait to try this completely new recipe with all the replacements made! Here are pictures of the process.

Slicing the greens

Slicing the greens

Other ingredients: paneer, onion, garlic, chili, cumin

Other ingredients: paneer, onion, garlic, chili, cumin

Frying garlic, chili, onion

Frying garlic, chili, onion

Paneer goes in

Paneer goes in

Powdered spices go in

Powdered spices go in

Stir to coat

Stir to coat

Greens go in

Greens go in

Done

Done

Bitter melon greens with paneer

Ingredients
  • 1/2 pound paneer
  • Half a bunch bitter melon greens
  • 1 large shallot or half a medium onion, chopped fine
  • 4-5 cloves garlic, sliced
  • 1-3 serrano chilies, sliced
  • 1 teaspoon cumin seeds
  • 1/4 teaspoon turmeric powder
  • 3/4 teaspoon salt
  • 1/2 teaspoon red chili powder (optional)
  • 1 tablespoon ghee
Method

Rinse and slice the greens. The finer you slice the greens the better the final result. I ultimately didn’t get it super fine but I did try to ensure no stem was longer than half an inch. Dice the paneer into little blocks about 1/4 inch on each side. Finely chop the shallot, garlic and chilies.

Heat the ghee in a wide pan on medium heat. When it is shimmering, put in the cumin seeds. They will presently sizzle, then in goes the garlic and chilies. Let them get a little shriveled (couple minutes) and put in the onion. The onion only needs to cook until pink and translucent, not browned.

Put in paneer at this point, along with the dry masalas (turmeric powder, red chili powder and salt). Stir to combine. Greens go in next. Toss with paneer and spices. Then don’t need to cook for long. When they look shrunk down and shiny, add about half a cup of hot water, cover and cook on low for just about 4 minutes and you are done.

This goes well with chapatis/rotis or rice.

Let's connect... FB-f-Logo__blue_29 pinterest_badge_red Google+ twitter-button-small

Exploring the vegetarian gumbo

Vegetarian gumbo

Vegetarian gumbo

I met a lady from Louisiana over Thanksgiving at my in-laws’ place. Of course, I asked her about gumbo, it being the only thing I know about Louisiana, other than that Louisianians are sometimes inclined to place their banjos on their knees. Well, I’m glad I asked. In her lovely Louisiana accent, she related the story of a dish amalgamated from three different cultures, that has become one of the touchpoints of Cajun people. One browns the flour in grease for hours and hours, constantly stirring, she told me in a faintly challenging tone of voice; of course this made me want to try making it right away.

(By the way — you know how a couple posts ago I threw out this thing about American food not needing a lot of slaving over the hot stove? I knew not whereof I spoke. Because, well, there’s gumbo.)

What is gumbo? People often call it a soup, but from what I can tell it is more of a stew, and eaten with rice. Sometimes seafood is cooked in it, other times meat — never both. But I’m not a huge fan of meat, and the hubby doesn’t much care for seafood. Lucky for us, there is a long tradition of vegetarian gumbos as well, either from the rustic cuisine of people who could not afford meat, or the six-week period of Lent when meat is to be abstained from.

The most interesting thing about gumbo is that each of the peoples that has lived around the Gulf has left their mark on it.

Filé

The Choctaw people have lived around there since the days of the mastodon, which they hunted. If that sounds rather prehistoric, well, it technically is — the mastodon became extinct 12,000 years ago. The Choctaw were intimately familiar with the native plant and animal life around their region; one of the things they contributed to the gumbo is their use of sassafras leaves. This plant (the root of which is the one that gives ‘root beer’ its name) is distantly related to other aromatics such as bay leaf and cinnamon. Sassafras leaves are ground up to make filé, which is used to flavor and thicken gumbo.

Roux

Ten thousand years of sheer Choctaw-ism and then the Europeans show up. What concerns us here, through all the sturm und drang of the European settlement, is the effect it had on gumbo: the small population of French Canadians that were exiled here brought with them some notions of French cooking. This includes roux — the cooking of flour in fat that many French sauces are based on. French cooking tends to use butter, but then the French roux seems to be mostly left pale; for gumbo the roux is cooked for hours till browned, and in that situation the butter would burn, so for gumbo, oils or lard are used instead.

Interesting tidbit — the word ‘Cajun‘ is a corruption of the word ‘Acadian’ — Acadia, Canada being the place that the French Canadians were exiled from.

The holy trinity

Cooking aromatics into the base of the stew is another common European method. The French call it mirepoix and the Spanish call it sofrito. The standard set used in gumbo is called the holy trinity and is made up of equal amounts of onion, celery and green bell pepper (capsicum). This particular set clearly shows the Spanish influence on the region.

Okra and rice

Another set of cultural influences arrived with the Africans brought over through the slave trade. Now once again, many tears and blood have been spilled over this, but what concerns us for gumbo is that the Africans brought over a couple of my old friends to America — my slimy old pal the okra (bhindi) that I have loved since childhood, and rice. West African stews often cook down okra into it with onions and meat: the okra gives off its glutinous slime (I say that with love) to make the whole stew have integrity. Hello, okra. And rice has become the traditional accompaniment to gumbo; there are other rice-based dishes in Cajun cuisine as well (like jambalaya).

Three types of vegetarian gumbo

Now a lot of veteran gumbo-eaters will probably click away as soon as they hear the word ‘vegetarian’ spoken before gumbo. But for the rest of you, here are three that I made. Since this was my first time making gumbo, I tried to keep it very simple, and not add too many flavorings; at the risk of sacrificing flavor, perhaps, but all the better to learn the basic palate of these few key ingredients. I also used whole wheat instead of white flour, because I am a bit of a fanatic. The only difference it made is that I believe the final result was a bit grittier than it would be with white flour.

The Gumbo base

The amounts specified here can form up to four separate gumbo meals for two.

Ingredients:

  • 1/3 cup fat (oil or ghee or lard — I used lard)
  • 1/2 cup whole wheat flour
  • 1 medium onion
  • 2 sticks celery
  • 1 medium green bell pepper (capsicum)
  • 1/2 teaspoon salt

Method:

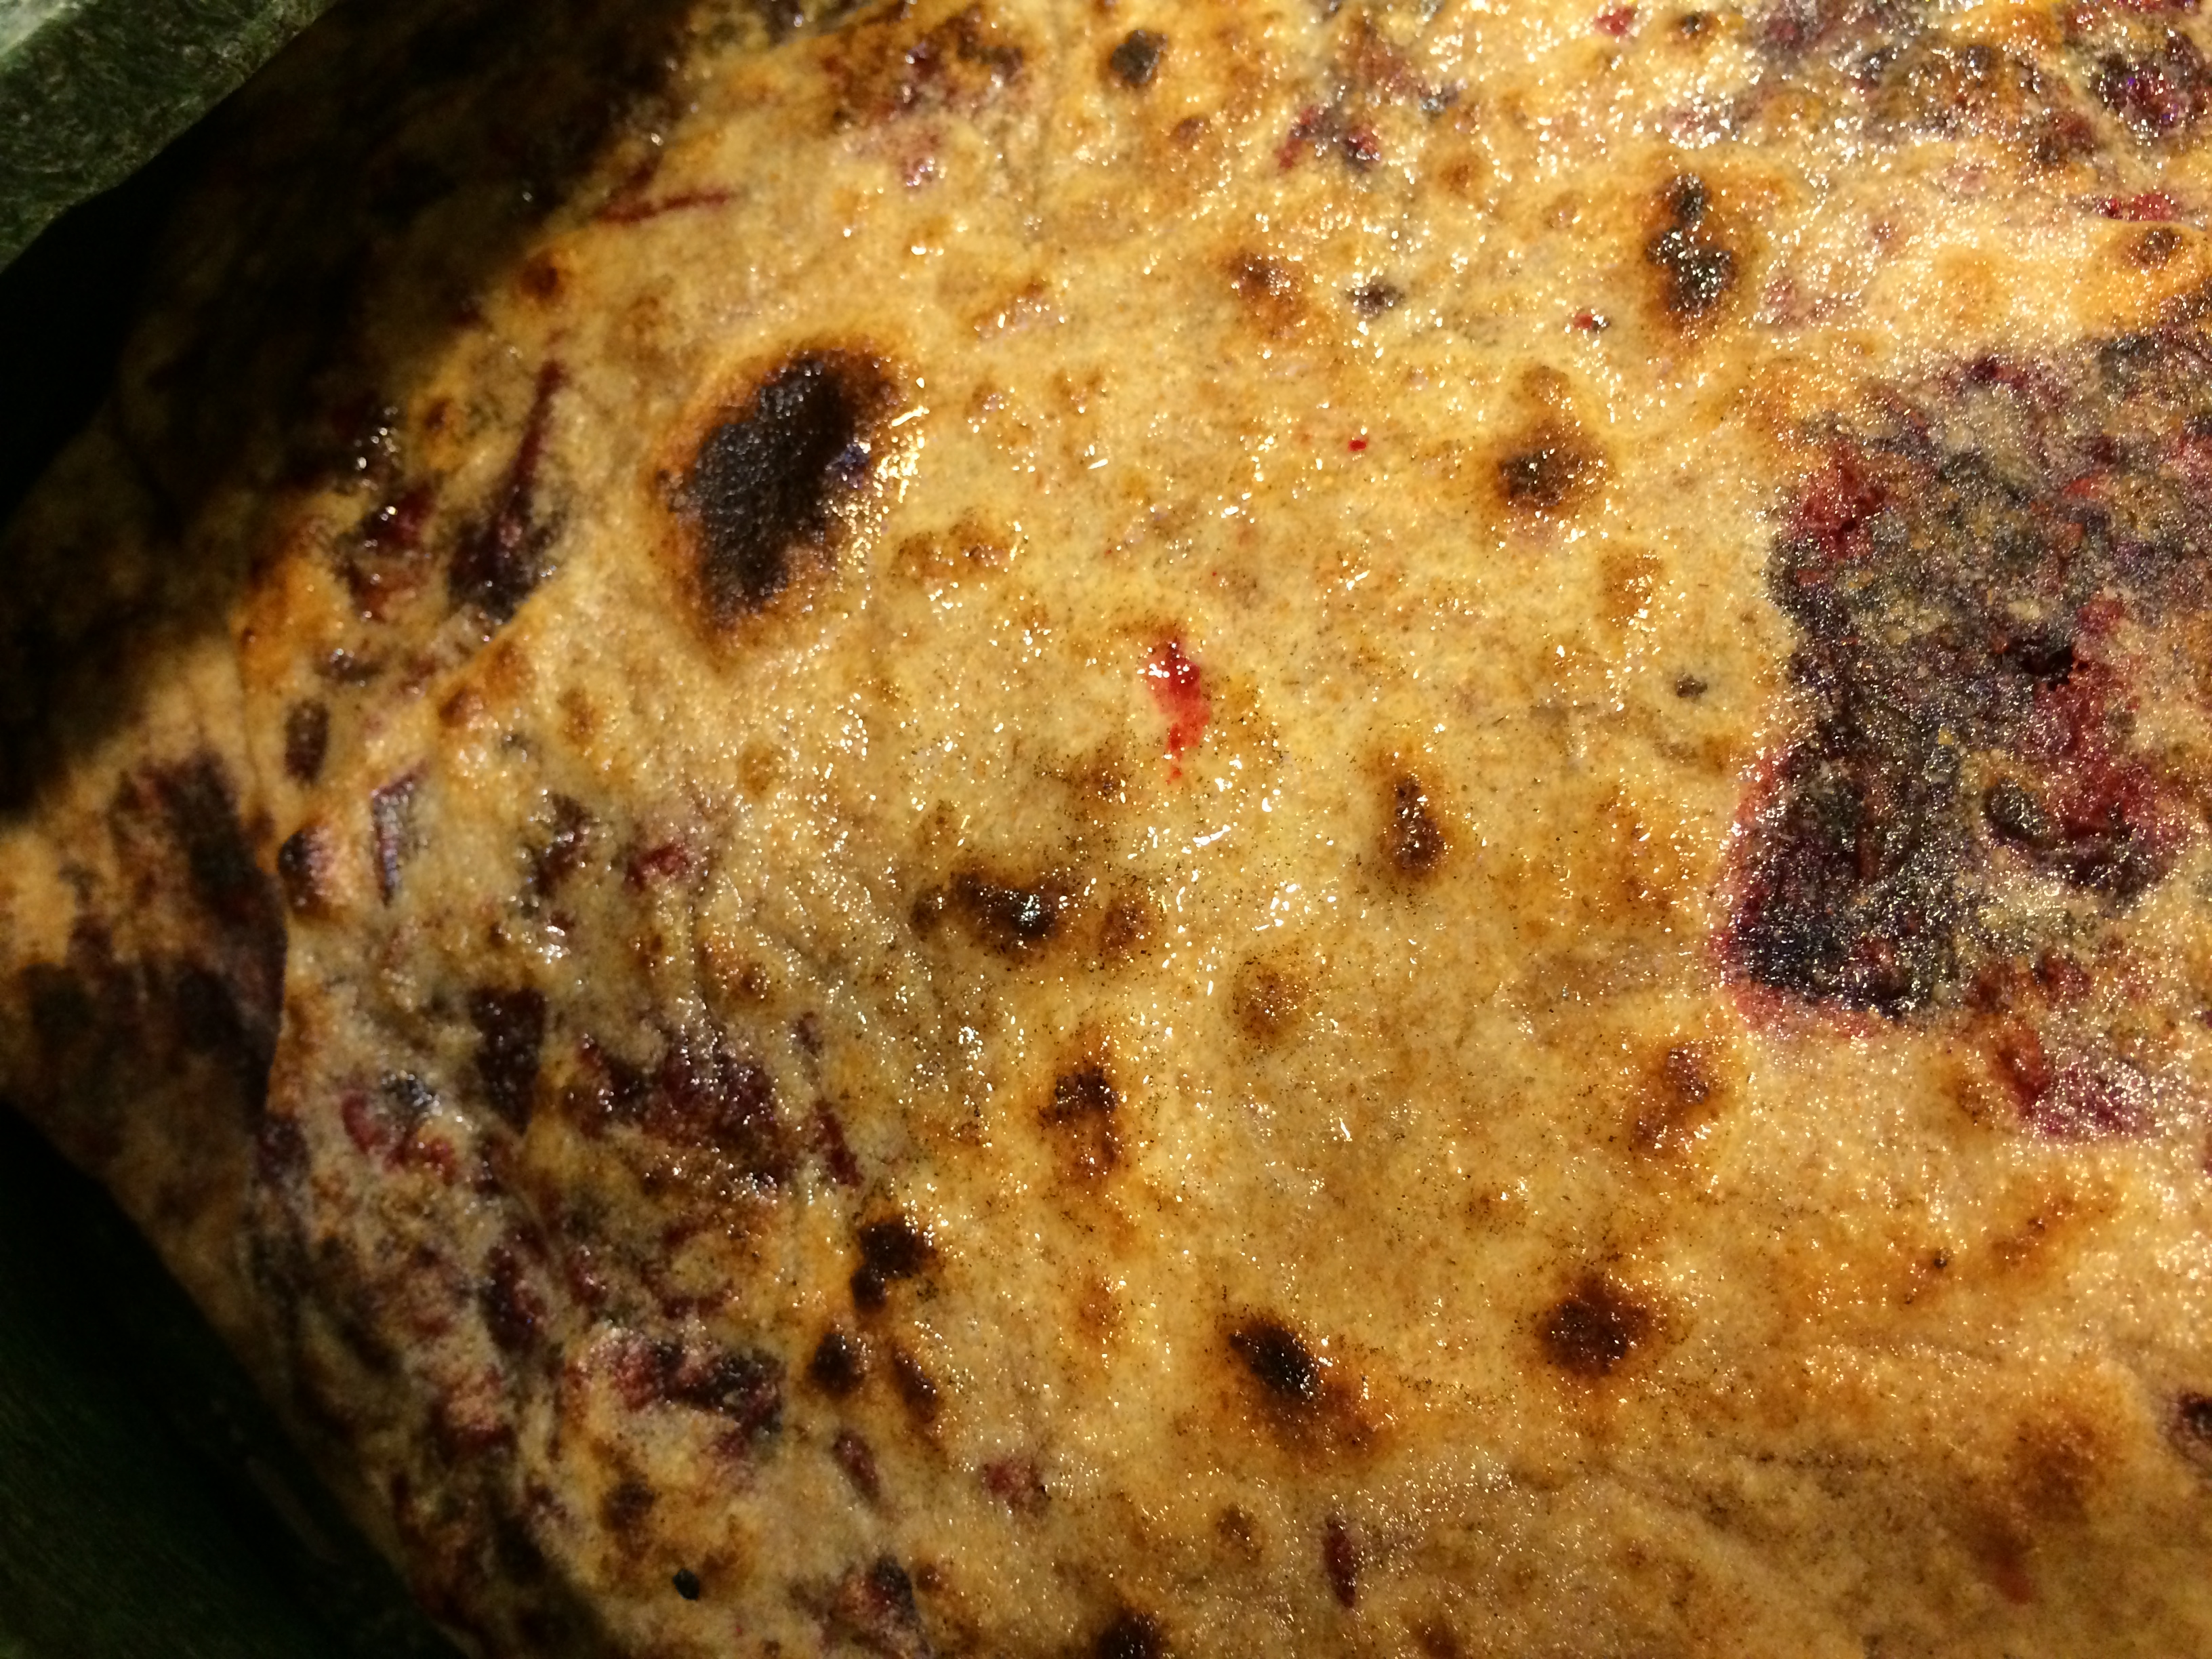
Heat the fat in a thick-bottomed pot and when it melts, put in the flour. Stir to combine into a paste. There, the roux is underway. Now the idea is that it has to go from a blond color to a dark chocolate brown. For me, this took about two hours, because I had the heat on medium to medium-low, which made it so that I could stir it every minute or so. If you are willing to stir it every ten seconds or so, you can have the heat higher and it will be done faster.

So in about two hours I went from this to this. Remember I started with whole wheat flour so it was already brownish from the beginning.

IMG_1034 IMG_1039

Now chop up the vegetables into little dice and put it into the pot along with the salt. Even if the roux had been calmly cooking away, you will notice that upon entry the vegetables will immediately sizzle, showing how hot the fat really is. In about 20 minutes of cooking, the vegetables soften down and the gumbo base is done.

IMG_1035 IMG_1037 IMG_1040 IMG_1041

I divided the gumbo base into 4 quarters to store. Each quarter can be used to make an entire gumbo meal for two people. Each quarter will take about 2-3 cups of additional liquid (water, stock, milk); so using that hint you can make any gumbo dish. The resulting meal, once the base is done, is very quick and can be easily put together on a weeknight.

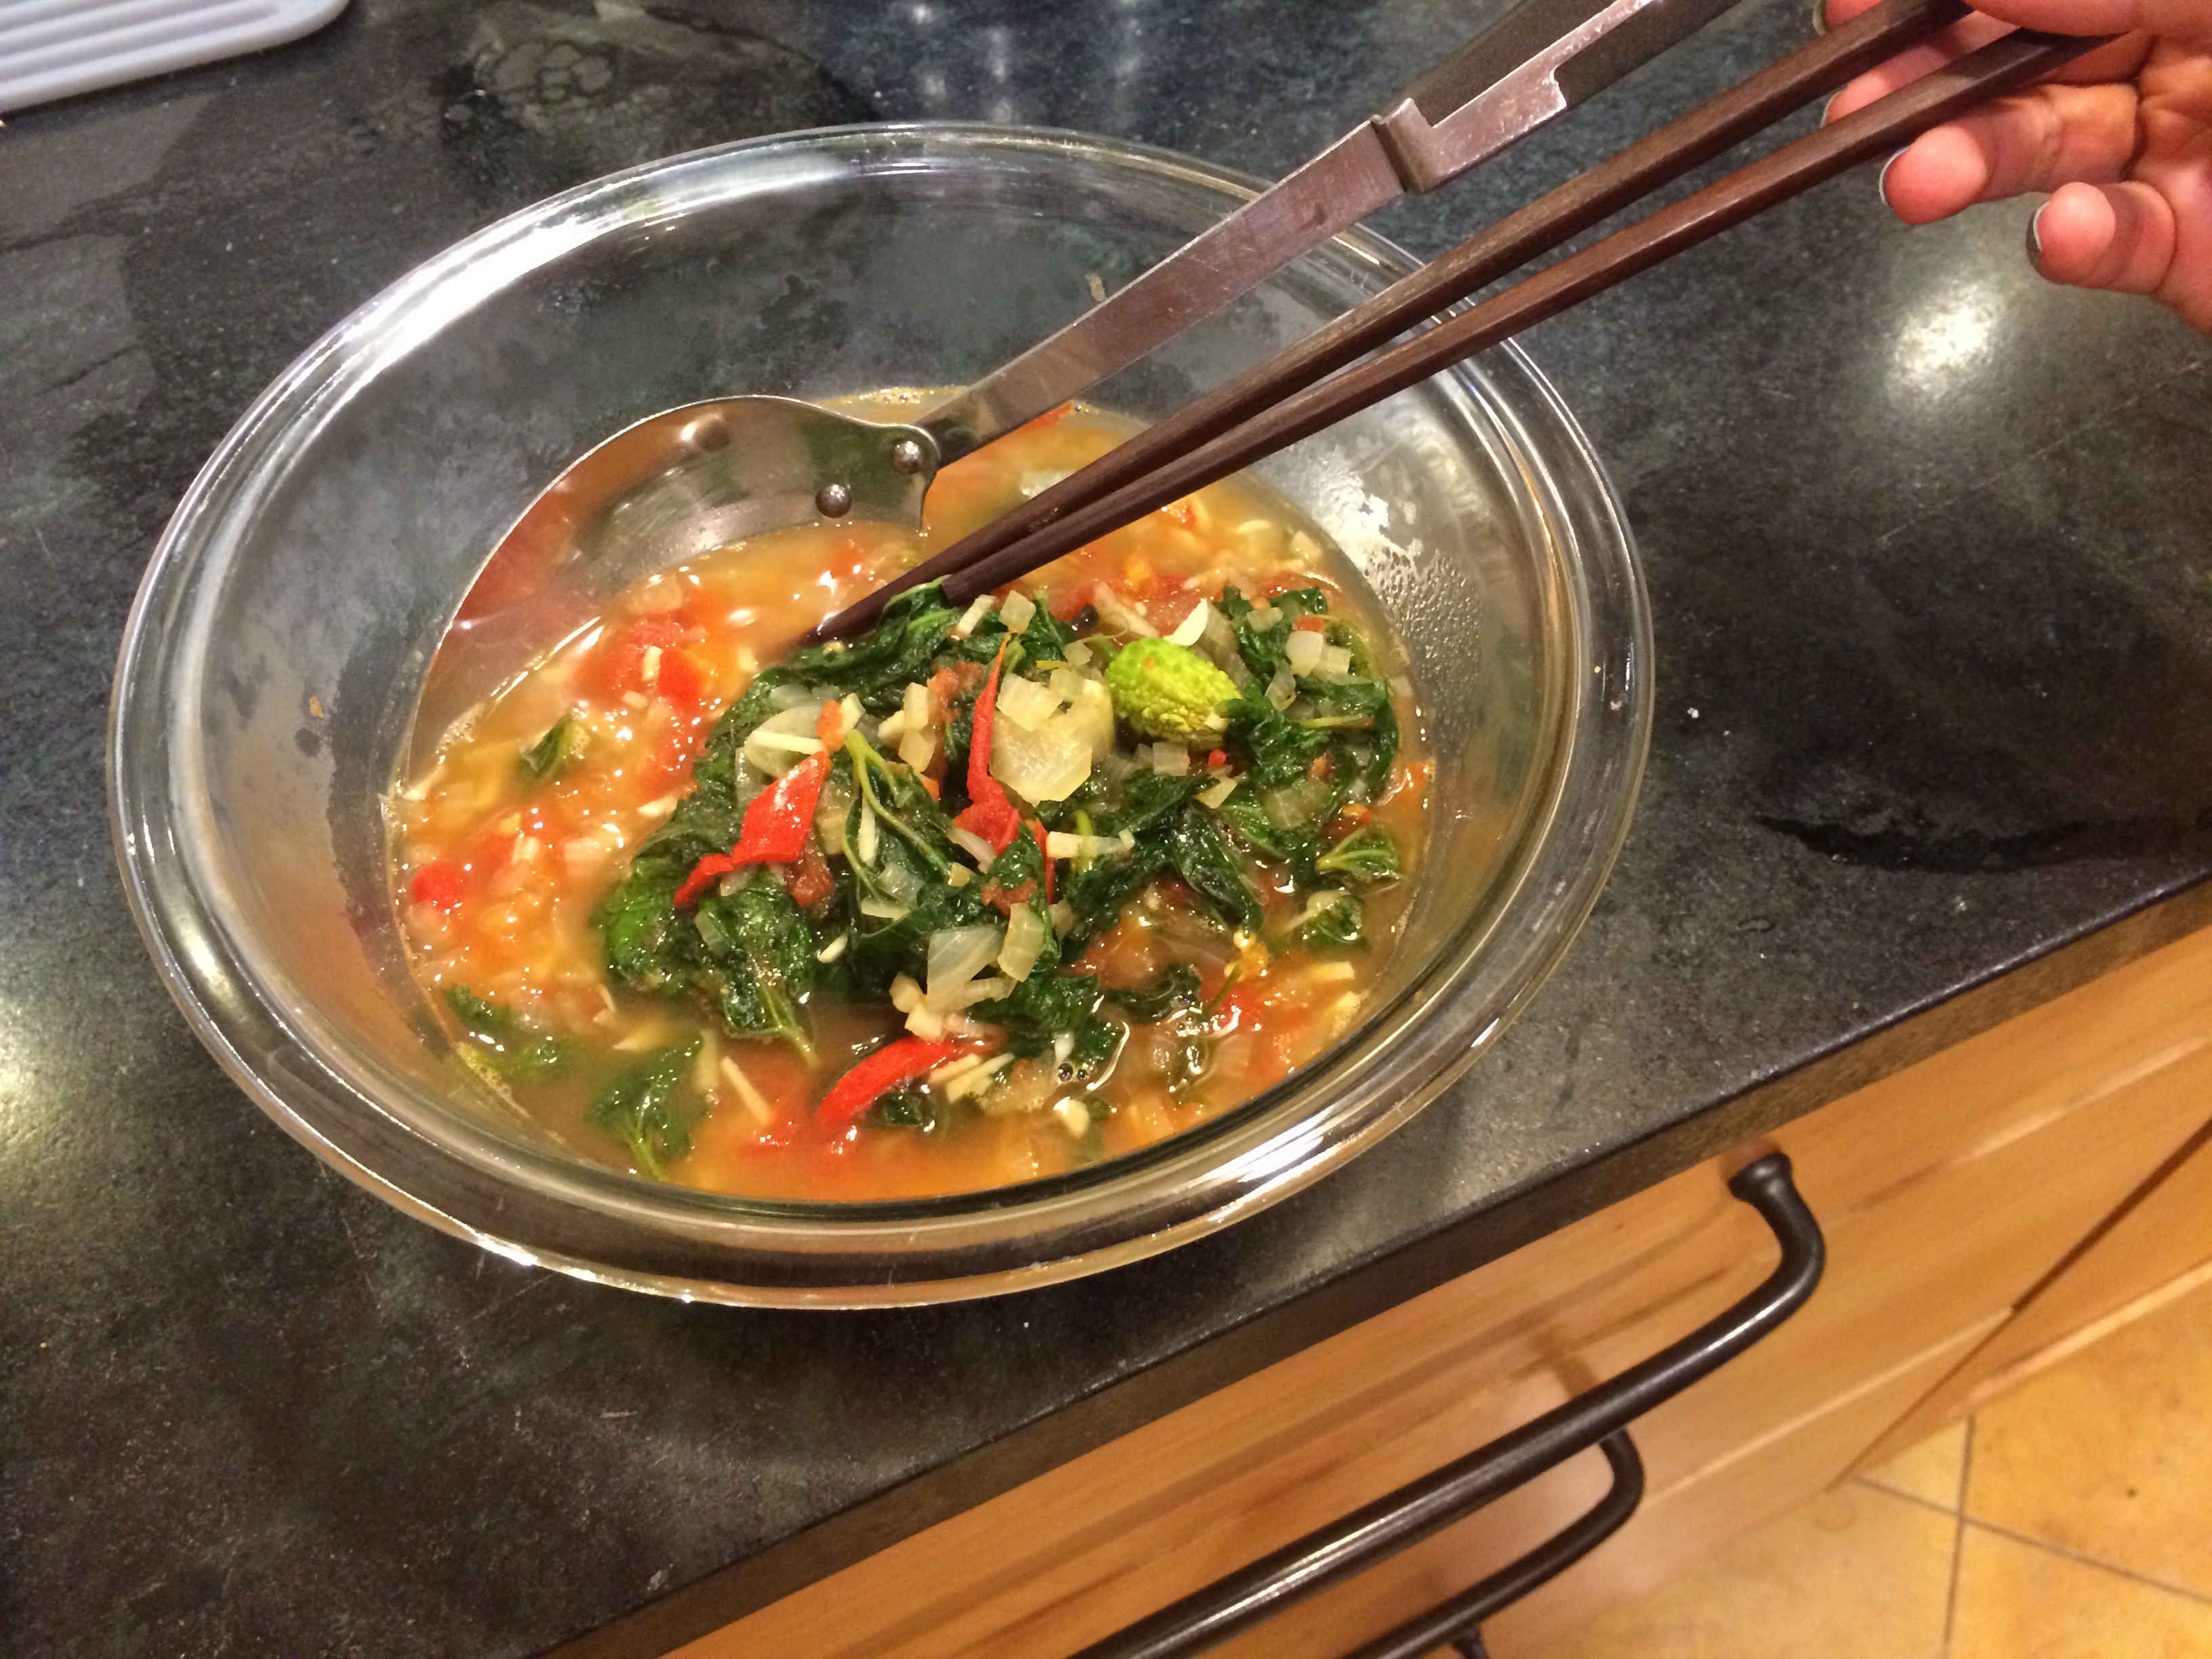
1. Greens-okra Gumbo

Greens and okra gumbo

Greens and okra gumbo

In this gumbo, okra is cooked into the stew and greens are added later. I love the earthiness that okra adds here. Instead of pureeing the greens as is often done, I left them in ribbons, and enjoyed that textural variation. A little vinegar is added at the end for some brightness.

Ingredients: 

  • 2 quarters of the gumbo base from above
  • 1/2 pound okra, destemmed and sliced
  • 1/2 teaspoon paprika
  • 1 bay leaf
  • 1 teaspoon salt
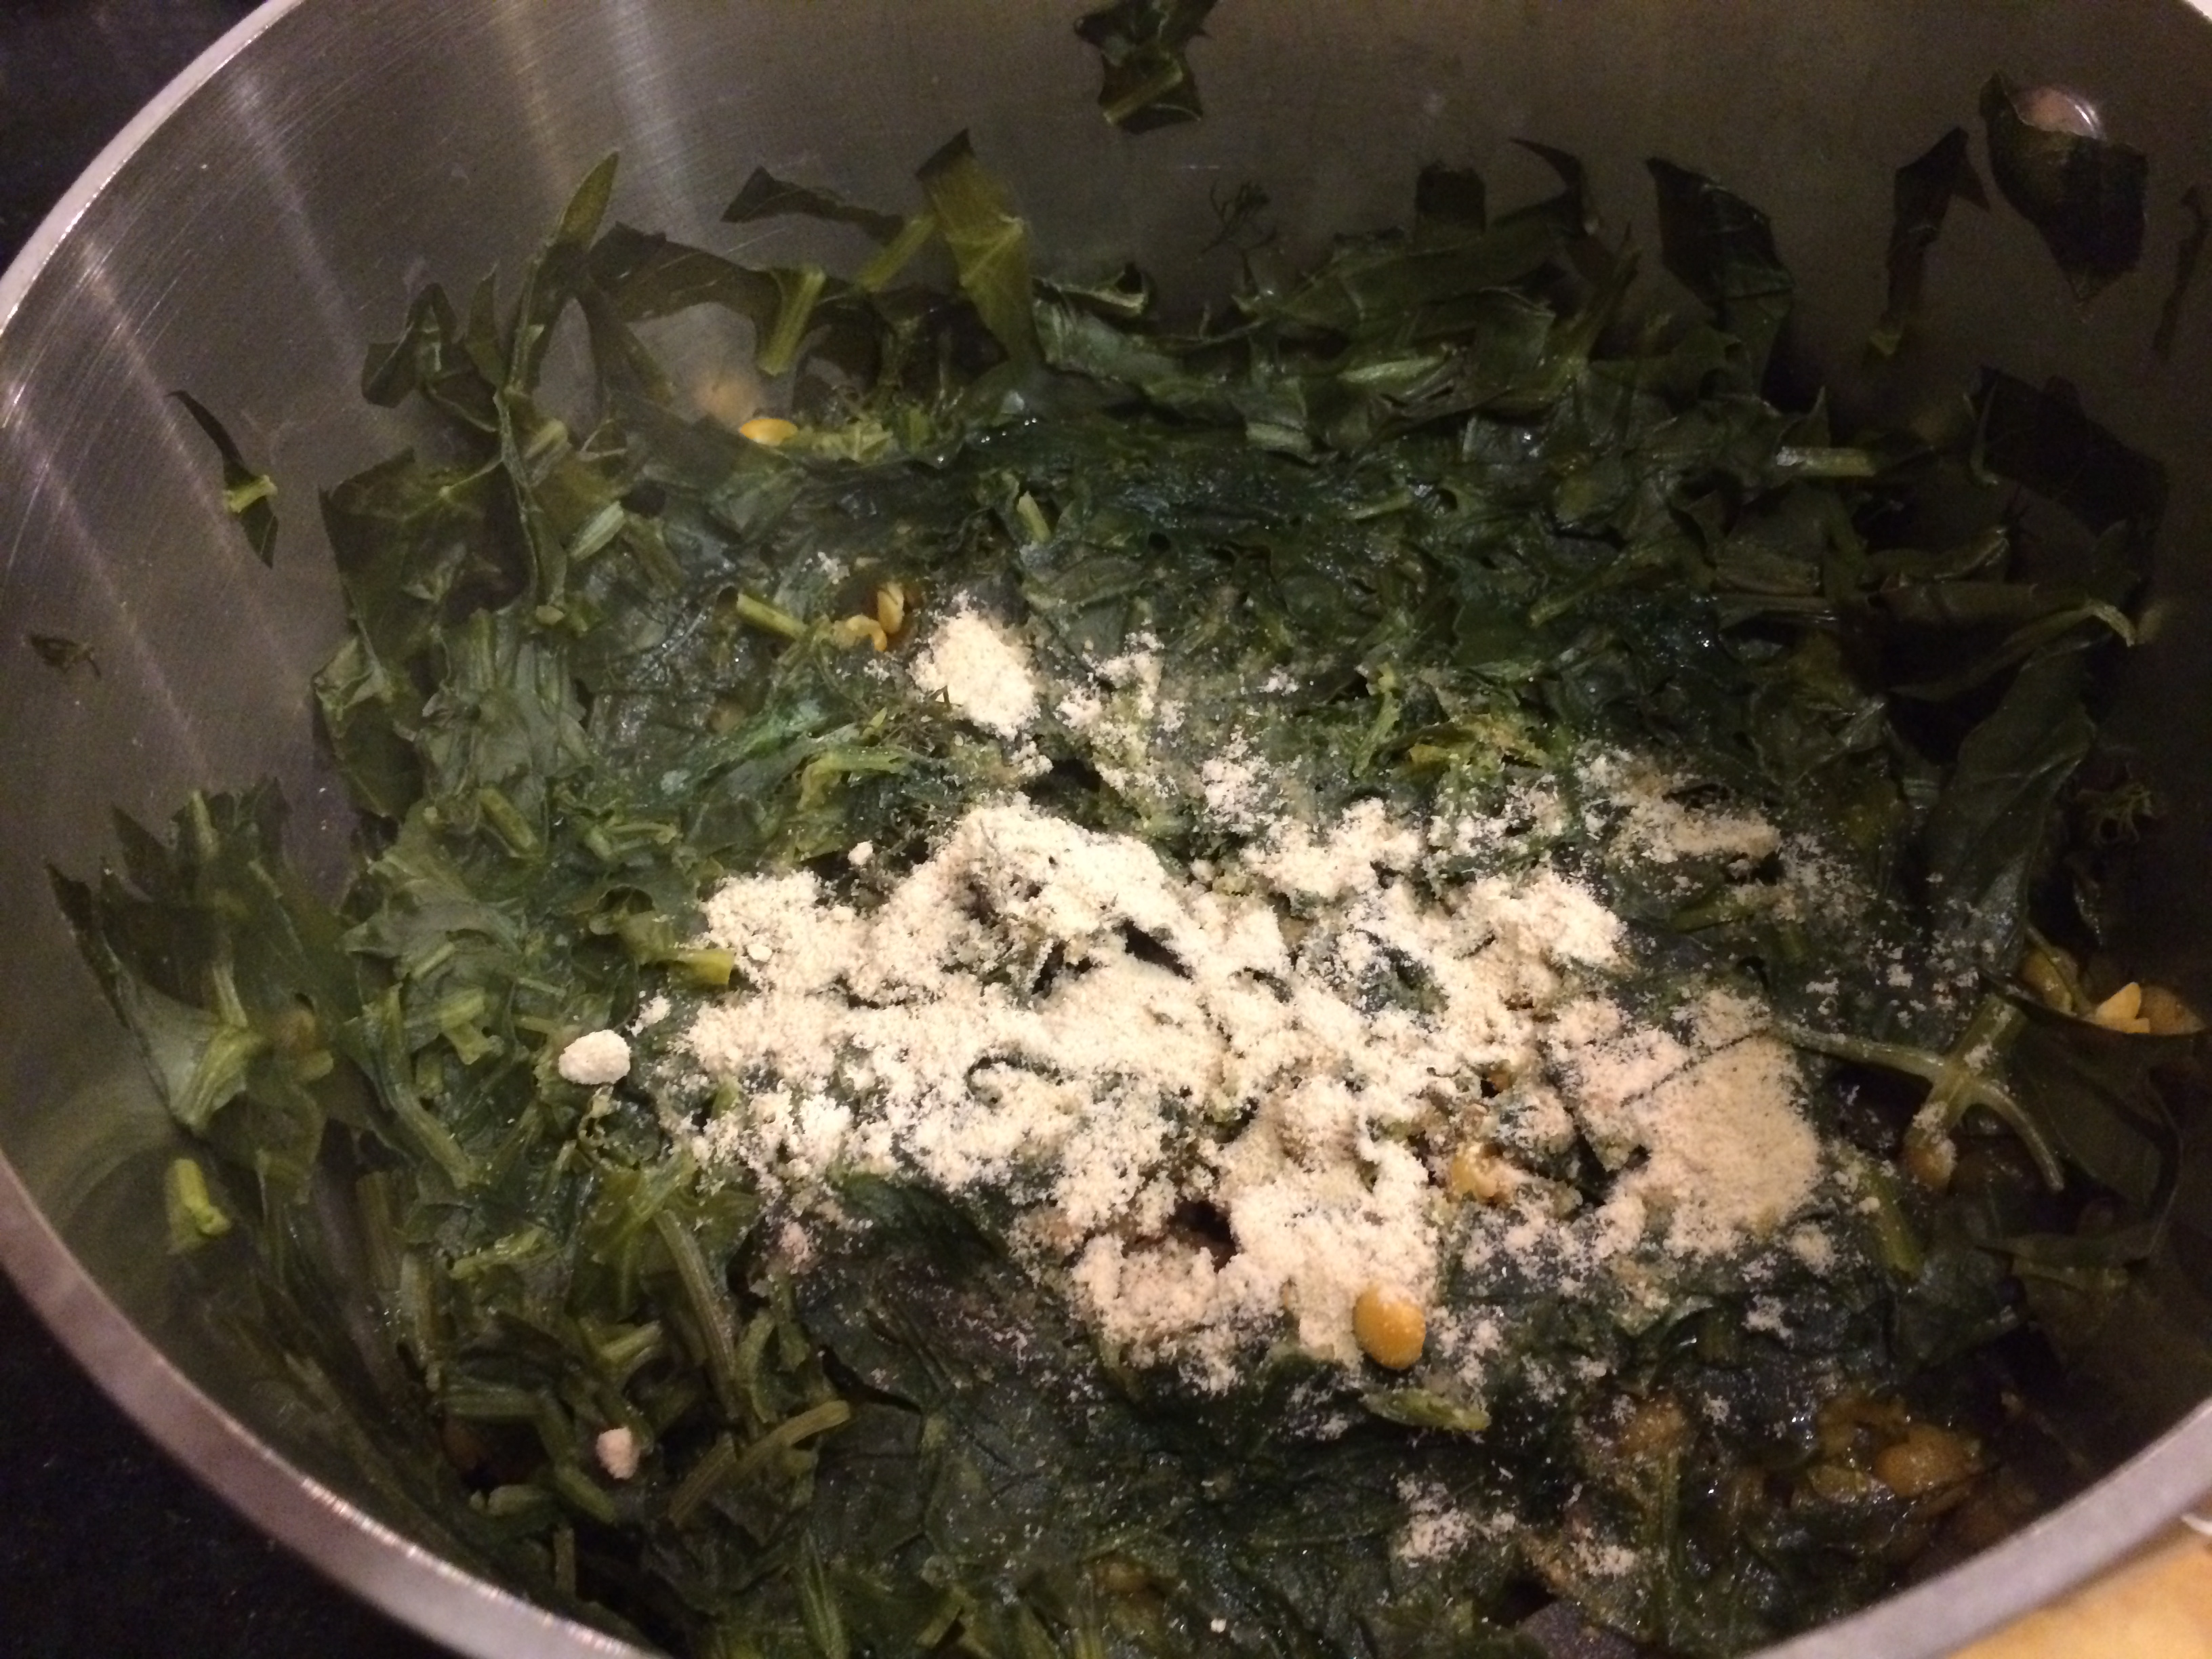
  • half a bunch mix of greens, sliced into ribbons (mustard, kale, spinach, chard, etc.)
  • 1 tablespoon white vinegar

Method:

Heat the gumbo base in a pot. Once it is hot, add about 5 cups of hot water, little at a time, after each time stirring the roux into a paste. This is the classic French method of making béchamel sauce, except that the liquid in that case is milk. Once all the water has been incorporated — this will take a few minutes — bring to a low boil. Add the okra, the paprika, bay leaf and salt. Boil for half hour to one hour on a low boil. Now add the greens. They only need to cook for ten minutes or so. Add the vinegar, taste for salt, and you are done.

IMG_1042 IMG_1044 IMG_1045

2. Cabbage Gumbo

Cabbage is found as an ingredient in some older recipes from the region and has lately gone out of style…why? Because — cabbage! Come on! Well I’m pretty déclassé myself so this recipe definitely attracts me. Milk is used as the liquid this time. Also this time I used filé powder at the time of serving; it thickens and adds a herbal something.

Ingredients:

  • Quarter of the gumbo base recipe from above
  • 1/3 head of cabbage, shredded
  • 1 serrano or jalapeno chili
  • 2 cups milk
  • 1/2 teaspoon salt
  • 1/2 teaspoon filé powder

Method:

Heat the gumbo base in a pot along with the serrano chili, sliced. Put in the milk in the style of béchamel sauce, stirring to combine into a paste each time, making sure that there are no lumps. Once all the milk has been added, bring to a low boil. Add the cabbage and salt. Let it cook until the cabbage is softened, about 20 minutes. Serve with rice and some filé powder, which is to be stirred in.

Cabbage gumbo

Cabbage gumbo

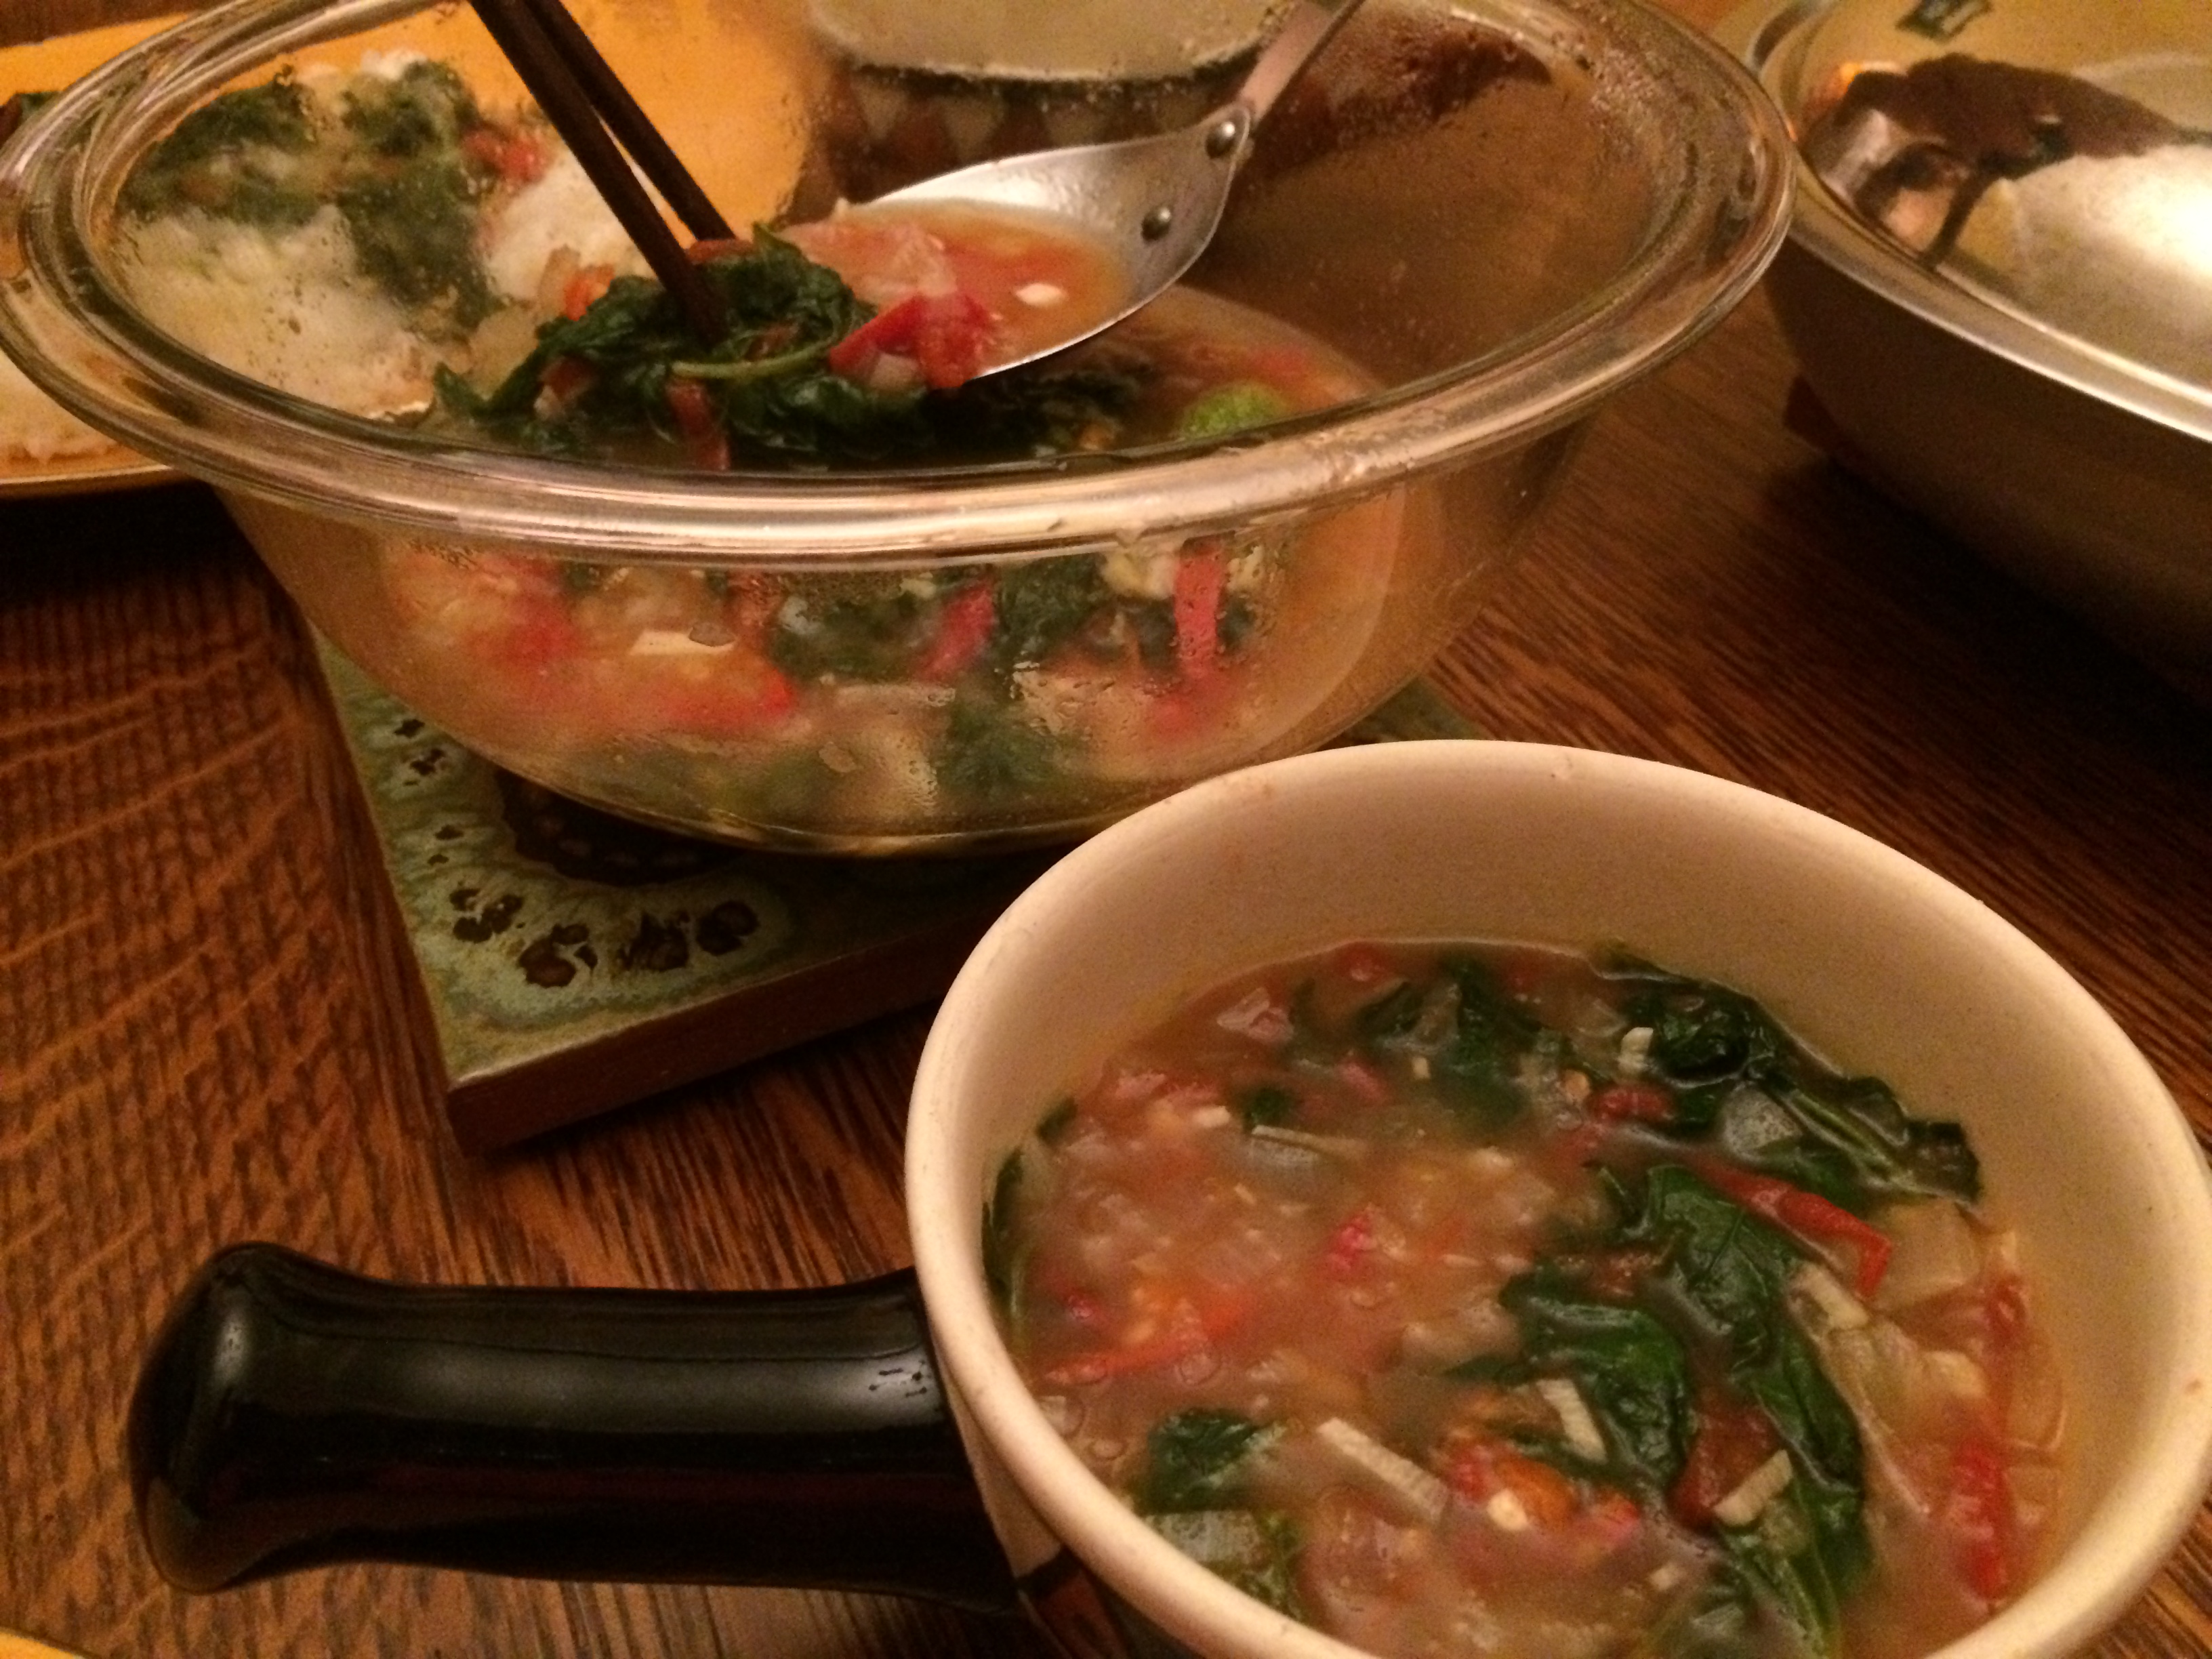
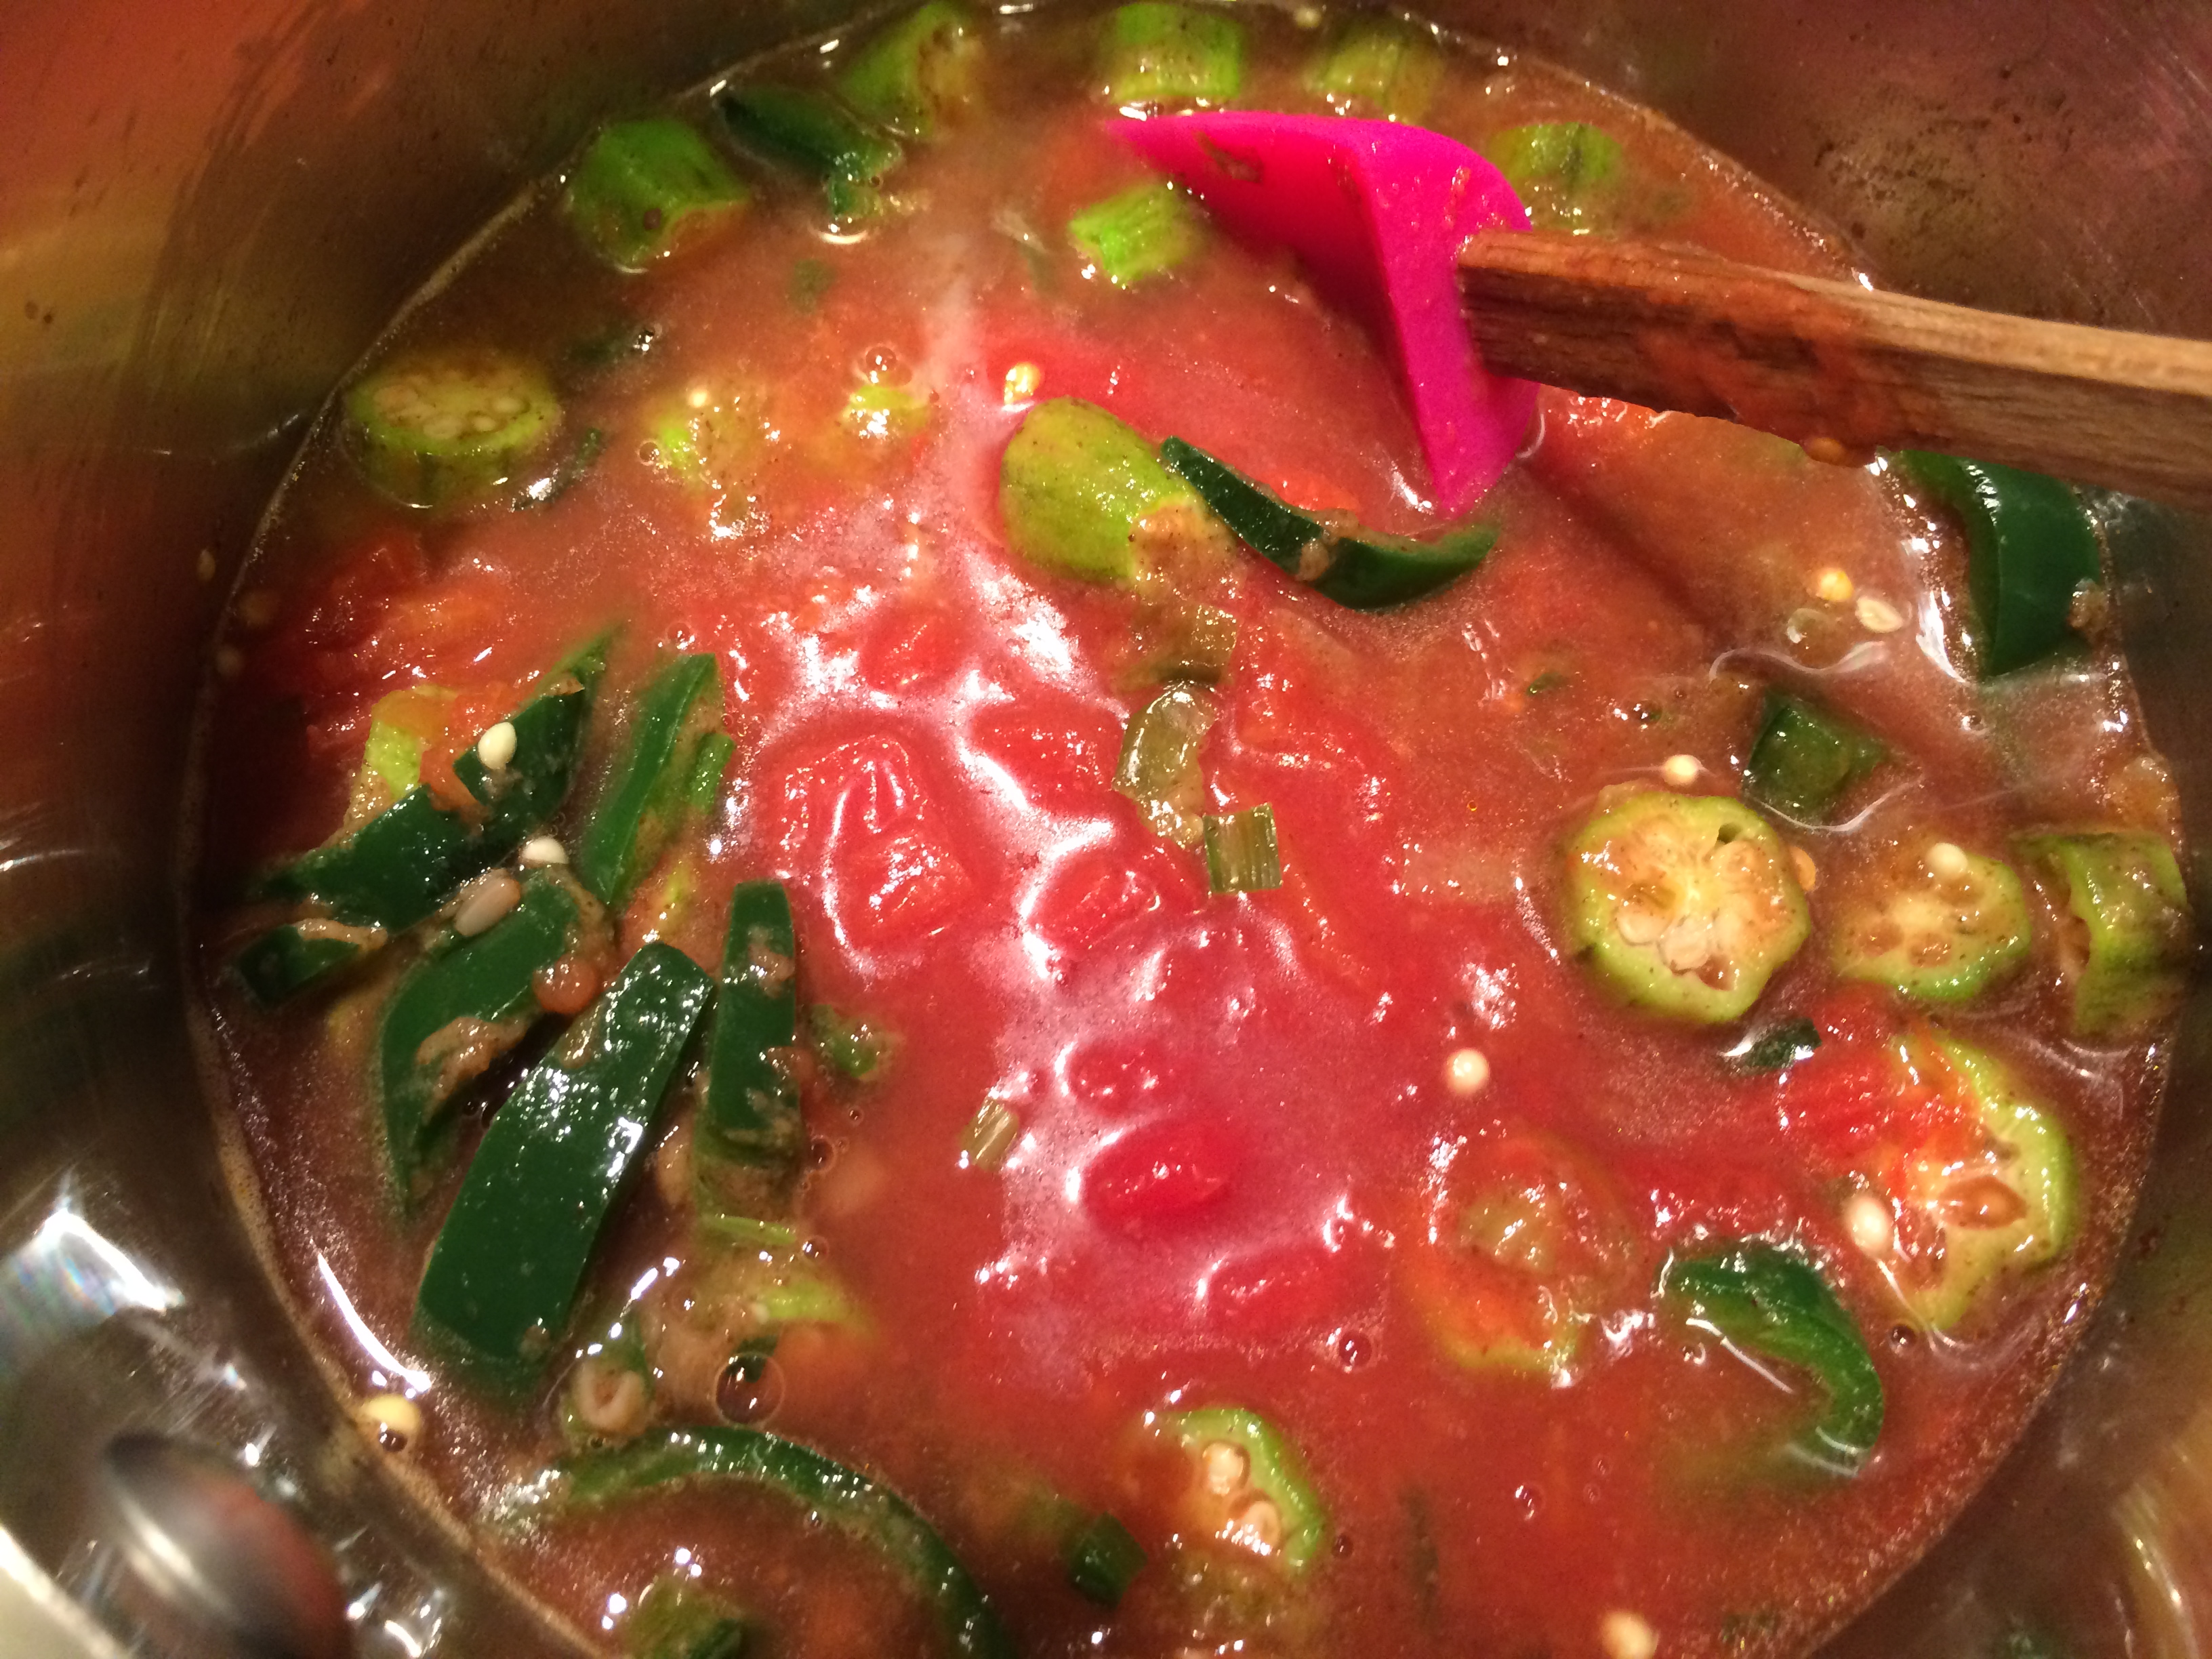
3. Tomato-okra Gumbo

Most of you won’t care one whit but I guess I am dipping my toe into controversy. Some people don’t consider that tomatoes belong in a gumbo at all, but then I find tons of tomato gumbo recipes on the interwebs. So here it is, for what it is worth. Authentic or not, it was delicious.

Ingredients:

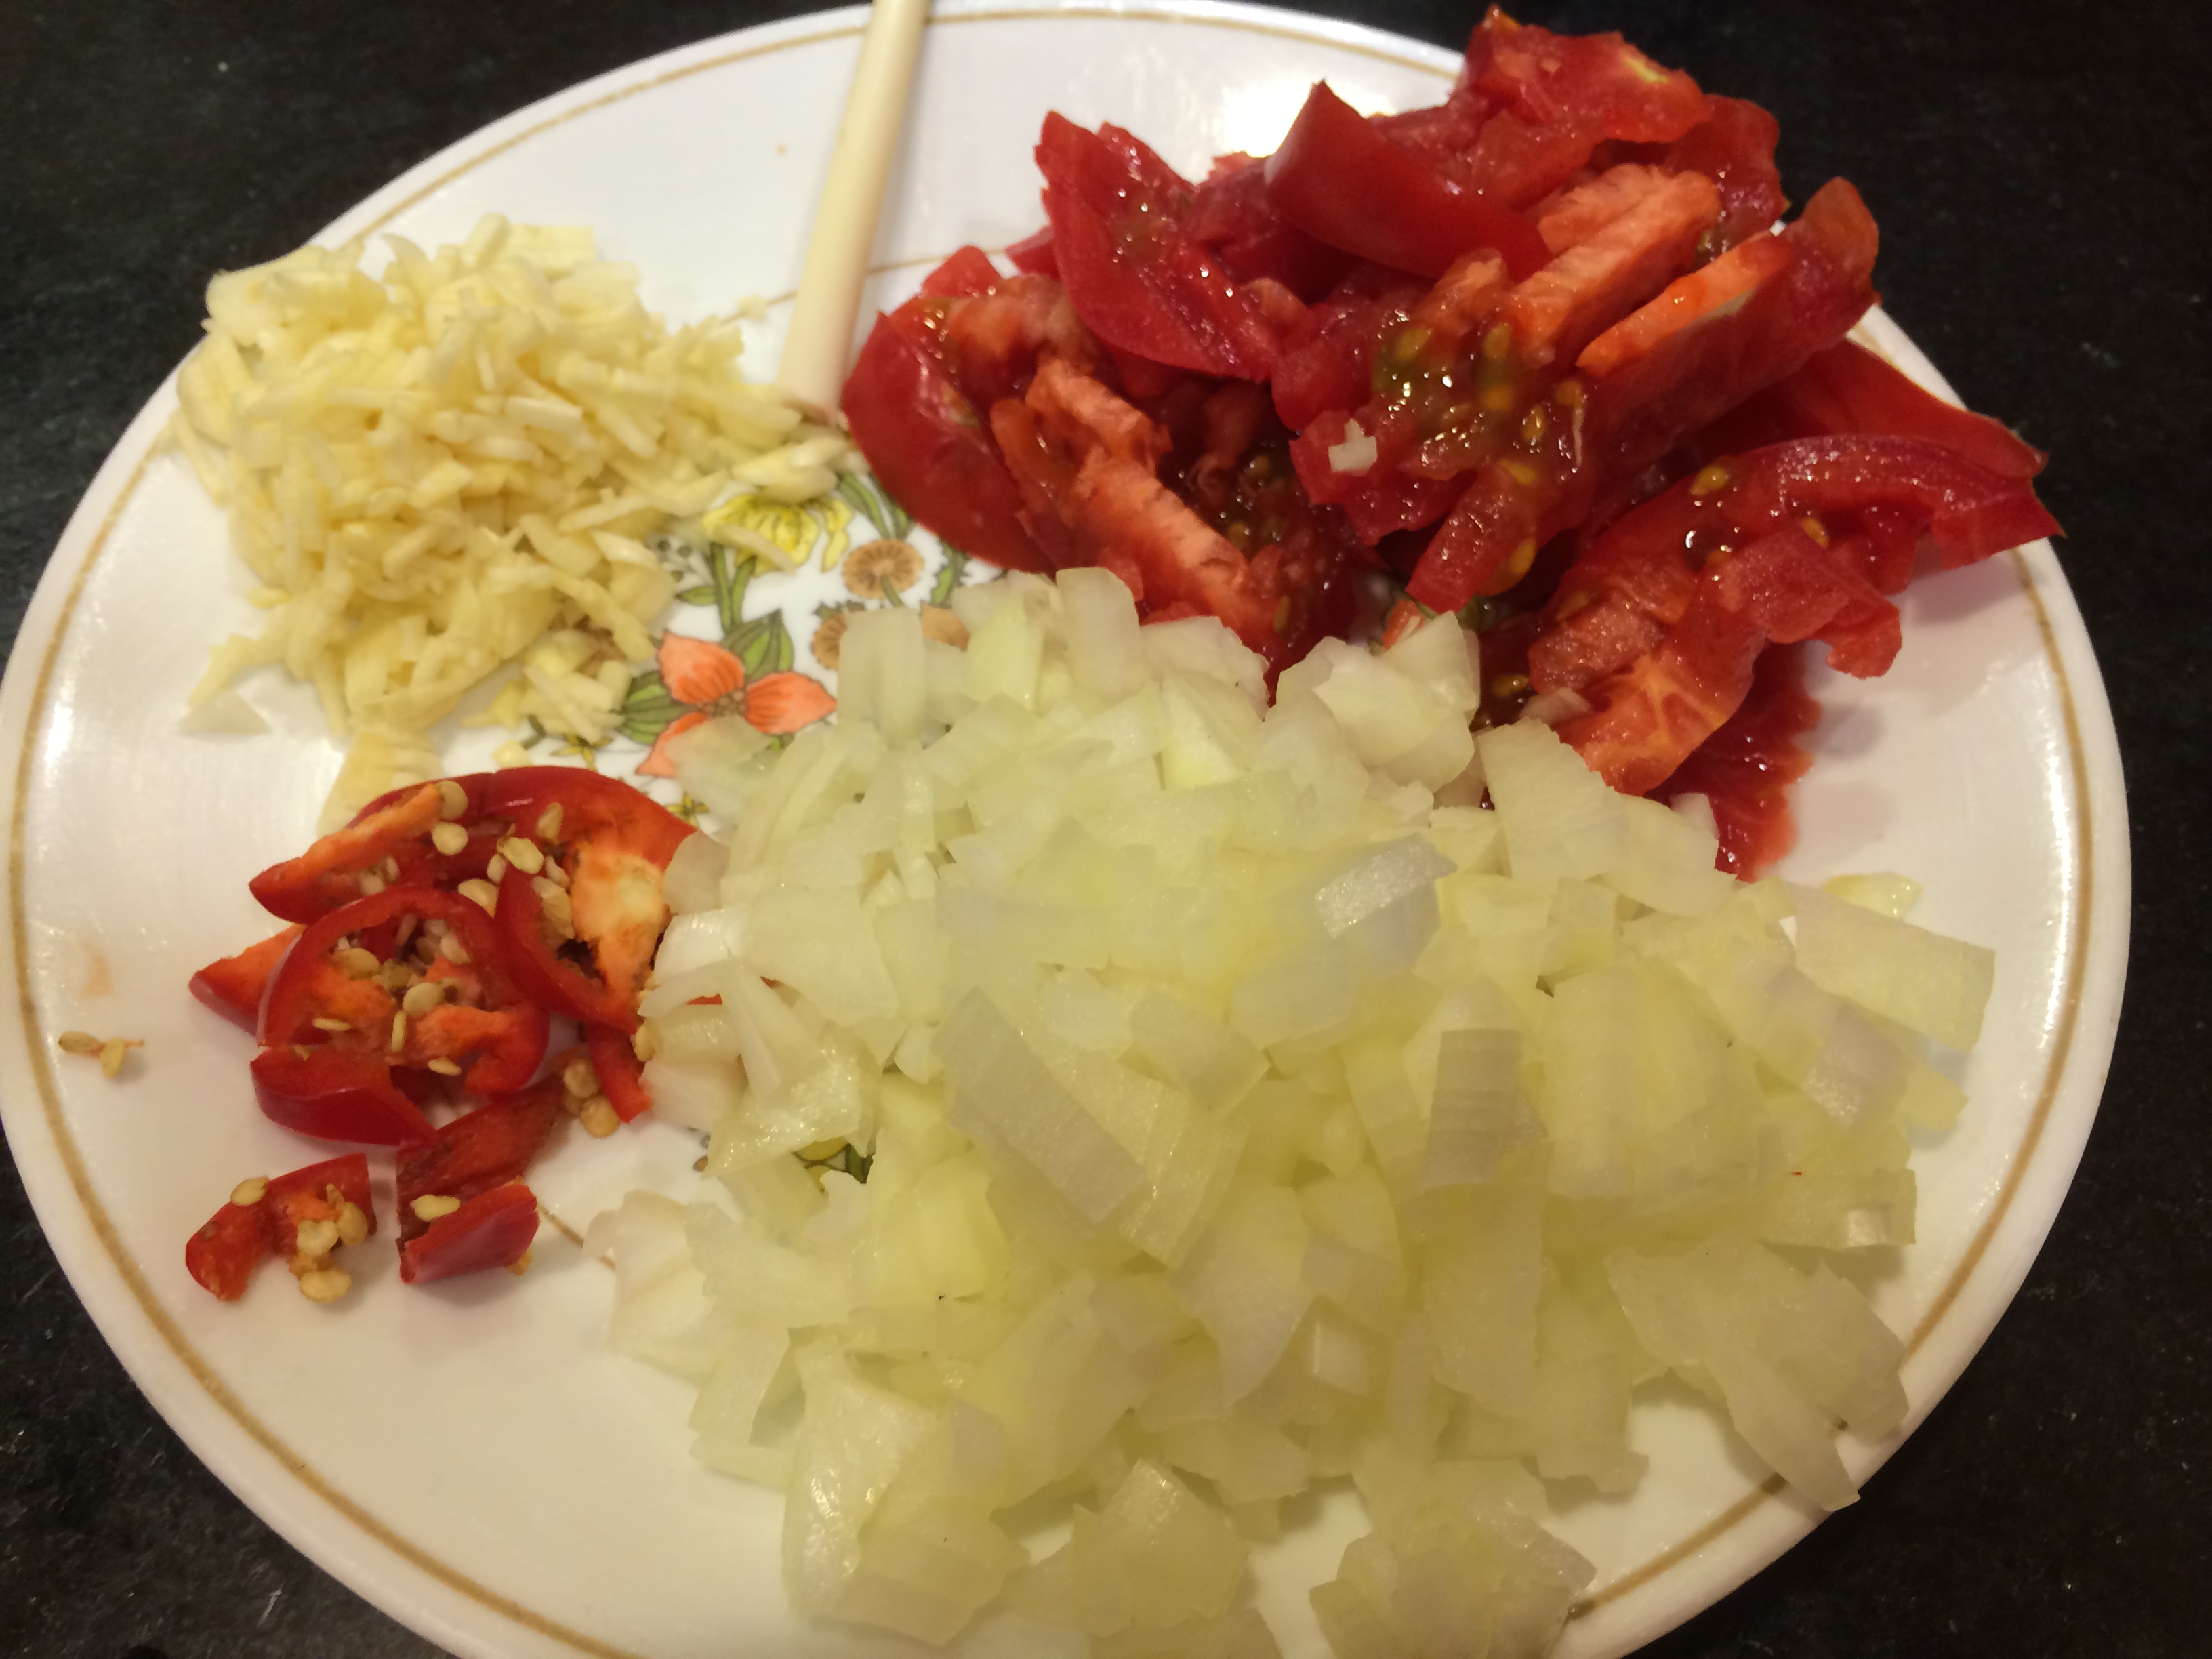
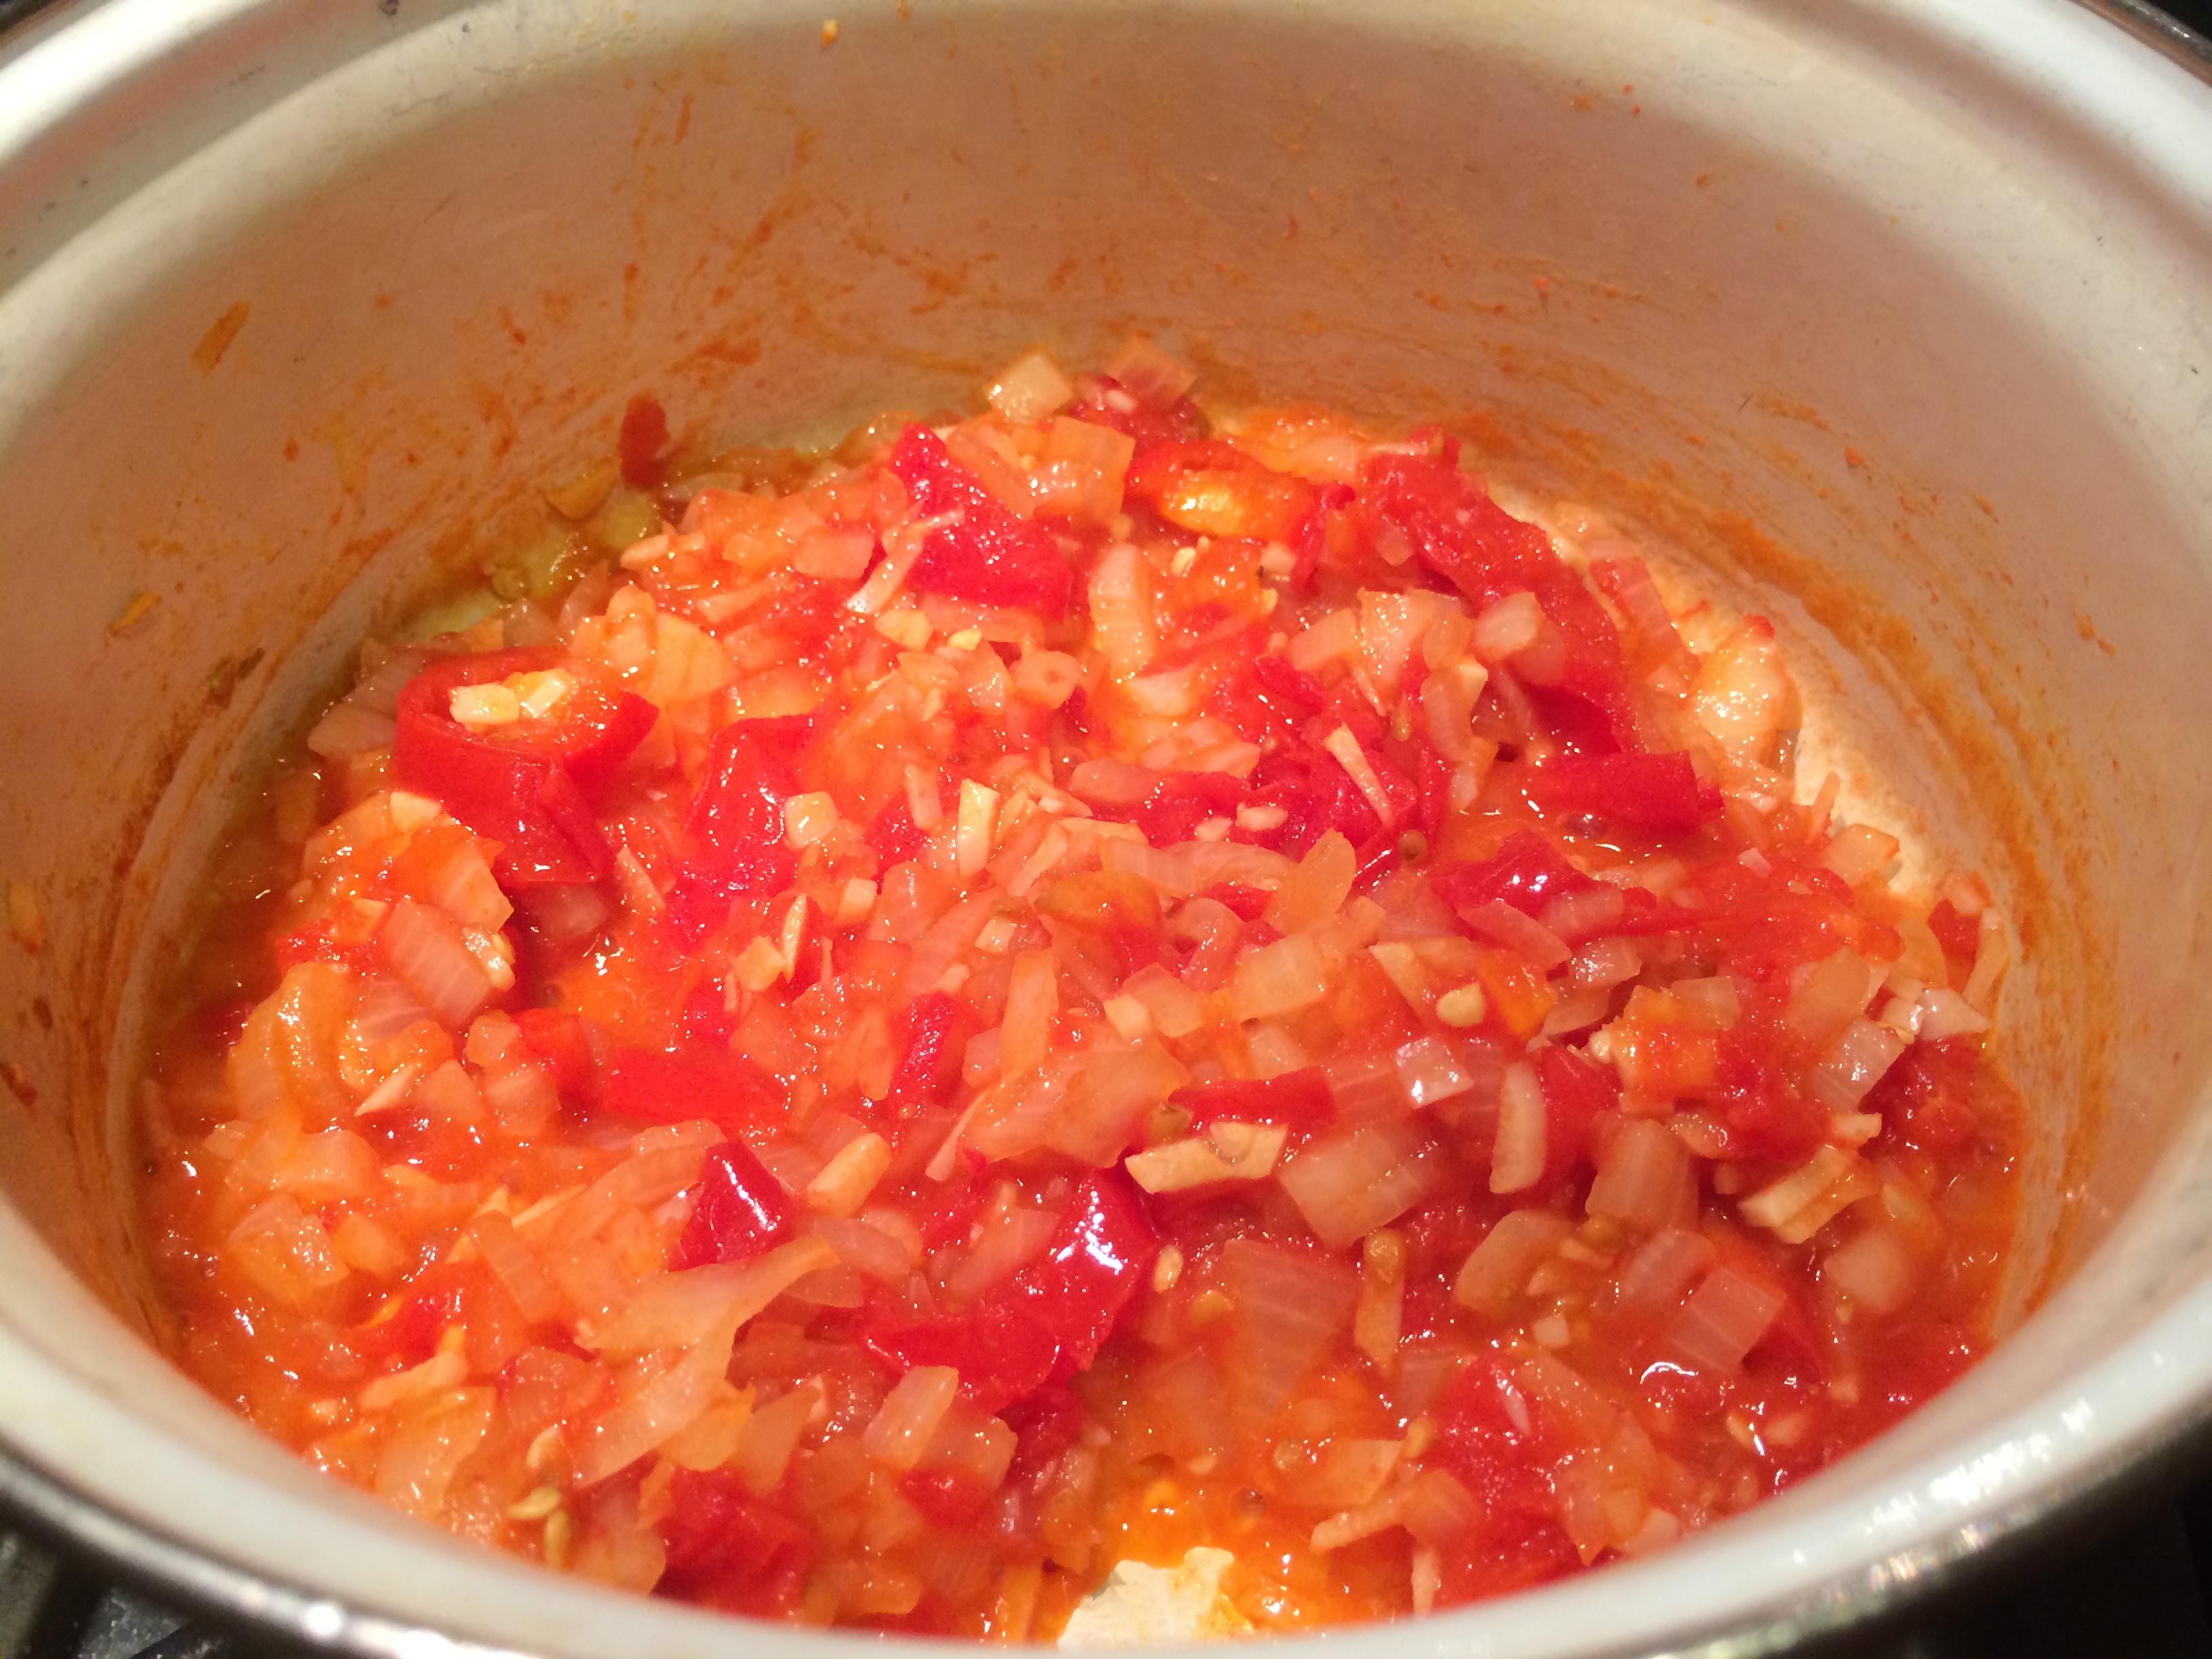
  • Quarter portion of gumbo base from above
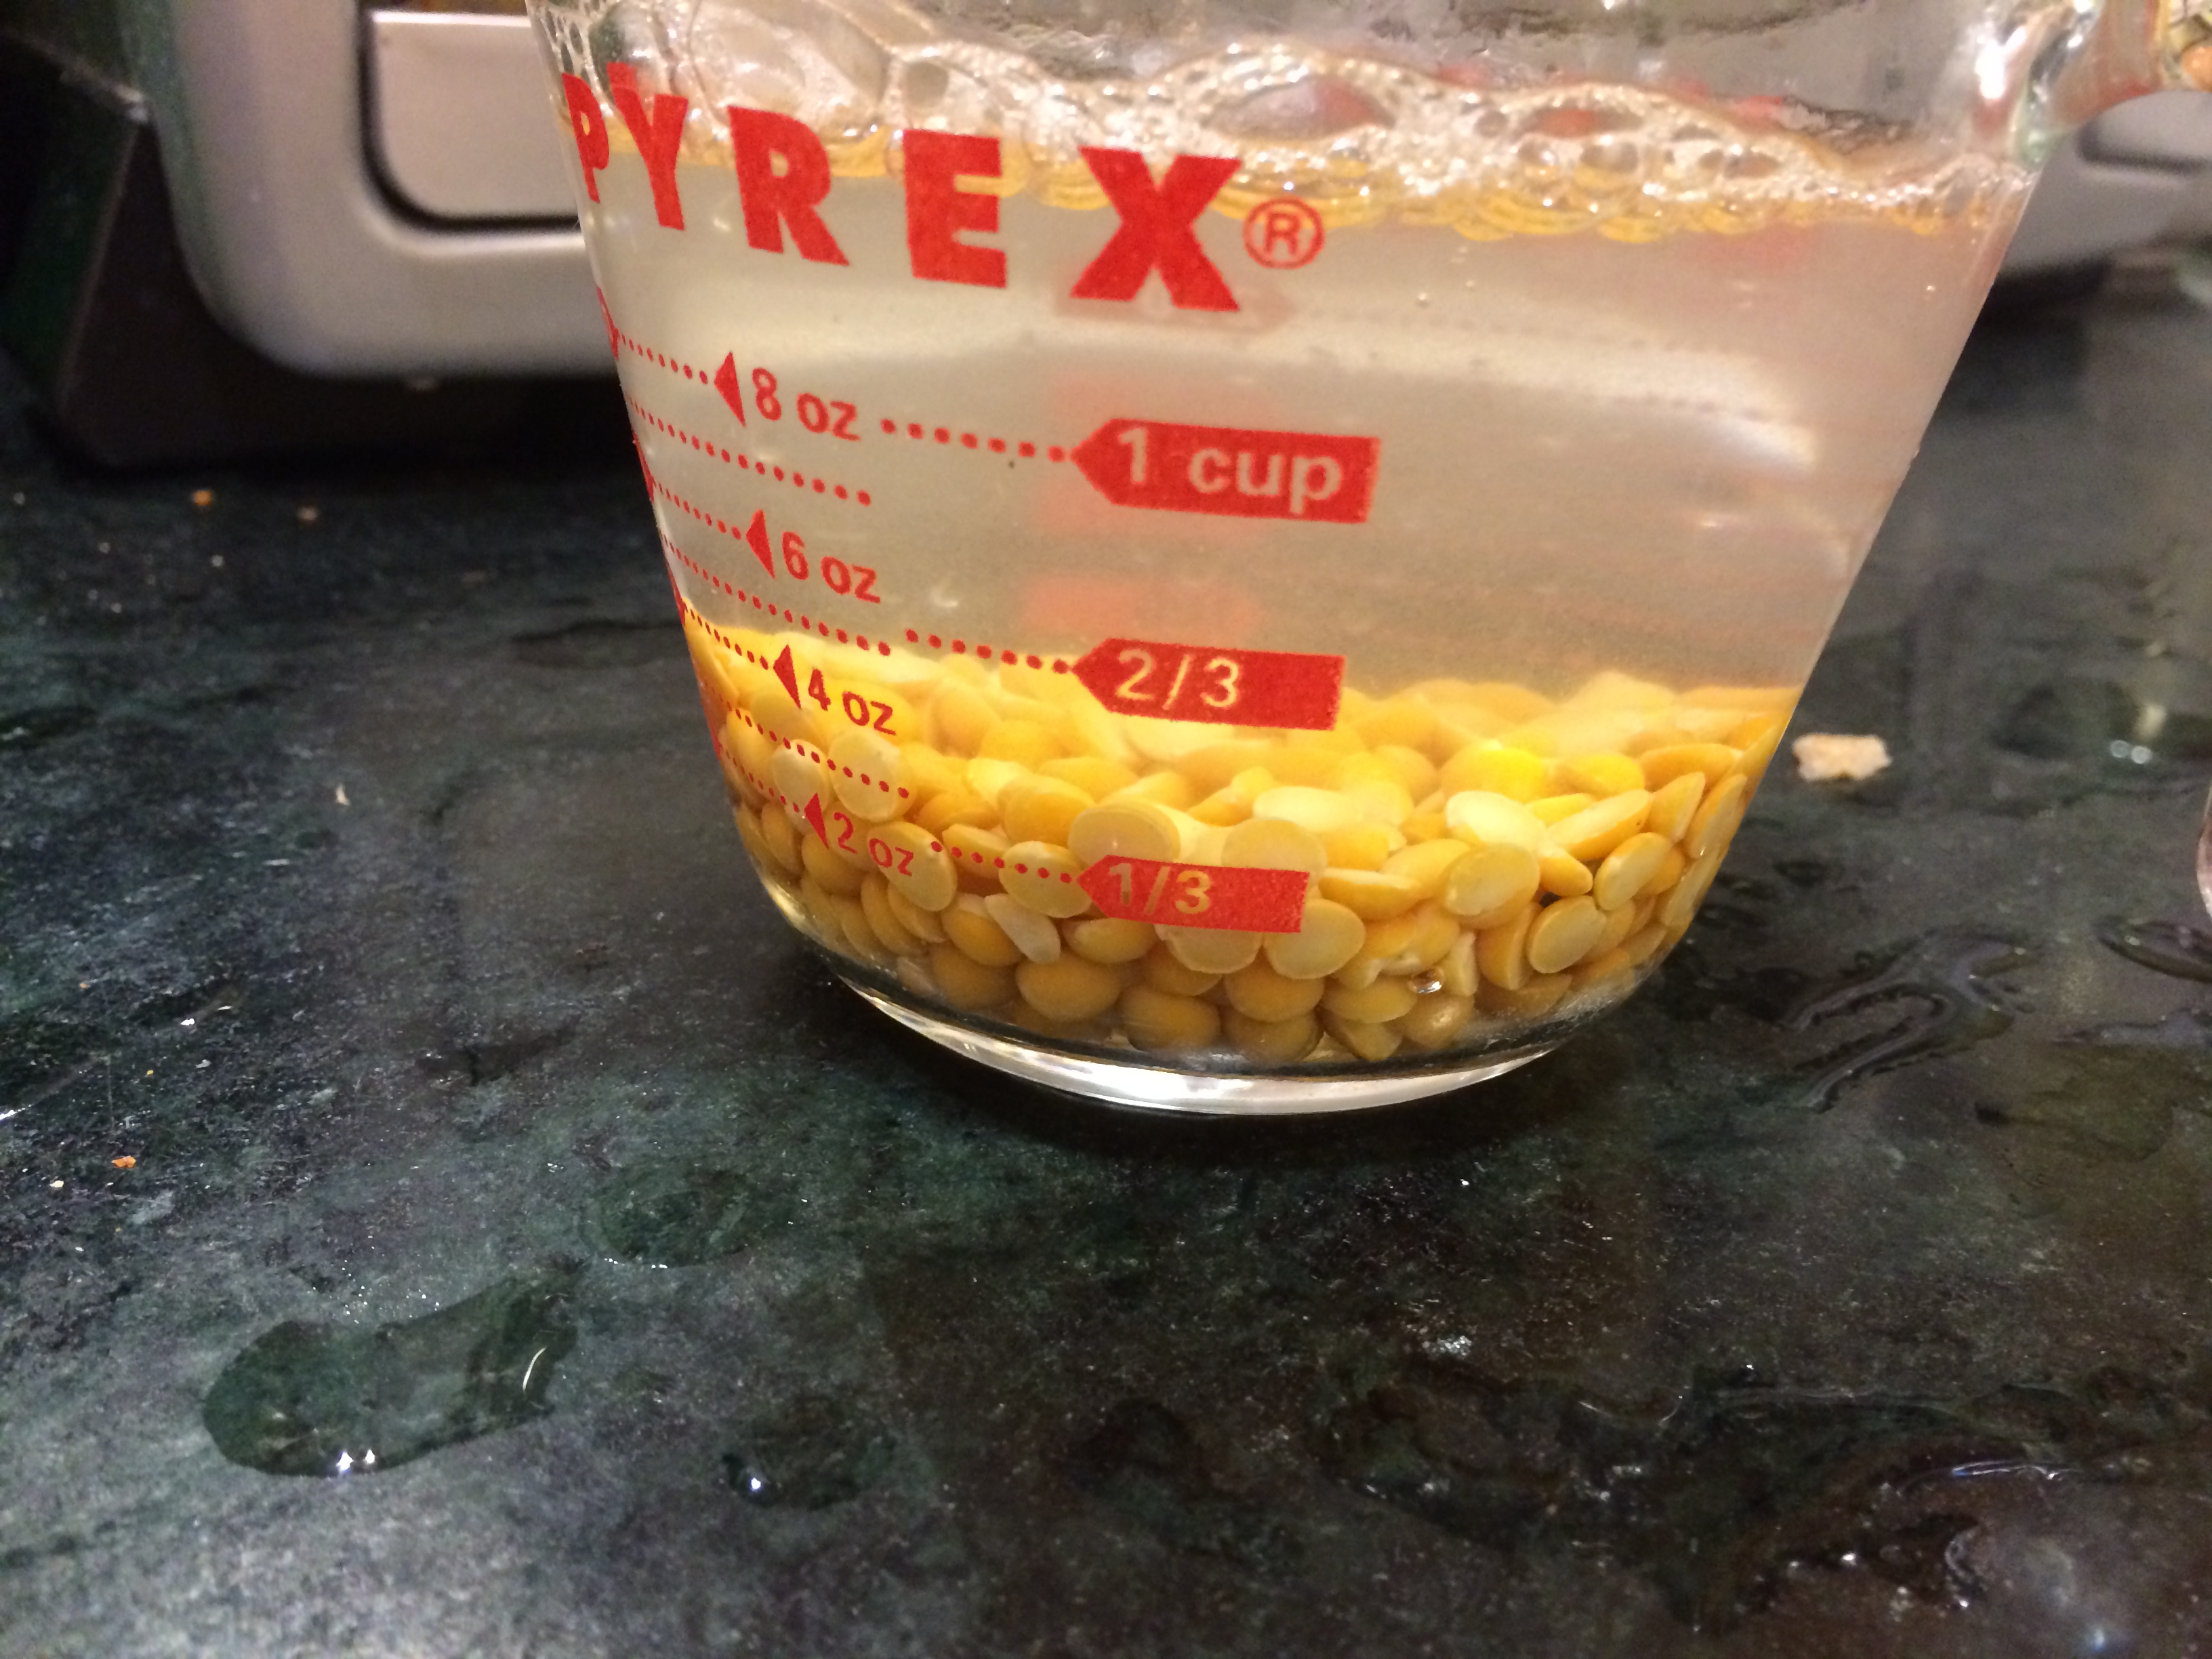
  • 1/4 cup dry red kidney beans
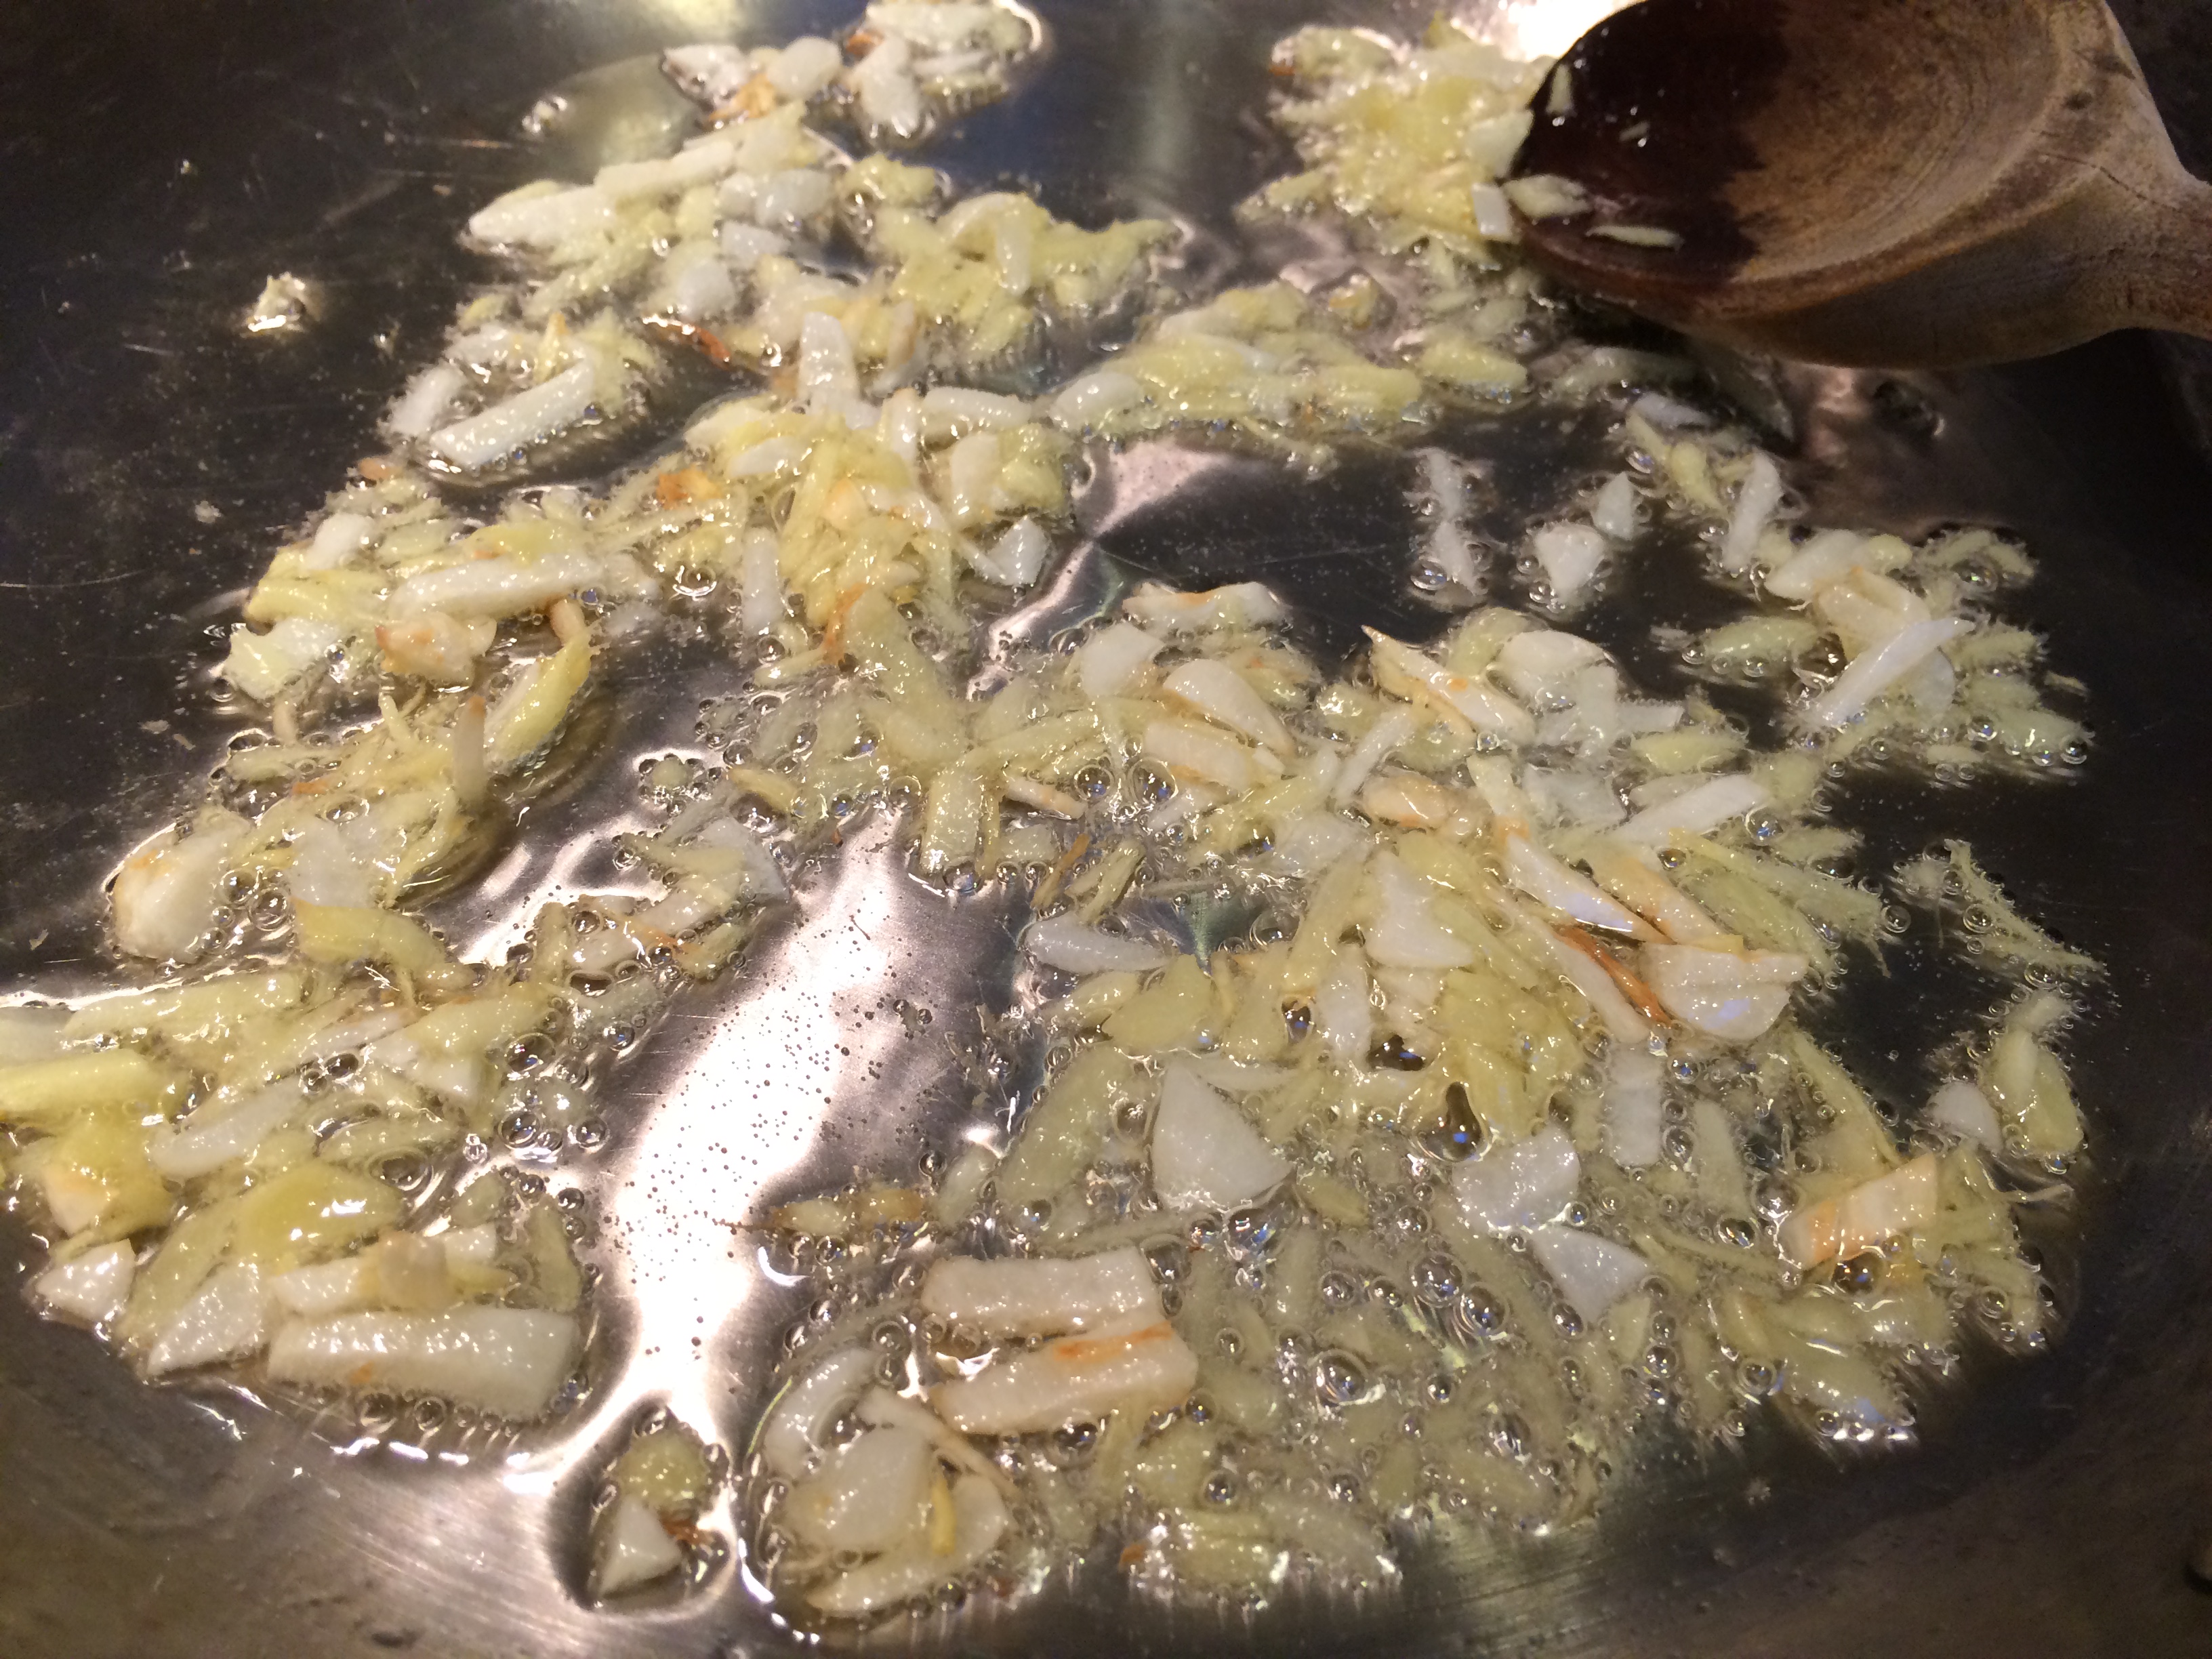
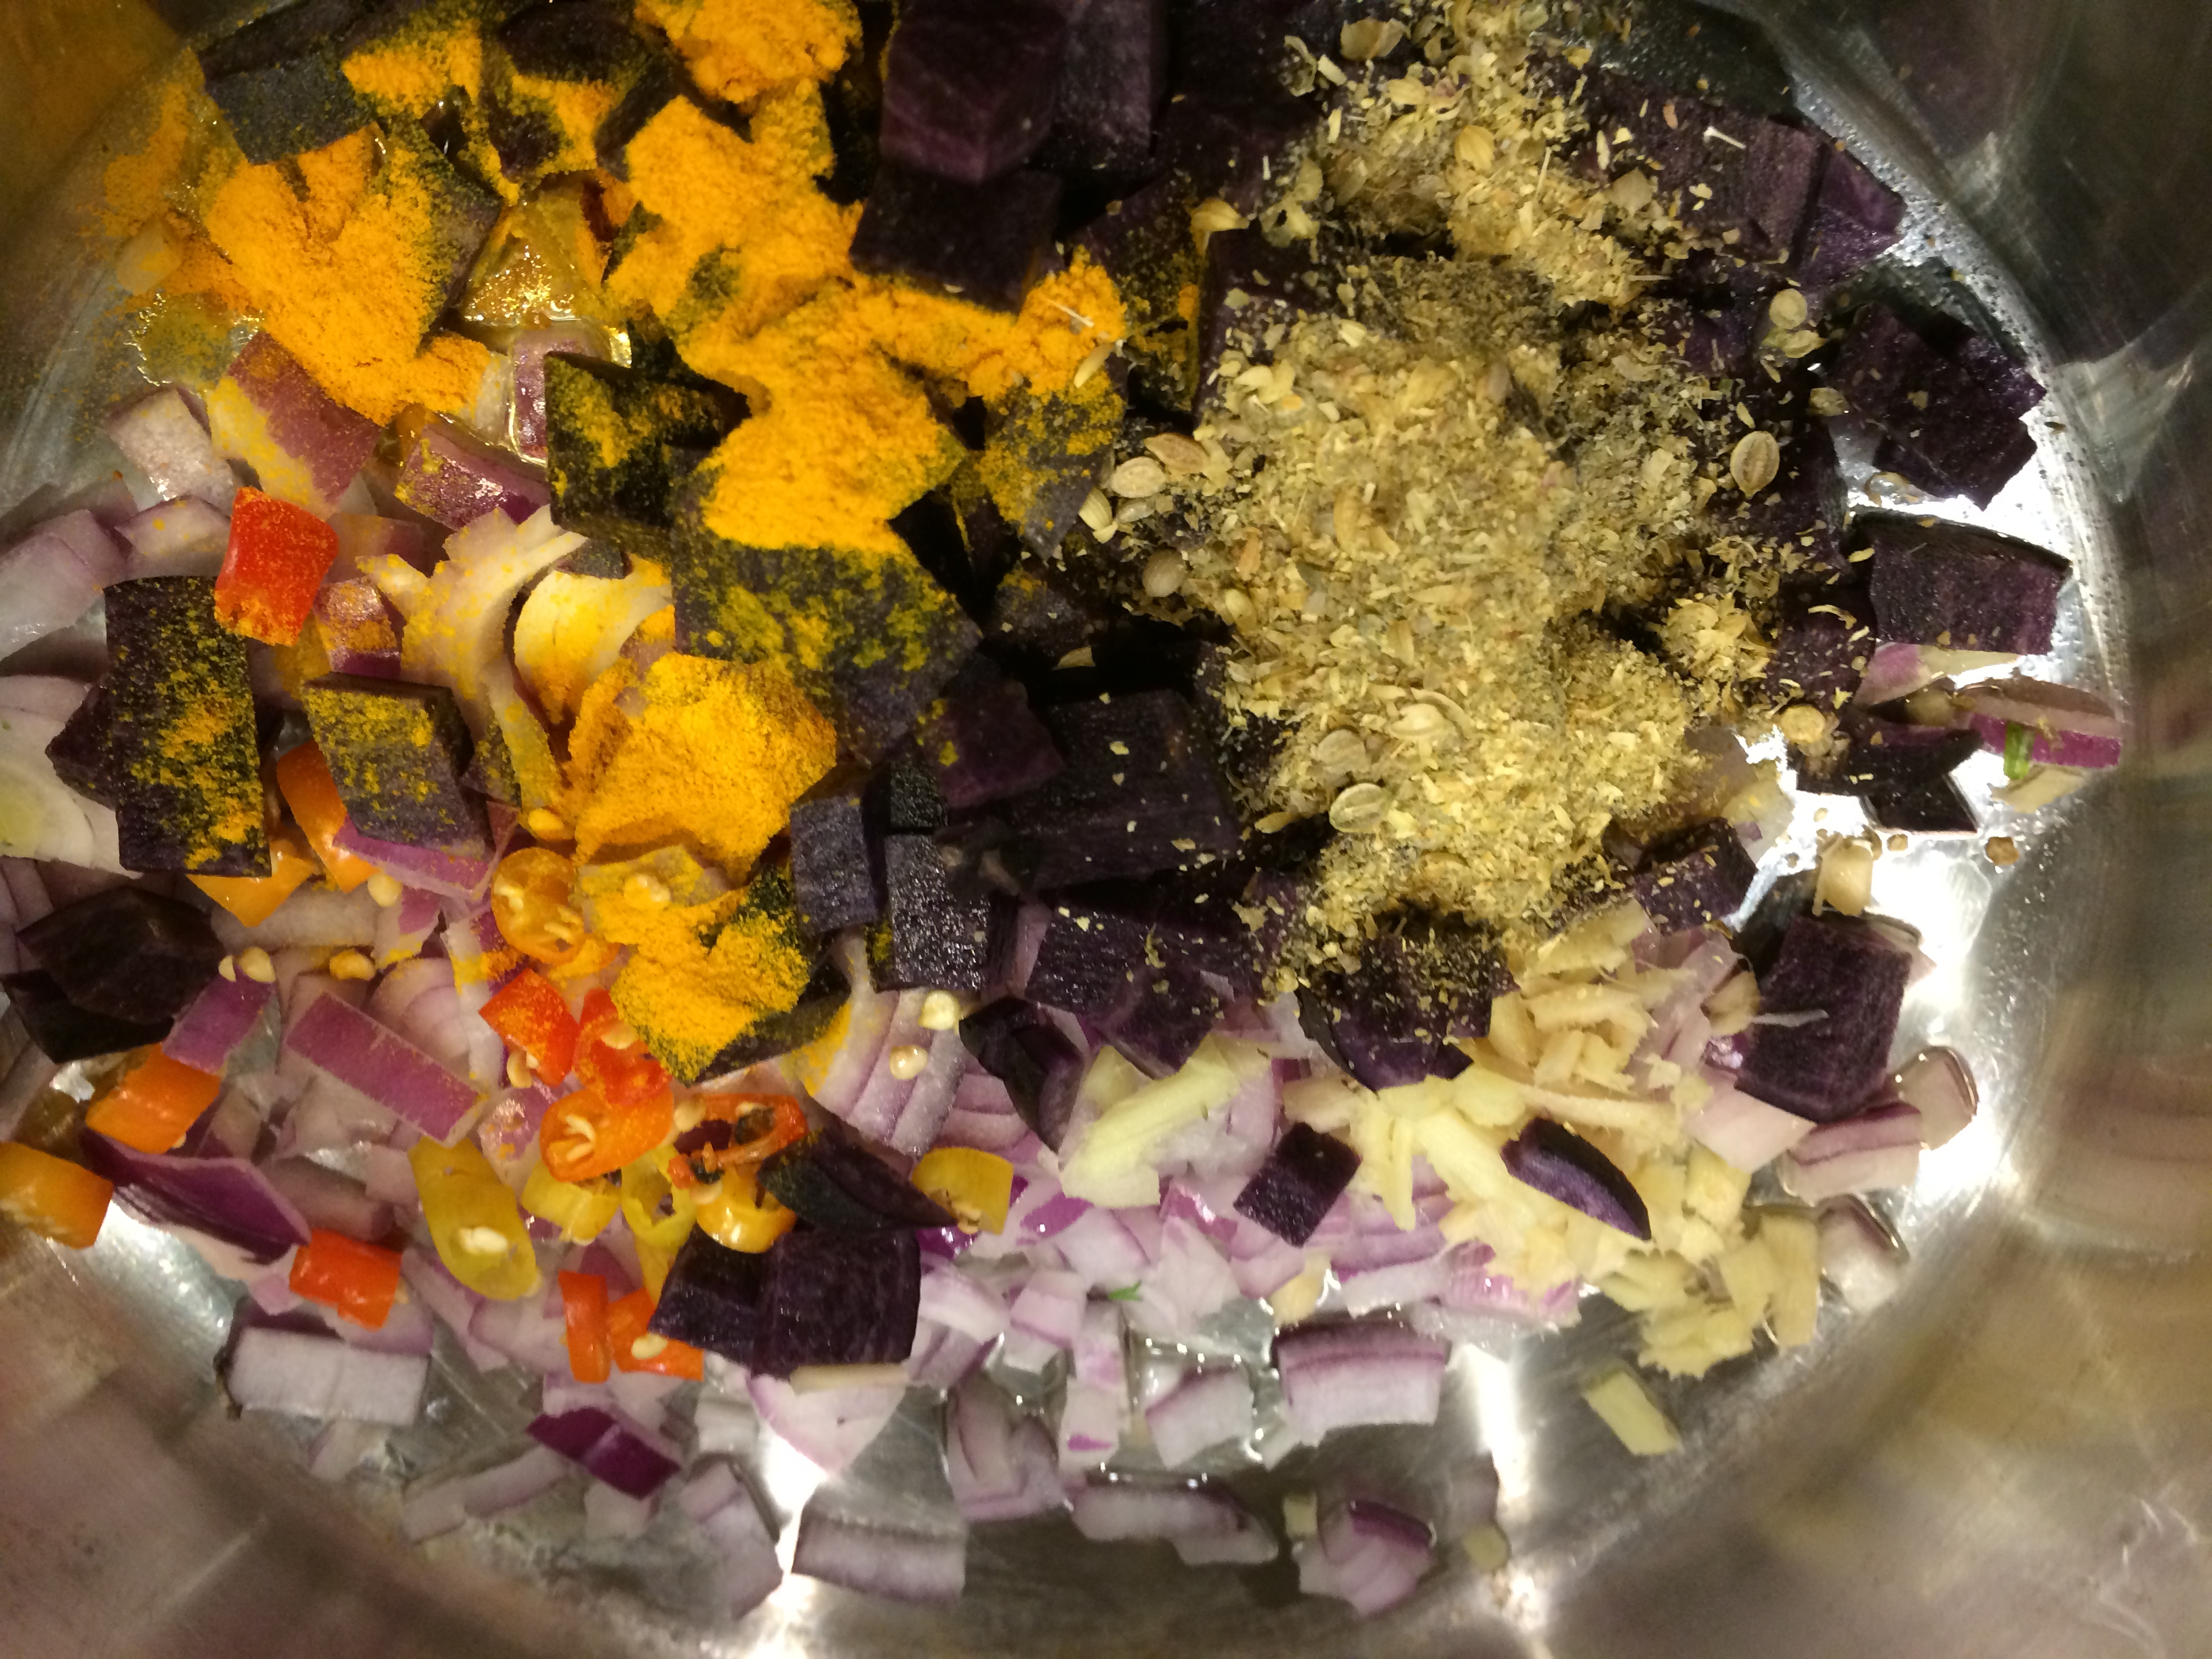
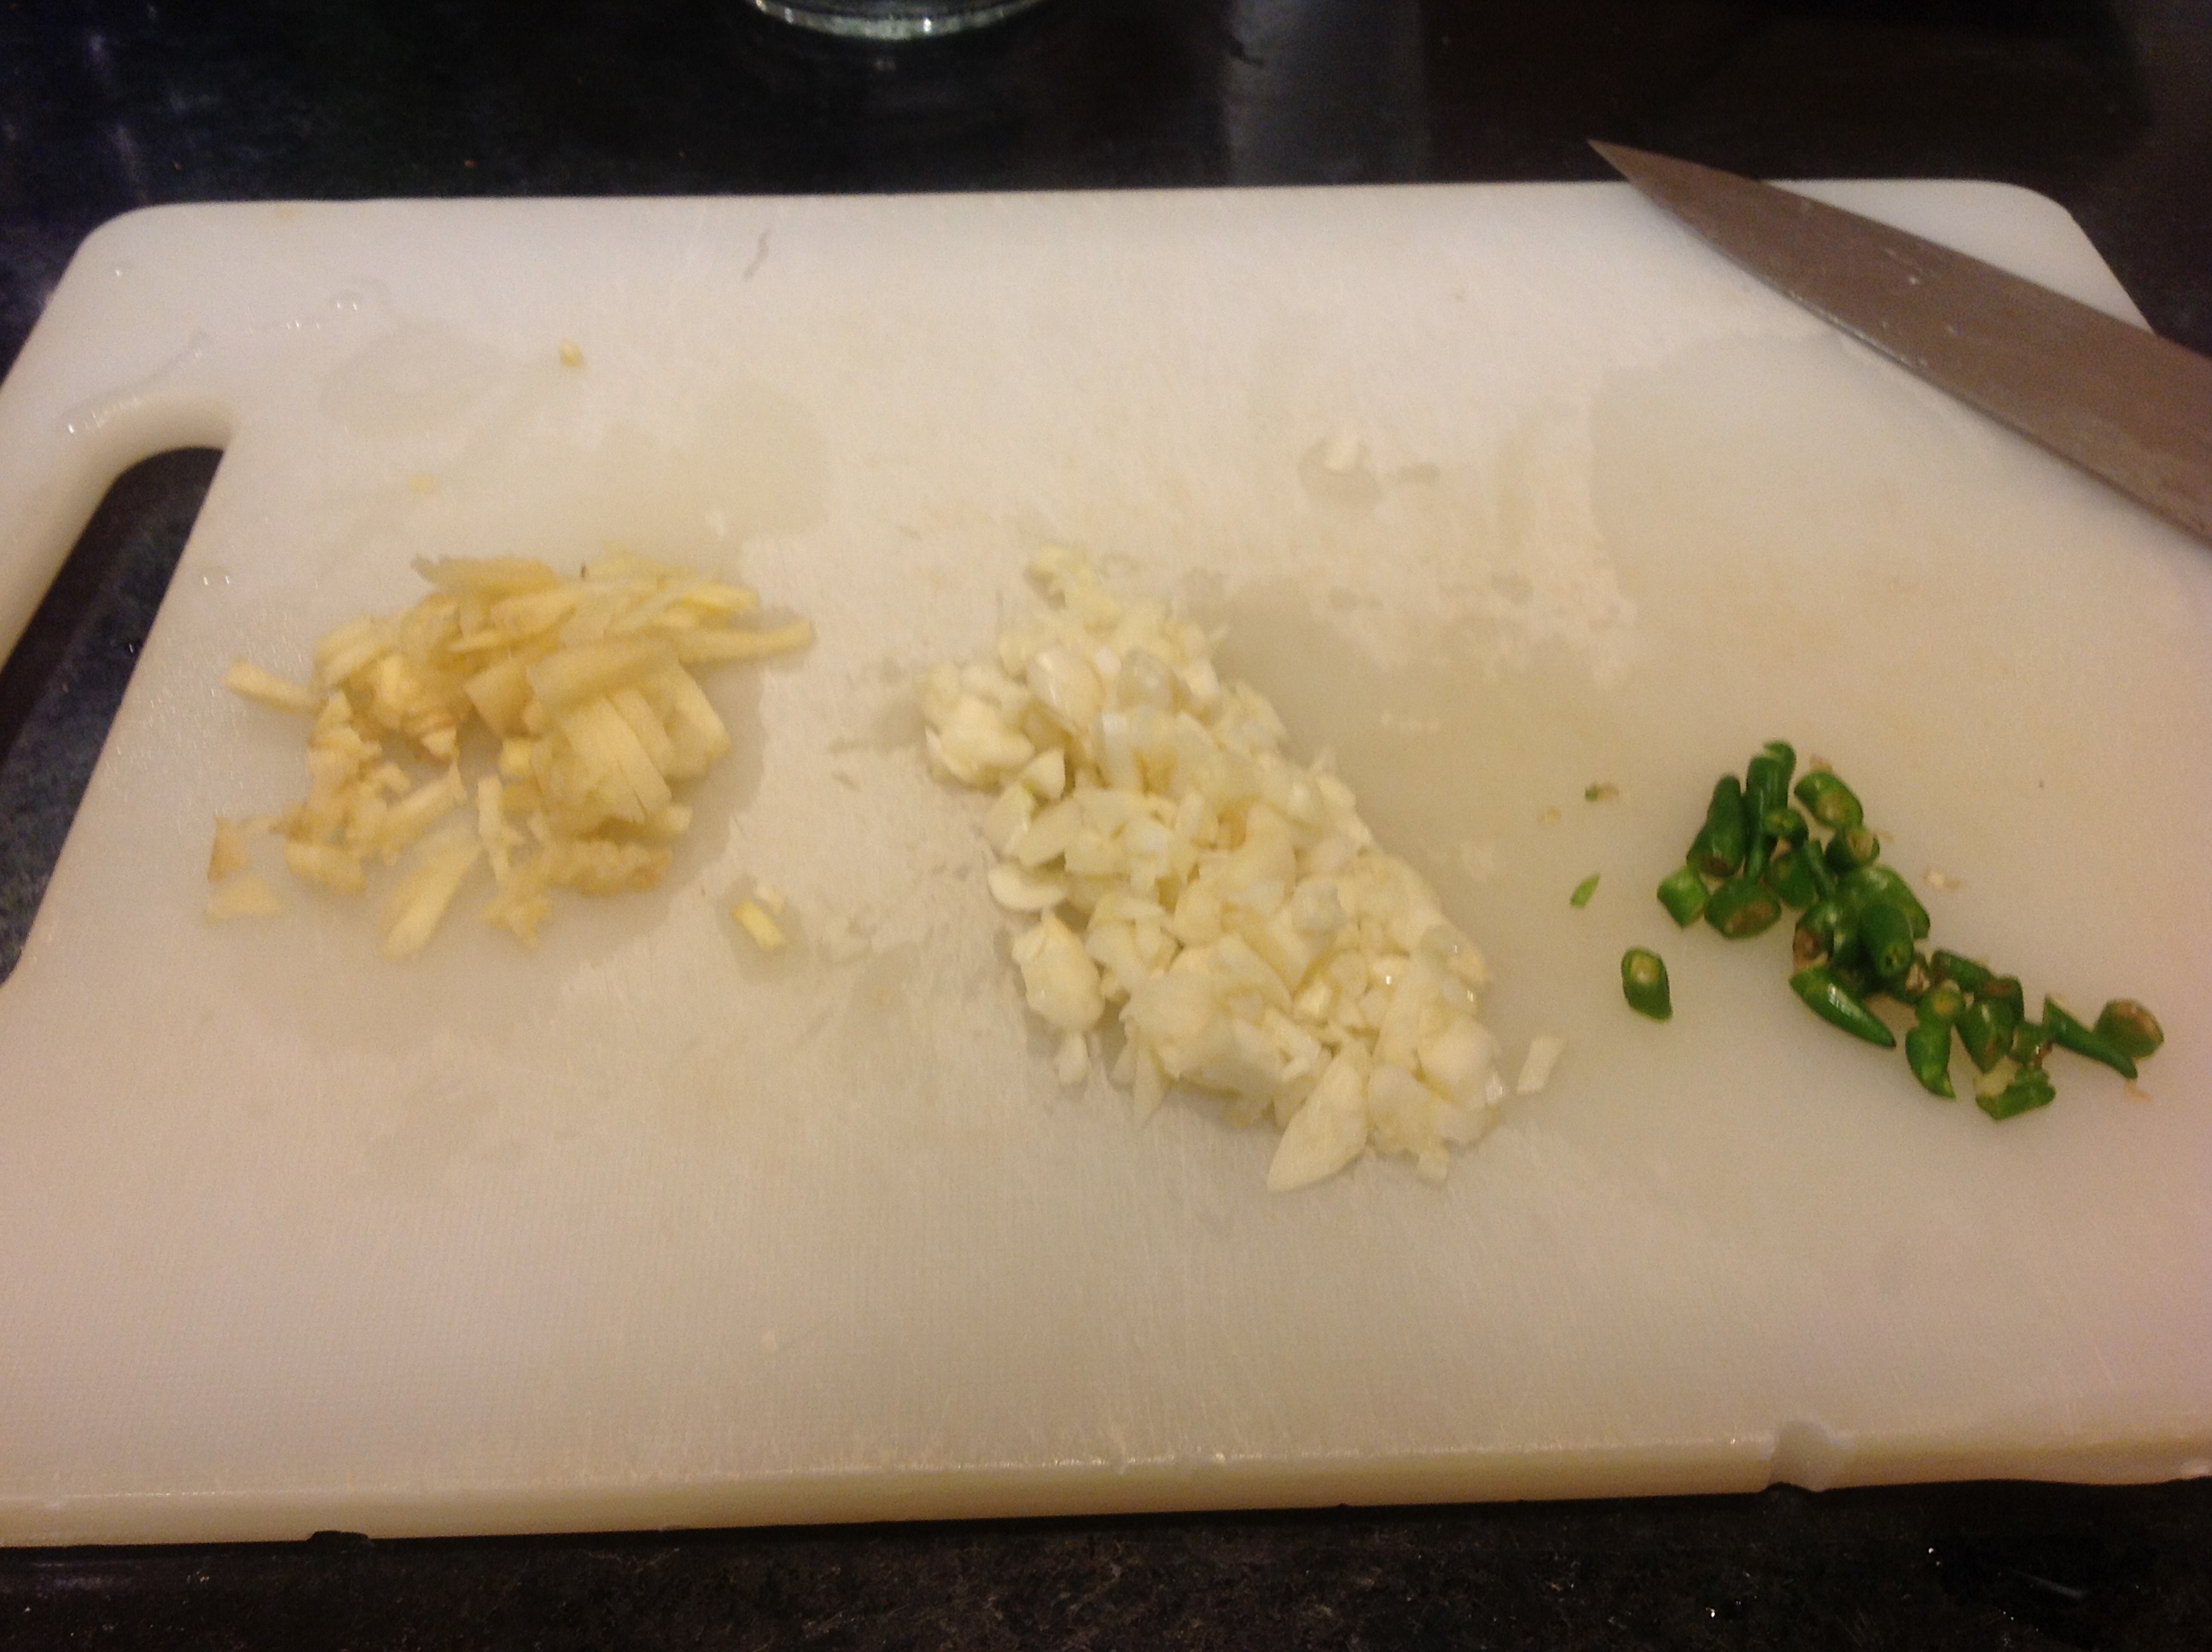
  • 3 – 4 cloves garlic (I used several sticks of wild garlic)
  • About a dozen pods okra, sliced
  • 1 pasilla pepper, sliced
  • 1 cup thick tomato purée
  • 1 teaspoon salt

Method:

Soak the red kidney beans overnight, or, in very hot water for an hour. Then put them in a pot with about a cup of water, bring to a boil, cover and simmer for half hour or so till softened.

IMG_1194

Put the gumbo base in a pot on medium heat. Once it is hot, sweat the three vegetables in it, one by one: first the garlic for a few minutes, then the pasilla peppers, and then the okra. Now in goes the tomato purée along with a cup and a half of extra water. If you had any water left over from cooking the beans, now is the time to add it. Add the salt. Bring to a boil, leave at a simmer for at least half hour, or as long as you want, until the vegetables are as softened as you like. In the last ten minutes of cooking, put in the kidney beans to meld its flavors together.

IMG_1193 IMG_1196

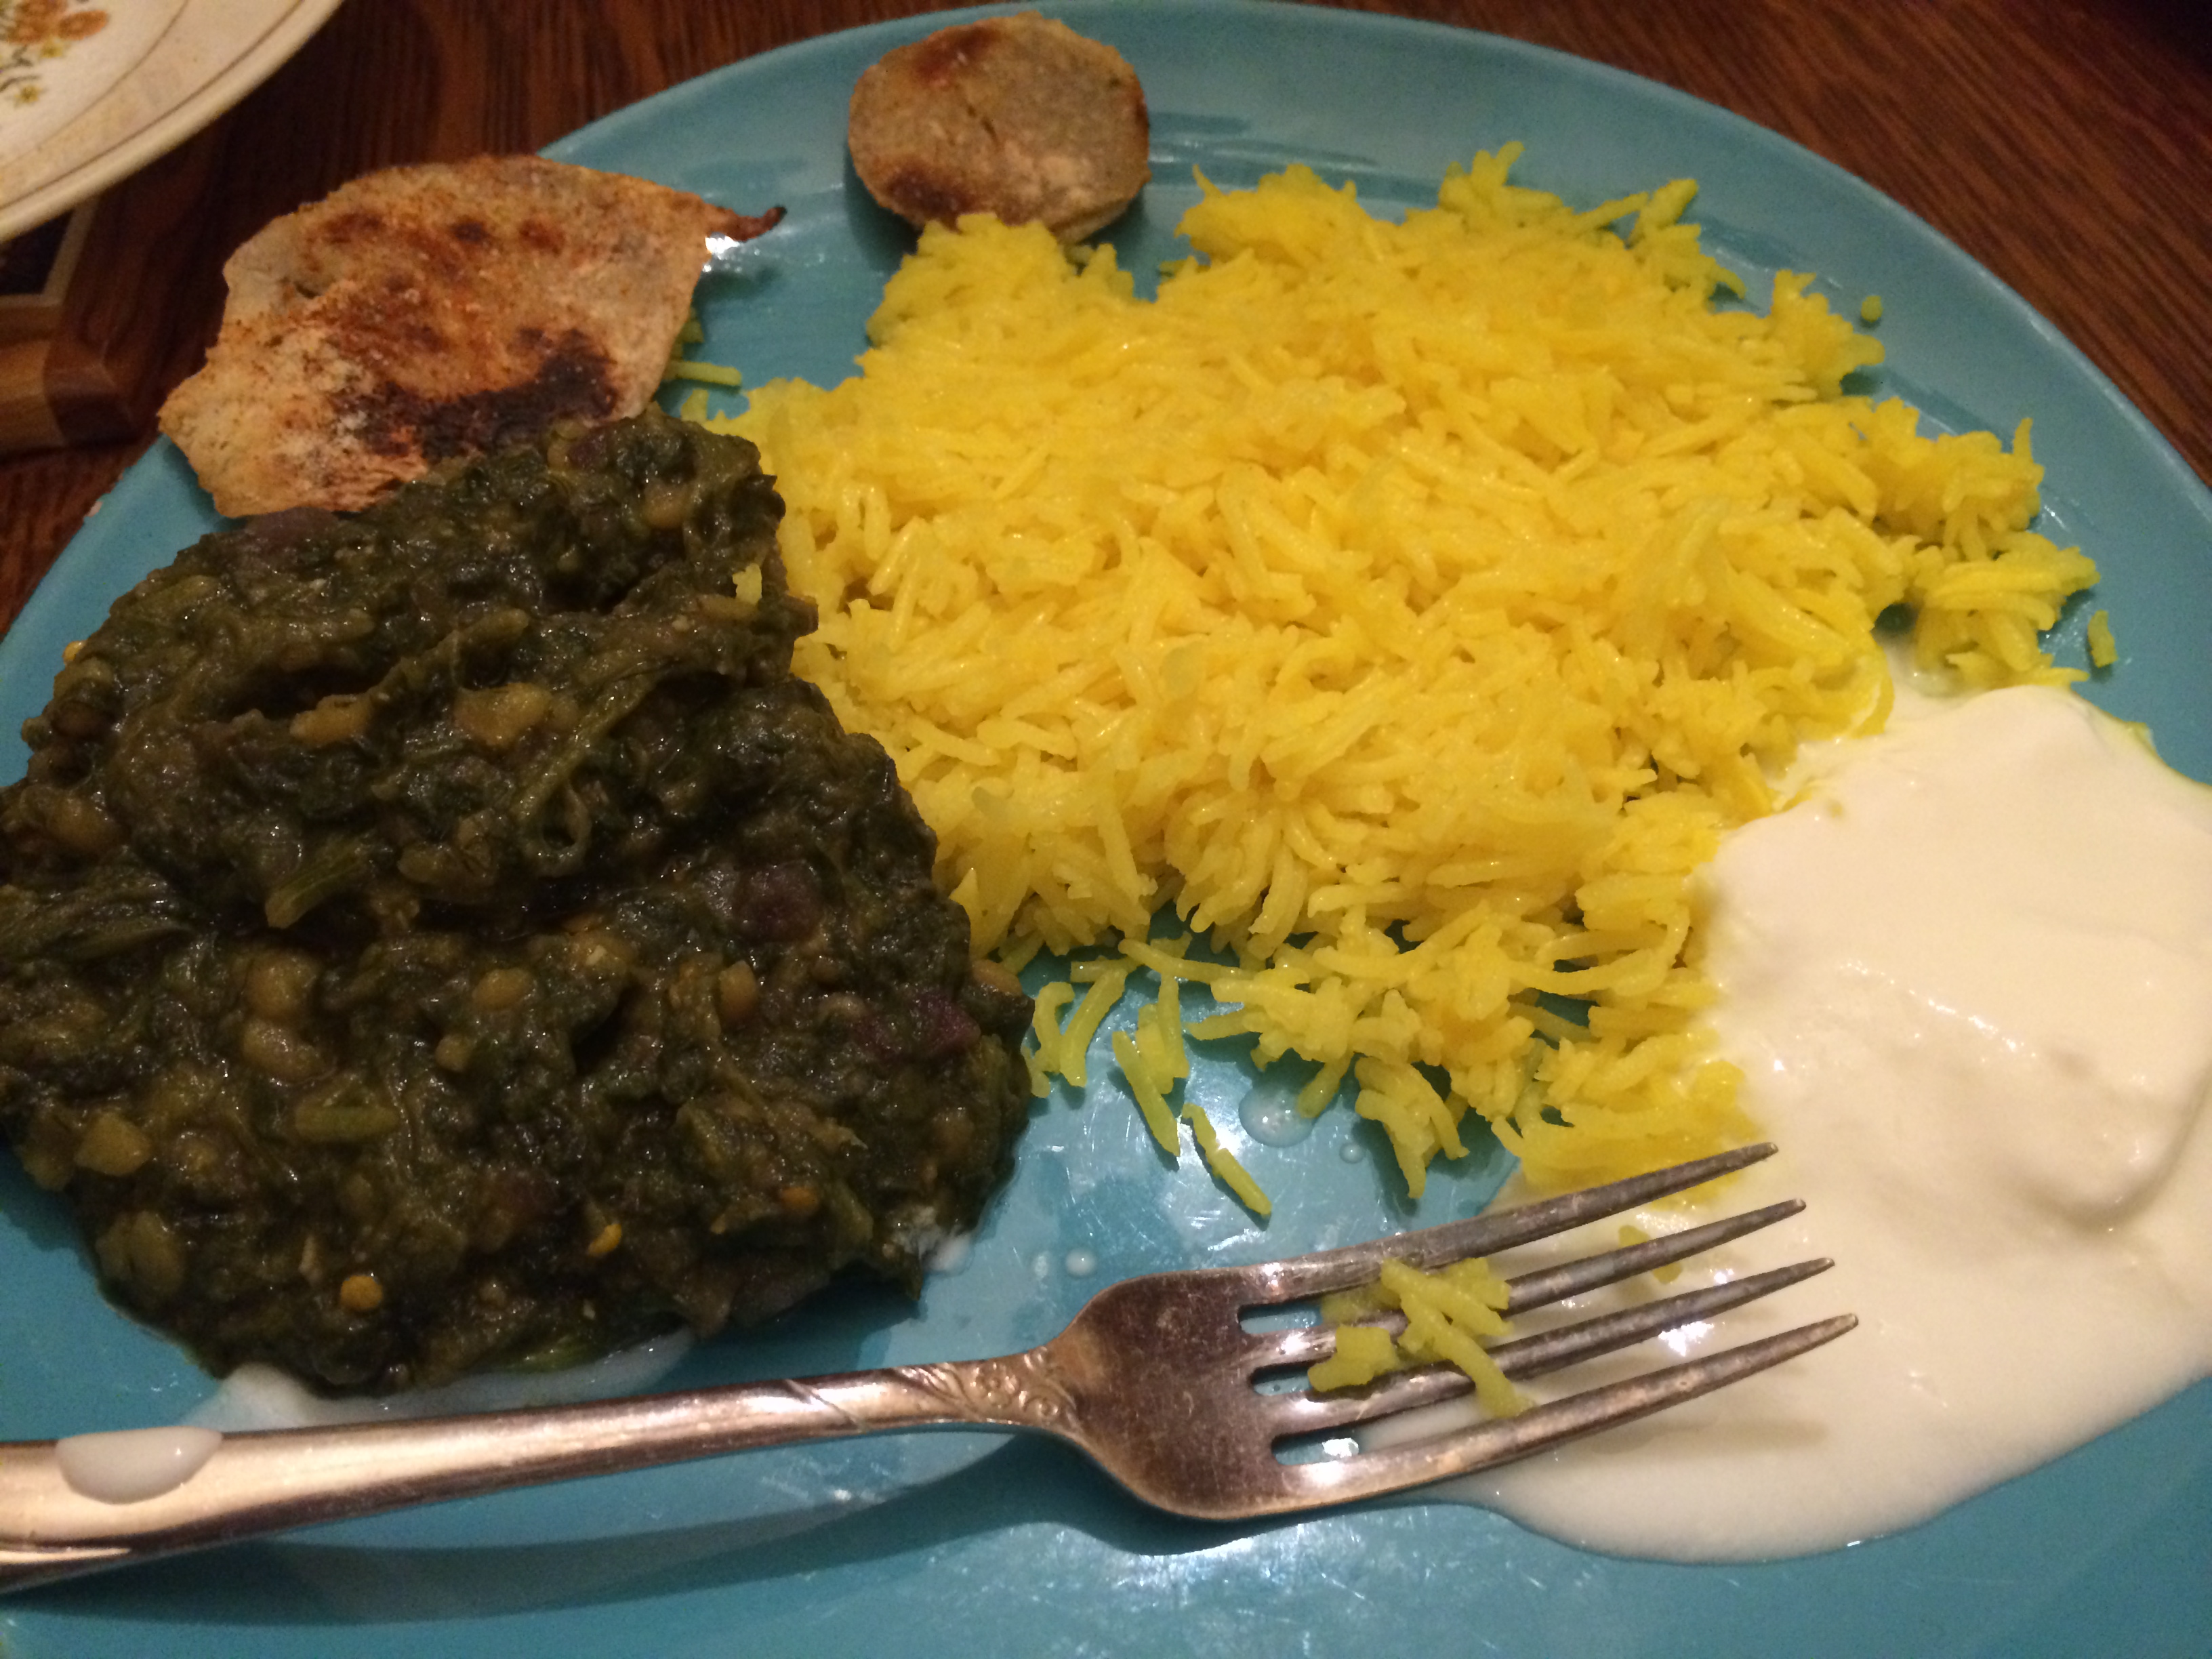
So what did my adventure with vegetarian gumbo teach me? It can be done with excellent results. My husband enjoyed all three gumbo meals; he never once asked ‘where’s the meat?’ But he is so spoiled with Indian food that he did ask — ‘where’s the masala?’ I guess that is a compliment?

Tomato Gumbo

Tomato Gumbo

I referred to several webby recipes for Gumbo. Here are some of them.

http://www.nola.com/food/index.ssf/2010/05/cabbage_gumbo.html

http://www.101cookbooks.com/archives/vegetarian-gumbo-recipe.html

http://www.gumbocooking.com/veggie-gumbo.html

Late breaking news:

Of course, the lard makes it not be vegetarian! Please use ghee for a ‘pure’ vegetarian experience. Or a good oil with a high smoke point. I used lard because I had some in the freezer, but then I’m not big on purity (of any sort!) I just like the taste of vegetables and am not keen on the taste of meat.

The bane of every Sindhi child

IMG_0176

This is a meal that every Sindhi child has made faces over at the dinner table while dawdling over their food. But by the time that Sindhi child has grown up into a Sindhi adult, they begin to crave it with an intensity that is only matched by their craving for home.

When I was the Sindhi child making faces at Sai Bhaji — which translates simply to ‘greens’ — no amount of talking up by my mother about how this meal is a nutritional powerhouse mattered to me at all. Now as an adult (and a mother myself) I’m thinking — a delicious, simple-to-make, nutritional-powerhouse meal-in-a-pot! What’s not to like?

Sai Bhaji is a stewed concoction of spinach and other greens, some lentils, with other veggies thrown in. It is eaten with rice and plain yogurt and possibly something fried on the side.

One of the selling points of this dish is that you can throw in basically any vegetable you have lying around in portions that are too small to make a meal themselves. The taste of spinach and dill is strong enough that all these mini-portions will be swallowed, subsumed, absorbed and spat out as part of the Sai Bhaji empire. Thus adding even more nutrition.

Sai Bhaji (spinach-lentils stew)

Ingredients:

  • One bunch spinach
  • Half a bunch fresh dill
  • Two tablespoons channa dal, soaked for half an hour at least. This post talks more about channa dal.
  • 1 – 2 tablespoons oil
  • One small potato chopped
  • Half an onion, chopped
  • 1 – 4 fresh chilies, jalapeno/serrano/bird’s eye/cayenne
  • Half inch slice of ginger root, minced
  • One teaspoon coriander powder
  • Half a teaspoon turmeric powder
  • One teaspoon dry mango powder (aamchur) or substitute with lime/lemon
  • One teaspoon salt
  • Optional: 1 cup of other chopped vegetables, such as eggplant, zucchini, tomato, carrots, bell peppers, etc.

Method:

Have the channa dal soaking in plenty of water for about half an hour. Wash the green thoroughly in a sink full of water a few times. Chop them up roughly including the stems that are not too woody.

IMG_0163 IMG_0162

Now start layering the dish in a thick-bottomed pot with a well-fitting lid. First, the oil. Then, the onions, chili and ginger. Then, the potatoes, and the coriander and turmeric powders. Then about half the greens. Sandwiched between this and the other half of the greens throw in the drained channa dal. After the last of the greens, sprinkle the salt over, cover, and bring to a boil. The water from rinsing the greens should be enough to cook, or add about a quarter cup if it seems dry.

IMG_0164 IMG_0165 IMG_0166

Once it comes to a boil lower to a simmer and let it be, covered, simmering for about 45 to 50 minutes.

When you open the lid, the lentils should be softened and the greens cooked down a lot. Add the dry mango powder or lime/lemon juice, and mash it with a potato masher or the handy-dandy mandheera.

IMG_0172

mandheera

mandheera

IMG_0175

Warm it through before serving. This is generally eaten mixed with rice and plain yogurt. Three types of rice dishes work well: rice browned with onions, khichdi rice, or yellow garlic rice (recipe forthcoming).

On my plate, I served sai bhaji, rice and yogurt in three neat sides, with some fried taro on the side. My husband however likes it all piled up, like this:

IMG_0176 IMG_0178

Far be it from me to dictate which way you choose to eat it, but you won’t be sorry you did.

Introducing the Eggnach

Eggnach with roti

Eggnach with roti

My People — the Sindhis — have made a lot of contributions to world culture, but I must say this ranks as an important one. Sindhis discovered that spinach and eggplant, when cooked together, meld well, marry well, and make a tasty nutritious brew.

Not only is this technique explored in the very famous Sai Bhaji, but in this rather less well-known dish as well. It goes well with rotis, but would go on the side of rice very well too, if you have some plain yogurt on the side. A very nice accompaniment would be yellow rice — cooked with some garlic, salt and turmeric powder (recipe forthcoming).

I found this recipe in this book and as usual made some modifications.

The Eggnach — eggplant and spinach dish

Ingredients:

  • 1 bunch spinach
  • 1 regular-sized eggplant
  • 1 medium tomato or 2 small ones
  • 4-5 cloves garlic
  • half and inch piece ginger
  • 2 serrano chilies or several smaller birds-eye chilies
  • half a teaspoon coriander powder
  • half a teaspoon cumin seeds
  • half a teaspoon red chili powder
  • salt to taste
  • 2 tablespoons oil
  • 1 tablespoon ghee (optional)

Method:

Rinse and chop the vegetables.

IMG_0547 IMG_0548 IMG_0549 IMG_0550


Chop the garlic, ginger and chili. Give them a pounding in a mortar and pestle after sprinkling a bit of salt on it to add a bit of roughage and to draw out moisture.

IMG_0546 IMG_0551

A note about salt: it draws out moisture! This is an incredibly useful fact that helps out in various ways. In this case, I pound it with a bit of salt, so that the paste self-makes itself, without adding even a splash of water.

Salt also pre-cooks food as it draws out the moisture, at least that is how I think of it. If you mince garlic, and salt it, in 10 minutes you will see that it has turned mushy and wet, and by the way, the taste of the garlic will not be as aggressive as when it is raw.

So anyway, getting back to our job. Pound those guys to get them to paste up. You don’t need to go the extra mile, just a simple smashing will do.

Heat oil in a thick-bottomed pot. When it shimmers, throw in the cumin, red chili powder and coriander powder. Now enters the garlic/ginger/chili paste. Let it sizzle. Now in tumble all the vegetables, chopped. Salt them, stir them around, cover, and cook for 15-20 minutes on medium first, then, when it comes to a boil, on medium-low.

IMG_0553 IMG_0554 IMG_0555 IMG_0557

Everything you have in there is quite mashable by this point. So attack it with a potato masher or simply the back of your spoon.

IMG_0560

Eggnach mashed

If you like, top it with a teaspoon of ghee, and possibly a sprinkle of lemon juice, and you are done.