Poached fish with soy, sesame and ginger (and ginger)

IMG_5846There are people who like ginger, and there are those who don’t. Both are within the bounds of normalcy. But then there are people who like ginger beyond all reason and sense. My husband is one of them. He is not satisfied with a ginger-flavor suffusing the food; it must have that, and also ginger sticks in addition, so he can actually taste it.

It’s pathological, as Donald Trump might say.

So if there is anyone in your life with a similar addiction, here is a recipe to finally satisfy them. And stop them complaining! That alone is worth the price of a good piece of fish.

To everyone’s astonishment (and relief), this meal actually has more to it than just ginger. The base is a poached fish: it could be halibut, or cod, or other white fish. Most people recommend very subtle accoutrements for poached fish in order to not drown out its mild flavor; but that is not what I did. As is my wont, it is often the seasoning that is the highlight of a meal, and the poached fish performs the function here of a nice inoffensive background.

Now for the seasoning. For this dish, I used two dressings, layered one on top of each other. Both use elements from the sort of Pan-Asian cuisine that is popular here in California, with flavors of sesame and soy.

IMG_5834
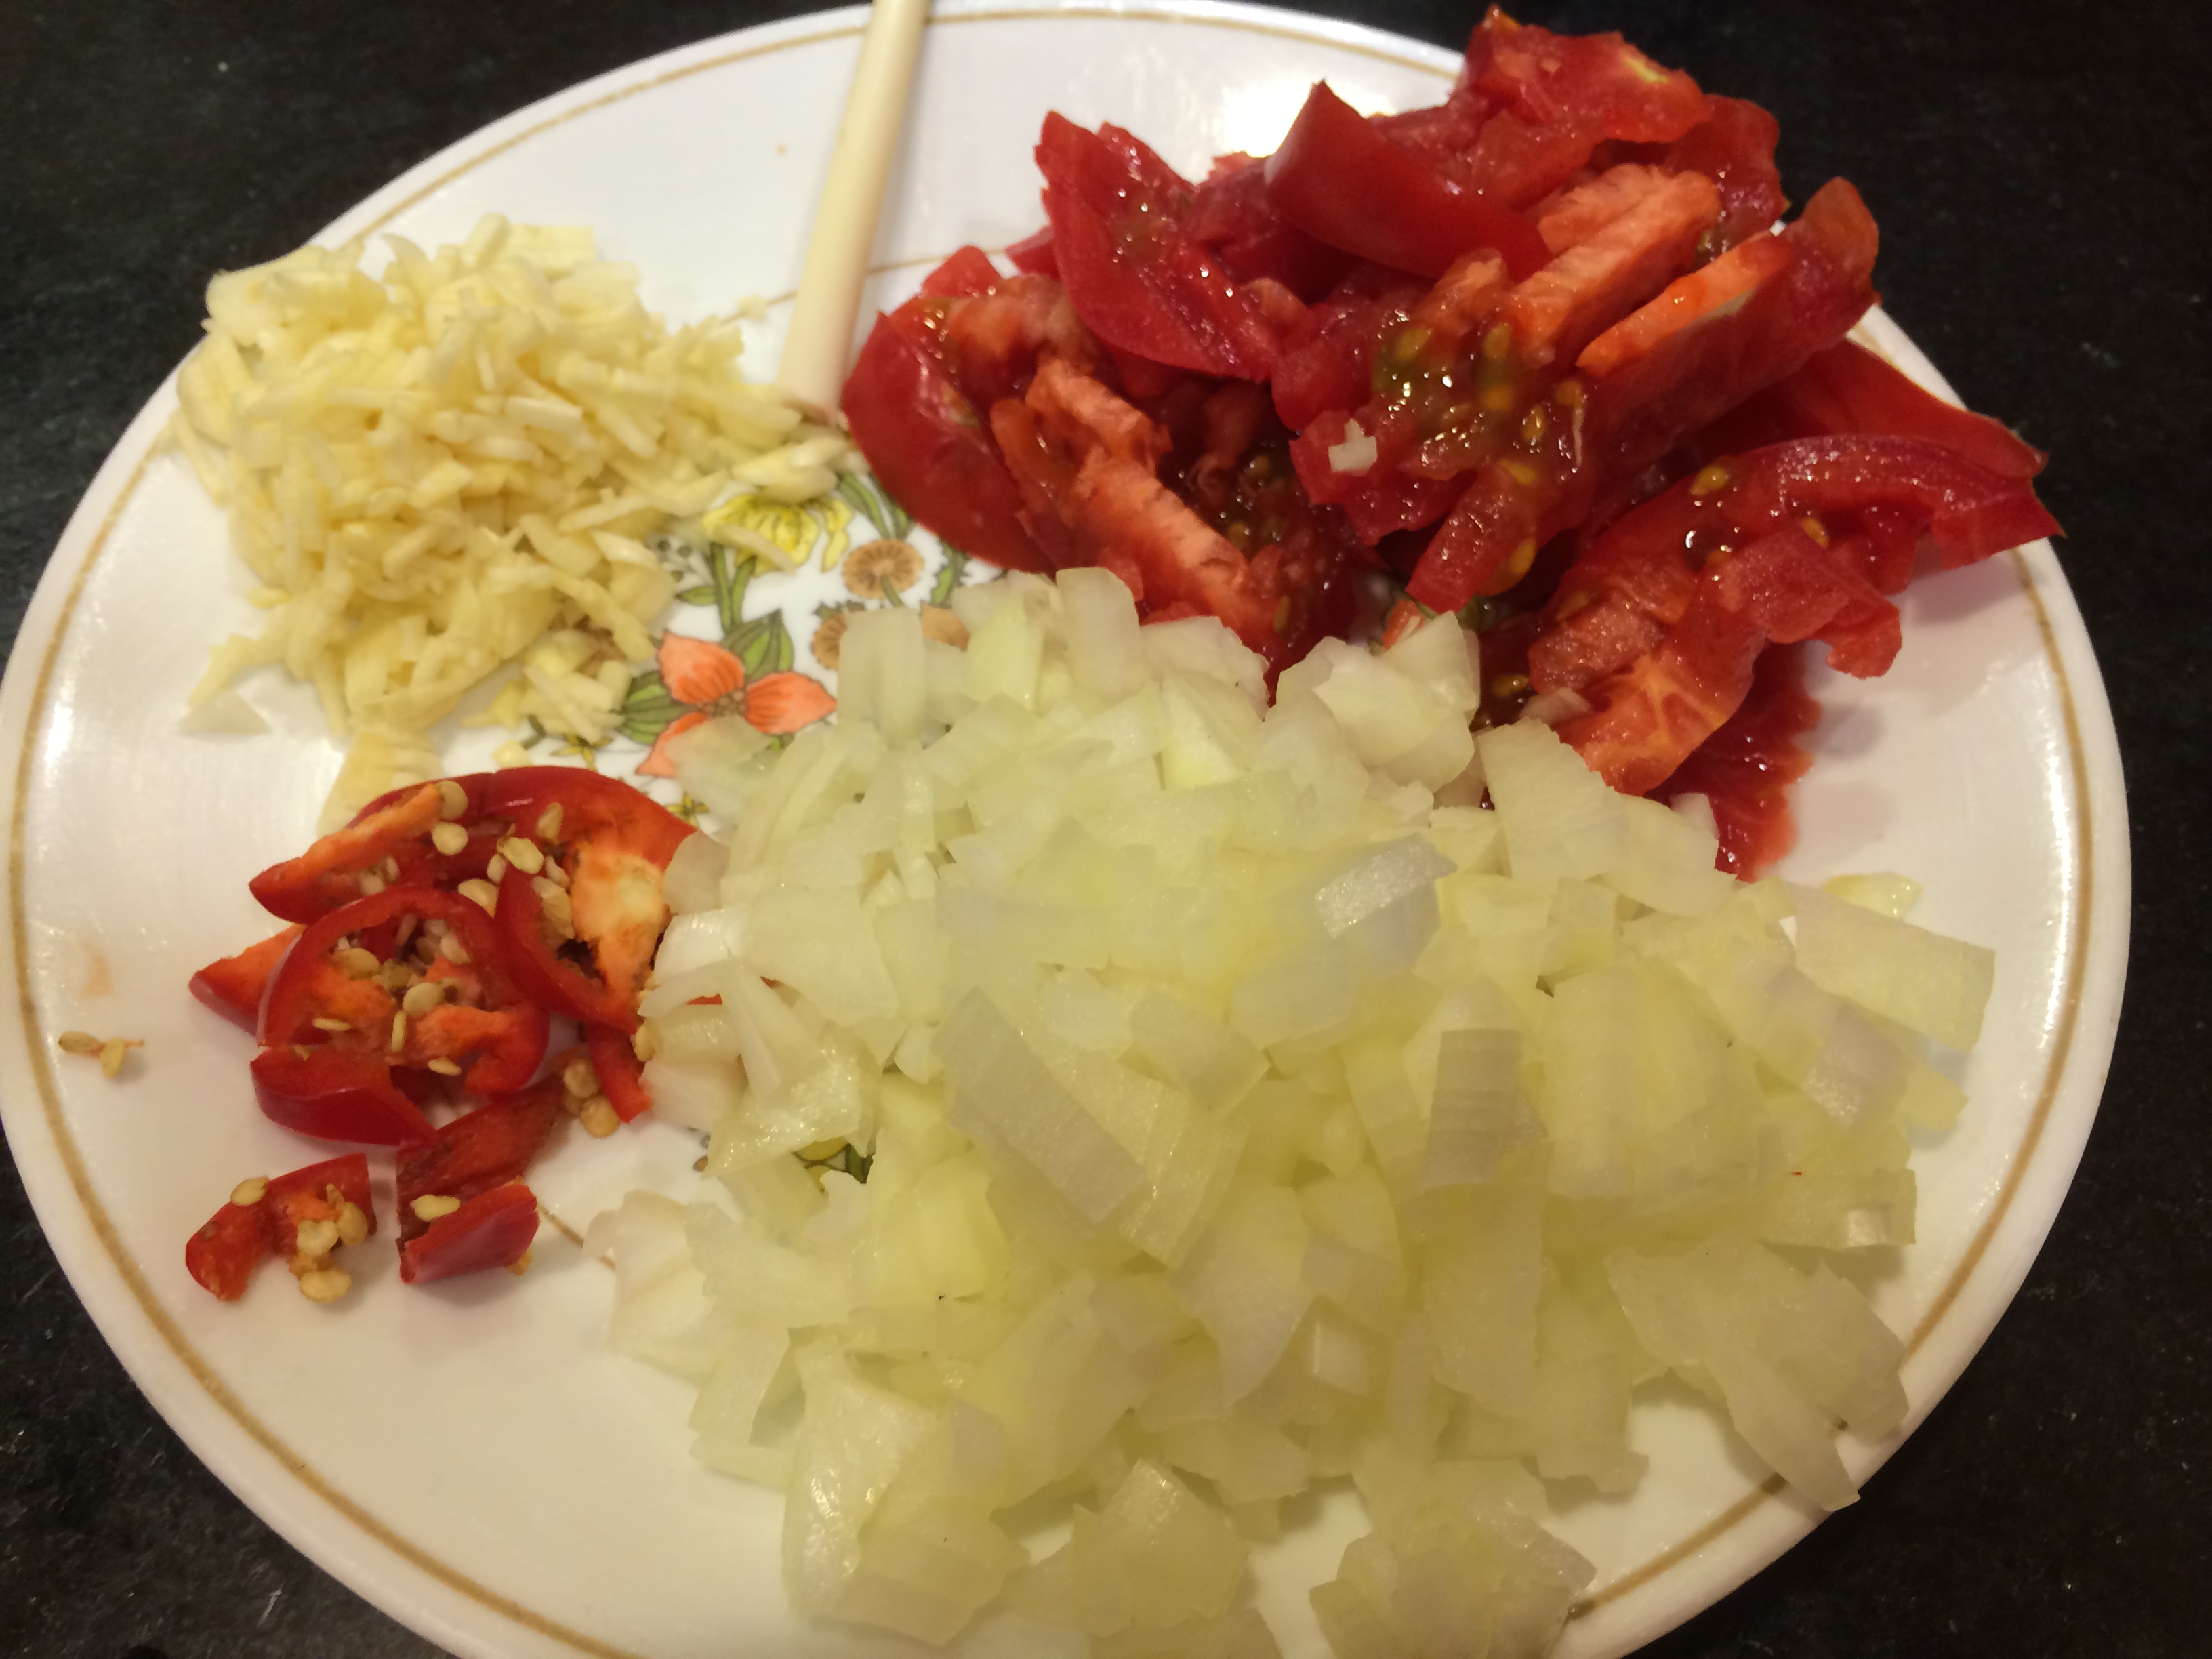
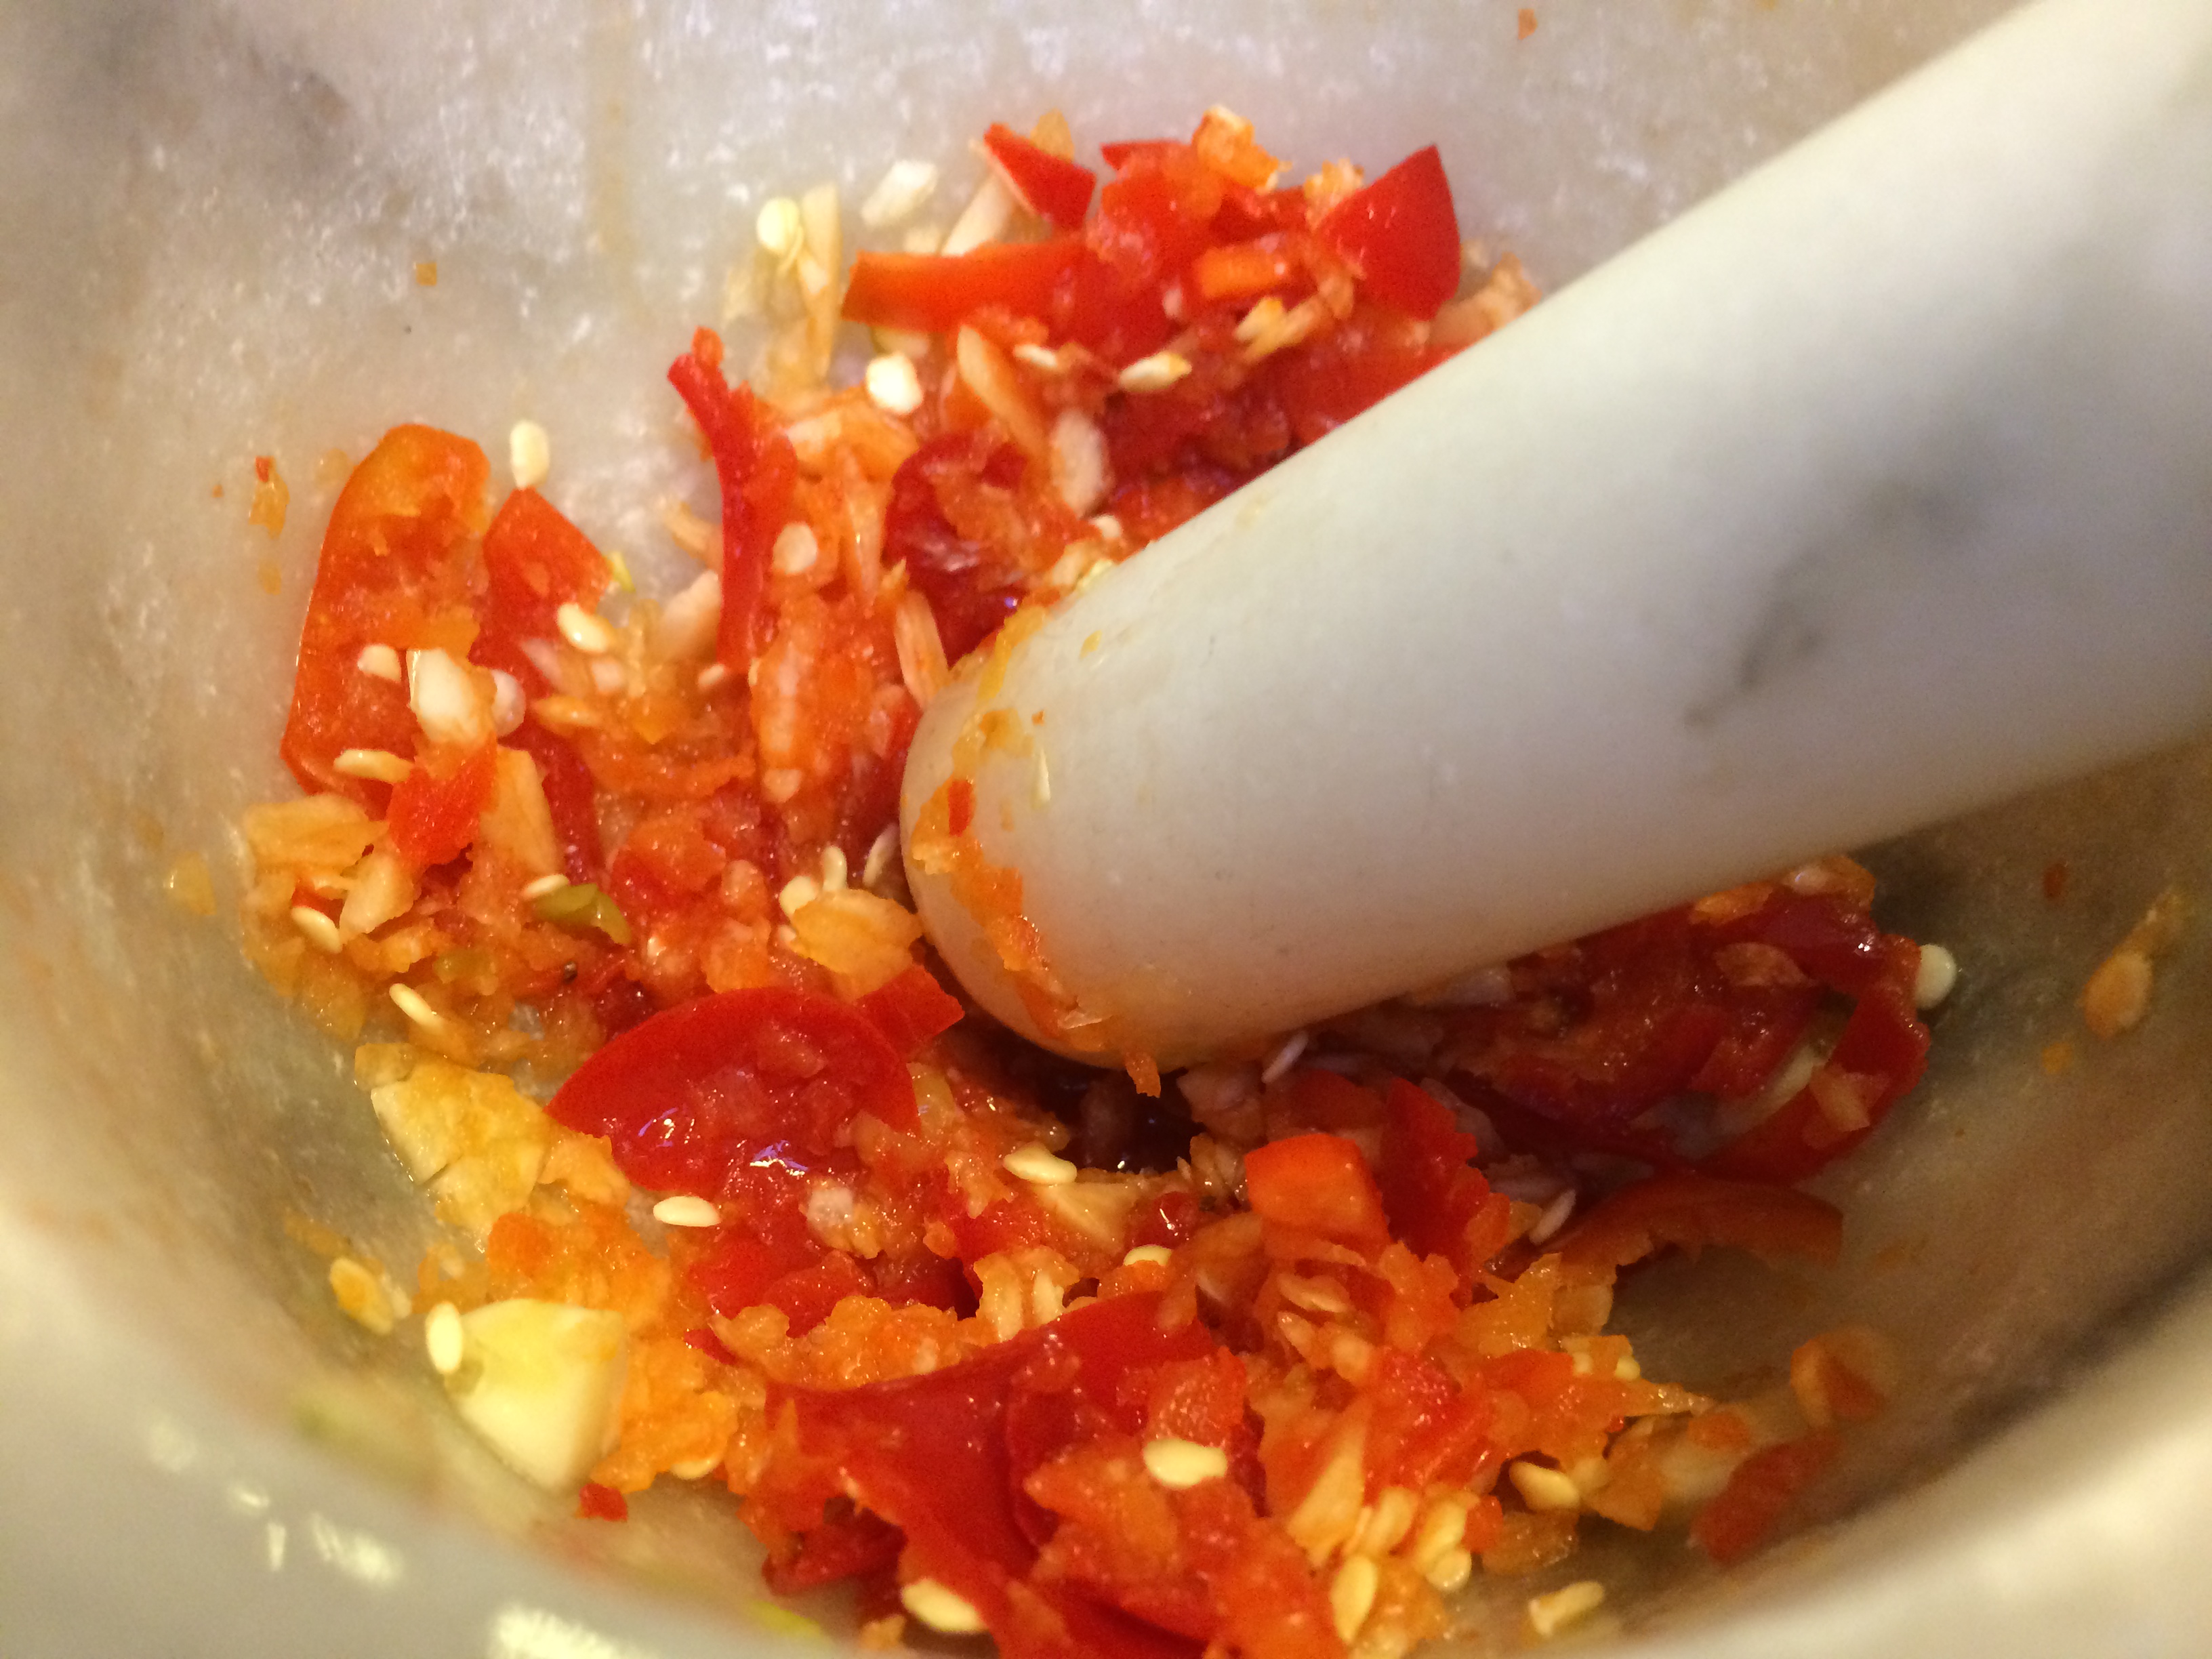
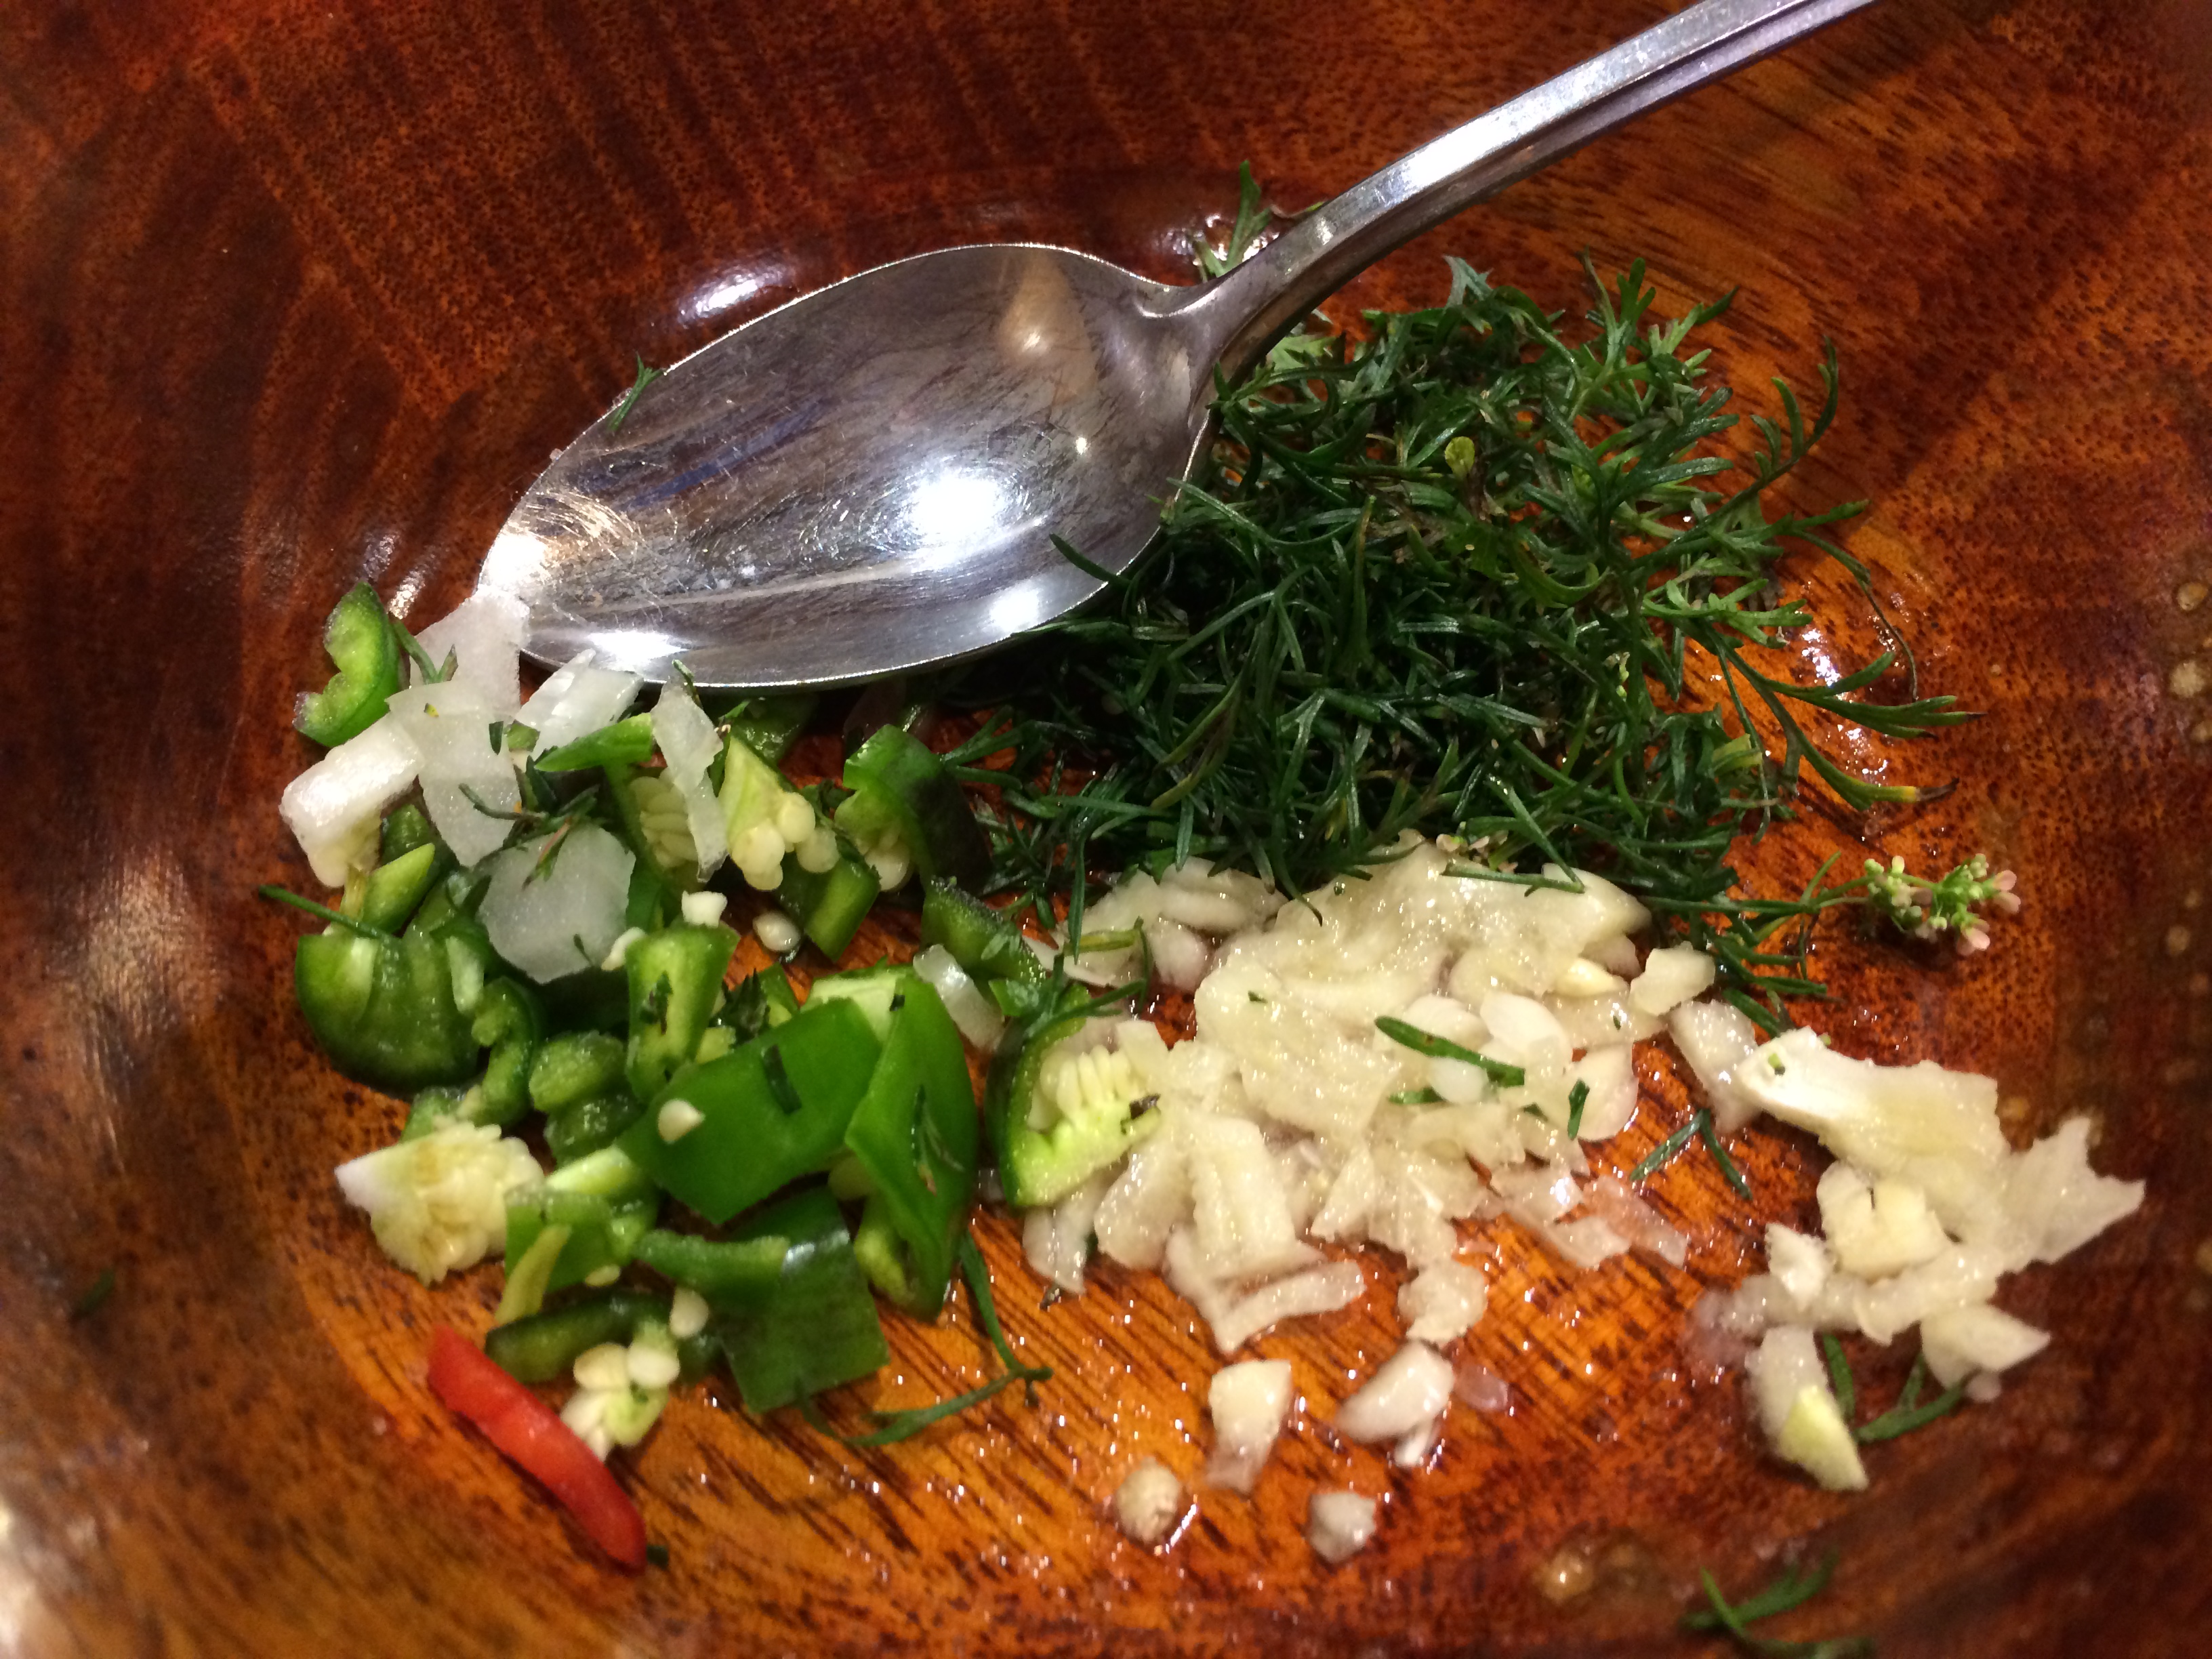
Both dressings use the same trio of scallions, chilies and ginger. The first dressing, which is simmered in soy, has these items minced fine (on the left). While the second dressing, which is fried in sesame oil, has the chilies whole and the ginger in long sticks (on the right).

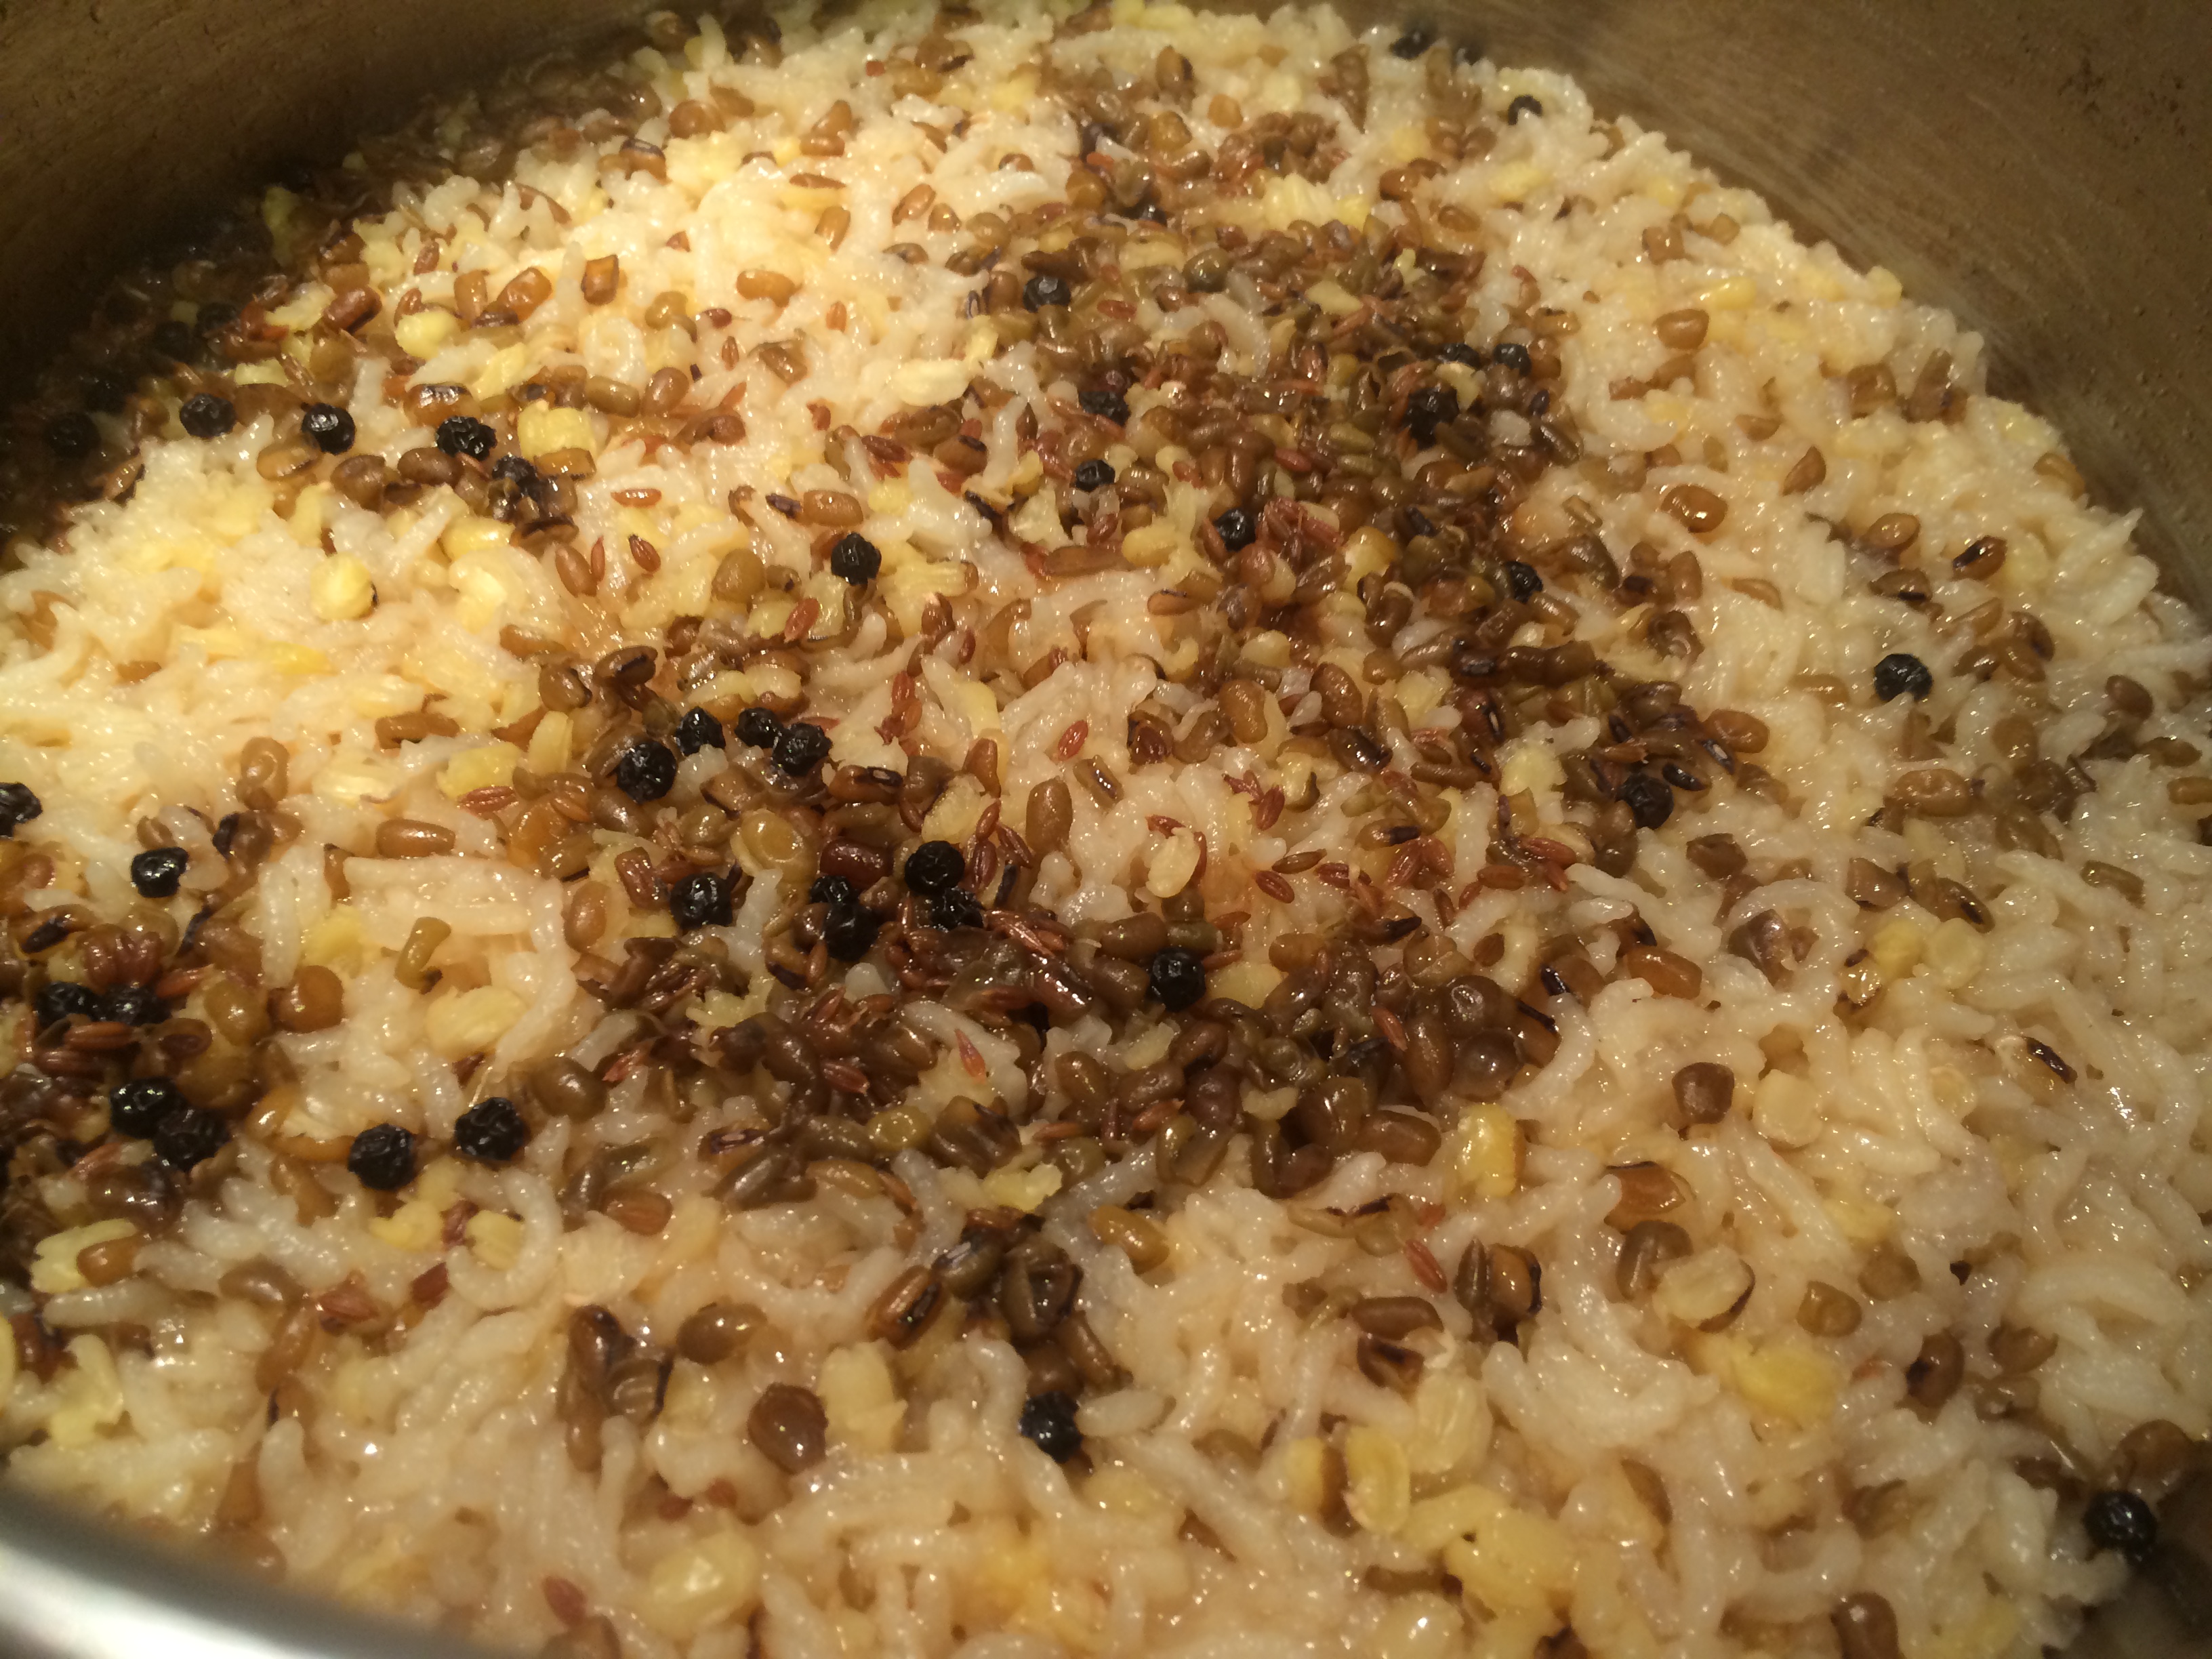
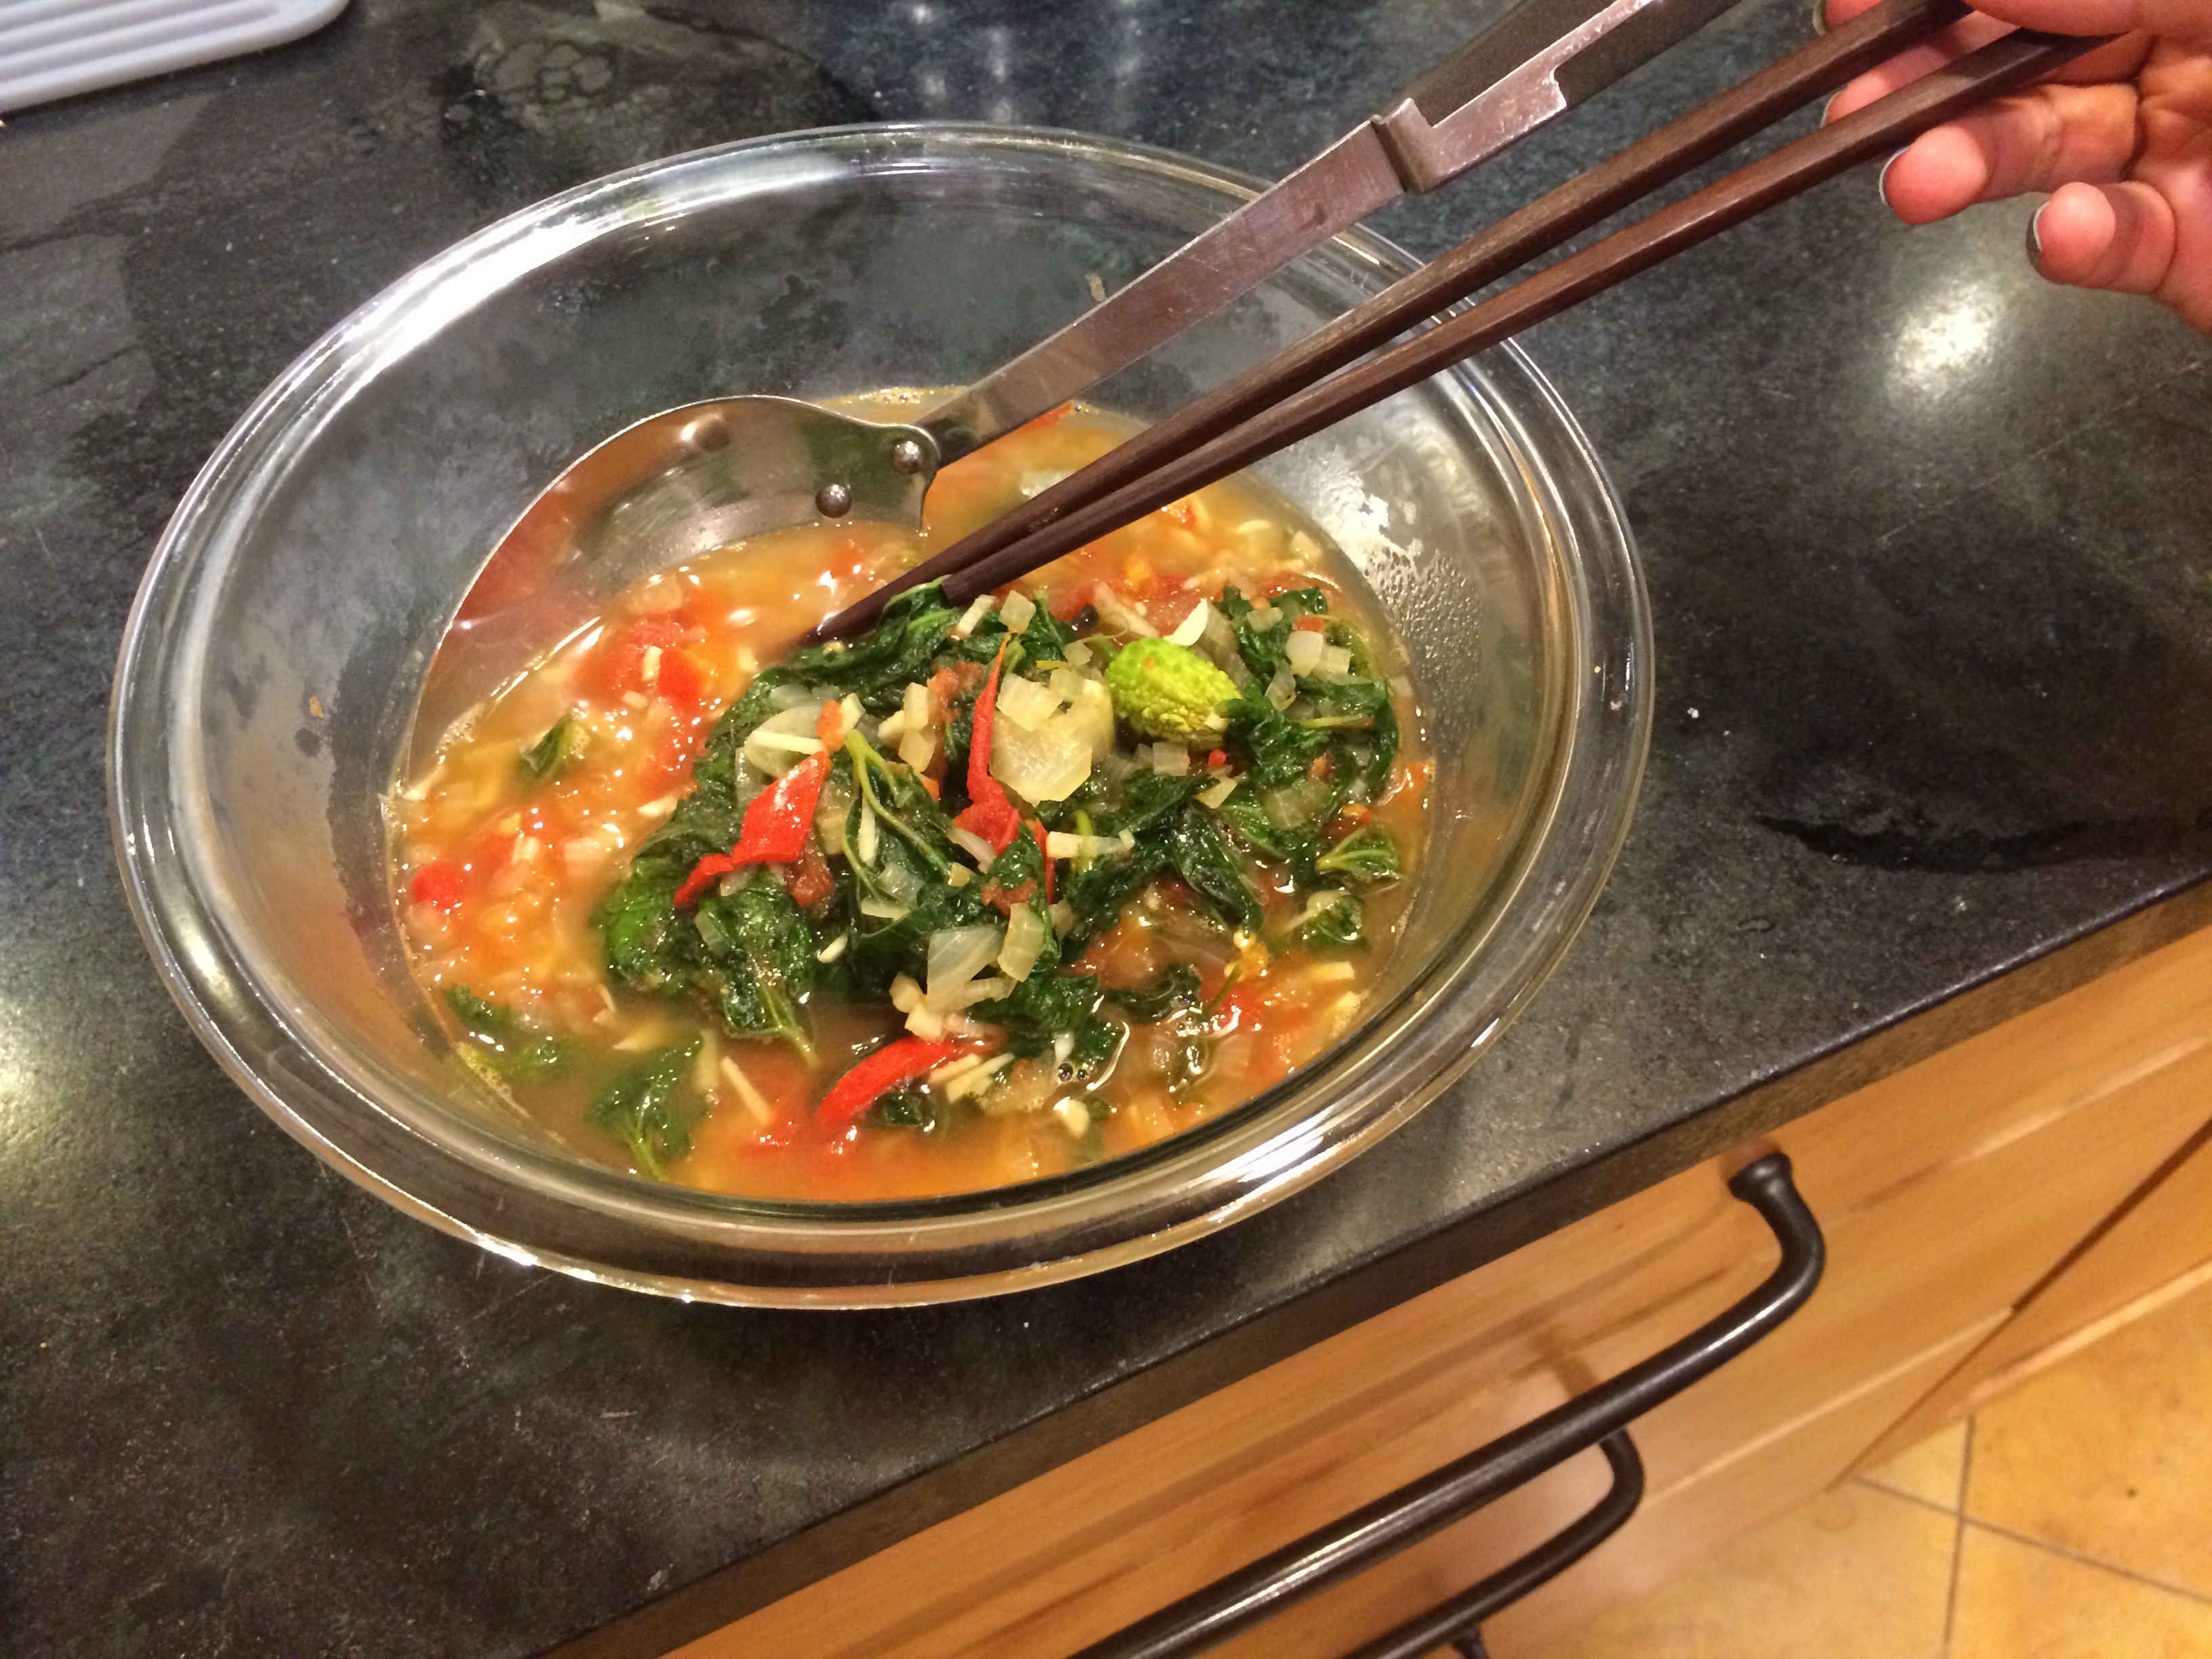
The poached fish, with both dressings layered on, makes a wonderful side for rice.

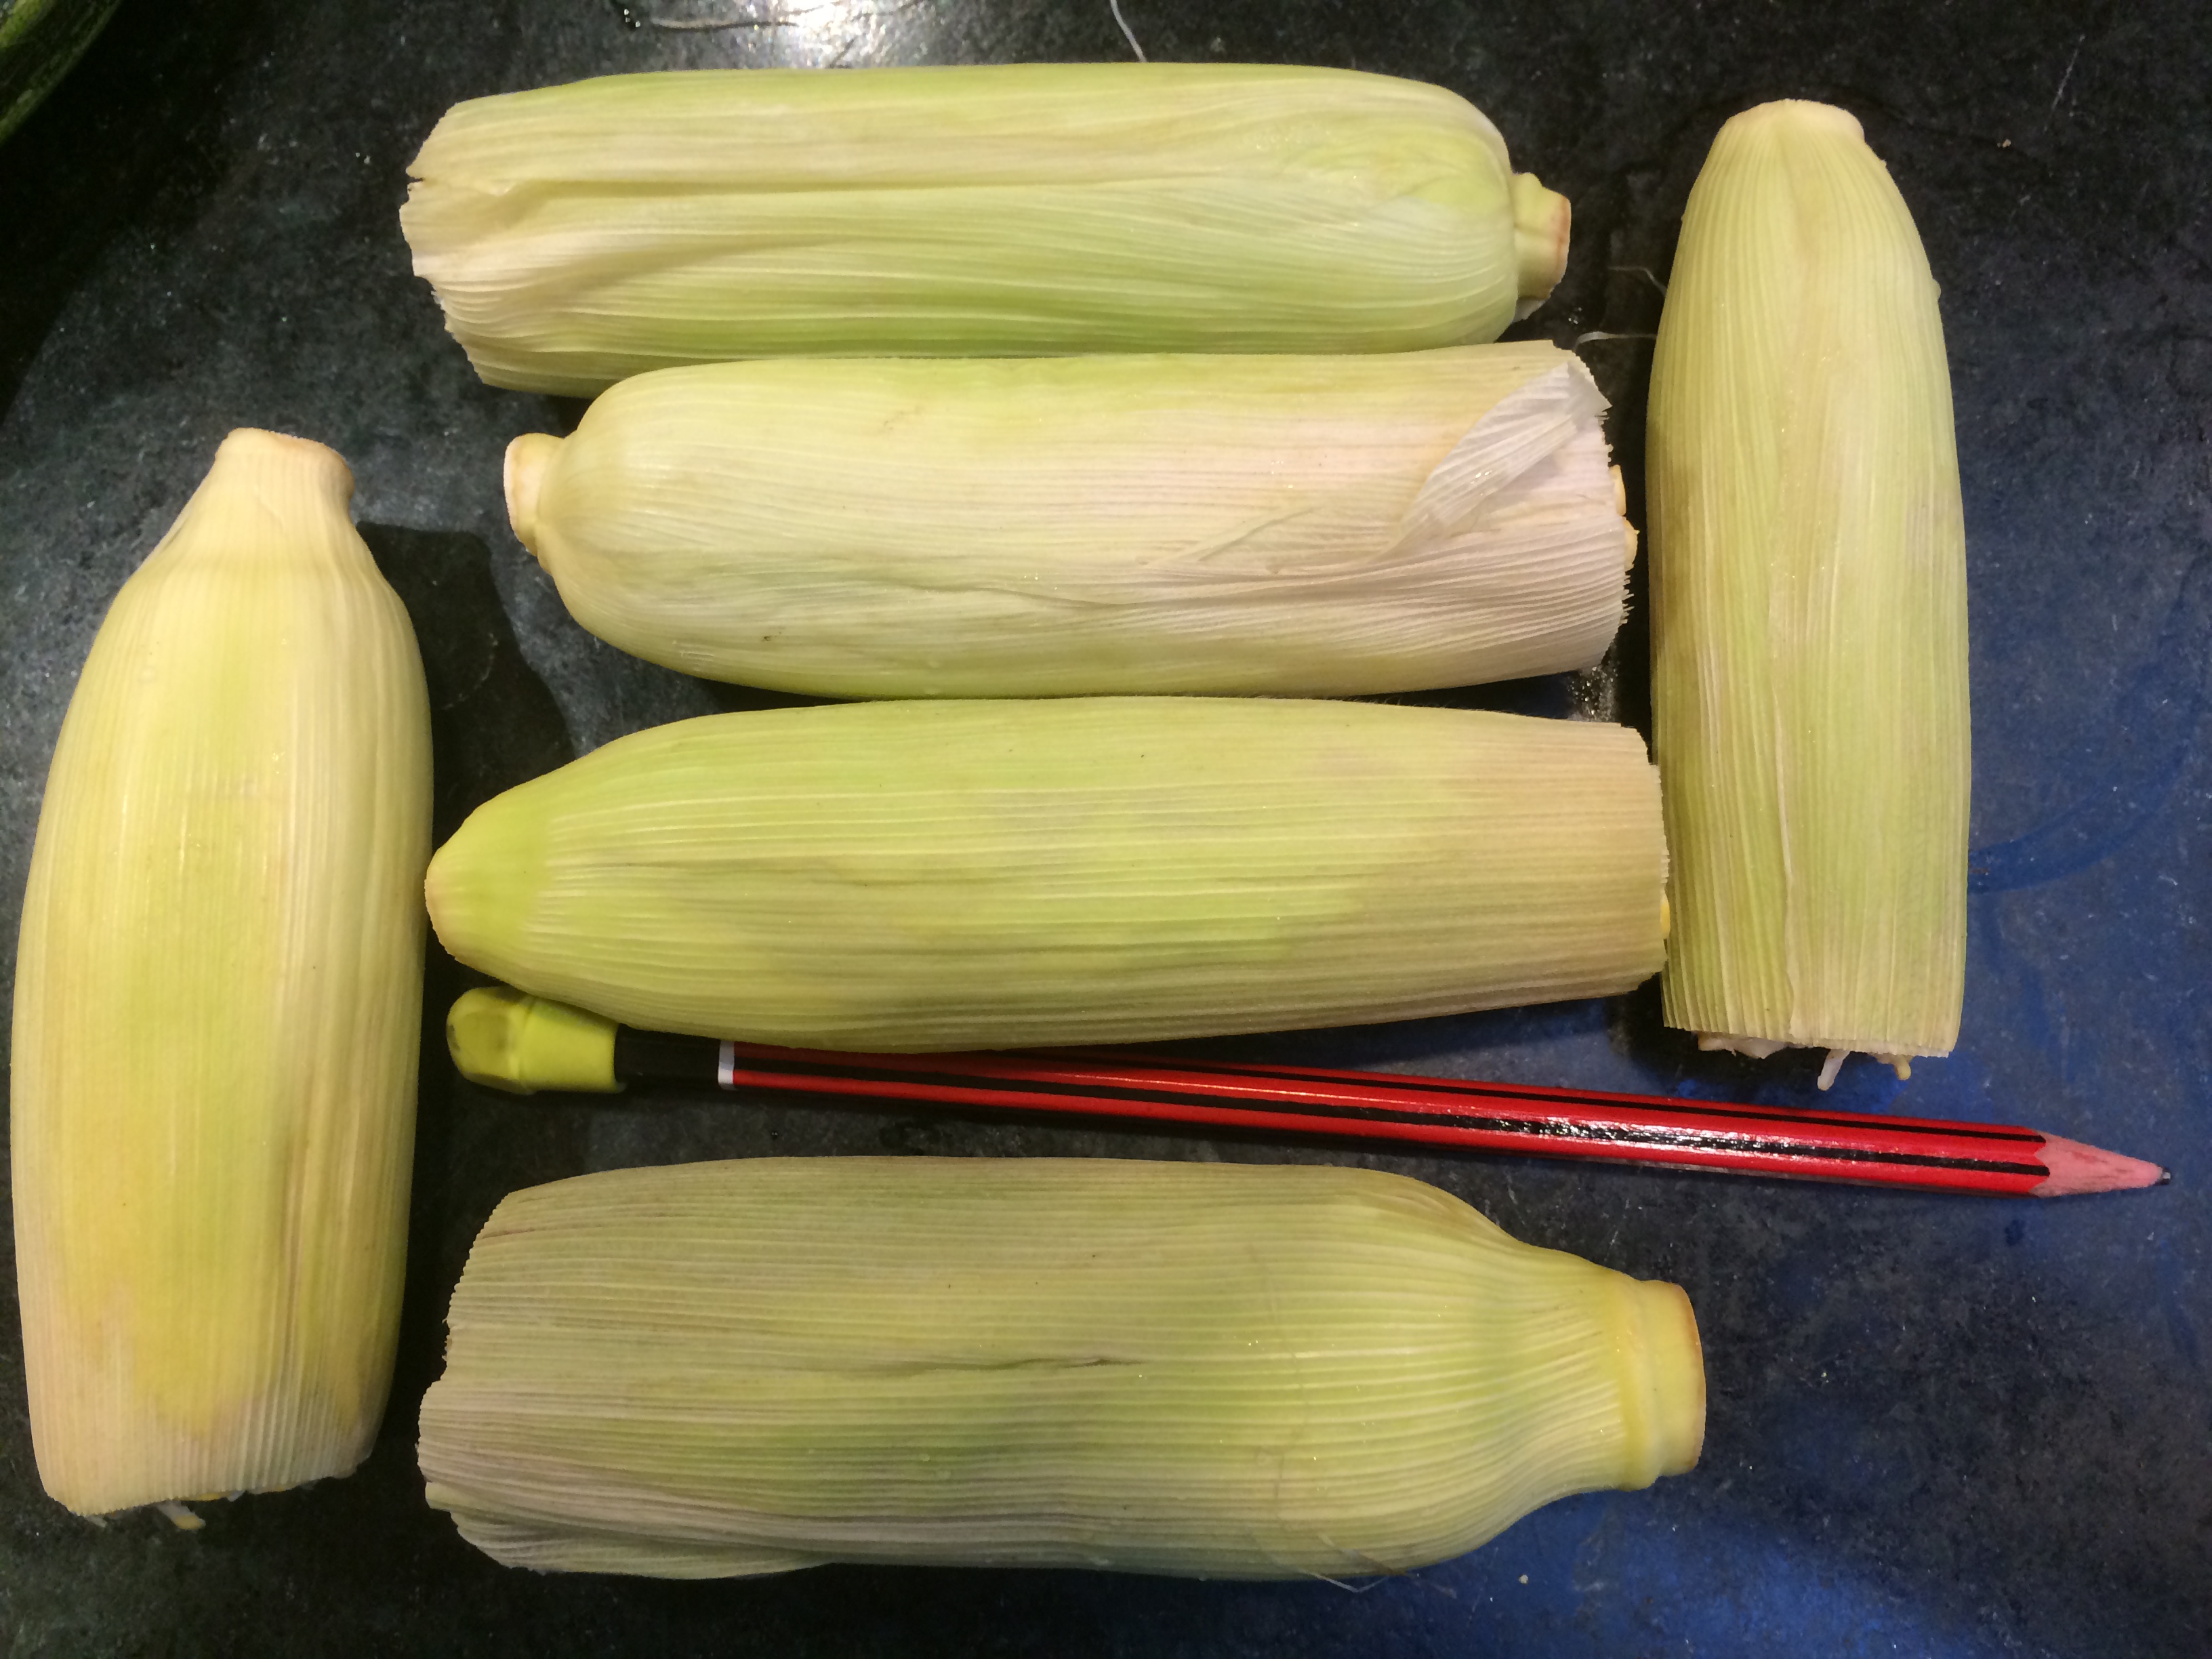
The fish, as it poaches:

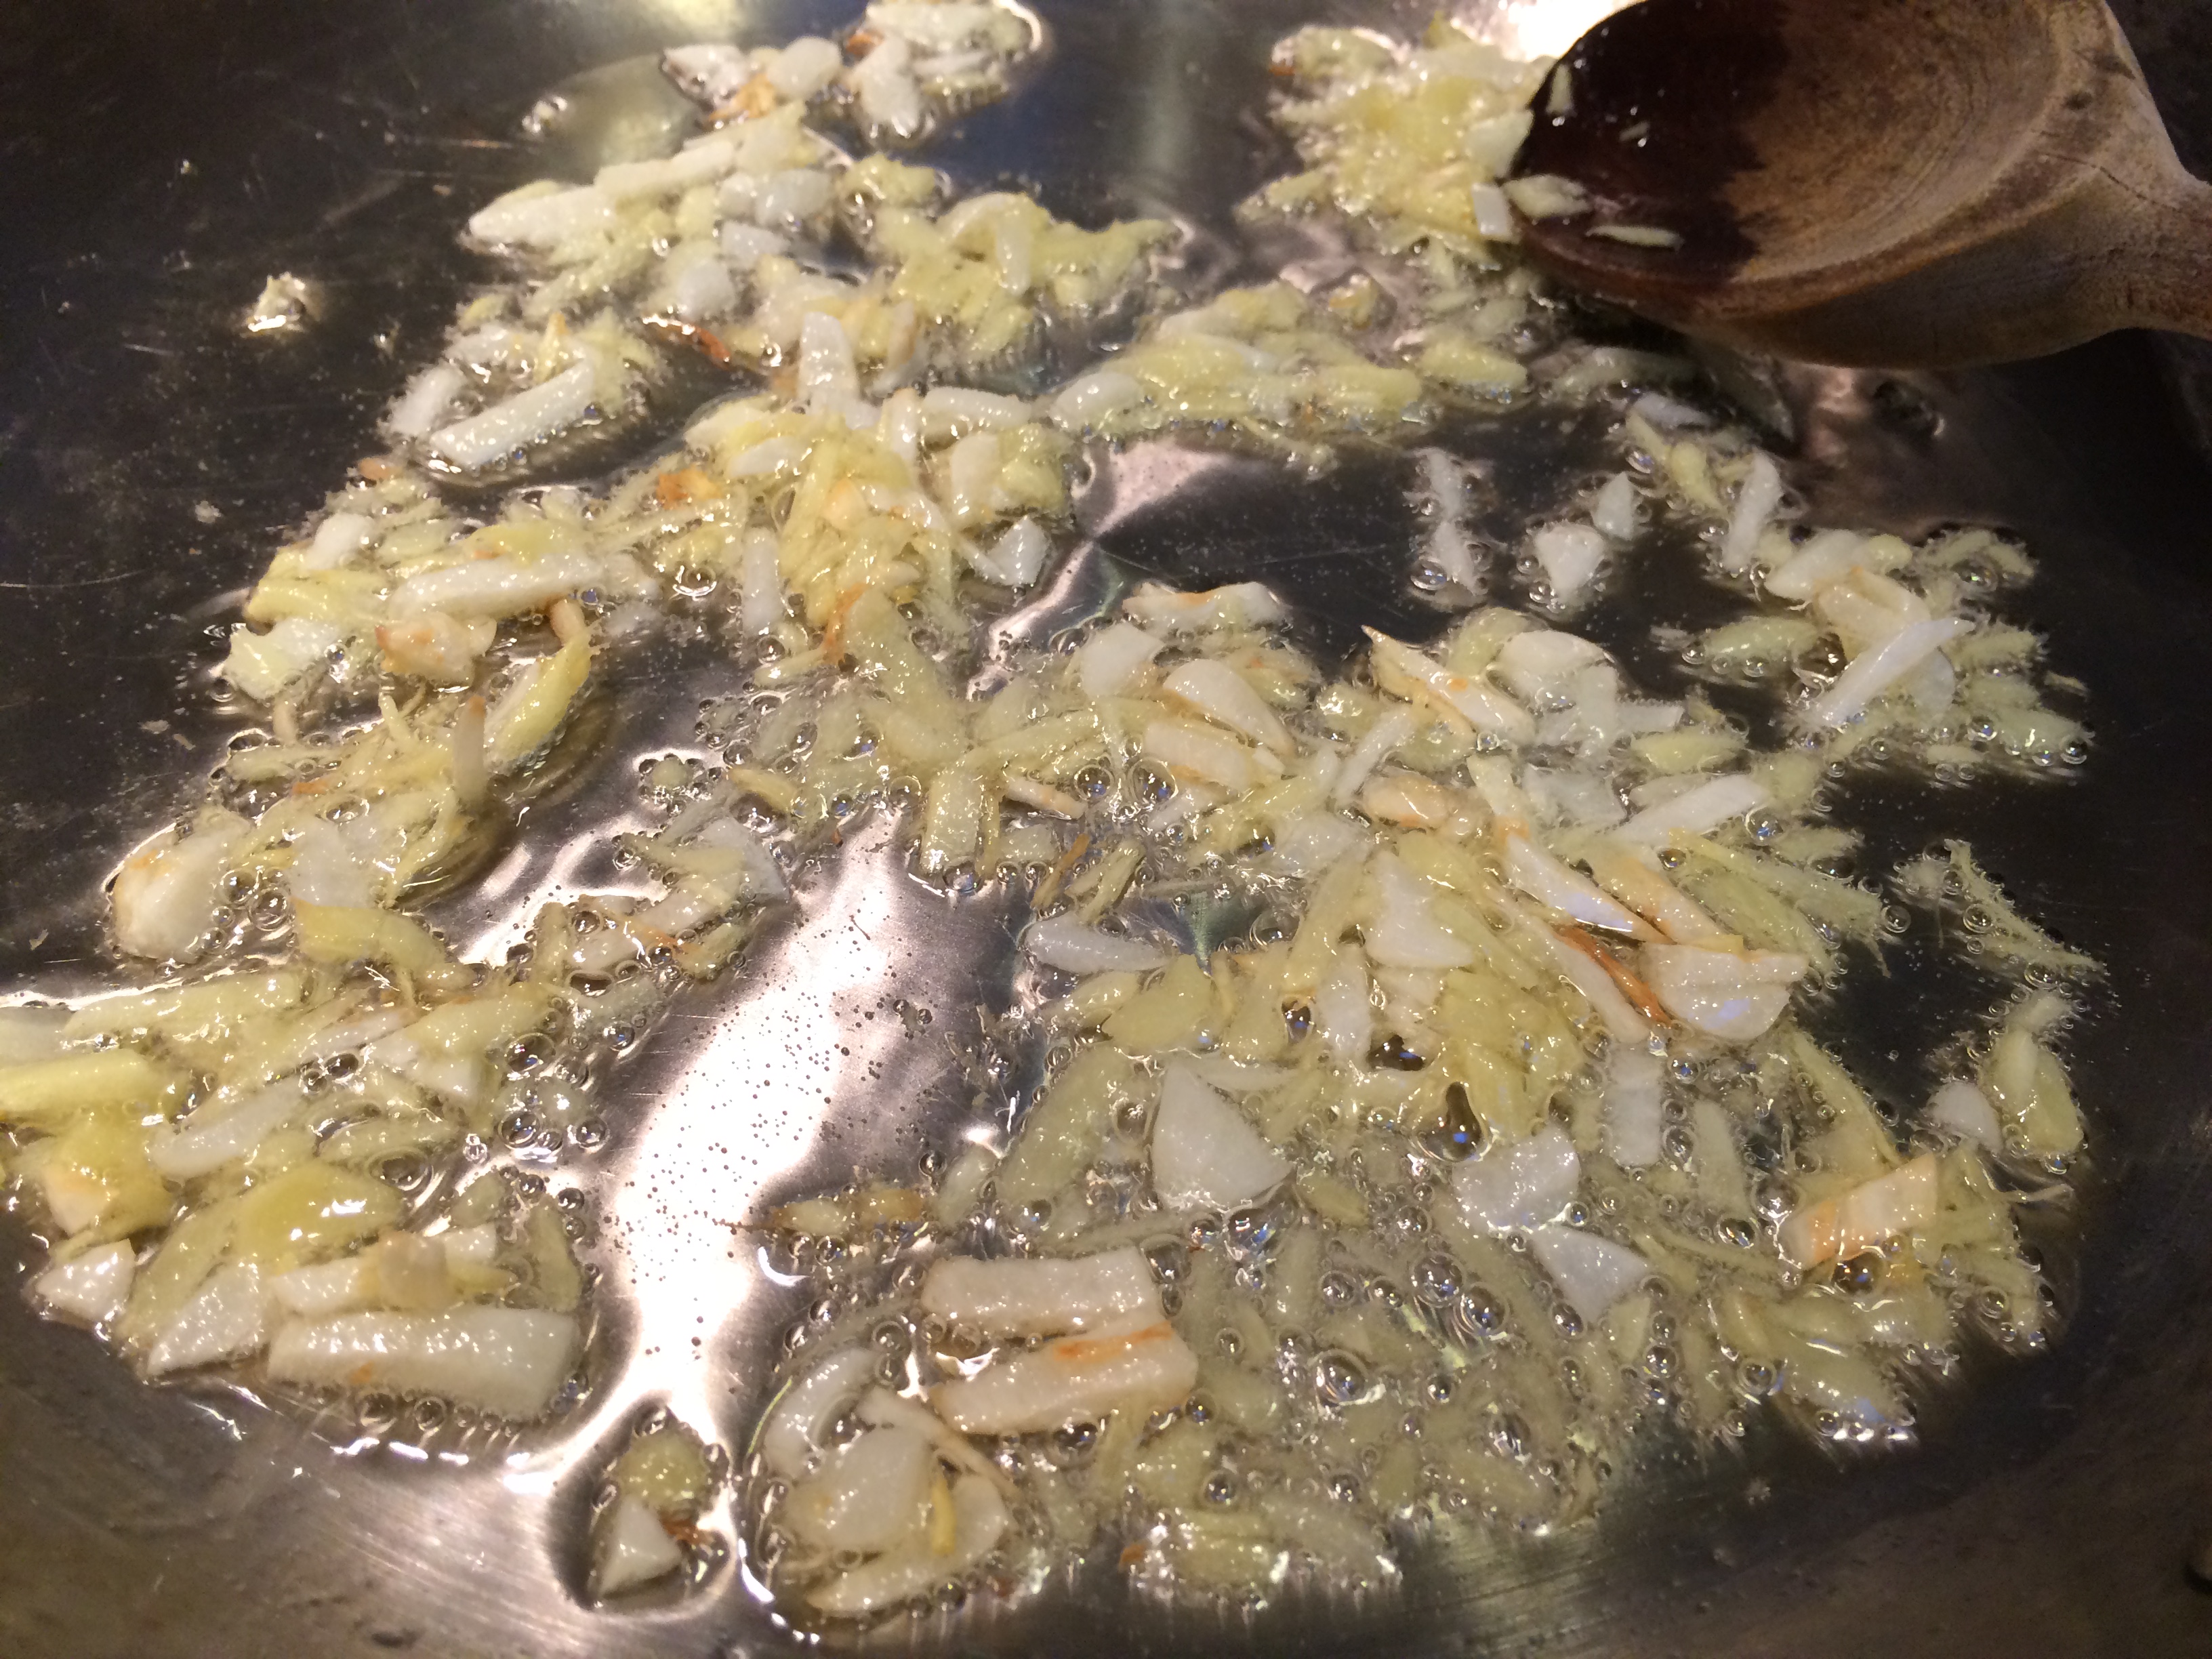
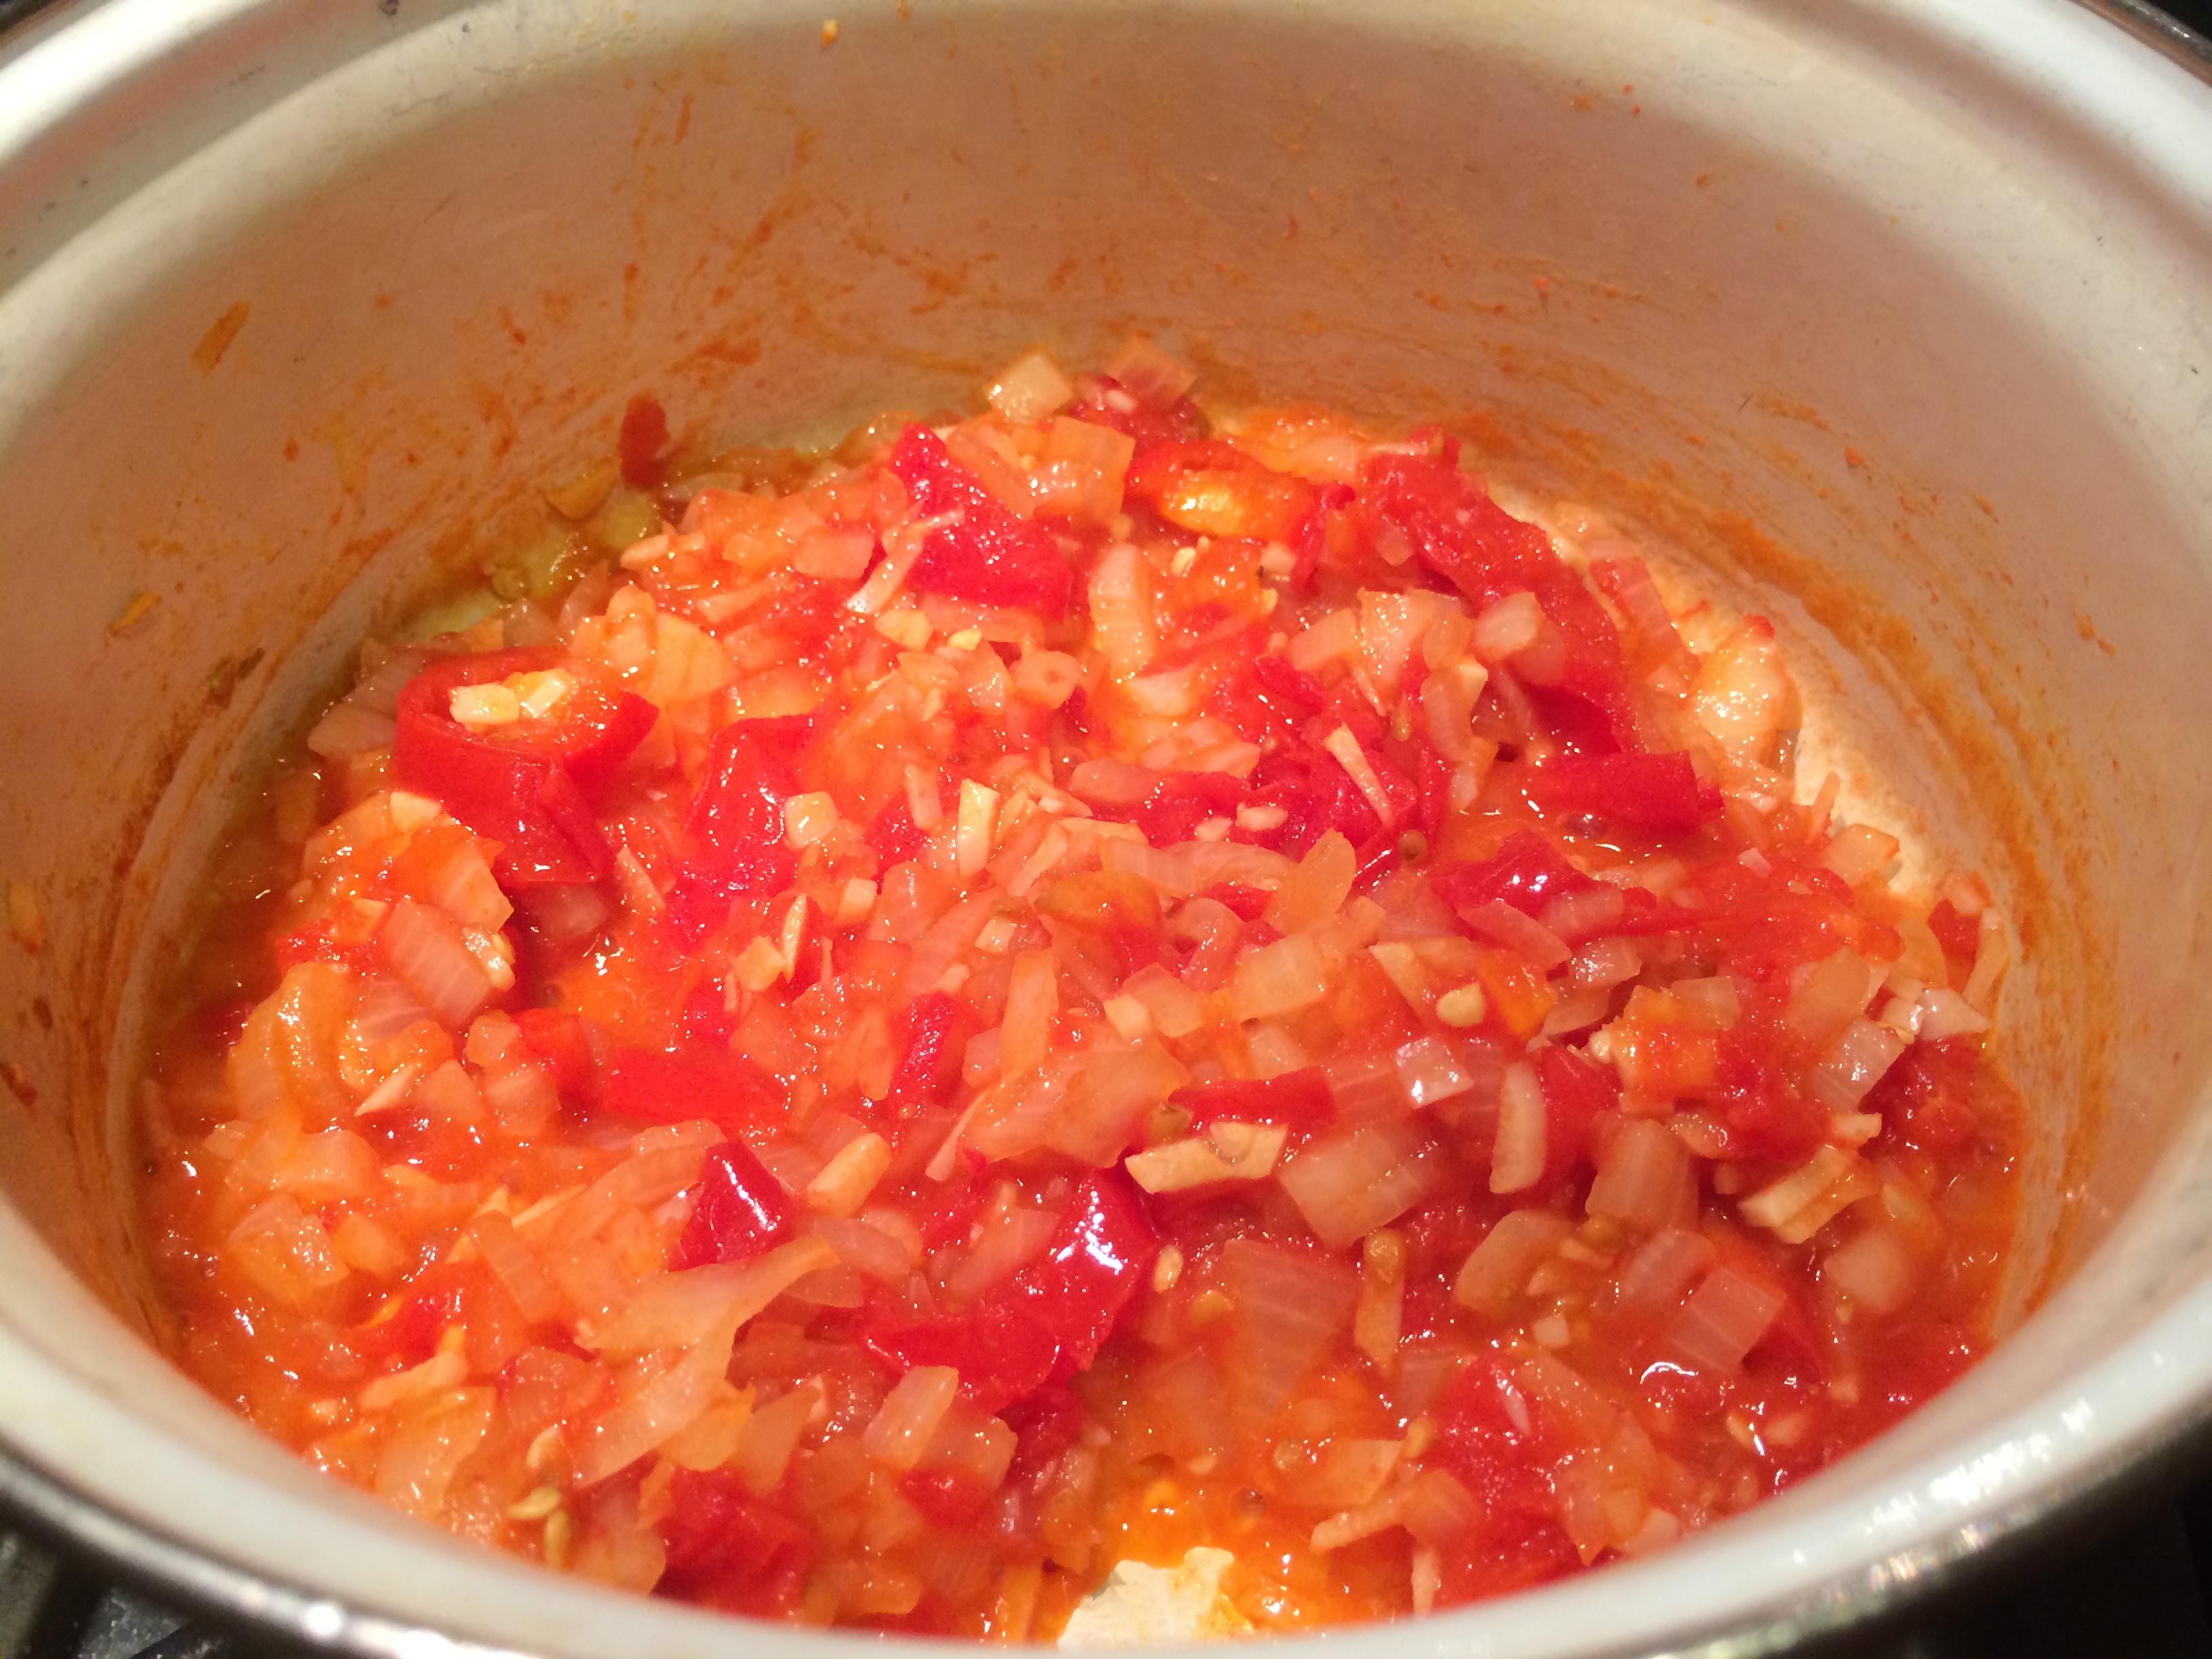
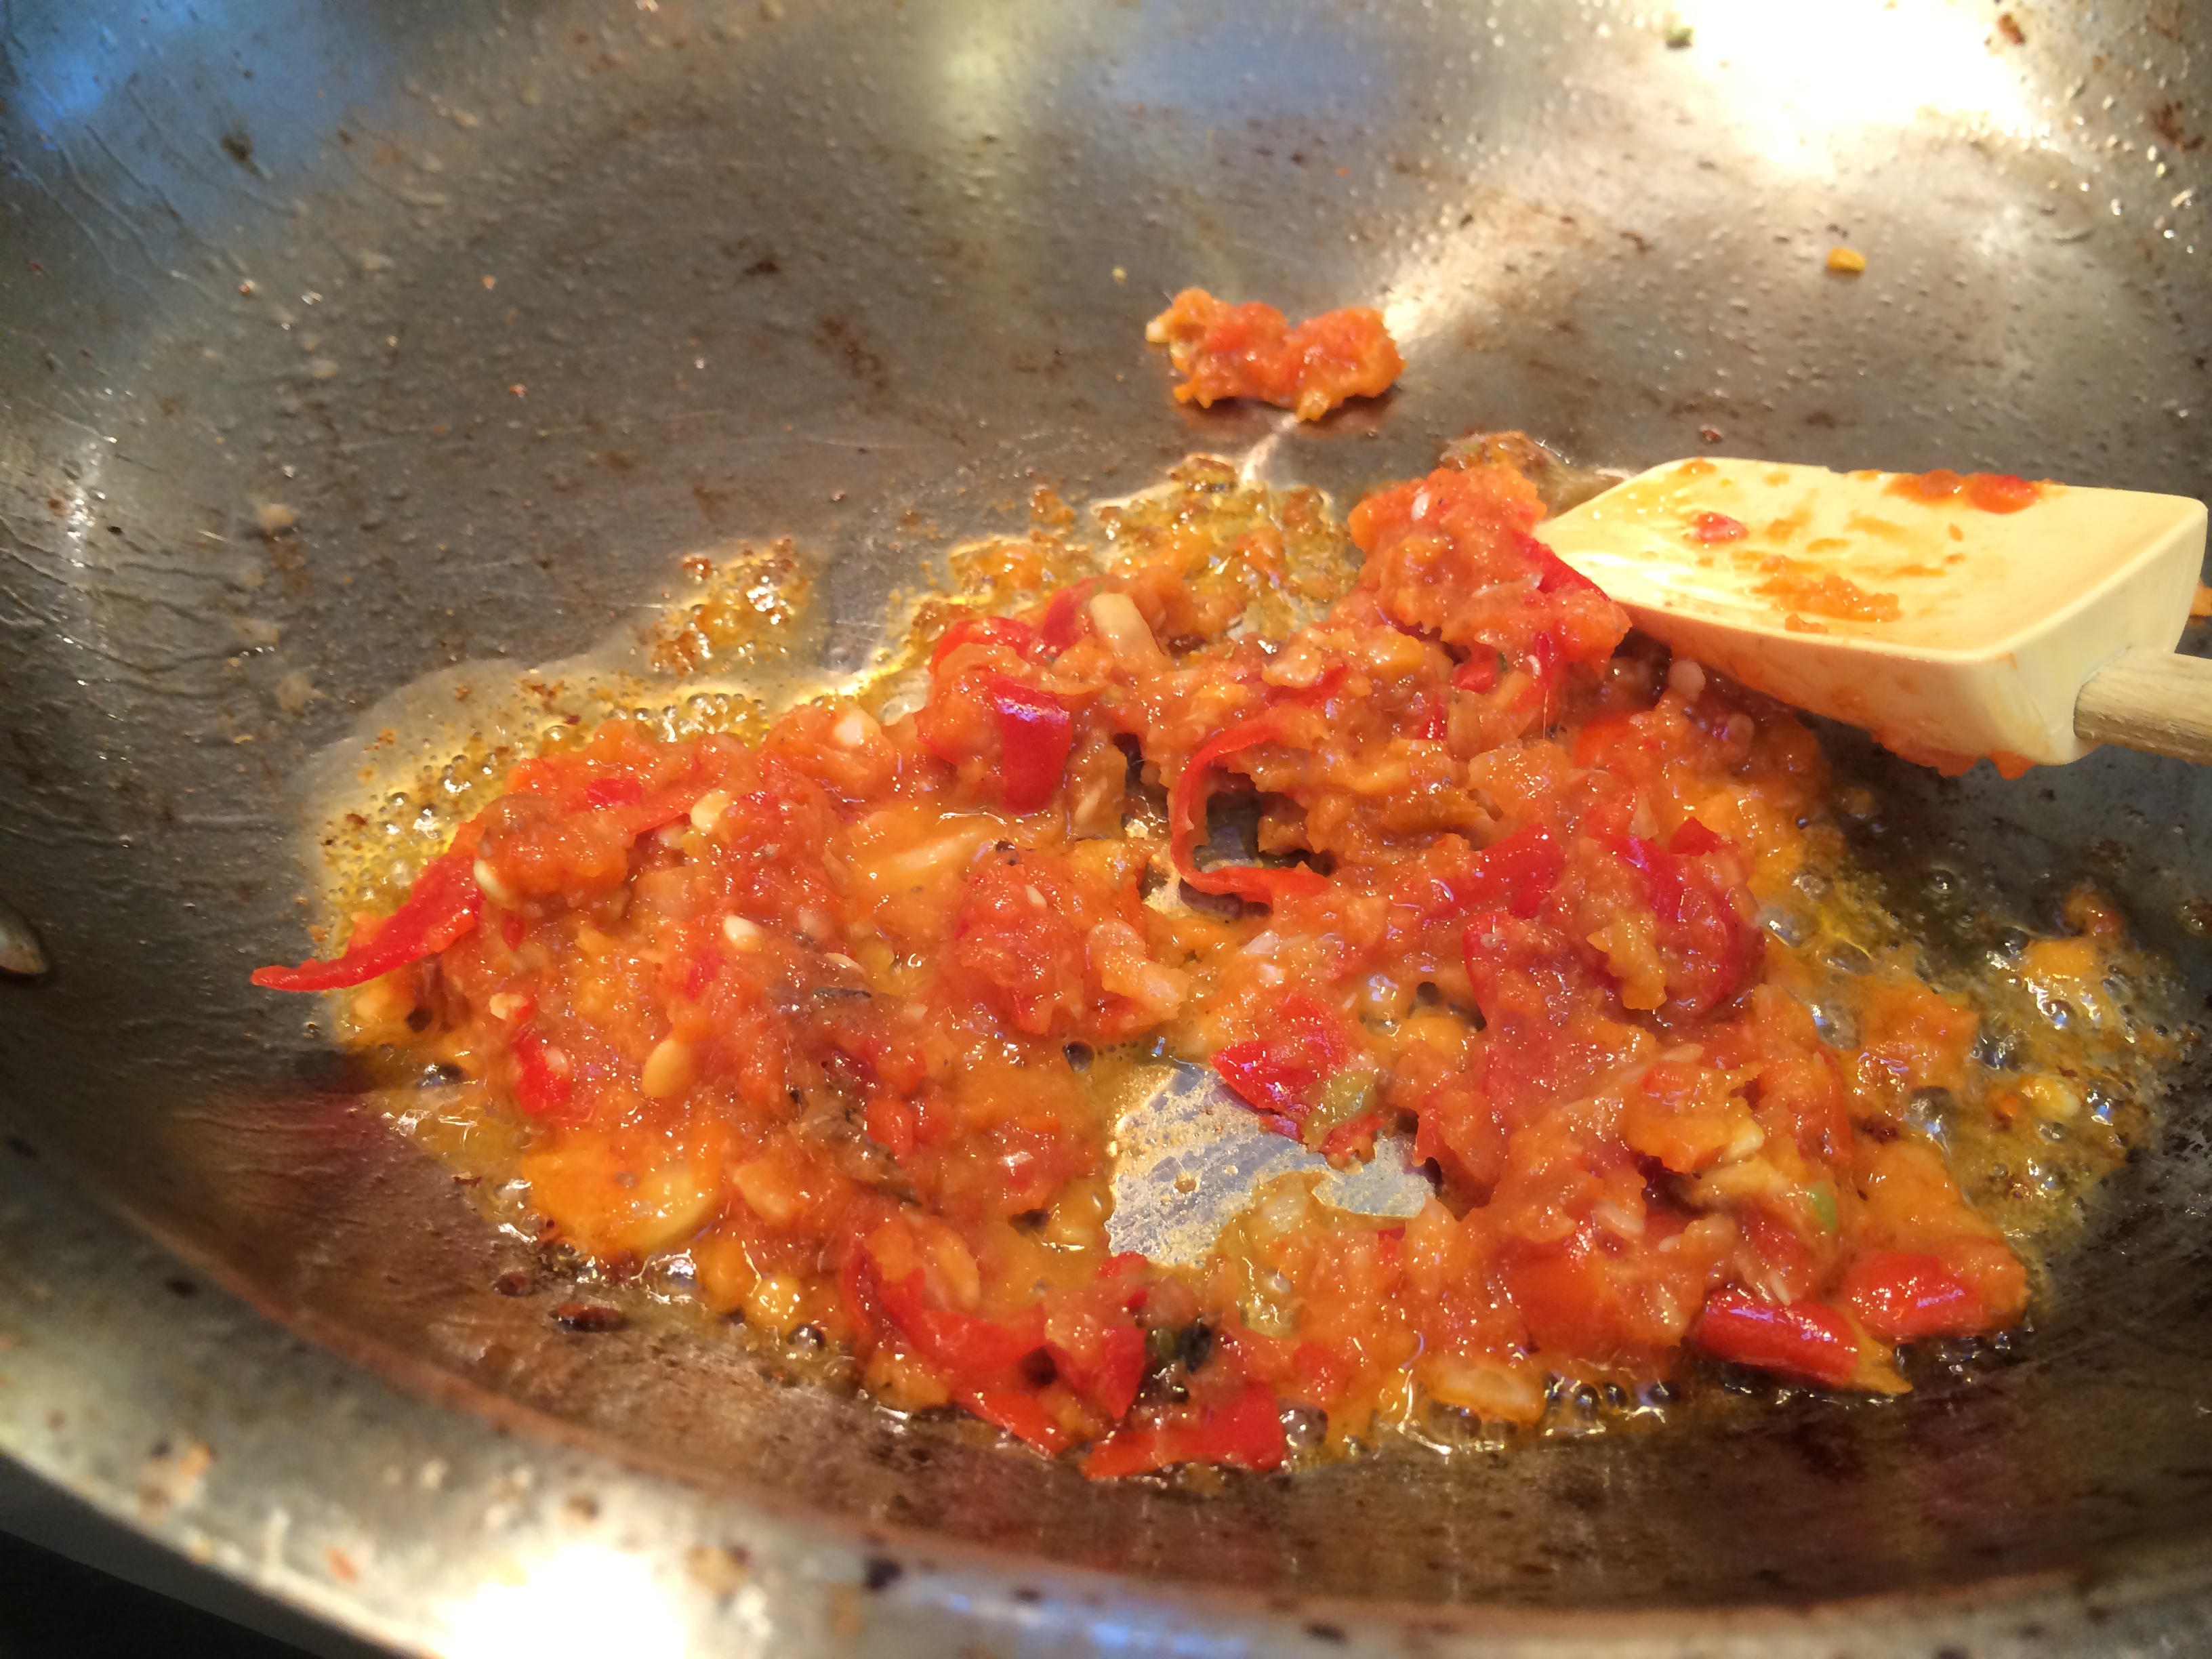
Here is what the soy dressing looks like, as it cooks:

IMG_5842

Frying ginger and red chilies

IMG_5849

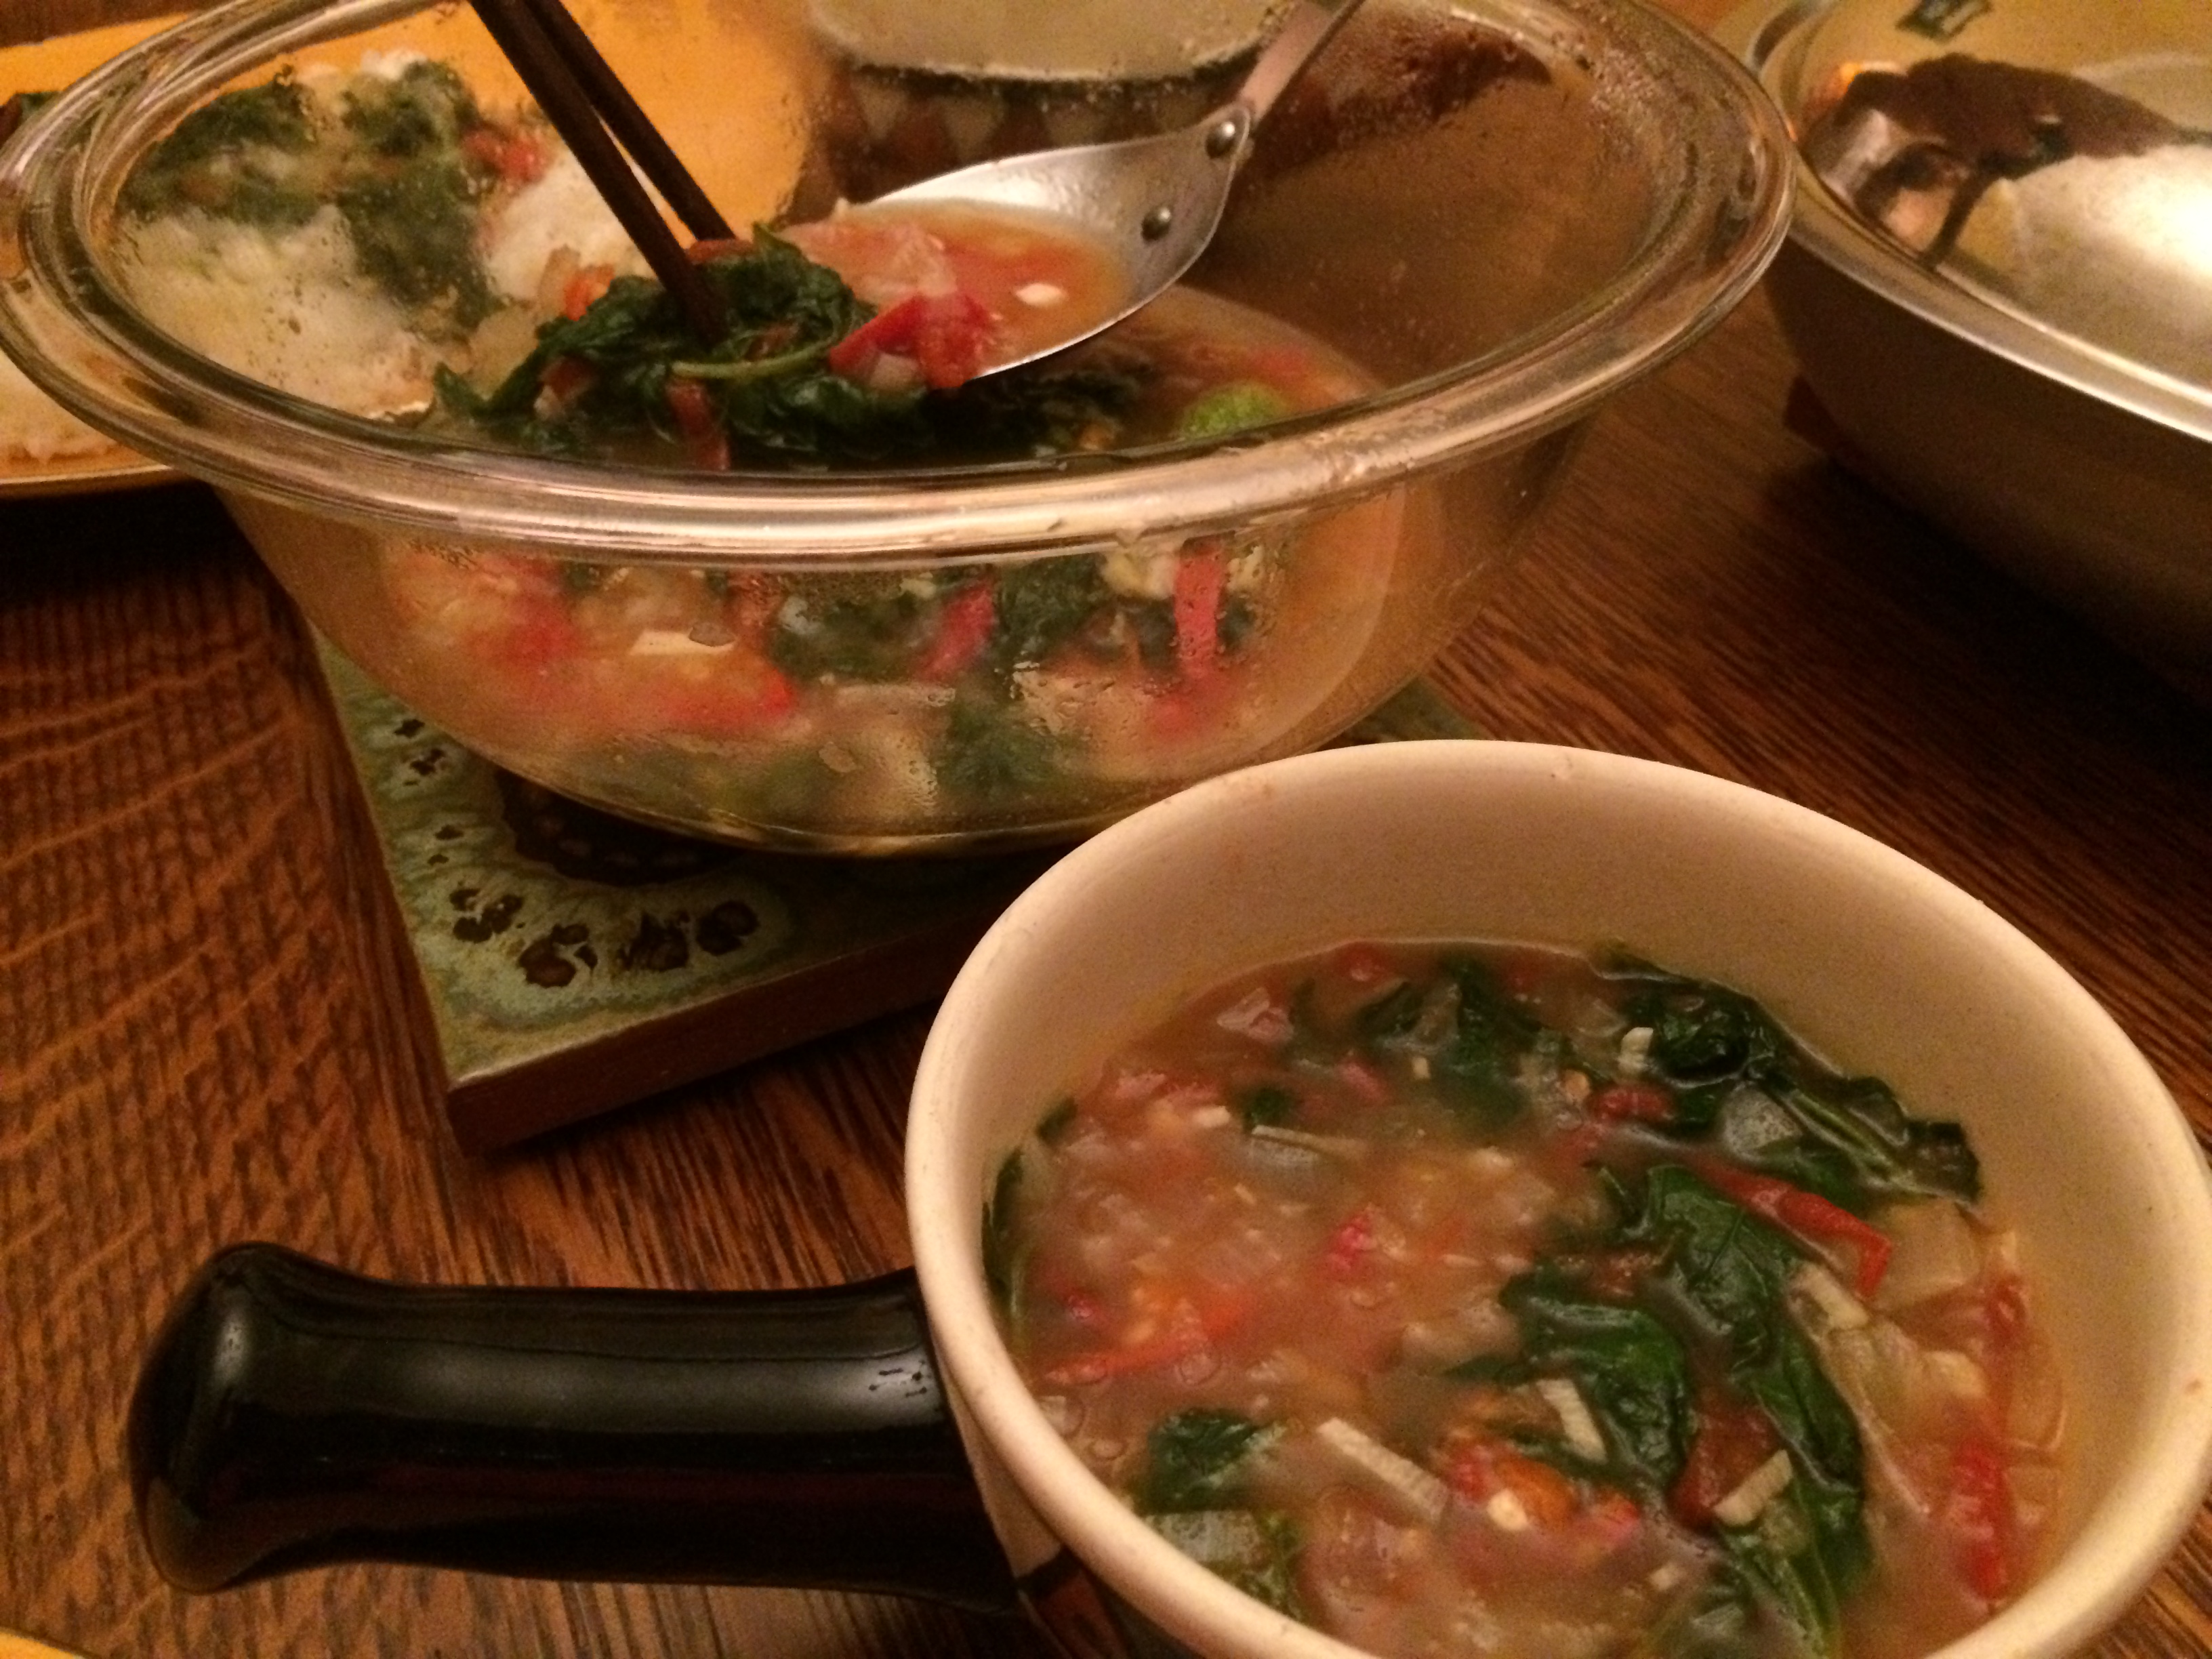
Served with rice and a side of greens

Poached fish with sesame-soy-ginger dressing

Ingredients:
  • 1 lb fish fillet (halibut, cod, snapper, etc.)
  • Half a cup of water
  • Quarter teaspoon salt
  • Dressing 1 (soy-based):
    • 2 tablespoons soy sauce
    • 2 tablespoons white wine
    • 1 teaspoon sugar
    • white part of about 3 scallions, sliced thin
    • 2 small red chilies, minced
    • Half inch piece of ginger, minced
  • Dressing 2 (sesame oil based):
    • 1 tablespoon roasted sesame oil or plain sesame oil
    • 2-3 red chilies, whole
    • Half inch piece of ginger, cut into long sticks
  • Garnish:
    • Green part of about 3 scallions, sliced thin
Method:

Heat water with salt added to about 160ºF (a simmer, less than a boil). Place the fish in it and poach for about ten minutes.

Meanwhile prepare the soy dressing. In a small pot, combine the ingredients and bring to a boil. Lower to a simmer and let it reduce by about half.

Once the fish is done, place it in the serving platter. Pour the soy dressing over to cover it everywhere.

Heat the sesame oil until it shimmers. Fry the ginger sticks and red chilies until the chilies darken and the ginger sticks shrivel a bit. Pour the hot sesame oil over the fish evenly all over it. Cover with the green scallion garnish. Serve with rice on the side.

(Click here to find me on Facebook and here on Twitter.)

A global stew from my San Francisco kitchen

Global Stew

Global Stew

Once you learn a new method of cooking it can lead to a bit of an explosion of ideas. The new method in this case is the one I wrote about in this post about red kidney beans—it is about cooking beans in a slow cooker or low oven, over six hours. It has all the virtues of crockpot cooking, which is that you set it and forget it; and requires no prep such as soaking, sautéing, except stuffing all ingredients into the pot. Even tough beans that one normally soaks overnight and then pressure-cooks succumb to the slow but steady blandishments of the oven.

Well, there is no reason, obviously, to limit oneself to that one recipe. Here I experimented with a set of ingredients drawn from a variety of regions of the world, that all came together in my Bay Area kitchen.

Global stew with polanta

Global stew with polanta

There is the black-eyed pea, ancestrally African, which itself is a bit of a global traveler, having found its way to Northern India as an occasional character actor, and to the New World on slave ships.

There is the cranberry, that Native Americans first explored the use of and now is a staple of the American Thanksgiving feast.

Pine nuts are a staple of Italian cooking, but the pine is a pretty widespread tree, so their use is known all over the globe. In the Americas, there are treaties that protect the right of Native American tribes to harvest them. In China, a certain species of pine nut has been known to ‘disappear’ your taste (temporarily) and leave a bitter metallic one in its place.

The use of the bay leaf I learned at my mother’s knee; while the use of tomato paste came from my mother-in-law. Butternut squash is my husband’s favorite, and happens to be one of those vegetables that were made by humans by crossing two of nature’s somewhat problematic products—in this case, the gangly gooseneck squash and the ginormous Hubbard.

Spinach on the other hand is just spinach.

On we go. Notice how short the ‘method’ part of the recipe is.

Global Stew

This can be eaten as a hearty soup, or a stew, with some soft rolls or crusty bread on the side. We enjoyed it with polenta. It would also make a very nice all-in-one side for a steak or chicken for a paleo type of meal. None of the beans or the squash turn completely into mush, which is nice; but they are completely tender and cooked through.

butternut squash layer

butternut squash layer

More ingredients

More ingredients

All ingredients layered on

All ingredients layered on

After six hours in the oven

After six hours in the oven

Yum....

Stirred. Yum….

Global stew

Ingredients:
  • 1/2 cup black-eyed peas (dried beans)
  • 1/2 butternut squash, peeled and cubed
  • 4 cups spinach
  • 1/2 onion, diced small
  • 3 cloves garlic, smashed
  • 1/4 cup tomato sauce or 1 tbsp tomato paste (optional)
  • 1/4 cup pinenuts
  • 1/3 cup cranberries
  • 1 bay leaf
  • 1 teaspoon paprika
  • 1.5 teaspoon salt
  • 2 tablespoons olive oil
  • 2 cups water
Method:

Layer all the ingredients (order not important) in a dutch oven with a tight-fitting lid. Put it in an oven heated to 250ºF for six hours. Take it out, give it a gentle stir, and serve.


(Click here to find me on Facebook and here on Twitter.)

The sweet potato’s diamond-shaped leaves

Sweet potato greens stir-fry

Sweet potato greens stir-fry

The next time you would like greens for dinner, look beyond spinach (the old stand-by) but also look beyond kale (the flashy rising star). You may not find these at a big grocery store, but the farmer’s markets and Asian stores are usually packed with leaves of all shapes and sizes bundled together with a trifling rubber band. Among them, here is what I found the other day — sweet potato greens. Sadly, I have never seen these for sale in any of the big stores, even ones that have piles of sweet potatoes all through the year. If one has any kind of relationship with the growers, one could ask vendors of the sweet potato to occasionally bring in some greens too; or if one has a garden one could try growing them. If all else fails, take a trip to lovely San Francisco for the Alemany farmer’s market on Saturday mornings.

Like its more famous root brother, the leaves are packed with nutrition. Each diamond-shaped leaf is about a few inches long, and the stems are green and look like hollow reeds. They take very little cooking. Once wilted, they are pretty much done, and the tender stems can be eaten too. Only the tougher ends (you can feel them resist as you try to snap them, much like one trims asparagus) must be thrown away. Once cooked this way, their taste is extremely unobjectionable; a slight sliminess is about the only thing that sets it apart.

You know what that means — it is all about the seasoning! A simple sauté will wilt them nicely. We needed a side for an Asian meal that centered around rice. Here is what I did.

Sweet potato greens with ginger, garlic and fish sauce

The ingredients here are so few that the details matter. The ginger and garlic are minced fine and cooked in oil in a slow sizzle. Fish sauce adds a wonderful aroma so I would suggest you don’t substitute with soy (though in pinch, I have).  The leaves and tender stems are cut in two-inch segments, which is large enough to have body and small enough to be bite-sized. And the sesame oil topping is just the thing.

A tip! There are other mild-flavored greens that would do just as well: pea shoots and chard come to mind. This goes very well with some plain white jasmine rice.

Diamond-shaped leaves of sweet potato

Diamond-shaped leaves of sweet potato

Trimmed

Trimmed

Ginger and garlic and greens

Ginger and garlic and greens

Gently saute

Gently saute

Sizzling

Sizzling

Piling greens in

Piling greens in

Wilted

Wilted

Sweet potato greens stir-fry

Ingredients:
  • 1 bunch sweet potato vines
  • 1 tablespoon oil
  • 3-4 cloves garlic, minced
  • 1 inch piece of ginger root, minced
  • Quarter teaspoon salt
  • 1 tablespoon fish sauce
  • Few squirts of roasted sesame oil (optional)
  • 1 teaspoon sugar (optional)
  • Red chili flakes or sesame seeds for garnish (optional)
Method:

Wash and trim the greens. Only remove the tough stems; this can be discovered by snapping them at the point where the tender stem ends and the tough stem begins, much like snapping asparagus spears. Mince ginger and garlic.

Heat the oil in a wide, thick-bottomed pan. When it shimmers, put the ginger and garlic in. Turn the heat to medium-low and allow them to cook slowly. This will ensure that all the aroma is released, but also that they do not brown. When they start to seem shriveled, pile in the leaves along with whatever drops of water cling to them.

Turning carefully with tongs, allow all the greens to be covered with oil. This will take a few minutes; as soon as the bottom ones wilt, turn it over, and shortly all the greens will have wilted. Add the small amount of salt and the fish sauce. If you are adding sugar, now is the time.

This barely needs covering in order to cook; once all the greens have wilted, remove to the serving dish. There will be some flavorful liquid left over, carefully pour that over the greens. Add a few squirts of sesame oil, and the cracked pepper and sesame seeds.


(Click here to find me on Facebook and here on Twitter.)

Man meets bean: falafel results

Falafel

Falafel with chili paste and tzatziki

Let’s say you are a human being who has encountered a bean for the first time. I’m speaking of a bean with a hard shell, the kind that looks more like a pretty rock than anything to do with food. Your mission — find a way to turn it into food. What do you do?

You could boil it, of course. Boil it and boil it and boil it. This will work, and you will get a nice mushy meal.

Or you could keep that bean dry, and grind it into a fine powder. Then, you can use the resulting flour in all kinds of batters and doughs. This works too.

What else? Well, some creative people in the middle east decided on a third route. Soak it overnight, and when it is plumped up, grind it, and fry the resulting mash. This time it will be more like a dough that clumps together, rather than a fine powder, because the beans have drawn in all that water and gotten rather plump and soft with it. The only cooking the notoriously hard-to-cook bean will get is at the end, frying in a pan. Is that foolhardy? No, the soaking did most of the work.

"Il Falafel di Ramallah" by OneArmedMan - Own work. Licensed under Public Domain via Wikimedia Commons

“Il Falafel di Ramallah” by OneArmedMan – Own work. Licensed under Public Domain via Wikimedia Commons

Well, well, falafel! That is what a falafel is, and the bean in question is the garbanzo bean (a.k.a. chickpea).

(Cooks in India discovered this trick also, but with a different bean: vadas are made by first soaking the split urad bean overnight and then wet-grinding it after).

Falafel, though, is made out of the whole garbanzo bean, soaked overnight. Parsley, onion and garlic are ground up along with the garbanzo for flavor. The resulting mash is bound with flour, or left as is. Balls made of this mash can be deep-fried or, as I did, patties formed in one’s palms can be shallow-fried. The result — an outside surface that is crunchy and satisfying, while the insides are still pliable and savory to the hilt.

Falafel: street food and mezze

Now you will agree that this is a pretty neat invention. Nifty, even. Tucked inside a pita bread, drenched with chili pastes and salads and strong stuff like onion, it makes a convenient item to eat while holding in one’s hand without ceremony. This is why falafel is known as the king of street food all over the middle east.

San Francisco has its own share of immigrants from all over the world, and of course we have our share of falafel food trucks and hole-in-the-wall restaurants. Some are famous for their hot sauces, others for their pita, and yet others made their name for the pickled or fried vegetables that they tucked into the pita pocket.

Kan Zaman restaurant in SF (source: http://Pakibarbie.blogspot.com)

Erstwhile Kan Zaman restaurant in SF (source: http://Pakibarbie.blogspot.com)

Some serve falafel not as a sandwich or a wrap, but as one of a platter full of appetizers known as mezze. (This word, by the way, comes from the Persian mazze, the root of the Hindi mazza, meaning ‘fun’). One particular restaurant that ran for years near Haight Ashbury — and one that I sorely miss — served their falafel this way, on a giant brass platter with embossed designs, while you lounged on floor cushions and smoked flavored hookahs, and watched a raucous belly dance. Much as I love falafel, that was not the highlight of this particular establishment — it had so many others.

Soaking garbanzo beans and other ingredients

Soaking garbanzo beans and other ingredients

Everything in food processor

Everything in food processor

Ground up mash

Ground up mash

Add some spices

Add some spices

Mixture

Mixture

Pan-fry

Pan-fry

Flipped

Flipped

Stacked up

Stacked up

Served on pita

Served on pita

Falafel

  • Servings: About 10 patties
  • Print
Ingredients:
  • 1 cup dry garbanzo beans (a.k.a. kabuli channa, a.k.a chickpeas), soaked for 8-10 hours
  • 1/2 a medium onion
  • 3 fat cloves garlic
  • 1/2 cup loosely packed parley leaves
  • 1 teaspoon salt
  • 1/2 teaspoon paprika or red chili powder (optional)
  • 1/2 teaspoon roasted cumin powder (optional)
  • Oil for pan-frying
  • 1-2 tablespoons all-purpose flour (optional)
Method:

Soak the beans overnight in four cups of water. The next day, they will have swelled enough to fill up almost the entire container. Drain and rinse.

Roughly chop the onion and garlic. Rinse, dry, and take tough stems out of the parsley. Put the beans and vegetables into a food processor, but make sure that everything is well-dried — one does not want extra liquid in the mash. Add salt and the optional spices. I needed two batches of processing.

The resulting mash should be able to clump together, and yet, not be dripping with liquid. At this point, you can add a tablespoon or two of dry flour if you like to bind it. I skipped this step.

When you are ready to fry, get a wide, thick-bottomed pan, preferably non-stick, nicely hot. Add oil generously. Spread oil on your hands and form the patties within your palms. You will need about a golf-ball sized amount of mash for one patty.

Lay it flat on the pan. It will sizzle. Press it flat with a spatula. When the underside seems browned (this will take about five minutes on medium-high heat), put a few drops of additional oil on the top (uncooked) surface of each and flip each gently. Another five minutes and you are done.

Alternatively, you can form balls and deep-fry them. You should make doubly sure that the mash is binding well with the added flour if this is your approach.

Have as a side or in a pita with tabouli (recipe forthcoming), chili pastes, and tzatziki (recipe forthcoming)


(Click here to find me on Facebook and here on Twitter.)

vvlpbutton1300px

I submitted this recipe to the Virtual Vegan Linky Potluck!

Is Khichdi the Risotto of India?

Khichdi

Khichdi

Good morning everyone! I have been away from my blog home for a long time, but I have certainly not neglected my kitchen. Meanwhile, global warming has given us the warmest January on record, and our San Francisco February, which ought to be dreary and cold, has instead been sparkling with sunshine.

Still, it is time for some winter cooking, no? Let’s talk about khichdi.

What is khichdi? Simply put, it is comfort food, rice cooked with a dal or two. One of my go-to books on cooking, World Vegetarian by Madhur Jaffrey, describes it as the risotto of India. When I first read this, I had not heard of nor eaten any Italian food other than spaghetti and pizza. So at the time my thought was — aha! so risotto is the khichdi of Italy!

But is it? I suppose, in a vague, cross-cultural kind of way. But really, there are differences.

With risotto, the starchification of the rice is so much fetishized that it impacts many choices. The choice of the grain — Italians use a plump starchy variety, that will nevertheless hold on to a firm core. Khichdi on the other hand, can be made with the ‘normal’ medium or long grained rice that you use for other cooking. The cooking technique — risotto is stirred and stirred with nominal additions of water until the starch is drawn out the the rice. The result is something like the Asian congee, or a porridge, but with more definition. While khichdi — starchy though it may be, the effect is produced just by the addition of more or less water.

More importantly, the additions. Risotto can have vegetables, but also seafood and sausages and other meats. While khichdi must, must, must…simply must! have dals cooked along with the rice. Otherwise it is not a khichdi. Since dals take longer to cook than rice, you are already looking at a somewhat gloopier texture, rather than the ideal of each grain of rice being separate. Vegetables are optional. Meats are never used. Carnivores, look away, khichdi is not for you. Though there is the bastardized British version called kedgeree, where, I hear, fish such as kippers are often added.

The accompaniments. With risotto, it seems, one can never have too much parmesan or cheese of one sort or another. For khichdi however, plain yogurt is utterly appropriate. And ghee is the cooking medium of choice.

Split green mung khichdi

There are probably as many versions of khichdi as there are families in India. In my family, this khichdi was eaten every Monday night, along with this dish. It uses a handful of split green mung cooked along with the rice. The texture is meant to be a little wetter and more gloppy than plain white rice, but don’t go all the way to porridgy.

Now just cooking the rice and dal along with some ghee and salt will give you a good dish. But here I have fancied it up a tiny bit with cashews and fried onions.

Rice and split mung measure

Rice and split mung measure

Whole black pepper and cumin

Whole black pepper and cumin

Washed and rinsed

Washed and rinsed

Black pepper floating to the top

Black pepper floating to the top

Frying onions and cashews

Frying onions and cashews

Cooked

Cooked

Topped

Topped

Khichdi with split green mung

Ingredients:
  • 2/3 cups medium- or long-grain rice
  • 1/3 split green mung
  • 1 tablespoon ghee
  • 1 teaspoon whole cumin seeds
  • 1 teaspoon whole black pepper
  • 3/4 teaspoon salt
  • 2.5 cups water
  • 1/4 medium onion, sliced
  • a tiny fistful raw cashews
Method:

Rinse and drain the rice and split mung together. Put in in a pressure cooker or a nice hefty pot along with two and a half cups water, the salt, the cumin and black pepper. At this point, swish it around so that all the whole black peppers float to the top. This way, it will be easier for you to pick them out after the cooking is done.

Pressure cook for 15 minutes, or, if boiling in a pot, bring to a boil, cover tightly, and simmer for 45 minutes. Uncover and pick out the whole black peppers.

Separately, heat ghee in a small thick-bottomed pan. Fry sliced onions in it until browned; then give the cashews a light browning as well. Mix this in with the rice, but reserve some to add to the top as garnish.

Enjoy it with some plain yogurt on the side and some sharply tasting pickles or chutneys, some kadhi, or this spinach wonder.

Burmese broth with bitter greens

Burmese broth with bitter greens

Burmese broth with bitter greens

Two things that I’m having a lot of fun discovering — one is Burmese cuisine with its fishy umami and floral flavors . The other is the leaves of the bitter melon. I can’t decide which to be more excited about; but when you combine them? An explosion of flavors!

So let me tell you what I know about both. I have always loved the bitter melon (karela). This is a cousin of your garden-variety cucumbers and cantaloupes, but its seeds are large and hard, its skin is bumpy, and its flesh is scanty and bitter. Certainly for special tastes; but once your tongue has learned to love it, you really love it.

Bitter melon grrens

Bitter melon greens

But then, I recently discovered that its leaves are edible too. One finds them at the farmer’s markets in San Francisco that serve an ethnic clientele. They are sold in giant bunches for a dollar. I leave with my wallet almost intact, and my shopping bag full to bursting with greens, the tendrils spilling over the top.

One of the most enchanting things about buying a bunch of bitter melon greens is the baby gourds one finds attached to some shoots. Normally the gourds are at least six inches long, but with every purchase you also get some baby gourds, some no bigger than your finger tip. These can be thrown into the pot along with the greens, they do not need much cooking.

A baby bitter melon compared to an onion

A baby bitter melon (karela) compared to an onion

Those of you who want to like dandelion leaves, but find that they are just a little too bitter to enjoy, might love the bitter melon leaves. They only have to be cooked long enough to wilt, and have a complex, grassy bitter-tinged flavor.

Now about Burmese cuisine. I admit I don’t know much about it but I’m starting to learn. I recently got a Burmese recipe book; but rather than make any recipe from it, I tried to understand the techniques and flavors and tried to imbue this particular broth with the Burmese gestalt. At the risk of causing derisive laughter among any Burmese readers, I made what I like to think of as a Burmese broth. Unlike Indian food, it only gently cooks onions; it uses lemongrass infusion; and it uses fish sauce instead of the more Chinese soy.

We loved it with some white rice. please let me know in comments if you did too.

Soften vegetables

Soften vegetables

Vegetables in pot

Vegetables in pot

Softened

Softened

Lemongrass

Lemongrass

Add greens

Add greens

Serve

Serve

Burmese broth with bitter melon greens

Ingredients:
  • Leaves and baby gourds from 1 bunch of bitter melon greens (about 4 cups)
  • 4 big cloves garlic finely minced
  • 2 medium tomatoes sliced
  • 1 chili sliced
  • half onion diced or sliced
  • 1 cleaned stalk of lemongrass (optional)
  • 2 tbsp oil
  • 1.5 cups chicken broth
  • 1 tablespoon fish sauce
  • salt to taste
Method:

Put oil, onions, tomatoes, garlic and chili all together in a thick-bottomed pot and cook gently until softened (about ten minutes). The tomatoes should have liquefied and somewhat dried by now, if not cook a few minutes longer. Now add the broth, the fish sauce, and the lemongrass. Bring to a boil and simmer for ten minutes or so. Add the greens, and allow them to wilt. Turn off the heat.

Serve in soup bowls, with soup spoons and chopsticks for lifting the greens, and some white rice on the side.

(Click here to find me on Facebook and here on Twitter.)

Roasting corn the sticky way

Roasting corn

Roasting corn

There was a time when corn was a delicious starchy snack. You had to cook it to enjoy it, and sometimes for quite long. But when you did, the kernels had this indescribable corny flavor that you could enjoy with butter, or chilies, or lime, or a number of other ways.

Wait. Rewind. Start over.

There was a time when corn was nothing but a big grass called teosinte, and the cob was basically a stick, and there were maybe five kernels on it. And they were covered with a hard shell. This corn was, shall we say, inedible.

So various talented ancient breeders who saw the possibilities in corn bred it to grow bigger.  And bigger. And made the kernels edible. Then, tasty. Richly colored with purple and red hues, the cobs would make as good a decoration as the kernels would a nutritious tortilla, if you ground them up and slaked it with lime.

Fine. Then came people (closer to modern times) who didn’t care much for these splashy colors and wanted food to be pure white (picky eaters) possibly to better match their bone china. So they bred corn white.

Great. Unknowingly, they also said goodbye to the wonderful nutrients carried in the purple and red hues. Then they realized that if you pick corn and eat it right away it is sweet. If you wait even a few hours, it is starchy. So they got into a sort of fever to eat corn as soon as it came off the farm like one, two, three, ready…pick…eat!

Then came test-tube-wielding lab-coated people who found a teeny-tiny-leetle thing you could change in corn to make it stay sweet longer, so they did. This corn was not really a very good organism, since it could not reproduce on its own. But it was a very desirable crop.

Sweet corn. A sensation. The lab-coats had nowhere left to go but down. They made corn sweeter. And super-sweeter. Closer and closer to candy. Until there wasn’t much difference left between this and this.

Corn Candy corn

Stop! Just stop already. We recently bought corn at the grocery store and ate it eagerly for dinner…such a disappointment. Sweet it was, very much so; but none of that wonderful corn flavor that comes with the starch. We felt like we had eaten dessert early. Where does one go if one misses the savory flavor of corn that goes with a bit of chili, a bit of lime; perhaps some charring? Where does one go for corn of such arrested development?

To the farmer’s market!

Sticky corn

The other day at the farmer’s market I found mounds of corn that went by the name of sticky corn. Some were purple, some not. They were quite a bit smaller than the regular cobs. What they exactly were was a mystery to me, but judging from the people crowding around the piles I guessed that sticky corn is an Asian specialty.

It turns out that way back in the 1500’s almost right after the Portuguese found corn in America, they brought it to China, where it became quite popular. Now once in a while corn will develop waxy grains. Normally this is a defect and the waxy grains don’t bode well for corn itself. But the Chinese, already used to sticky rice, treasured and tended to the defective sticky corn. It became a delicacy.

Breeding away in backwaters of China, sticky corn escaped this drive to turn everything sweet and easy.

From the 1500’s to present-day farmer’s markets in the Bay Area where certain Indian immigrants (me) are sick and tired of candy-sweet corn and are craving the roasted starchy flavor. Of course I swooped in and grabbed some.

Roasted corn

Now I was trying to recreate a specific thing. All over Mumbai there are food stalls that serve but one dish — roasted corn. There are coals and there is fire, and a simple red chili and salt combination with some lime. It turned out that sticky corn needed pre-cooking to achieve this dish but it turned out delicious.

Sticky corn with pencil for scale

Sticky corn with pencil for scale

Sticky corn in pot for boiling

Sticky corn in pot for boiling

Boiled

Boiled

The kernels when boiled

The kernels when boiled

Roasting

Roasting

Served

Served

Roasted sticky corn

  • Servings: 2 cobs per person
  • Print

Ingredients:
  • Sticky corn in their ears
  • Red chili powder
  • Salt
  • Lime or lemon
  • Butter or ghee (optional)
Method:

Pressure cook the ears of corn for 15 minutes with some salt added to the water. If you don’t have a pressure cooker you can boil them for 45 minutes instead.

Take the leaves off the cobs. Hold them with tongs and roast them over an open flame, turning slowly, for about seven minutes each until evenly charred. If you like, rub some ghee or butter over. Serve with quarters of lime and a small bowl with a mix of red chili and salt, so that by dipping the lime in the powdered mix, and rubbing the lime over the entire cob, all the flavorings can be added at once.

Why these beans might fly off at any moment

Winged beans sauteed with red-chili garlic paste

Winged beans sauteed with red-chili garlic paste

The other day, walking through the farmer’s market, I had one of those moments that stops you short in your tracks. I saw an odd sight. I raised a trembling finger and exclaimed — with some rich feeling, I might add — ‘what on earth is that?’

I saw bunches of long frilly green pods sitting next to a whole pile of long frilly green pods. I walked over to the stall where they had already caused a minor stir.

Now The Odd Pantry is no stranger to odd vegetables. It has covered, with delight, the scruffy taro and the anatomical fiddleheads. This one though was new. Completely. At first glance I would have guessed it was a type of seaweed. I could just picture it in great rippling ribbons underwater.

But upon asking the lady of the stall, they turned out to be long beans — yes, legume pods that grow on vines — that had four rows of frills all along the length. Winged beans.

The winged bean

The winged bean

I asked the lady how one would go about eating them.

‘Well,’ she said. Long pause. She looked at me, judging how far to go. ‘Salad, stir-fry.’

Hm. Tight-lipped. The bird was caged but wouldn’t sing. I pressed her for more information. Placing my hand tellingly on my purse, I grilled her for the goods. ‘Out with it,’ I said, noting that she was starting to wilt.

Then it all came tumbling out. She broke off a piece for me to try. Hmm — tastes like — a vegetable. Maybe a fresh green bean of the French sort. ‘Make a paste of garlic and red chili,’ the lady said. ‘I’m Pilipino and that is what we do.’

A man walked up with a cloth shopping bag. ‘You Indian?’ he said to me, waggling his eyebrows. Yes, indeed, I am.

‘You know saag?’ he continues. Eyebrows doing a proper jig, now.

‘Intimately,’ I reply.

‘You cook it like saag!’ he says like a punchline, rifling through the bunch of winged beans.

Hm. I think I’ll stick with what the lady said.

Winged beans (Psophocarpus tetragonolobus)

This has become a habit. The Alemany Farmer’s Market will introduce me to a brand new vegetable that then turns out to be a complete miracle plant, so much so that you would think the Department of Marketing this vegetable is making stuff up. What else can you think about a plant that offers so much?

  • Every part of it can be eaten. From a New York Times article: ‘Theodore Hymowitz, an agronomist at the University of Illinois who is a member of the Academy’s panel on the winged bean, said, ”it’s like an ice cream cone – you eat the whole thing.”
  • Excellent source of vitamins, minerals, protein, calories.
  • It can grow in nutrient-poor soils
  • The seeds can make a coffee substitute
  • The leaves can be a tobacco substitute
  • Can produce a milk like soymilk
  • The milk from the beans can be fermented into tempeh
  • Mushrooms can be grown on the dried pods
  • Can be boiled, roasted, stewed, stir-fried, eaten raw, or in soups
  • Can be grown as animal fodder, and used as a cheap source of protein for fish farmed for food

There is also an enduring mystery about winged beans — nobody has found the wild form of it. Given its wonderful qualities it isn’t surprising to find it cultivated in any resource-poor traditional culture that can grow it. It is grown for its roots in Burma, in South East Asia for its pods, in great variety in New Guinea (where the winged bean has developed a fondness for the mountains).

But the wild form of it has never been found. Where is it really from? Some guess Africa because most of its relatives come from there. Some guess New Guinea because it just seems so at home there. Perhaps the wild form has become extinct. Who knows? Entire careers in botany could be made or broken on this one fact. So if you see a wild winged bean growing somewhere out on your travels, call someone!

Winged bean roots for sale in Burma. (source: Wikimedia Commons user Wagaung own work)

Winged bean roots for sale in Burma. (source: Wikimedia Commons user Wagaung own work)

Winged bean stir-fry

I figured I would stir-fry the winged bean pods using some South East Asian ingredients. Shrimp paste is often used in these cuisines, and I didn’t possess any, so I used anchovies to replace that missing umami flavor. Also, fish sauce. This is a light salty liquid that is extracted from the fermentation of fish. It is a great replacement for soy sauce that can instantly take a dish from tasting Chinese to tasting more tropical, reminiscent of islands and bays and inlets and other such watery waterworlds.

Garlic and red chilies

Garlic and red chilies

Pound it

Pound it

Anchovies too

Anchovies too

Paste

Paste

Slice the winged beans

Slice the winged beans

Saute

Saute

Sauteed

Sauteed

Fry paste

Fry paste

Fried paste

Fried paste

Enter the beans and fish sauce

Enter the beans and fish sauce

Winged bean stir-fry

Ingredients:
  • 3-4 cloves garlic
  • 1-4 fresh red chilies, or according to taste (use fresh green if you can’t find fresh red, I got mine from my garden)
  • a few anchovies (packed in oil)
  • 1 pound winged bean pods (green beans or asparagus would make a good substitute)
  • 1 tablespoon fish sauce
  • 1 – 2 tablespoons oil (I used sesame oil)
Method:

Make a paste of the garlic, fresh chilies and anchovies in a mortar and pestle. Takes about 7 minutes, not too bad. Wash, trim and slice the winged beans lengthwise. If you are using green beans or asparagus, just trim them and leave them intact.

Meanwhile heat half the oil in a wide thick-bottomed pan. When it shimmers put in the winged beans. Stir-fry them on high heat for a few minutes until the frills look a little browned. Remove them with a slotted spoon or tongs.

Add the rest of the oil and fry the paste. It will take a few minutes for it to dry out and for the oil to separate. Watch it carefully and use medium heat to make sure it doesn’t burn. Once this is done, put the winged beans back in, add the tablespoon of fish sauce. Stir to coat the beans with the paste and fish sauce, cover for a few minutes to steam before serving.

(Click here to find me on Facebook and here on Twitter.)

Is it a wrap? A donkey? No–it’s a superbaby…burrito!

Made-from-scratch burrito

Made-from-scratch burrito

When I was new to California, Indian friends who had arrived before me told me eagerly about the exciting new cuisines they had sampled around the Bay Area. It became a bit of a parlor game to find the cuisine ‘most like Indian food’ — which meant, in practice, the most highly flavored with spices. People mentioned Thai food and Ethiopian food as contenders. One strong contender that kept coming up was the Mexican burrito.

Of course, I was told about it from an Indian point of view. Imagine this, friends told me, rice and dal wrapped inside a roti! What could be better! The ‘dal’ in question was refried beans and the ‘roti’ was a tortilla. My friends were talking about the Mission Burrito (=’little donkey’), a fat wrap invented in San Francisco from Mexican ingredients, a cheap and healthful all-in-one meal.

The Mission Burrito is meant to be customized. You stand at the counter while your food server moves through an assembly line with a tortilla laid flat in front of her. You can choose or decline each ingredient. Rice is in. You choose your meat, or none. You choose your beans. I quickly learned that I preferred black beans to refried or whole pinto beans. Shredded iceberg lettuce and cheese are usually turned down by me, but are a yes for most.

Fresno chilies growing in my yard

Fresno chilies growing in my yard

Then, if you didn’t forget to use the keyword ‘super’ you get the big payoff. The supremacy of the super burrito lies in having all kinds of blandishments added to it — salsa, guacamole, sour cream, hot sauces, heaps of onion and cilantro. For a recent immigrant from India (me, then) — the word ‘super’ meant ‘chutneys’. Fantastic. Then the tortilla is folded into a roll, tucked in at each end, and wrapped in double layers of foil. It can be eaten on the go, with no forks, plates, even napkins around.

People know Silicon Valley for its technical innovations, but its burrito innovations are not far behind. Some places are famous for offering beef brain and beef tongue in the choice of meats. Some offer vegetables grilled on the spot. Many have adopted whole-wheat, spinach or tomato tortillas. One of my favorite taquerías offers cooked cactus (nopales) upon request. A ‘naked’ burrito is served in a bowl, without a tortilla wrapped around it. A ‘baby’ burrito is a smaller sized tortilla, suitable for lunch for a smaller-sized person.

But here’s the other thing about the Bay Area…we must make this at home, from scratch! So here we go.
IMG_3051

Whole-wheat vegan superbaby burrito

For the tortilla I just made an Indian-style whole-wheat roti/chapati that added a nice wheaty complexity to each bite. They were smaller than the regular tortilla size, making this a ‘baby’ burrito. I bought dry black beans and soaked them overnight, then pressure-cooked them for 15 minutes to have the most luscious, earthy, non-metallic tasting black beans ever. The rice was cooked using the liquid drained from the tomatoes. The hot sauce came from this recipe for Mexican hot sauce. For the guacamole I used a nice large Californian Hass avocado. Cilantro and Fresno chilies from my garden. A mix of green zebra and early-girl tomatoes for the salsa. I made it vegan but my husband added some cheddar cheese. You could add sour cream or thick homemade yogurt, whisked.

Yes, it certainly had some Indian flavors….

Black beans soaking

Black beans soaking

Black beans cooked

Black beans cooked

Black beans

Ingredients:
  • 1/4 dry black beans
  • 1/4 teaspoon salt or to taste
Method:

Soak the black beans over night or for about 6 hours. If you are short on time, soak them in near-boiling water for an hour. Drain and pressure-cook for 15 minutes with 1/2 cup water. Add the salt after it is done cooking.

Tomatoes for salsa fresca

Tomatoes for salsa fresca

Tomatoes draining

Tomatoes draining

Onion, chili, cilantro

Onion, chili, cilantro

Salsa Fresca

Ingredients:
  • 4 small tomatoes or 2 medium
  • 1 tablespoon finely chopped onion
  • 1 tablespoon finely chopped hot green chili
  • 1 tablespoon finely minced cilantro
  • Lime juice from half a lime
  • Salt to taste
Method:

Dice the tomatoes and place them in a strainer with some salt mixed in, and allow to drain for half an hour or so. Collect the drained liquid in a bowl, this will be used later for the rice to add a subtle tomato-ness. Meanwhile finely chopped the onion, chili and cilantro. Once the tomatoes seem to be done draining liquid, mix it in with the onion, chili and cilantro. Add lime juice, mix, taste, and adjust for salt.

Beautiful Hass avocado

Beautiful Hass avocado

Garlic, chili, cilantro

Garlic, chili, cilantro

Guacamole

Ingredients:
  • One large avocado
  • 1 large garlic clove, minced
  • 1 tablespoon cilantro, minced
  • 1 tablespoon minced chili
  • Juice of half a lime
  • Salt to taste
Method:

Finely mince the garlic, add some salt to it and leave it mixed with salt for about 10 minutes. In this much time it will have turned pasty and ‘cooked’ a little. Cube the avocado flesh, mix it all together with lime juice. You can mash the avocado if you like but I like to leave little chunks.

Rice in pot

Rice in pot

Done

Done

Mexican rice

Ingredients:
  • 1/3 cup rice
  • 2/3 cup water including the liquid drained from tomato
  • 1/4 onion, minced
  • 1/2 teaspoon paprika
  • 1/4 teaspoon cumin powder
  • 1/2 tablespoon oil
  • Salt to taste
Method:

Heat the oil in a thick-bottomed pot. When it shimmers put in the minced onion, the cumin and paprika. Let them cook a few minutes on medium heat. Now in goes the rice. Stir to coat with oil. Next put in the water (including tomato liquid) and salt. Cover, bring to a boil, then simmer for 7 minutes. Turn off the flame and let it rest, covered, for a few minutes before opening the lid.

IMG_3054 IMG_3055 IMG_3057IMG_3063

Assembling the burrito

Ingredients:
  • 1 whole-wheat chapati/roti/tortilla
  • Some cheddar cheese, cubed (leave it out if you want it vegan)
  • Some rice
  • Some black beans
  • Some guacamole
  • Some salsa verde
  • Some hot sauce
Method:

I’ve left the amounts vague because you can customize each the way you want to. Layer the ingredients onto the roti laid out flat. Don’t overstuff it if you want a nice roll that you can bind securely. Fold in the two lateral edges to hold the fillings in place, then roll up the entire burrito starting at the bottom. Enjoy.

Found the Vegan Potluck folks who host a wonderful weekly vegan bash! That’s almost poetic. Entering this recipe there. 
(Click here to find me on Facebook and here on Twitter.)

My slimy old pal, stuffed

Stuffed okra

Stuffed

Here is a riddle for all you wonderful folks. Two cousins. One is hairy, one is slimy. I have talked about the hairy one quite a bit recently. The slimy one doesn’t get much love because many people object to its sliminess. Fear not! There are many ways to make it unobjectionable.

Here is the hairy one. And here is the slimy one. Both from the mallow family.
Cousins

OK I have dragged this one out enough. Of course, the hairy one is cotton. But the slimy one is the subject of today’s recipe — okra. The slime is a form of soluble fiber that has many benefits, from slowing absorption of glucose (diabetics take note) to capturing toxic bile and helping with constipation.

Now okra is often not popular. When I mentioned to my husband that okra and cotton were from the same plant family, he said, ‘no wonder okra tastes like cotton’. Funny guy.

But here’s the thing. You can do one of several things. You can use okra in recipes that absolutely thrive on its sliminess and use it to give cohesion to soups and stews. Like gumbo. Or, you can fry and crisp it up. Once you do that, no one would guess at the great gobs of sticky runny goo that normally erupts out of okra pods.

Or, you could do this.

Okra stuffed with spices (Bharela bhindi)

For this dish, the okra pods are left whole. A slit is made along the length of the pod with a paring knife, taking care to leave a pocket, not bust through to the other side. Stuff the pocket full of spices. Fry it. This process seems to dissolve the sliminess as well and makes it a delicious meal with some roti or rice and dal on the side.

While picking okra one has to be careful to pick the very young pods, where the ribs have not turned fibrous and woody (once that happens, there is no going back, and you will not enjoy eating them). A gentle squeeze while selecting them at the market will tell you if the pods are still young. The pods I found at the farmers market are from a variety that has been bred to have minimal ribs, and can be left on the plant longer without risk of turning woody. Nevertheless, I did find one or two that had, and I discarded them.

Pound of okra pods

Pound of okra pods

Whole spices

Whole spices

Roasting spices

Roasting spices

All spices mixed in a bowl

All spices mixed in a bowl

Pocket

Pocket

Stuffing the pocket

Stuffing the pocket

Stuffed and ready to go

Stuffed and ready to go

Frying

Frying

Add onion

Add onion

Done

Done

Stuffed okra/bharela bhindi

Ingredients for the spice mix:
  • 2 teaspoons whole coriander
  • 2 teaspoons whole cumin
  • 1/2 teaspoon whole fenugreek seeds
  • 1/2 teaspoon whole fennel seeds
  • 2 whole red chilies, more if you like
  • 1 teaspoon dry mango powder (aamchur)
  • 1/2 teaspoon turmeric powder
  • 1/4 teaspoon asafetida
  • 1/2 teaspoon red chili (if you want more heat) or paprika (for color and flavor)
  • 1 teaspoon salt
Ingredients for okra
  • 1 pound okra pods
  • 3 tablespoons oil
  • 1/4 onion, sliced (optional)
Method

Roast the whole spices from coriander to red chilies in a thick-bottomed pan, just until an aroma arises. Take it off the heat, wait a few minutes for them to cool and grind in a clean coffee grinder. Now mix in the powdered spices from the dry mango powder to the salt.

Wash and completely dry the okra. Take off the very top, the hat that looks like a beanie where the okra is attached to the stem. Using a sharp paring knife, make a slit along the length of the pod, stopping a little short on both ends, to make a pocket. Fill each okra with the spice mixture. A small spoon is very helpful for this. Then using your fingertips, spread spices nicely inside the pocket.

Once all the okra pods have been stuffed, heat the oil in a wide, thick-bottomed pan. When it shimmers, lay the okra pods flat in a single layer. Let them cook on medium-high heat for 10 to 15 minutes until each side is browned. Once in a while give them a turn with tongs or a spoon. Mostly just leave them be.

When they look pretty much browned, squished and done, throw in the onions. The onions only need to cook for a minute or two, the hot pan will soften them quickly. They do not need to brown. Turn off and cover the pan for a few minutes to allow the steam to finish the job.


(Click here to find me on Facebook and here on Twitter.)