The Sourdough Starter Challenge

IMG_6358

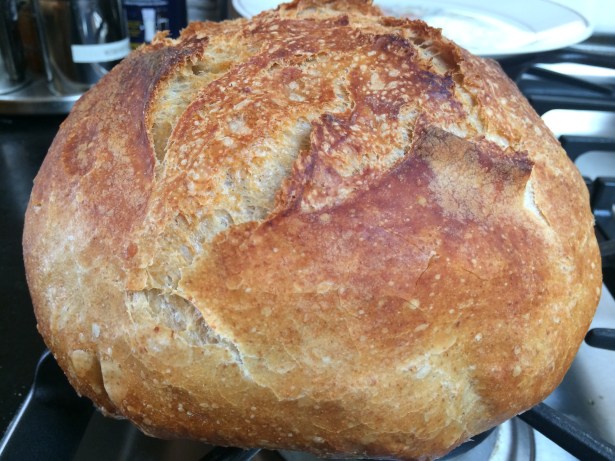
The interwebs are full of advice on how to create sourdough starter at home. The air is teeming with wild yeast (so we hear) and it’s just an issue of coaxing it to come eat your flour-water mixture.

But one can’t see the wild yeast. So that process requires a bit of blind faith and blind ritual; to keep feeding the unseen guests daily, without knowing if they are there, is a bit more…shall we say…devotion than most people can muster.

This is why, I think, a Twitter thread from yeast geneticist (or “local frumpy yeast geneticist” as he calls himself) Shoe Laces 3 (Sudeep) went viral. It is because he taught us how to see the wild yeast. The white powder on the skins of grapes? That’s yeast. The whitish dusting on the skin of raisins, or dried apricots? That’s yeast. So it is a matter of introducing that yeast to some flour+water, and they will eat it. As they eat it, they will breathe out carbon dioxide. That will make your flour+water full of bubbles and it will rise. It’s as simple as that.

And yes, the local frumpy yeast geneticist made it sound simple. The yeast are just like anyone else—they want to eat, dammit. I mean, they aren’t quite monks. Just bring them to food, they will eat.

So here we go—let’s try this out. Each day, I will post the progress of my wild yeast starter. That will include bubbleage, rise, smell, and so forth. If you want to follow along, go grocery shopping, get ready. Each day I will update this post.

Day 0: Grocery shopping

  1. Flour (bread flour or all purpose)
  2. Grapes (the skin will look a bit powdery)
  3. A clean glass jar that can be closed
  4. A wooden chopstick for stirring (a fork will do)
  5. A small spatula

Day 1: Create the mixture

8 pm

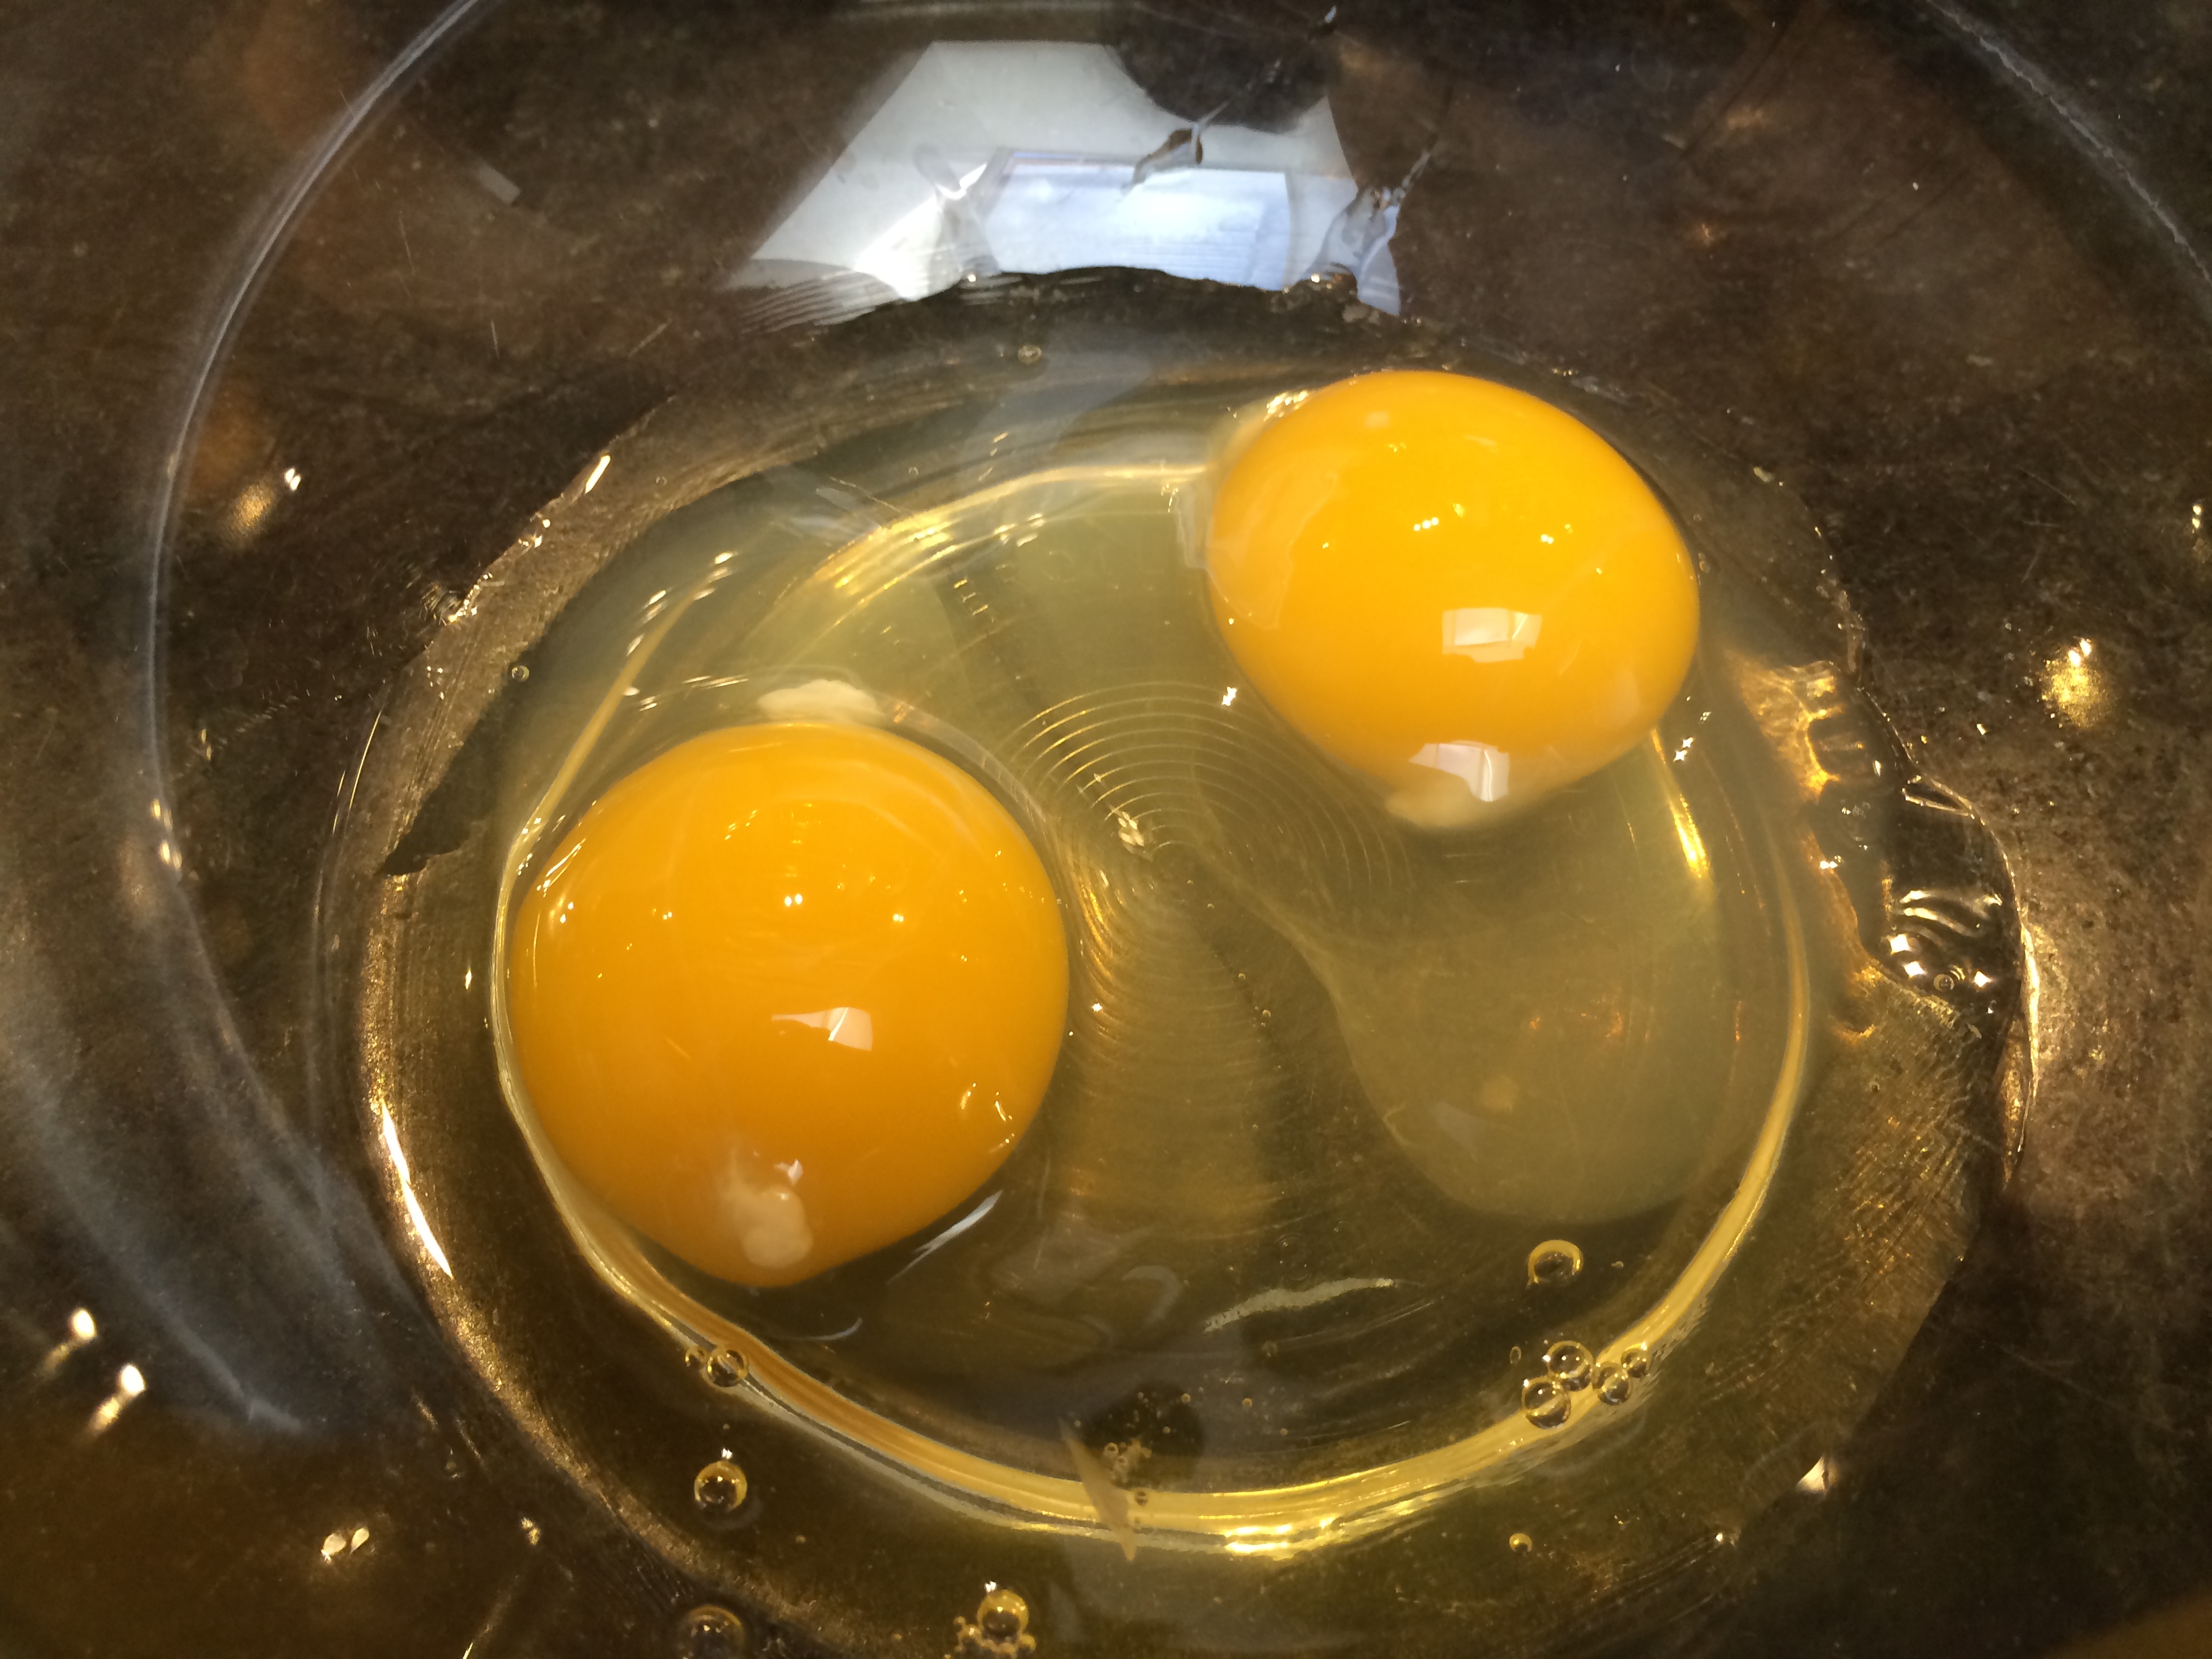
  1. Put 1/4 cup of water in a clean glass jar
  2. Add 2-3 grapes without washing them
  3. Stir it around
  4. Add 1/4 cup of flour
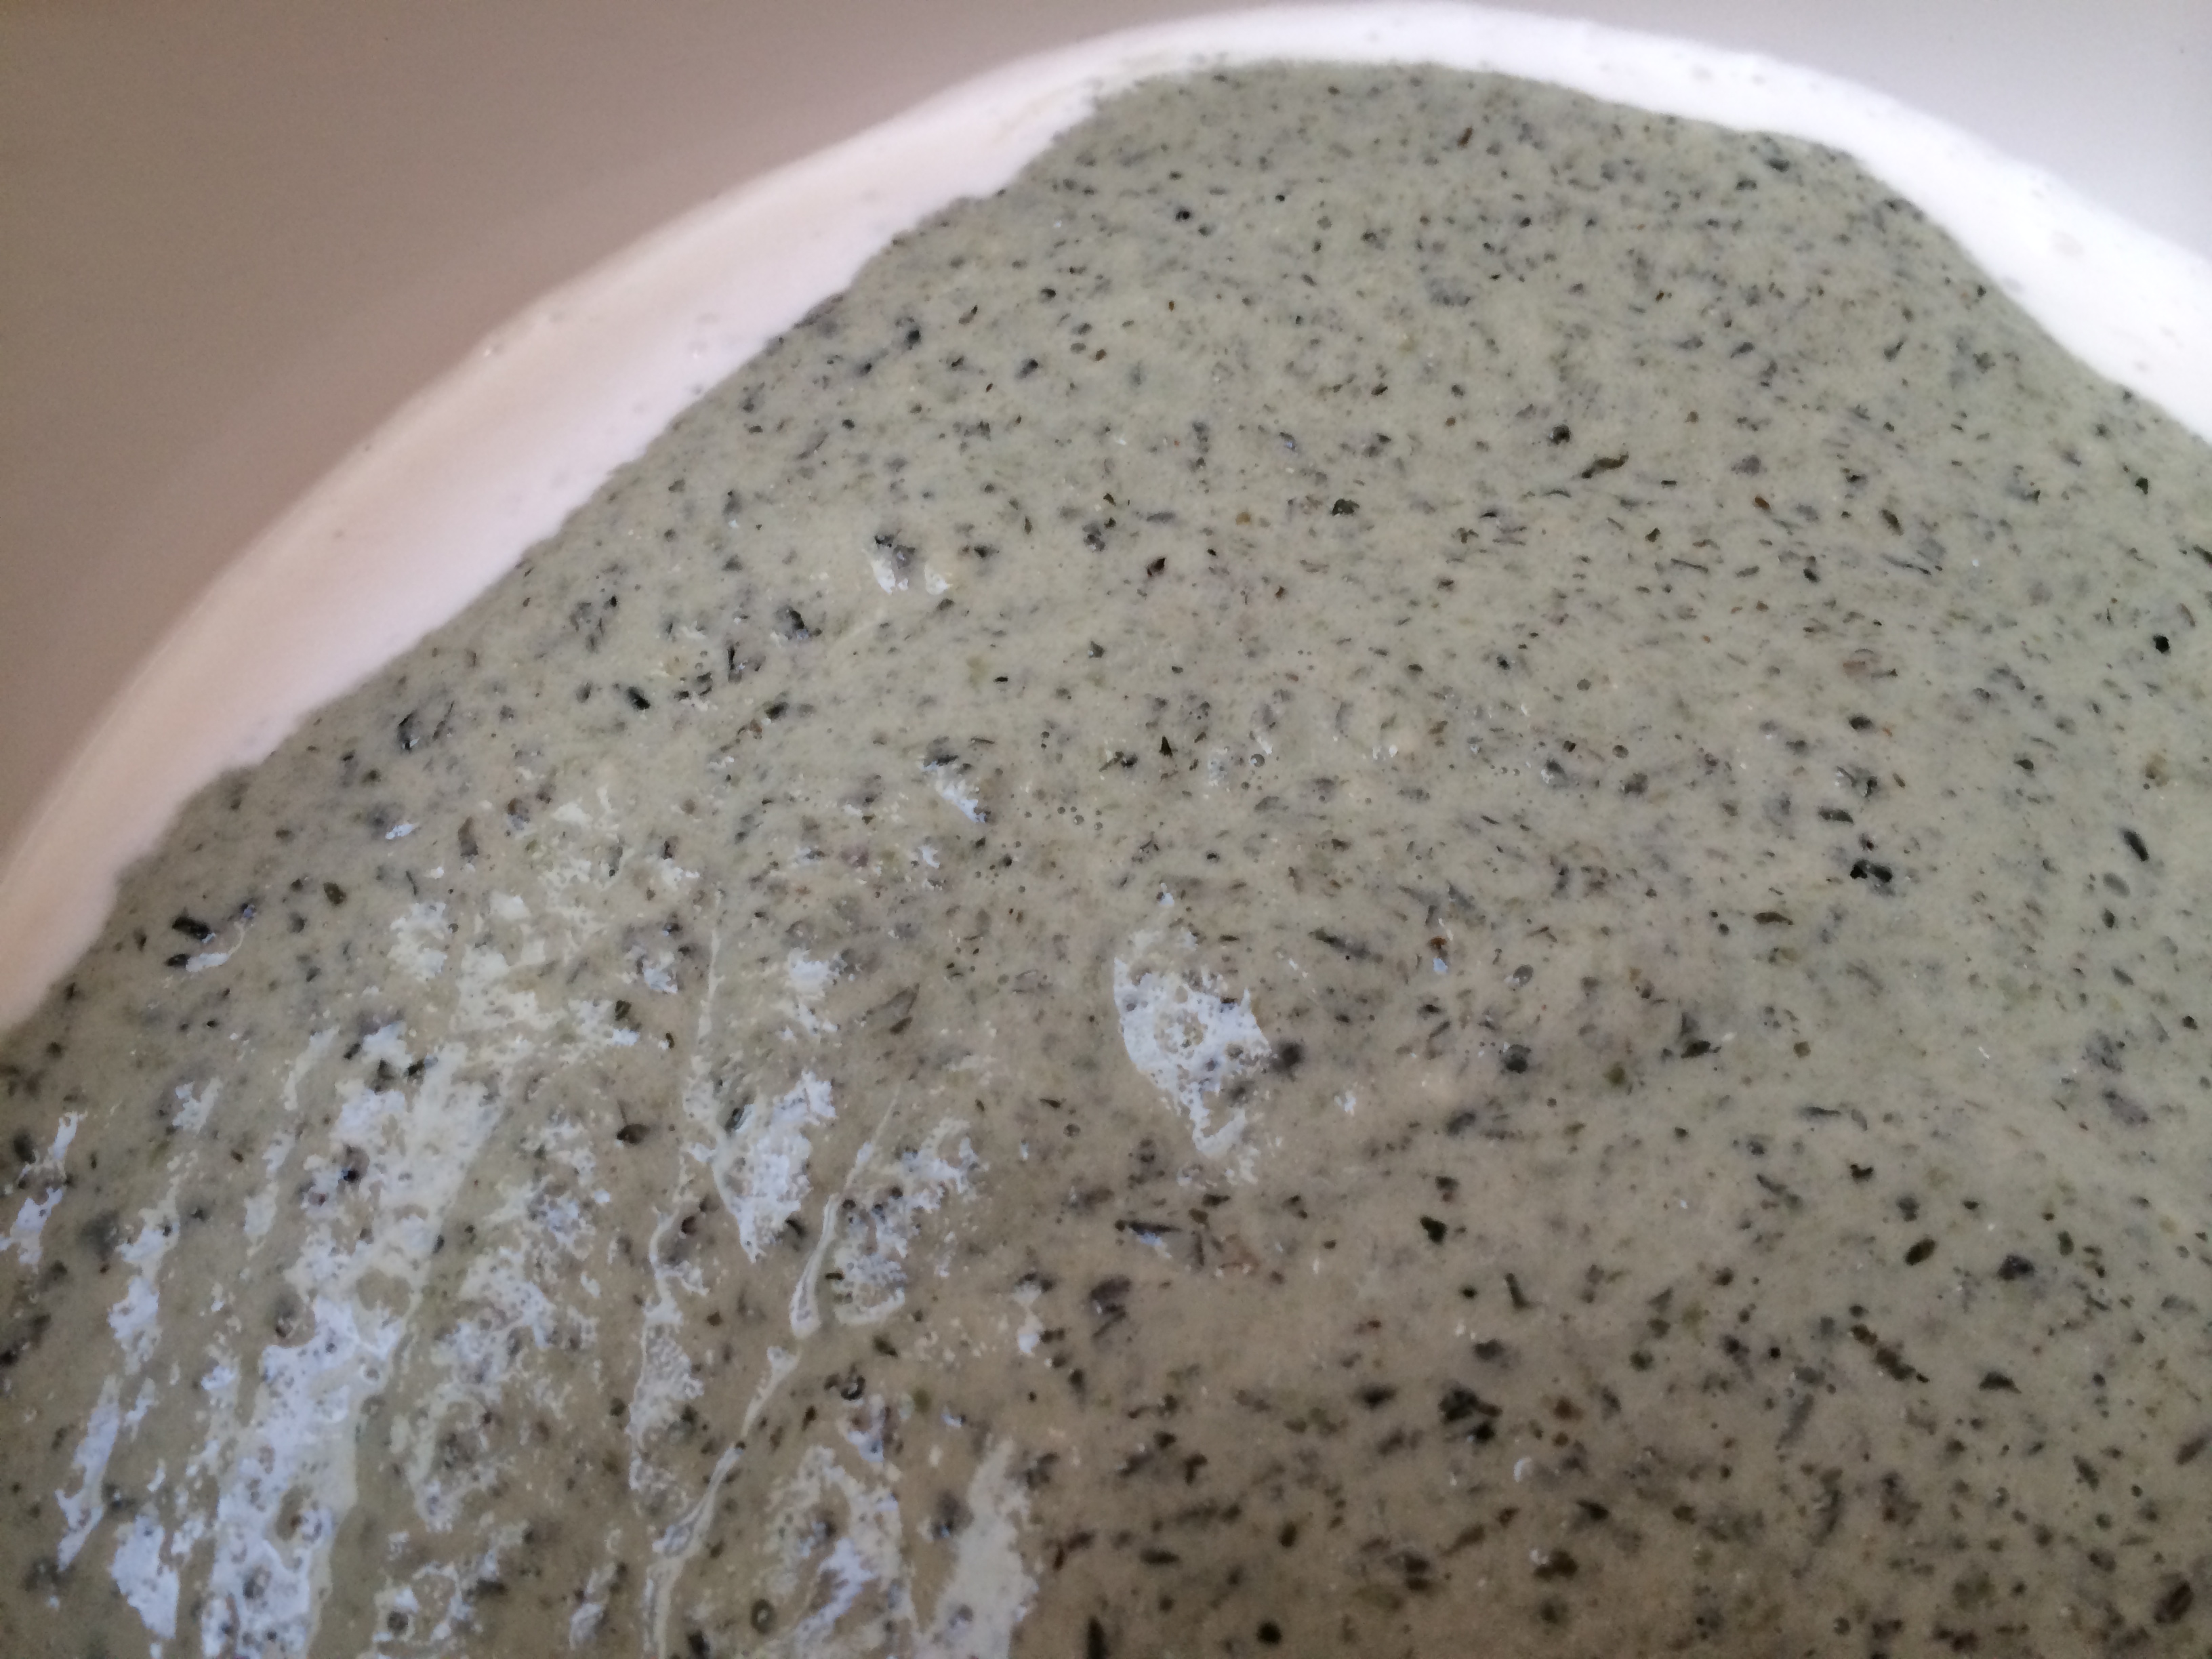
  5. Stir it around till you make a paste
  6. Scrape down the sides of the jar with a spatula
  7. Cover and keep it at room temperature (around 70-72 F)

Day 2: Look for bubbles, first feed

7 am

No bubbles to be found. Place inside oven with the oven light turned on for warmth. Do not turn the oven on.

5 pm

IMG_6983

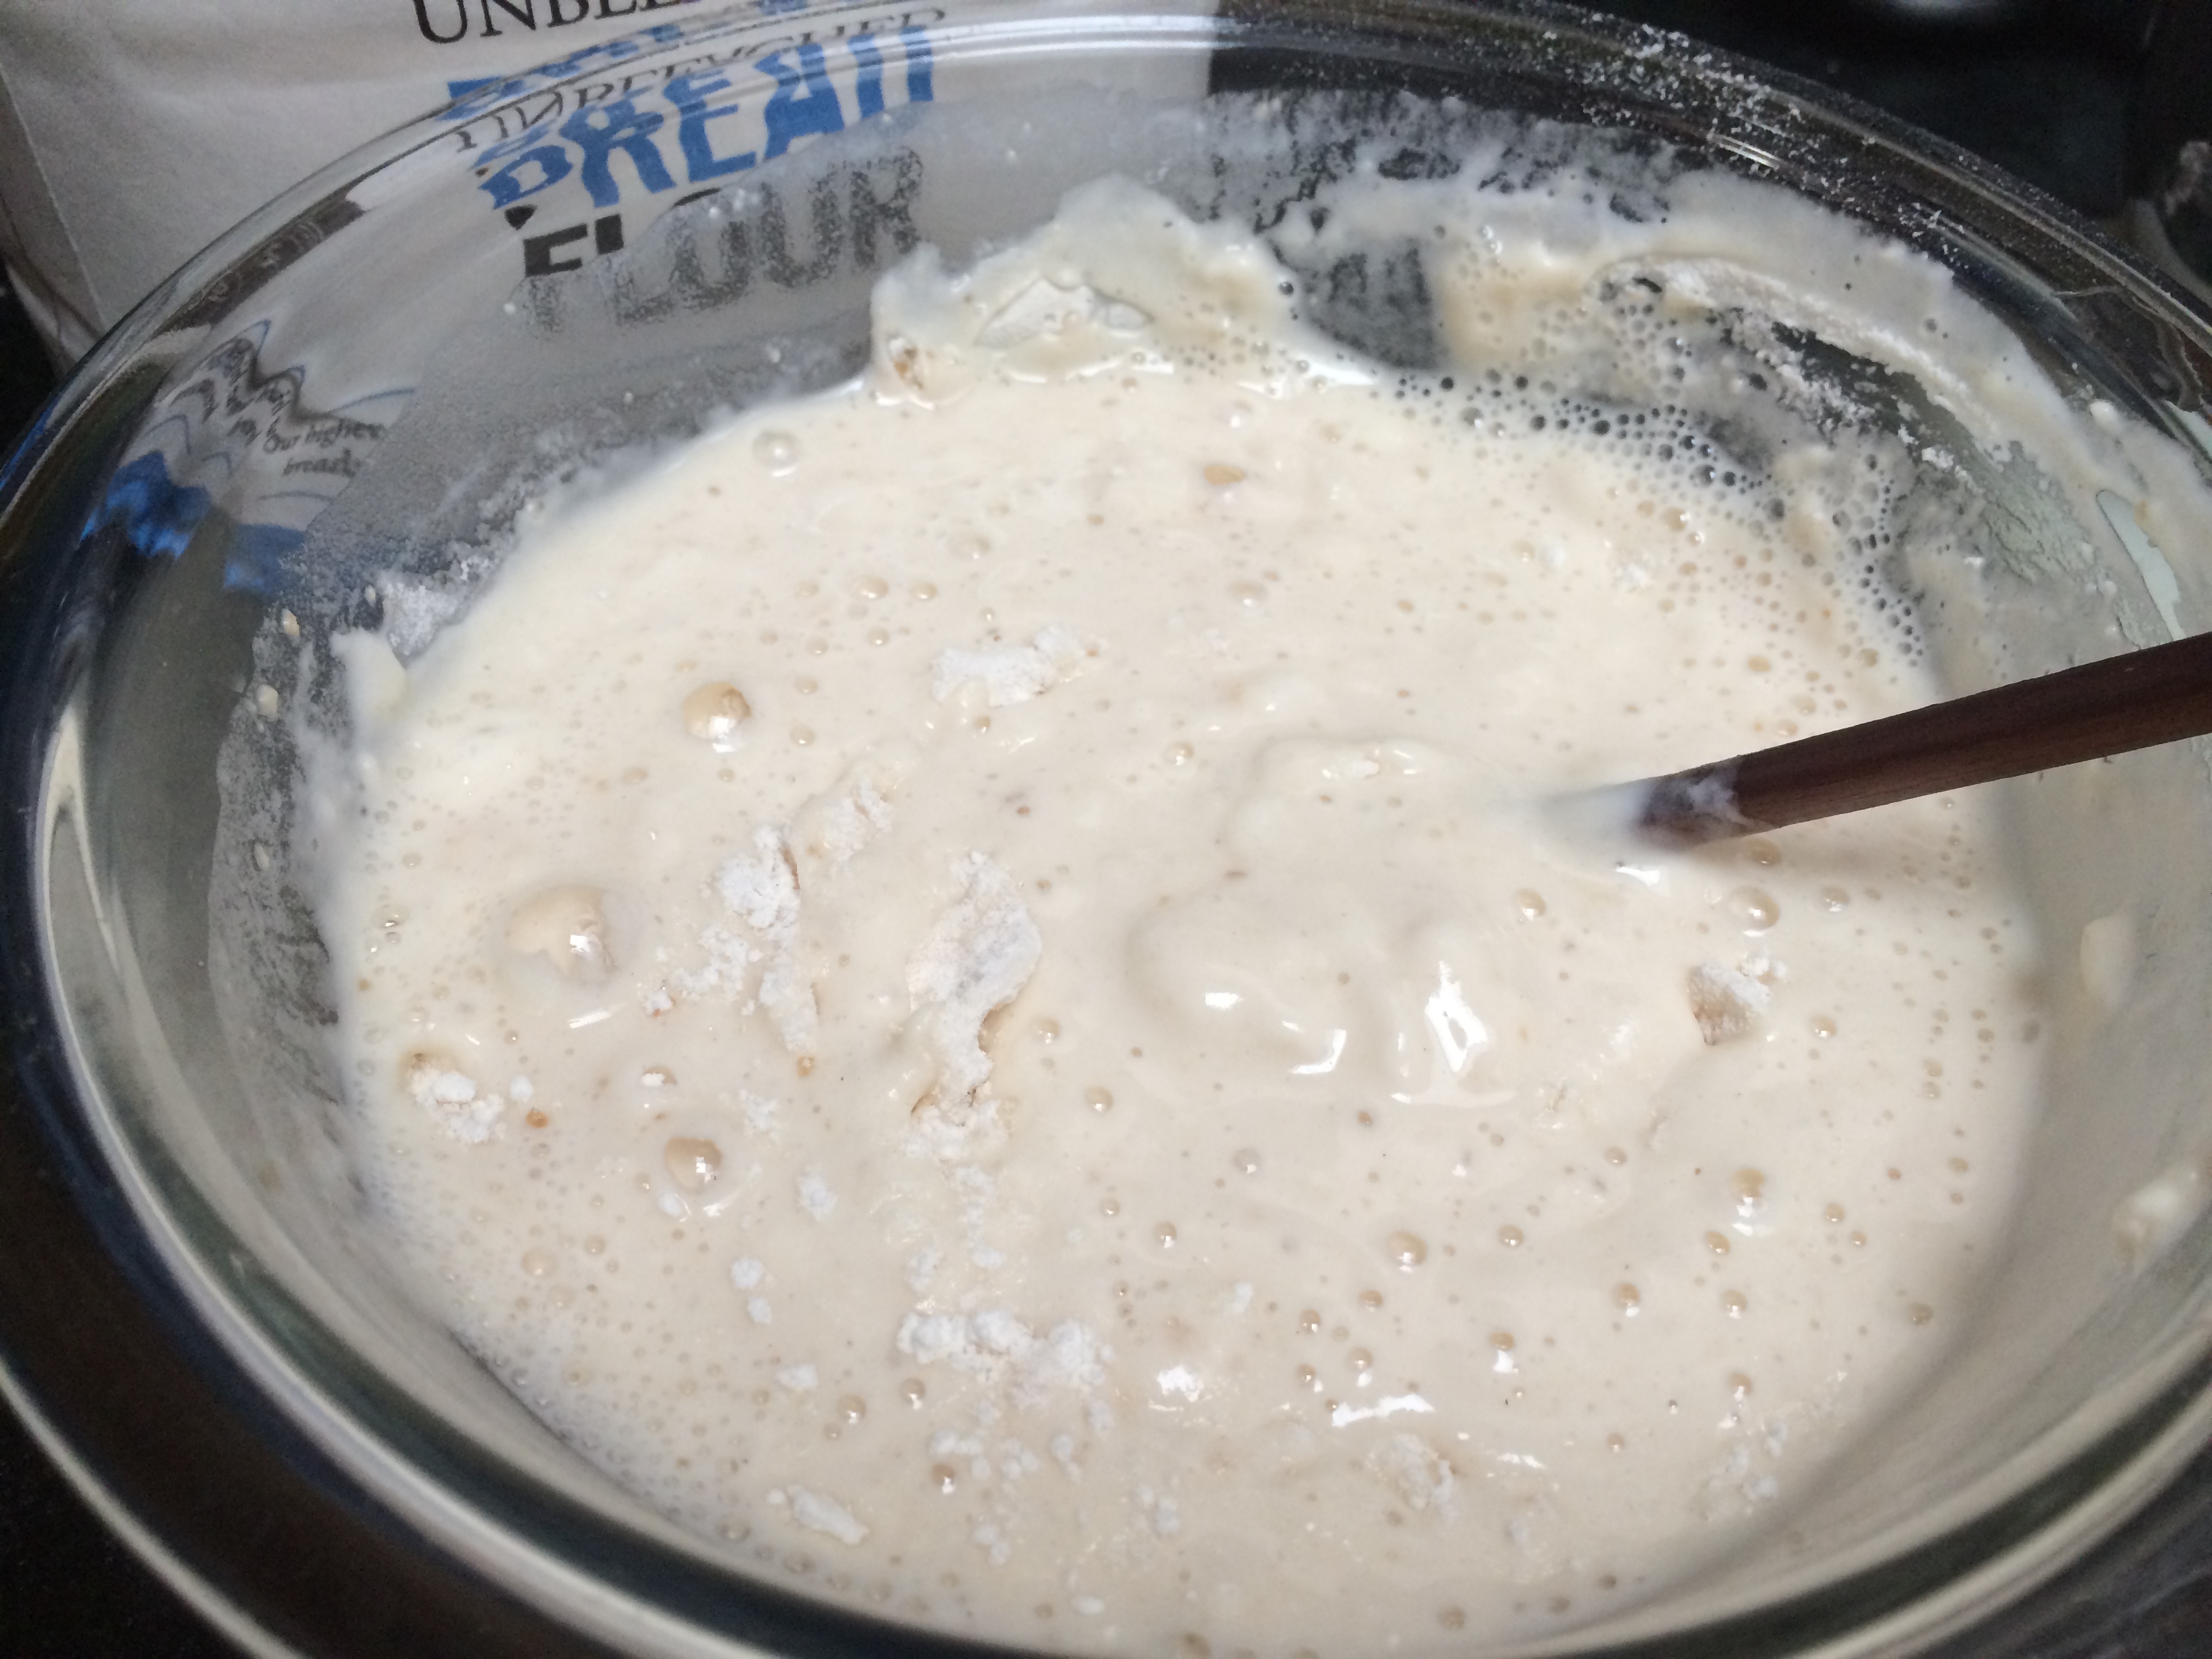
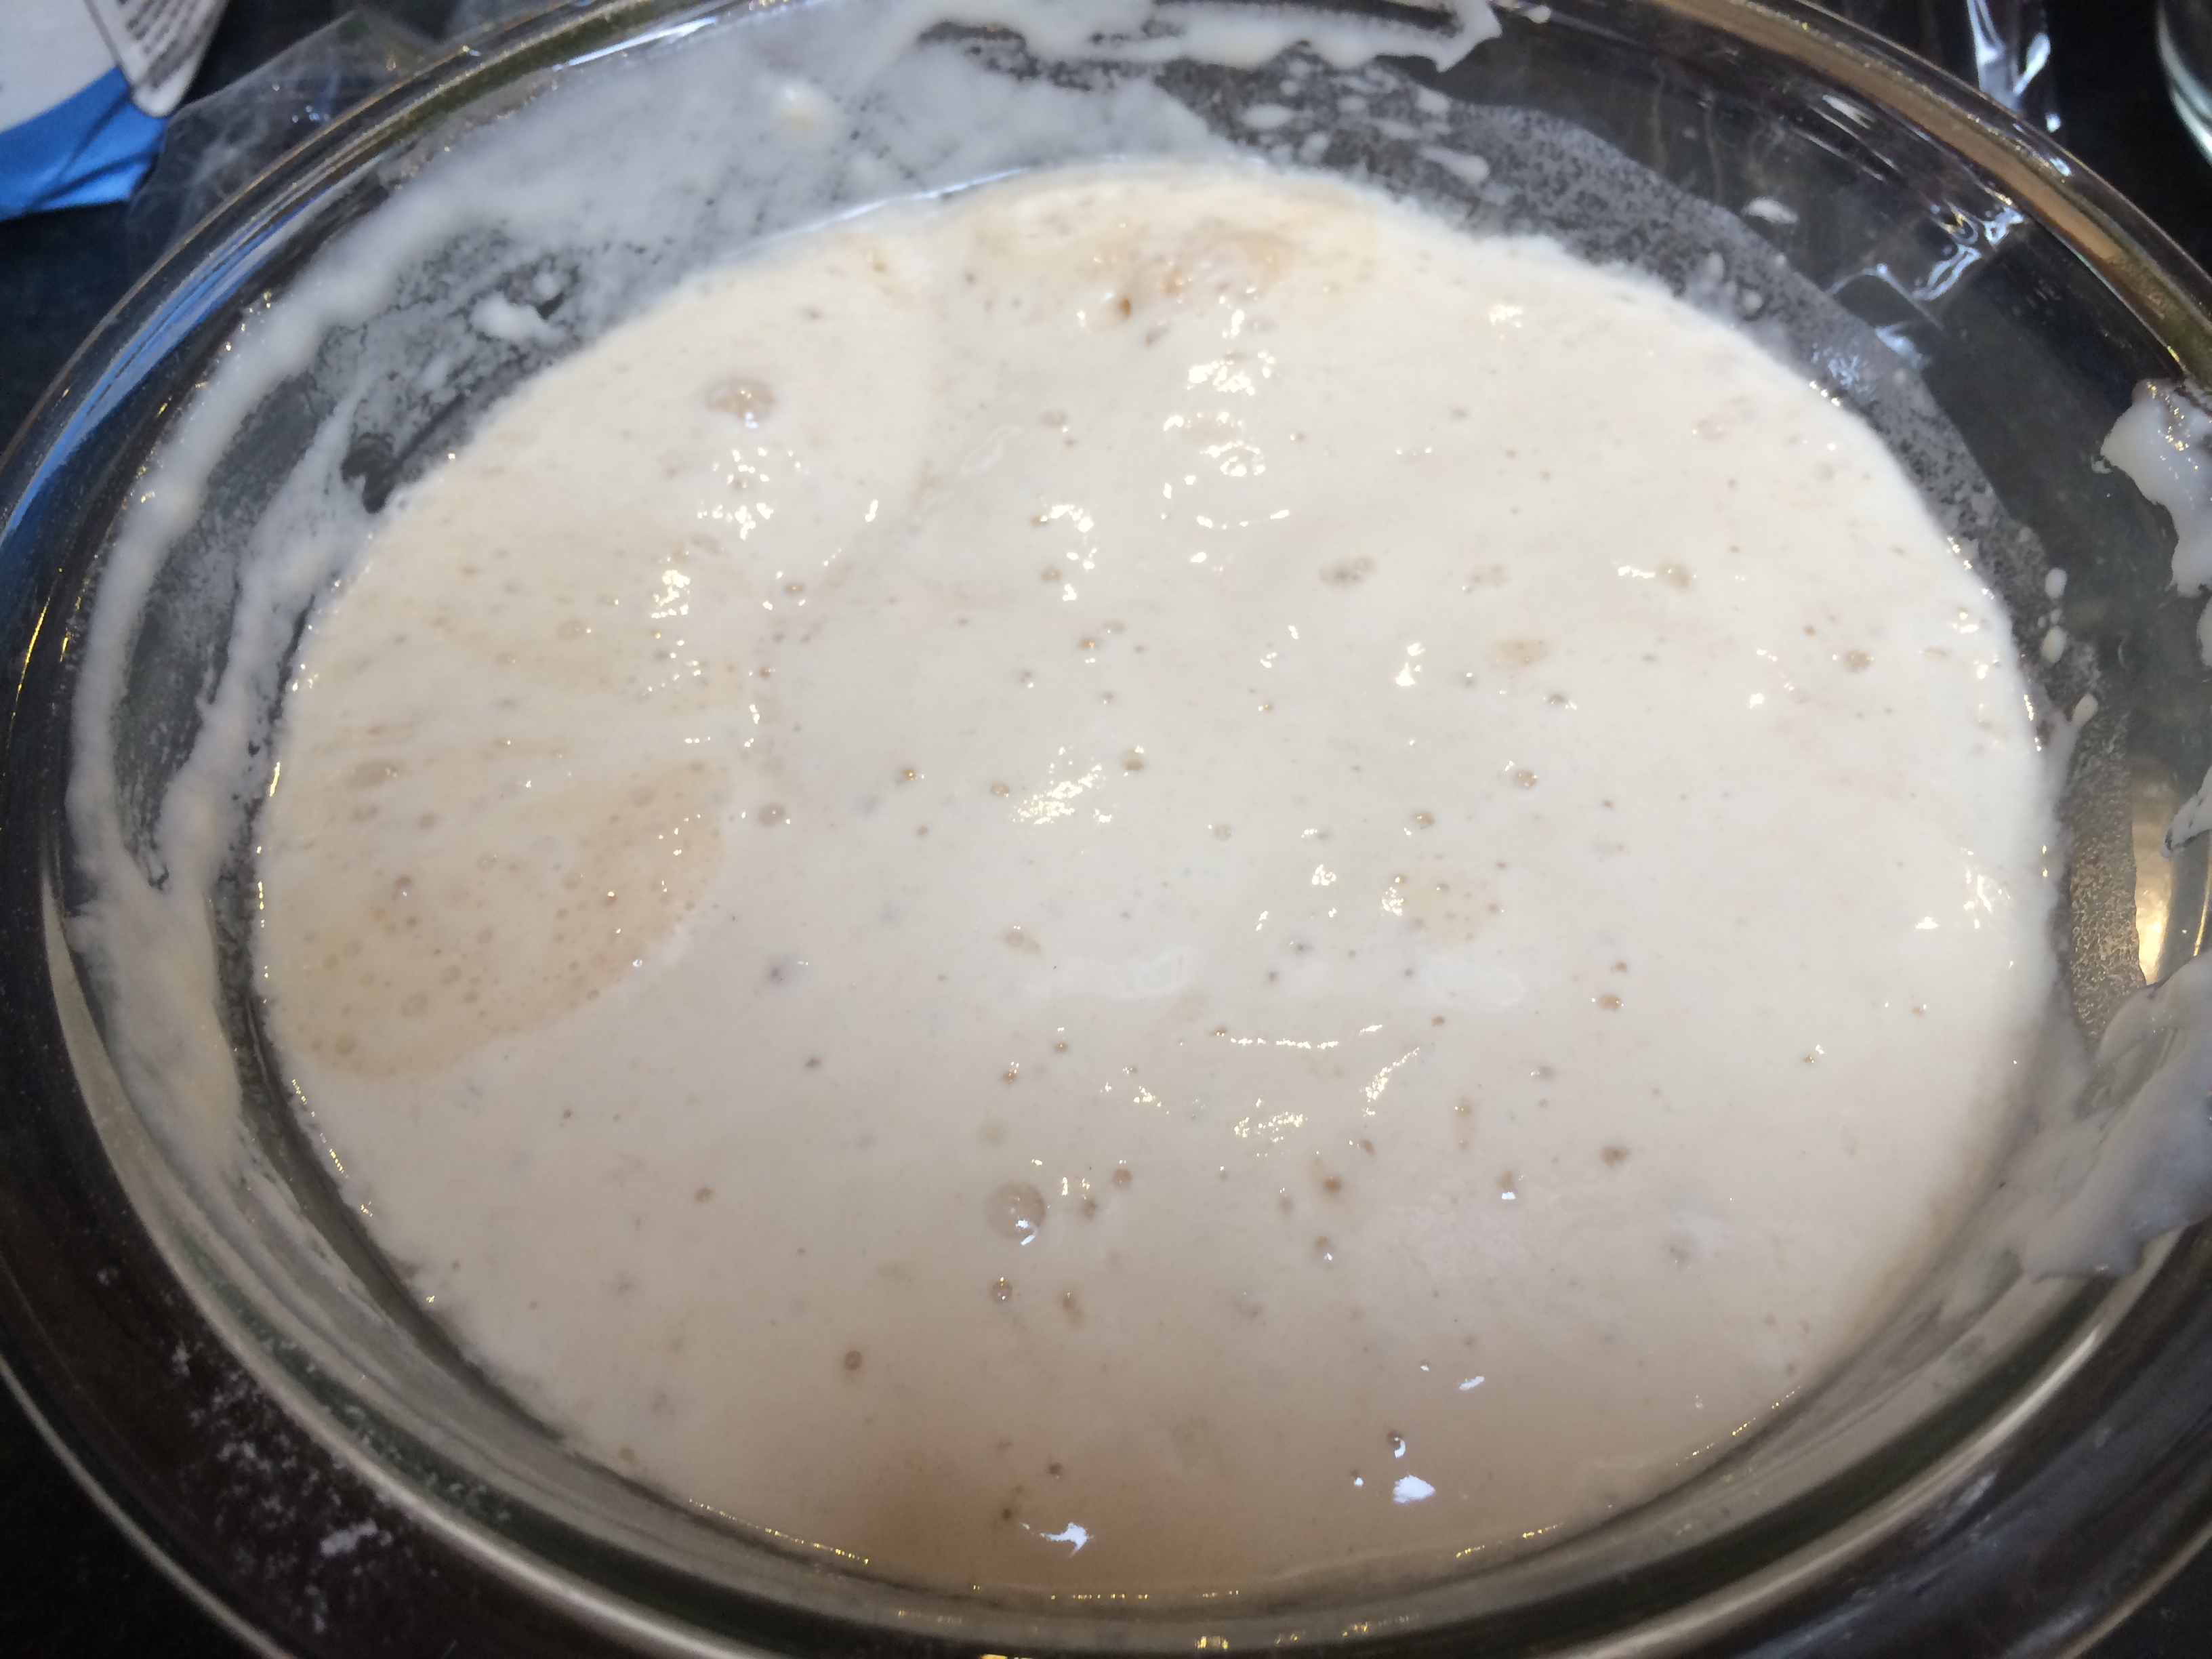
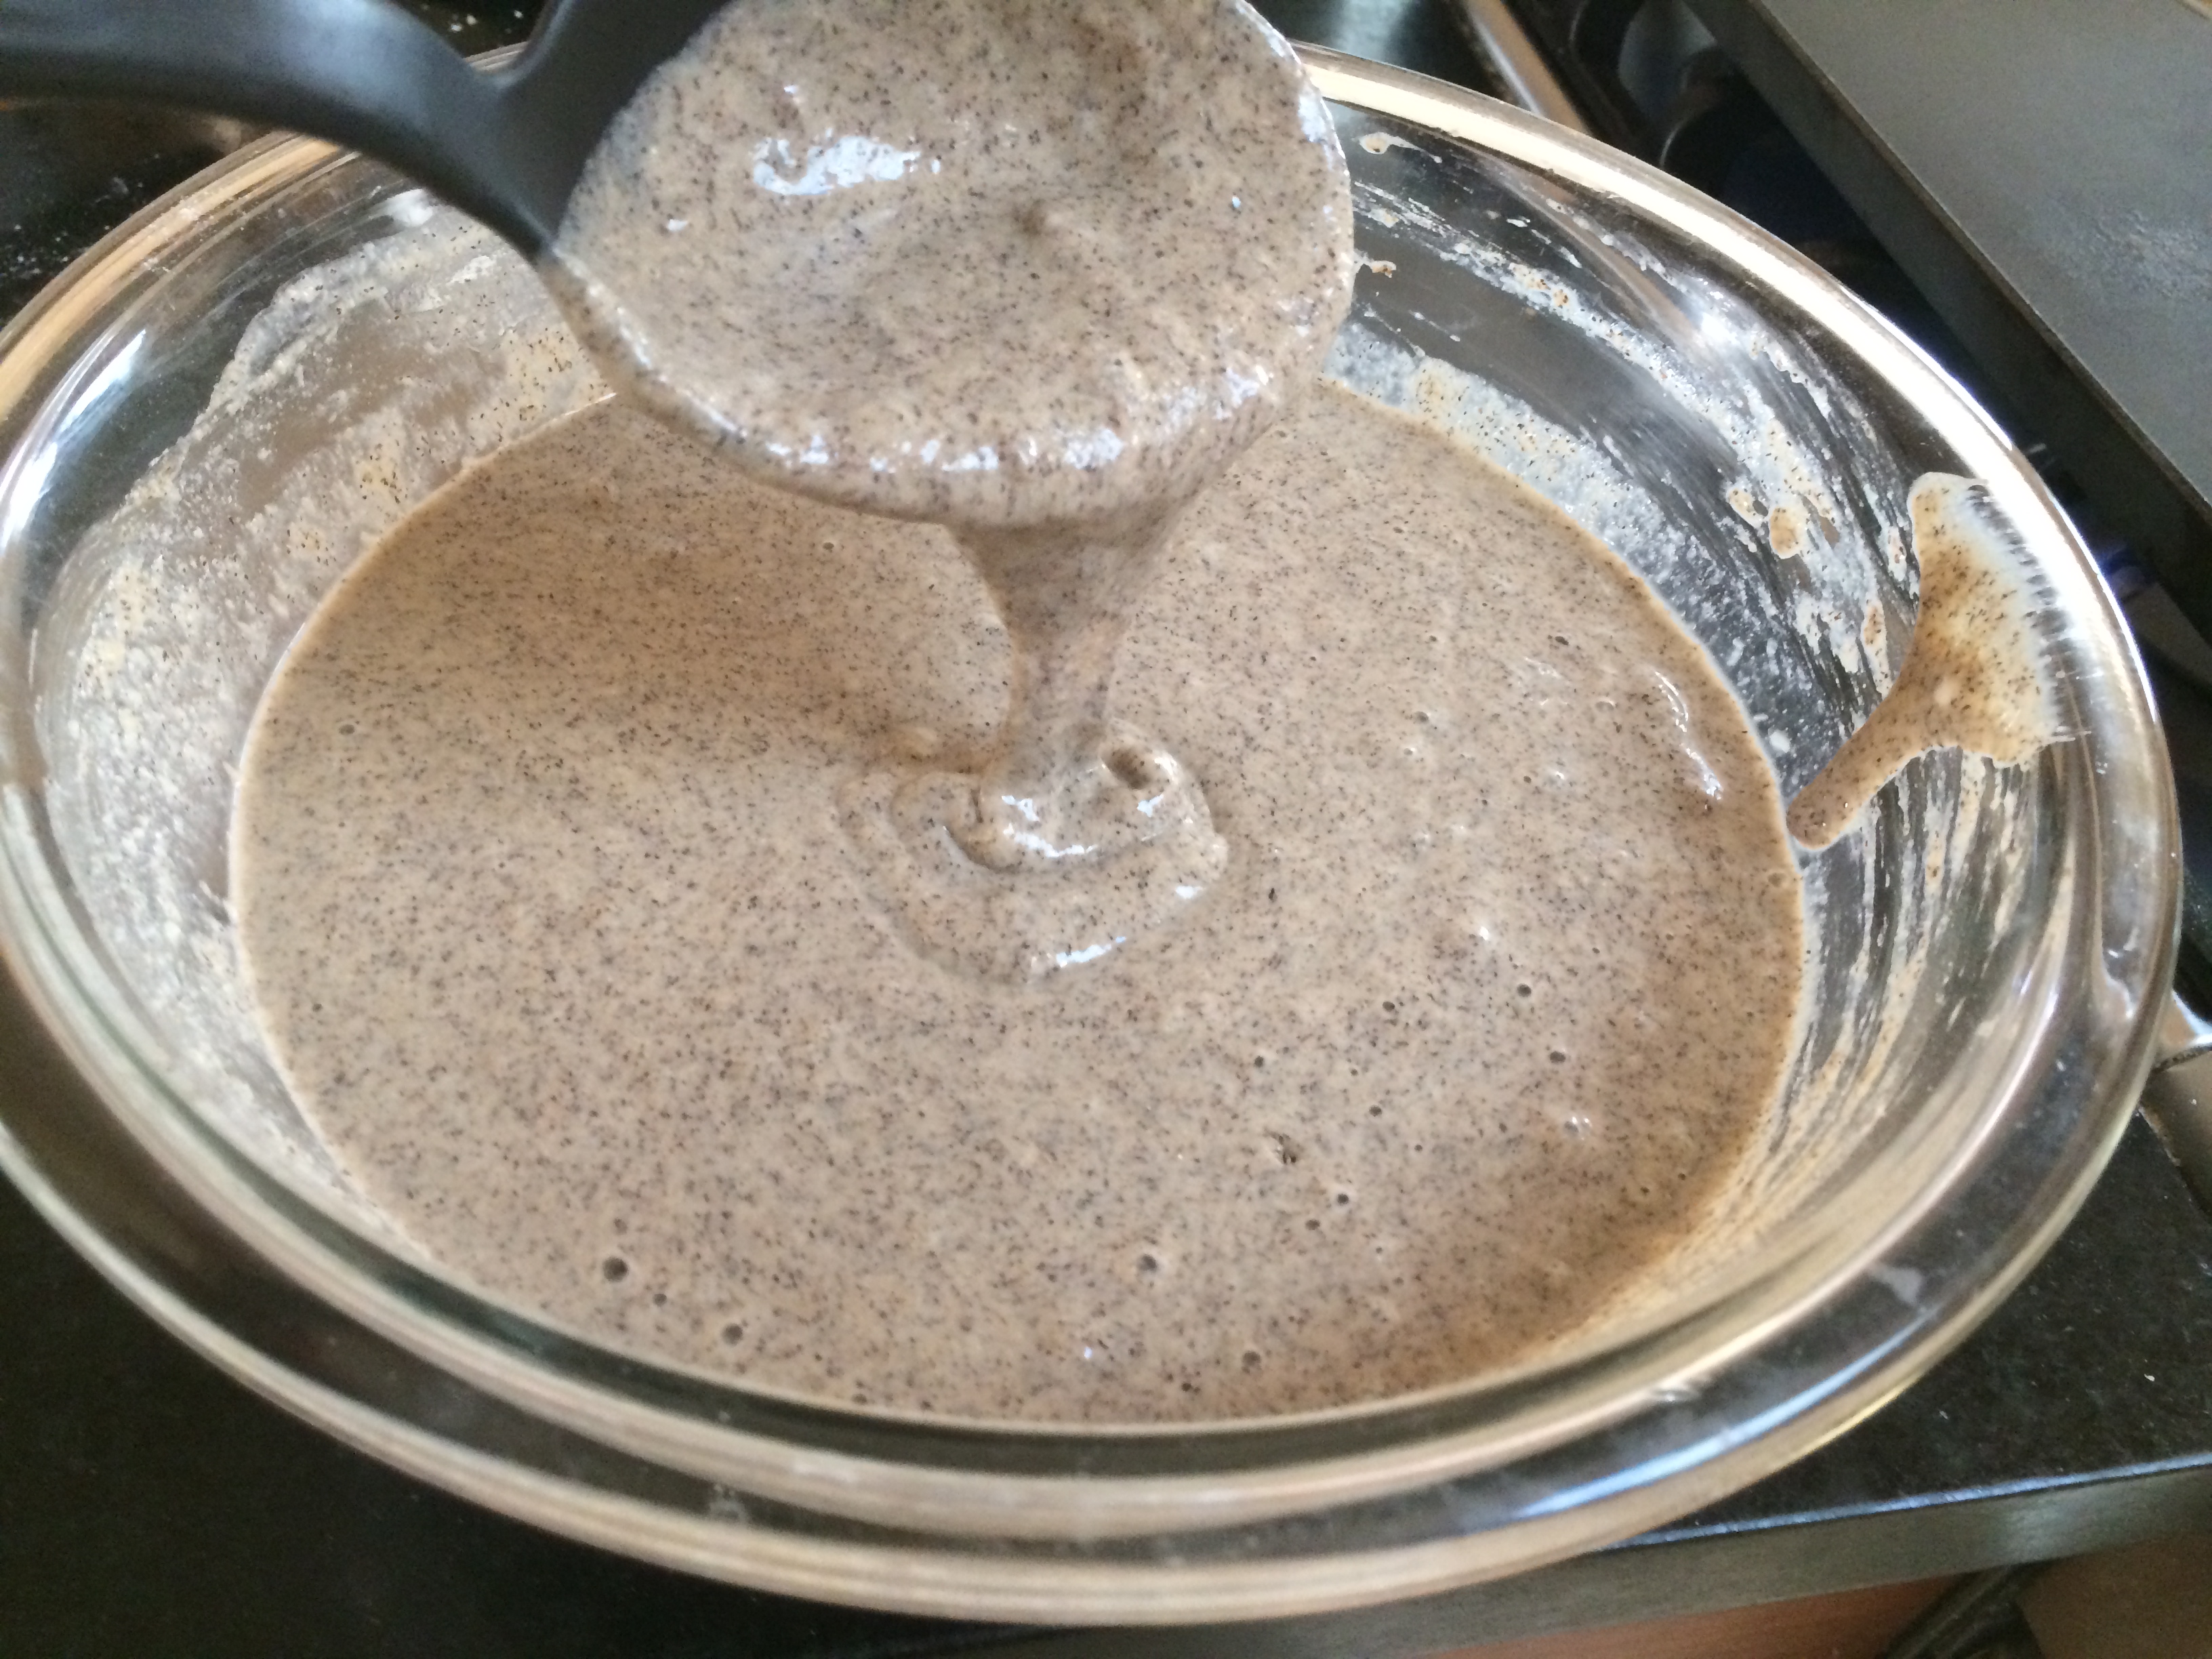
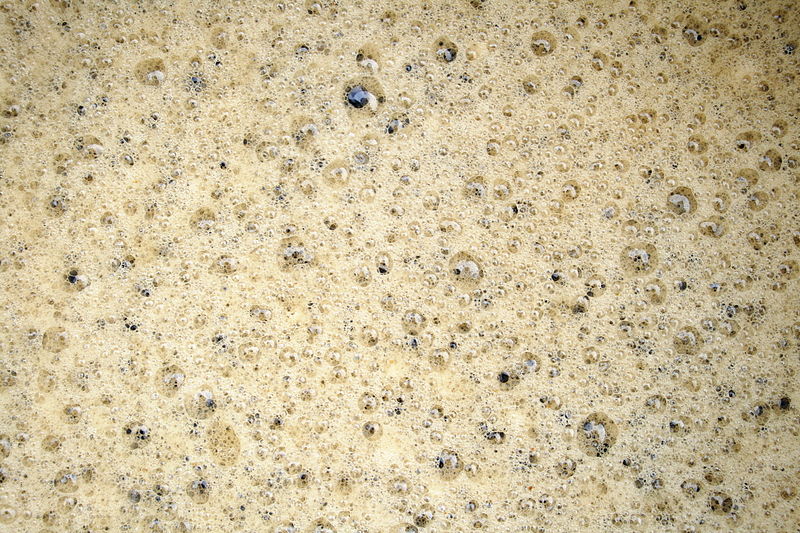
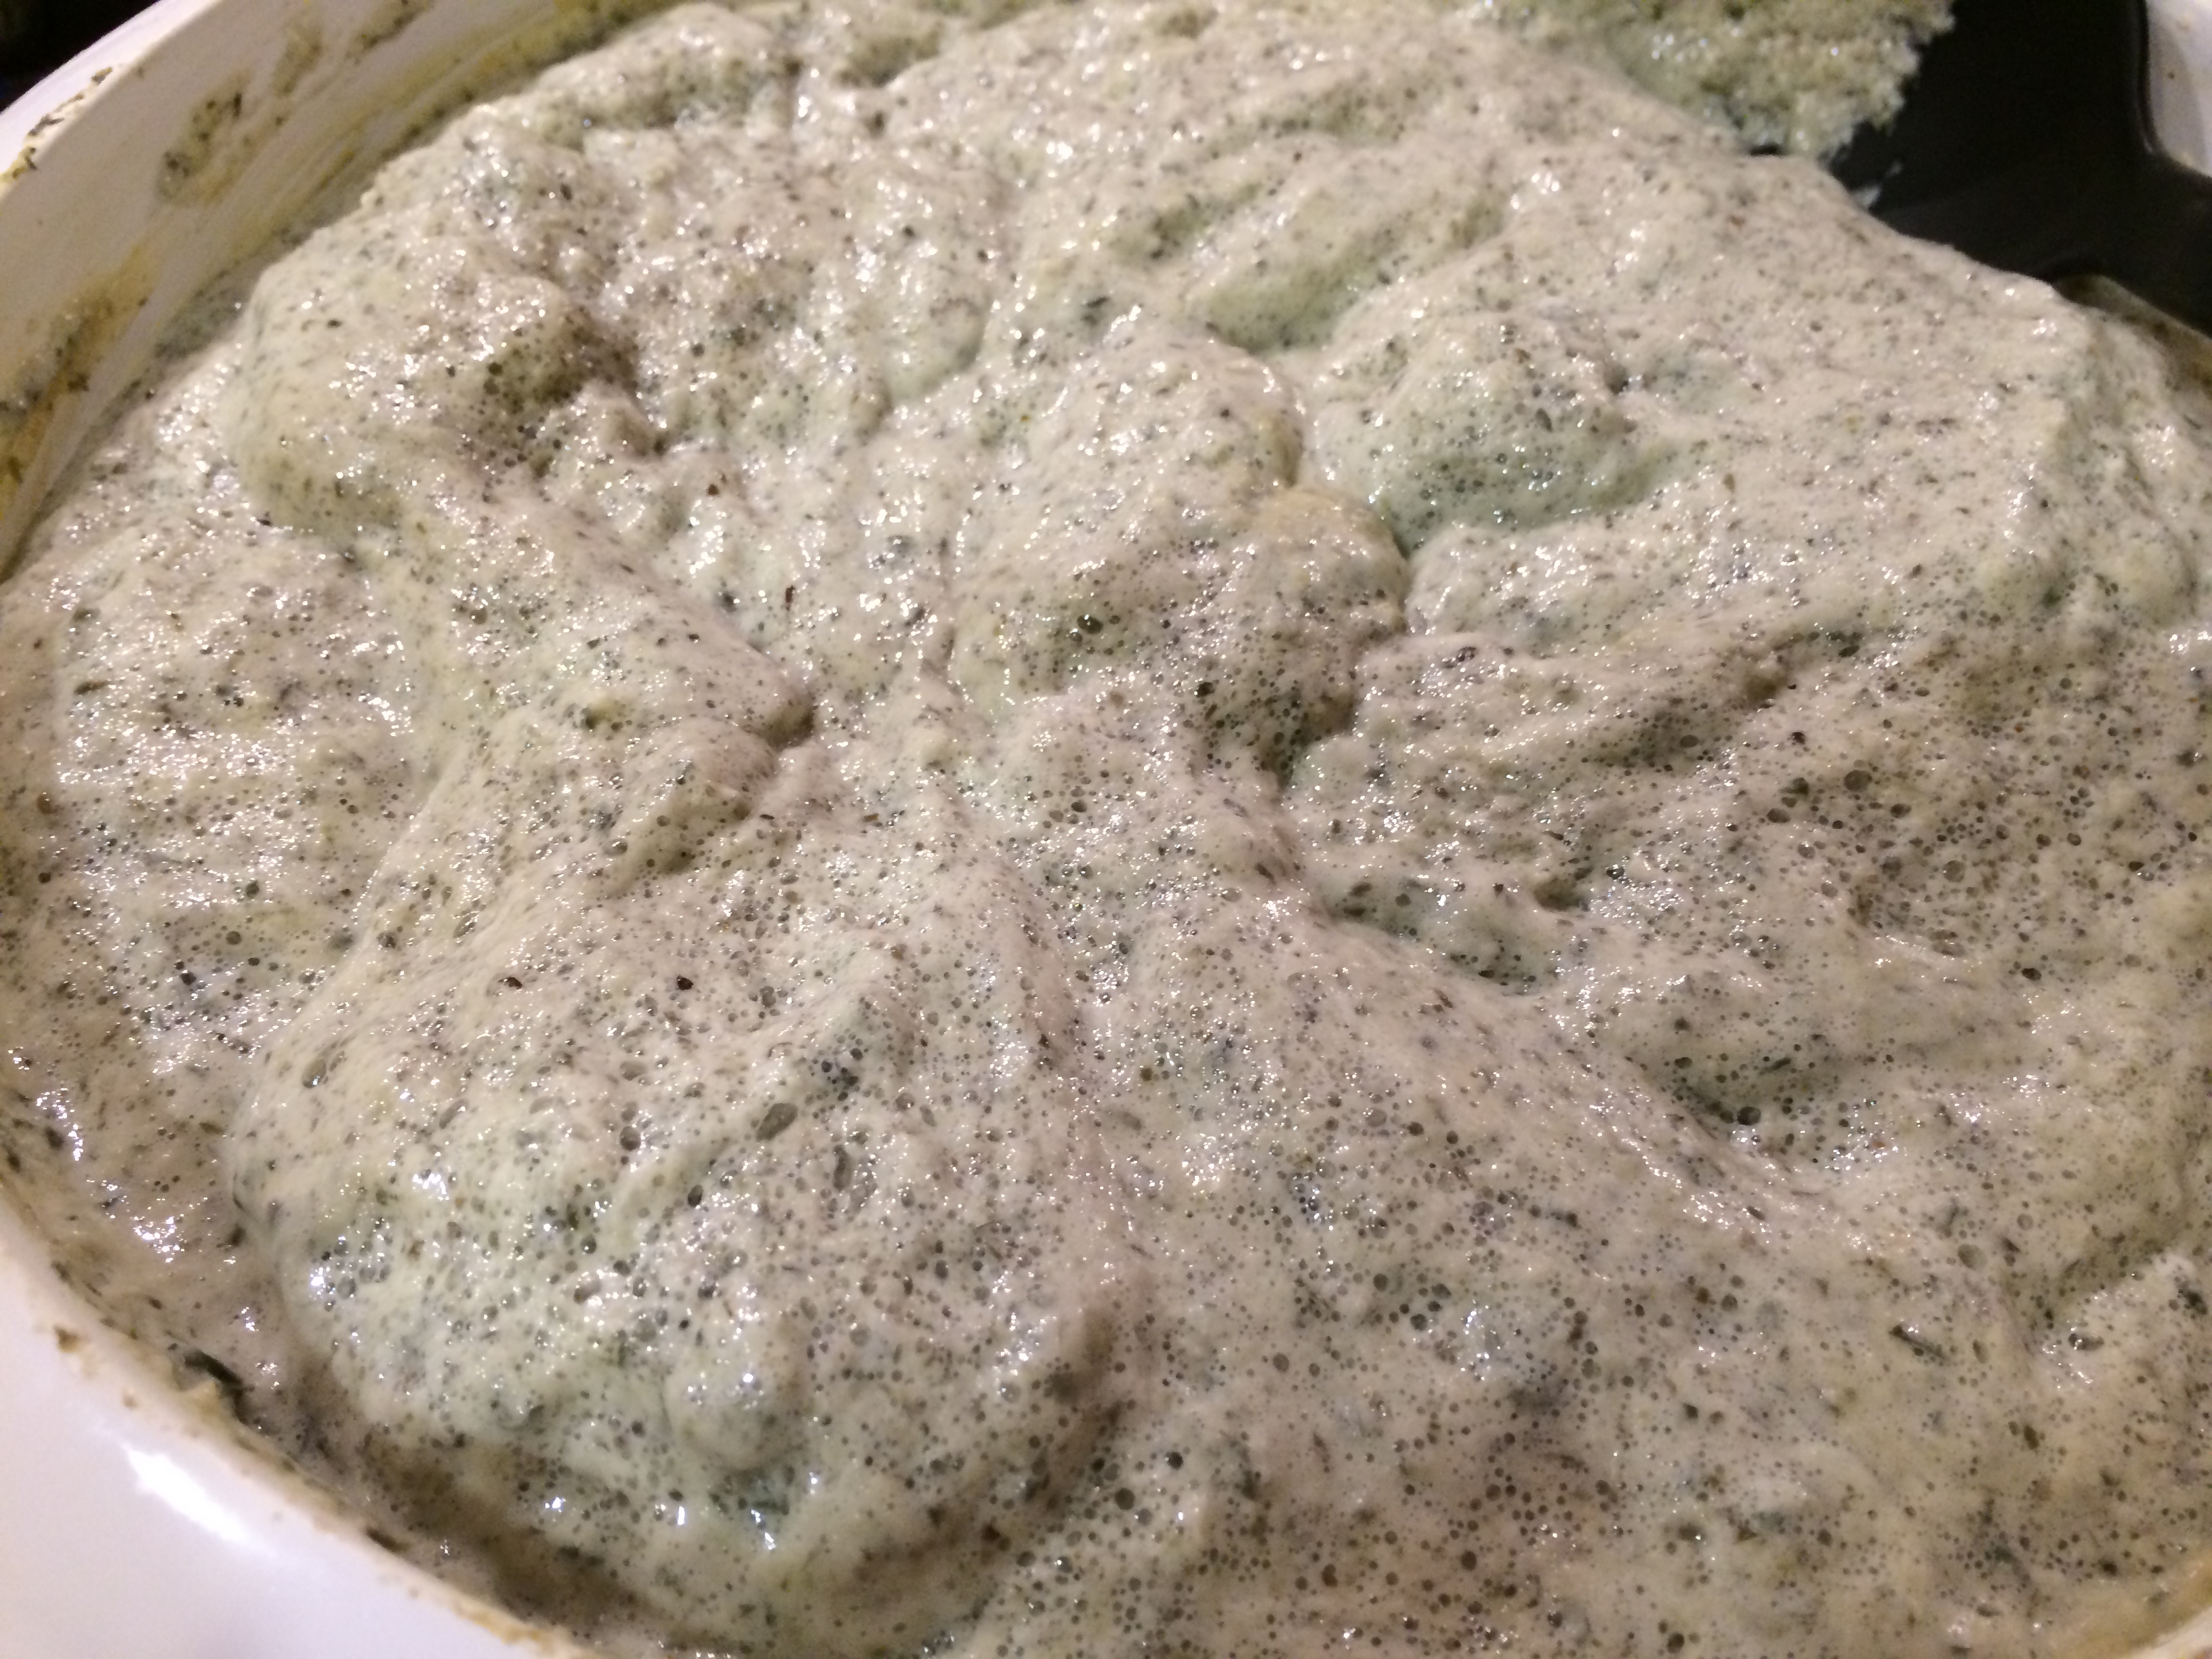
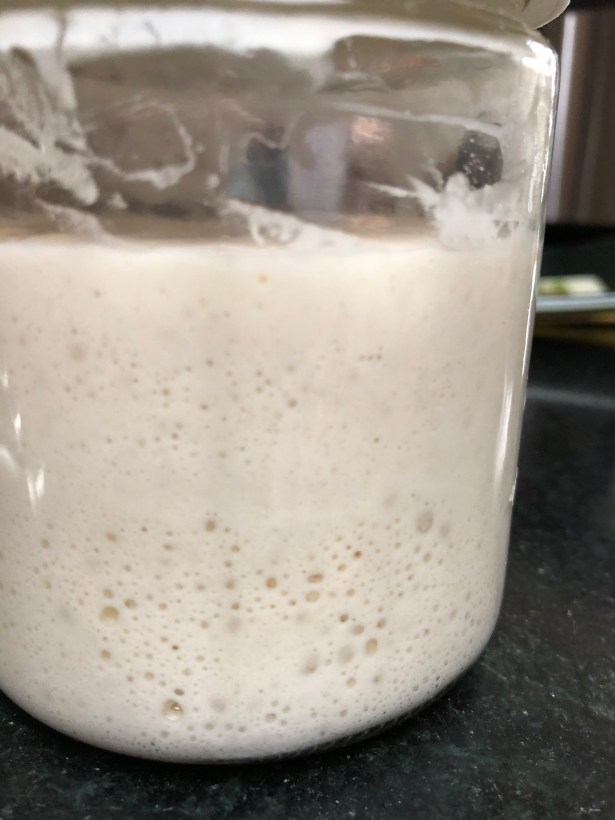
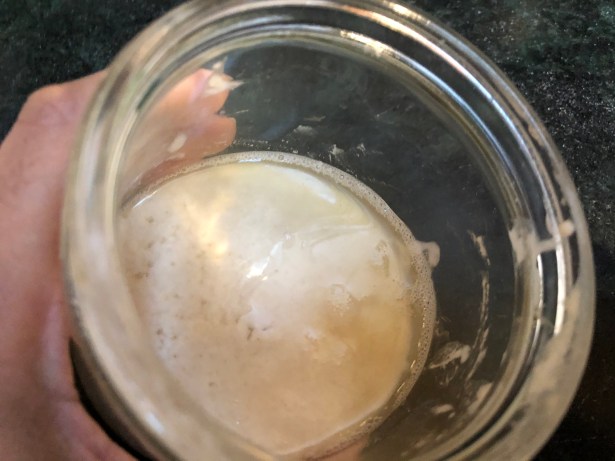
We have….bubbles! The mixture has risen to double. There is condensation on the sides of the jar. The surface looks frothy. It smells mildly alcoholic, mildly fruity, and a bit yeasty. There is some separated liquid at the bottom.

7 pm: Discard and feed

IMG_6985

  1. Discard most of the mixture, including the grapes. Leave about a tablespoon or so.
  2. Add 1/3 cup flour
  3. Add 1/4 cup water
  4. Stir with a wooden chopstick
  5. Scrape down sides with a spatula
  6. Cover and leave on the countertop overnight (not in warm oven this time)
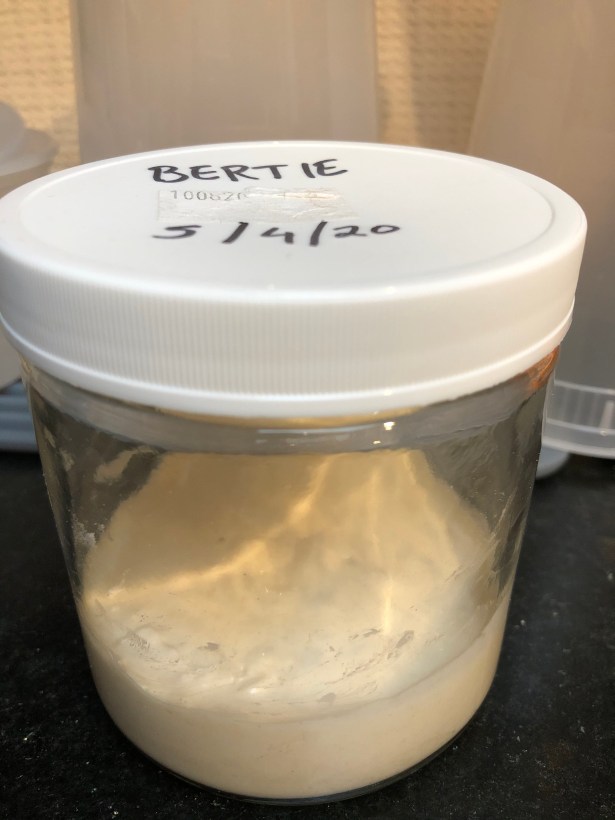
  7. My starter now has a name: it shall be called Bertie.

Day 3: Feed twice a day

8 am:

IMG_6986

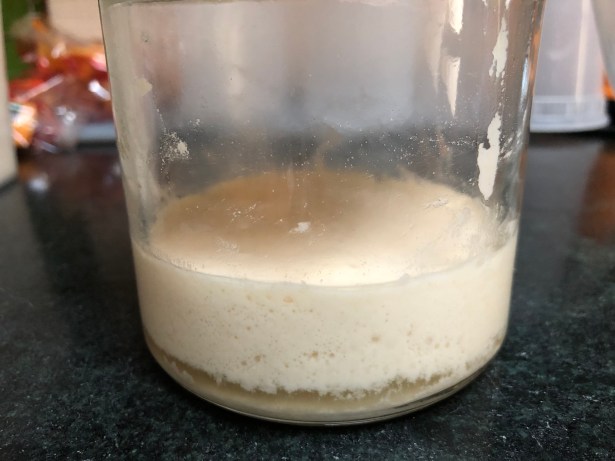
Bertie was left on the countertop overnight. Not quite doubled but there is bubbleage. Some liquid separated at bottom. Smells deeper than yesterday, more cheesy/yeasty, but also fruity.

  1. Stir the liquid in.
  2. Discard most of it, leaving a tablespoon or two.
  3. Add 1/3 cup flour
  4. Add 1/4 cup water
  5. Stir with a chopstick or fork
  6. Scrape down sides with a spatula
  7. Cover and leave on counterop.

5 pm:

IMG_6989

Similar yeasty, fruity, alcohol smells. Bubbly and frothy, but not really risen. There is some liquid separating out once again.

Apparently the liquid is called “hooch” and is a sign that the starter is “hungry”. The yeast has eaten the flour and the alcohol it releases is collecting up top. If it is hungry, I should feed it! But this is also when the sour bacteria start their activity, so in my book that is a plus. Same routine:

  1. Discard all except about a tablespoon or two
  2. Feed fresh flour, 1/3 cup
  3. Add 1/4 cup water
  4. Stir & scrape down sides with a spatula and leave on the counter.

Day 4: All hooched up

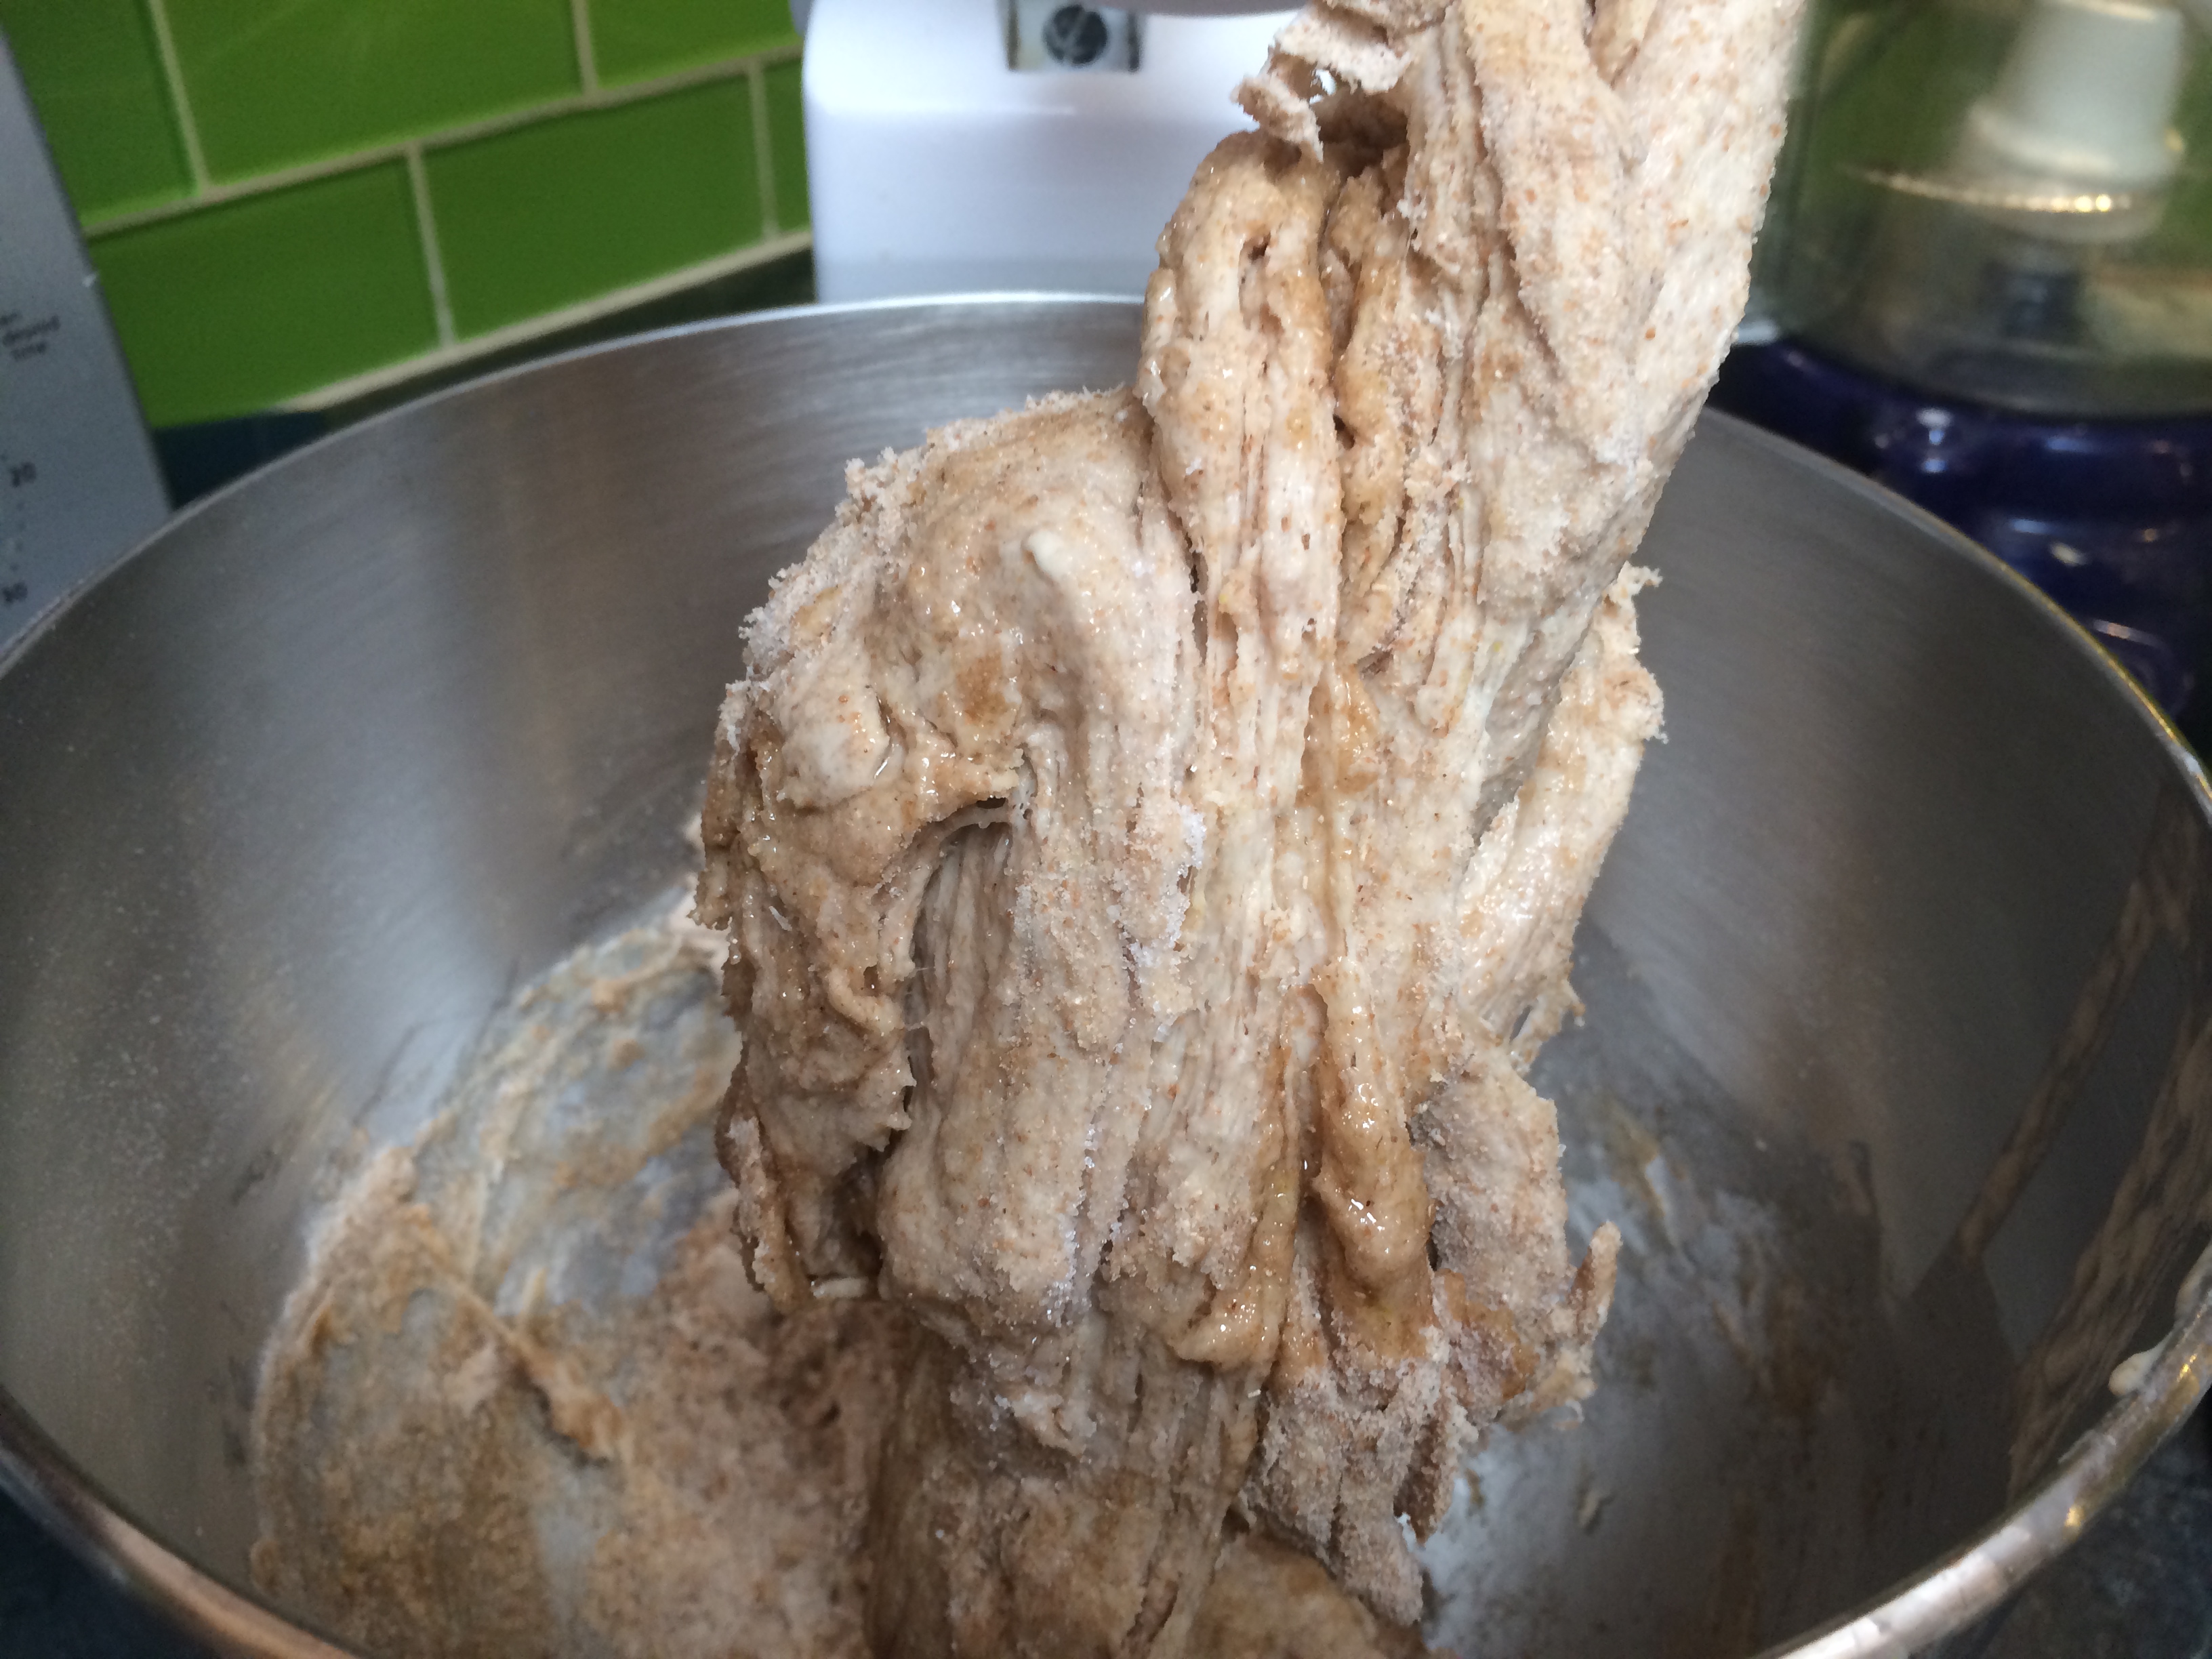
Well I have sad news to report about Bertie. After I let it go a bit too long without feeding, it got some hooch floating on top, and…died. No more bubbles.

No matter I will start a new one tomorrow.


Follow this post for daily updates!!

(Follow me on Twitter at @TheOddPantry and on Facebook at The Odd Pantry)

Advertisement

Bagels in the time of Corona

We are now living through a pandemic. Going to the bakery involves masks, gloves, strict social distancing ballets, and disinfectant. It feels apocalyptic. Creating bagels at home requires being covered in flour, messiness, kneading, the smell of baking in the morning. It feels…homey.

How to decide?

Bagels are pretty unique in the bread family in two ways: one is their torus (donut) shape, with a hole in the middle. This shape gives the bagel as much surface area as possible for their size, so that the dense insides can cook all the way through. The other is the curious step of picking up the risen torus entire, tender and fluffy from the bubbles trapped inside, and slipping it into boiling water for a minute before baking.

It’s odd, I tell you. I’ve made a wide variety of breads, from multigrain loafs baked in 9 by 4s to free-standing sourdough loafs to chapatis roasted on a griddle to pooris fried in oil. The step of boiling is completely unique. Generally, when you boil dough, you get dumplings, not bread.

And yet, here we are. Is a matter of fact, the boiling gives the bagel a sheen—and more importantly, a smooth soft shell, that preserves the shape and density during baking. That’s how you achieve the chewiness that for some reason is a match made in heaven (or “match made in leaven” perhaps) with cream cheese.

The method

Bagel dough is pretty standard, if perhaps drier and denser than a standard loaf bread destined to turn into slices and sandwiches. You have the option to add as much whole wheat flour as you like up to about 50%—I generally go with a third whole wheat, two-thirds not.

The list of toppings and flavorings that can be added, either to the dough, or on the surface of the boiled torus before baking, are endless: from cinnamon, to onions or garlic, to seeds like poppy, sesame, caraway. But I’m going to focus on the bagel recipe as a basic template, for you to experiment with on on your own dime.

Just like standard bread, there is a first rise. Depending on the amount of yeast added, and the temperature around your countertop, this can go from an hour to overnight in the fridge.

Just like standard bread, there is a shaping and a second rise. But rather than shape into a loaf, one breaks the bagel dough into pieces, rolls each piece into a snake about a foot long, and joins the snake head to mouth into a torus shape.

Then, of course, there is the boiling and the baking.

Sugar: this recipe is ideal for people who get tired of the amount of added sugar in commercially available food; it has no sugar at all. If you want to add some, you can add a teaspoon to a tablespoon or sugar or honey dissolved in the water.

IMG_6717

Flour + water

IMG_6718

Mixing the dough

IMG_6719

Dough

IMG_6721

After first rise

IMG_6722

Break into six pieces

IMG_6723

Start shaping each

IMG_6724

Rolled out to snake shape

IMG_6725

Join at ends

IMG_6726

Start second rise

IMG_6727

Risen

IMG_6730

Boil

IMG_6732

Toppings

IMG_6734

Done!

Bagels

Ingredients:

  • 3 cups flour (up to a third whole wheat, the rest bread flour or all-purpose)
  • 1 tsp instant yeast
  • 2 tsp salt
  • 1.25 cups water
  • 0.5 onion, sliced, for onion bagels (optional)
  • 2 tbsp mix of sesame and poppy seeds, for seeded bagel (optional)
  • other topping ideas:
    • garlic
    • shredded cheese
    • jalapenos
    • caraway seeds

Method:

Collect your flours in a wide bowl. Sprinkle the instant yeast over and stir it into the flour with a fork. Then sprinkle the salt over and stir that in as well.

Make a well in the center of the flour with a chopstick. Pour the water in. Start mixing the flour into the water with your chopstick (a wooden one works best because it won’t stick to the mixture). Once most of it is mixed in, turn the dough onto a counter to knead.

Continue to knead for a few minutes, until you have a smooth ball of dough. Cover with oil and plastic wrap, and leave it to rise for about an hour or two, or until puffy and almost doubled.

Divide the dough into six approximately equal pieces, using a pastry scraper to make neat cuts, rather than pulling it apart. Cover all the pieces with a kitchen towel or plastic wrap while you work on shaping each piece.

To shape a piece into a torus shape: gently roll into a foot long shape with some stretching, some rolling, some flattening, resting it for minutes at a time. Moisten the two ends with some water and connect end-to-end in a bagel shape.

Place them side by side on a well-floured cookie sheet, with at least a couple inches between them. Cover with a kitchen towel or plastic wrap to avoid drying out. Leave to rise for another hour or two.

Pre-heat oven to 425° F.

Set a large pot of water to boil. When it comes to a rolling boil, lower the heat to just above a simmer. One by one, gently scoop up each bagel by teasing it onto a slotted spoon and lower into the boiling water. Boil each side for 30 seconds and leave to drain. This is the time to put toppings on, such as fried onions or sesame seeds.

Place the tray with the boiled bagels into the oven for 20-25 minutes. Wait at least half hour before slicing them.

They go very well with butter, or cream cheese, or my idiosyncratic favorite: cream cheese and jam.

I’d love to hear in comments or on Twitter/Facebook if this worked for you. I would love to see pictures of your bagels!

(Follow me on Twitter at @TheOddPantry and on Facebook at The Odd Pantry.)

When it comes to no-knead breads, I am a believer

20 Vanity

For the longest time, all those recipes that promised you could make bread without kneading seemed to me simultaneously a cop-out and an oxymoron—like nut milks with no dairy, or vegan hamburgers or, for that matter, working holidays.

Why leave out the most kinetic, fun part of the entire process, that allows you to playact blue-collar labor, work out your aggression, and show the gluten who’s boss, all at once?

But I realized recently that I had missed the point. I had missed the import of one word: autolysis.

Bread starts with gluten. Flour has the potential of turning some of its proteins into gluten, that stretchy, strandy thing that binds the air into webs as it rises. Gluten is the cause of the elasticity of dough and for the spongy, soft interior of bread. Gluten is the reason bread doesn’t turn into either a pancake or a brick.

Flour, while it is dry and powdery, contains the ingredients to make gluten, but no gluten itself. But as soon as flour particles come in contact with water, a couple things happen. One, in the presence of water, two of the flour’s proteins start to come together to form gluten. And two, some of the starches break down into sugar. If the flour-water mixture is ‘infected’ with yeast, the little yeasties can feed on the sugar and multiply. This process is known as ‘autolysis’.

Now most of the wise bread teachers, like Rose Levy Berenbaum and the bakers at King Arthur Flour, have always recommended a period of ‘walking away‘ once you have mixed water and flour before the kneading begins. This walking away, whether it is for ten minutes or an hour, gives the gluten formation a head start, and makes the subsequent kneading a much easier task.

Call it walking away or call it autolysis, it is the time for the flour to spontaneously do the gluten-formation that kneading is usually called upon to do. But what if you took this principle to its logical conclusion, and allowed the flour-water to do all the work? What if you never had to knead at all?

What you have then is no-knead bread. It takes longer than kneaded bread, because the folding and squeezing that the dough is subjected to while kneading speeds up the process. But as a home cook, I plead—no, I demand—that you develop patience. It will take you a day, or more. But you will be proud of your loaf.

Wetness

Now here’s another advantage that no-knead breads can give you that kneaded breads simply cannot. The dough can be very, very wet. So wet in fact that they are impossible to handle, because touching it with your whole hand as you would have to in order to knead would make a sticky mess. No-knead bread is never handled (with one exception, as I’ll go into next). So it can have a lot more water by proportion than regular breads; and a wetter dough makes for a softer, more risen, more holey crumb.

Now the dough is so wet that one even foregoes the usual ‘freeform’ baking of the crusty loafs, where they sit in the oven all by themselves. The dough is simply too wet! This is why the standard way to bake this kind of bread is in a covered dutch oven or a loaf pan. (I’ll show you both by-and-by). The added advantage of this method is that in the closed, wet, hot environment of a dutch oven, you essentially create a steam sauna for the bread, and get a simply remarkable final rise—while baking.

Folding

Now while kneading is not called for, here’s a step that can lengthen and stretch the gluten strands and thus improve the final crumb. This is a step that Rose Levy Berenbaum specifies in all her crusty loaves. It involves laying out the flaccid dough in a gently stretched rectangle, folding both sides in to overlap in the middle, turning 90° and repeating it. So,

Step One: Fold in the left third of the rectangle in order to cover the middle third, then fold in the right third of the rectangle in order to cover the previous flap.

Step Two: Rotate the dough 90° and repeat the two folds above.

Steps

Mixing flour, water, yeast, salt

Folding

Shaping for final rise

Misting and scoring

Baking

No-knead bread

A note on ingredients:

You have considerable flexibility regarding ingredients. Where the flour is concerned, you can go up to one third whole wheat. I’ve used high protein bread flour, but all-purpose will work too, though the result will not be as chewy, but rather, softer. A single teaspoon of salt will be just enough for the bread to taste ‘normal’ but you can go up to even two teaspoons for a saltier crumb. Using less yeast then a quarter teaspoon will make it rise slower, more will make it rise faster. Though I would not recommend more than a half teaspoon because remember, you want this process to be slow.

Ingredients:
  • 3 cups flour (I used 2.5 cups King Arthur bread flour and 0.5 cups King Arthur whole wheat flour)
  • 1-1.5 tsp salt
  • 0.25 teaspoon instant yeast
  • 1.5 cups + 2 tbsp water
  • Dry flour for sprinkling
Time:
  • 5 minutes to mix.
  • 8-18 hours first rise.
  • 10 minutes folding and shaping.
  • 1 hour final rise.
  • Bake at 450°F for 45 minutes
Method:

Combine the first three ingredients in a large bowl and combine thoroughly with a fork. Make a sort of well in the center and pour a cup and a half of water into it, reserving the two extra tablespoons to add if needed. Roughly combine using a chopstick till ALL the flour is moistened. Add in the extra water if needed to make sure there is no more dry powdery flour in the bowl. A wet, sticky mess is what one is aiming for.

The resulting mixture will be very, very rough and sticky. Scrape down the sides of the bowl with a spatula, wrap tightly with plastic wrap and leave aside.

In about an hour or two, you are ready to fold the dough as described above. Sprinkle the counter with plenty of flour and scrape the dough out of the bowl onto the counter. Sprinkle dry flour on the dough as well as on your fingers, as this will help you handle it without it sticking. Perform the two folds as described above. Now the dough will be a much smoother, tighter roll than the mass you started with. Place it back in the bowl, covered with wrap, to rise.

This rise can take anywhere from 8 to 18 hours. If it is rising too quickly and you are not ready to proceed with the next steps yet, put the bowl in the fridge to retard it. Take it out the next morning and let it come to room temperature, about an hour or two.

At the end of this period, the dough should have more than doubled, and the surface should show some large bubbles. If you tap the bowl, it will shiver like jelly.

Sprinkle the counter with more dry flour and place the dough on it and proceed to shape it into a round. This is done by pretending you are making a cloth bundle with the dough: so gather the edges into the middle, tighten, and do it some more.  Not only is the dough turning into a tight ball, the outer skin is also getting stretched.

Place it seam side down on some floured parchment paper. Cover with plastic wrap once again and leave to rise. You can leave it to rise free form, but it is better to place it in a bowl or basket or, as I did, an empty tortilla container. This is so that the vertical sides of the container constrain the dough from spreading outwards, and it is pushed to rise upwards instead. The dough will take about an hour or hour and a half for this second rise.

About half hour before you are ready to bake, turn the oven up to 450°F and place the dutch oven, uncovered, and its lid, in the oven to get it hot.

At the end of the hour, remove the plastic wrap off the dough. Mist the top of the dough with a fine spray of water. Use a sharp serrated knife to score it: gently, with a slicing motion and barely any pressure at all, make a half inch cut in the top of the dough. A lip will open up, showing all the glorious webbing that has developed under the skin. Scoring in this way helps the crust, as it bakes, to open up along that line instead of haphazardly.

Lift up the dough ball, parchment and all, and place in the dutch oven and cover with the lid. Bake for 30 minutes covered and 15 minutes uncovered.

At the end of baking, the crust should be golden brown and the bread dramatically risen. When thumped on the bottom it will sound hollow. Let it cool for an hour before slicing.

(Find me on Twitter at @TheOddPantry)

Star-studded raisin-pecan bread

Star-studded bread

Star-studded bread

A lot of what I know about bread-baking I learnt at the home of Rose Levy Berenbaum. No, she is not my favorite aunt or neighbor (though how I wish she were) — she was in her home, on TV, and I was in my home, watching TV and earnestly taking notes.

I have made several of the breads in her book The Bread Bible, and this one is one of my favorites. Of course breads with raisins and nuts are quite common. But the standard configuration they come in is the sliced bread with a square shape, sprinkled with cinnamon and a swirl in the middle. Now that is wonderful, but there’s more to raisin-nut breads than the cinnamon swirl.

The Bread Bible

The Bread Bible

This particular bread (called the Raisin Pecan bread in the book) is a free-form loaf that is baked ‘naked’ in the oven, outside of any pans. Those are my favorite kinds of breads because of their crustiness. There is no cinnamon — that is the other difference. There is no swirl, instead the raisins and pecans are nicely spread throughout the loaf, hence the name that I gave it — star-studded. There is no added sweetness, making it less of a confection and more of an adult dinner bread. Spread with something creamy like clotted cream or a nice white cheddar it is one of the most popular snacks in our home.

She uses some ingenious tricks to enhance the flavor. A sponge is mixed hours ahead or the previous day. Raisins are soaked for 30 minutes, no more; and the soaking water is used in the bread. Some of the pecans are ground fine to be mixed in with the dough, some are just broken bits and add a delightful crunchiness to many bites. The nut and raisins are mixed in in a very delicate procedure, after all the heavy kneading is done,  to avoid a mess of runny raisin juice. Simple, small tricks, but they make a big difference.

I made one more modification — I substituted quite a bit of the flour with whole wheat, because we like that in our household.

Star-studded Raisin-Nut Bread

Mixing the sponge

Mixing the sponge

Soaked raisins

Soaked raisins

Pecans

Pecans with some pistachio thrown in

Straining ground pecans

Straining ground pecans

Ground pecans and bits

Ground pecans and bits

Sponge risen

Sponge risen

Mixing the dough

Mixing the dough

Spreading pecans

Spreading pecans

Adding raisins

Adding raisins

Rolling it up

Rolling it up

Ready for first rise

Ready for first rise

Shaped ready for second rise

Shaped ready for second rise

Risen

Risen

Scored

Scored

Done

Done

Star-studded bread (adapted from Rose Levy Berenbaum's raisin-pecan bread)

  • Servings: 2 pound loaf
  • Print

Ingredients for soaking raisins:
  • 1 cup raisins or currants
  • 1/3 cup water
Method for soaking raisins:

Soak the raisins in hot water for half an hour. At this point, drain the raisins and you will be left with 1/4 cup water, that you can use to make the sponge below.

Ingredients for sponge:
  • 1 cup bread flour
  • 1/2 teaspoon instant yeast
  • 1 cup water (including raisin soaking water)
  • 1 tablespoon demerara sugar
Method for sponge:

Mix the dry ingredients together in a bowl, then pour in the water (remember to use 1/4 cup of the raisin water for added flavor), and stir stir stir with a wooden spoon or chopstick, almost like you are whisking it. The sponge will look like batter with some air incorporated into it. Cover with a plastic wrap and keep aside at room temperature for at least 1.5 hours, at most a whole day.

Ingredients for dough:
  • 1.5 cups plus couple teaspoons more of whole wheat flour
  • 3/4 teaspoon instant yeast
  • 1.25 teaspoon salt
  • 1/2 cup finely ground pecans
  • 1.5 cups coarsely broken pecans (I substituted some with pistachios)
  • 1 tablespoon oil
  • All the sponge from above
  • All the raisins from above
Method for dough:

Stir together the flour, the yeast, the salt. Add in the sponge and the oil and the ground pecans, stir with a chopstick or the dough hook to moisten fully.  Cover with plastic wrap and leave it aside for 10 minutes. Come back to it and knead it properly into a dough. Let it rest for 10 more minutes.

Now flatten the dough and spread it out into a rough rectangle about 10 inches by 15 inches. Spread the broken pecans bits all over the rectangle leaving an inch border on all sides. Then spread the raisins over the same area evenly. Start rolling up the dough from a short end, also taking care to tuck in the edges. All the nuts and raisins will be hidden inside.

You do need to knead it lightly after, just to get it all to combine. At this point nuts and raisins might start falling out of your dough ball, just do your best to tuck them back in.

Cover with oil and allow the first rise until it is doubled, which will take about 2 hours. Shape it into a loaf and allow the second rise till doubled, covered with plastic wrap or a damp towel. This will take about 1 hour.

Heat the oven to 400ºF. Score the bread with a sharp, serrated knife. Each cut should go about half an inch deep. Mist the bread and put into the oven on a middle rack. In the first 5 minutes, mist inside the oven with a water spray bottle and quickly close the oven, about 3 or 4 times. After the first 5 minutes bring the temperature down to 375ºF. Continue baking for 40 to 50 minutes until it is golden brown.

Beet parathas; a classic recipe book

Beet paratha

Beet paratha

Some years ago I found a book in a used bookstore that really spoke to me in the depths of my soul. It electrified me from the title alone, even before I cracked open the pages.

Now a few books have been known to be enormously influential in people’s lives. For some it may be ‘Thus Spake Zarathustra’ by Nietzche, or ‘Atlas Shrugged’ by Ayn Rand. For others it might be ‘War and Peace’ by Tolstoy. For me, it was this:

tasty dishes from waste items by Aroona Reejsinghani

tasty dishes from waste items by Aroona Reejsinghani

For the 1970’s in India, in the midst of famine, this book was quite apropos. I remember talk of the high prices of vegetables at every social gathering. Meat for many was simply out of the question. This book begins with an acknowledgement of the scarcity that every housewife has to deal with. It goes on to celebrate the leaves, stems, peels, leftovers that most of us throw away. The author painstakingly lists the vitamin content of each of these leaves and rinds, including the mysterious Vitamin P (?)

Not only is it completely impressive that she was able to do this research in the days before Google, it is astounding how many recipes she was able to come up with.

In here one finds 5 recipes that make use of banana peels (throw away the outer green part, she advises), 9 recipes that use turnip leaves, 2 that want you to fry up potato skins. Curdled milk, of course, is an industry, and the author dwells on that for a bit. Stale bread gets its own section with 36 recipes. Leftover fish, meat, chicken each get their own sections as well.

Now we no longer live in a world of food scarcity but quite the opposite. Most developed countries don’t spend over 10% of their income on food, in the US, where I live, it is around 7%. But the message of this book is more relevant than ever. The cost of food production remains very high, it just doesn’t come out of our paychecks, but instead we pay for it with depleted soils and poorer biodiversity.

I have to admit I don’t go scavenging around the thrown away peels for my next meal, but instead compost everything. Given my chunky waistline, I figure it is even better to feed the worms than me.

Beetroot

Beetroot from foodreference.com

Beetroot from foodreference.com

Now, about beets. Here is basically the entire beet plant from roots up to the leaves. Stare at the leaves for a bit. You all know that the greens are nothing but chard, right? Beetroot and chard are not even different species but simply different breeds. Just like a Dalmatians may be bred for running and bloodhounds for tracking a scent, but both remain dogs, chard is bred for fancy leaves and beetroots for fancy roots, but both remain Beta vulgaris. The roots of the first and the leaves of the second can be eaten. This website has more on this: Is chard root edible.

If you have no use for the greens, you could discard them I guess, but for goodness sake don’t throw them away and then go buy chard at the market!

Out of the bunch pictured, here are the parts I ended up throwing away for this recipe, the rest was all eaten. I threw away the long tails of the roots. I threw away the part where the roots turn into stems — that tends to be tough. I peeled the roots thinly with a vegetable peeler. Last, some stems have thick fibers that simply zipper all the way off; if I caught hold of some of those, I threw them away, otherwise I chopped them up along with the stems and leaves.

Parathas with beet root and greens filling

A reader might be forgiven for wondering if I’m going through the little-girl spectrum for my parathas; some time ago I did a recipe for purple parathas, this time they are pink.

Anyway, the idea of the stuffed paratha is simple — it is a whole wheat flatbread stuffed with filling inside. The filling for these consists of the grated root and the finely chopped leaves and stems, cooked together with seasonings. Parathas are great with some plain yogurt on the side.

Tails trimmed

Heads and tails trimmed

Greens finely chopped

Greens finely chopped

Grated, cooking with oil

Grated, cooking with oil

Cooked down and dry

Cooked down and dry

Uncooked paratha, pink showing

Uncooked paratha, pink showing

Cooked paratha, stacking up

Cooked paratha, stacking up

See the pink?

See the pink?

Parathas with beet root and greens filling

  • Servings: 8 parathas
  • Print

Ingredients for filling:
  • 3 medium beetroots with greens and stems
  • 1 teaspoon salt
  • 1 teaspoon red chili powder (or to taste)
  • 1 teaspoon chaat masala, substitute with dry mango powder, substitute that with lime/lemon juice
  • 1 tablespoon oil
Ingredients for parathas:
  • Roti dough made out of about 1 cup whole-wheat flour as in this recipe
  • Oil or ghee or butter for shallow frying on griddle.
Method:

Make the dough and set aside for half hour to rest. Make the filling: peel, trim and grate the roots. Rinse and finely chop the greens and stems. Heat the 1 tablespoon oil in a wide pan. When it shimmers, put in the beets, greens and all. Stir to coat with oil. They will very quickly start to cook down. Add the salt, the red chili, and the chaat masala and stir. The point is to dry out the filling. Once it looks pretty dry, turn off the flame and wait for it to cool. Taste for seasoning and adjust. I generally prefer the filling to be highly seasoned because the dough does not have any seasoning at all.

To make the parathas you can refer to this recipe, but I’m including most of the steps anyway. The dough is the same as used for rotis/chapatis. Roll out a thin circle about 5-6 inches wide. Place a couple tablespoons of the filling in the middle. Gather up the edges of the disk into a pouch. Flatten the pouch with your fingers, then roll it out again carefully so as to prevent the filling from escaping. Once it is a flat disk once again, about an eighth of an inch thick, it is time to shallow-fry on the griddle.

Heat the griddle on medium-high. When some drops of water thrown on it sizzle, it is time to put the rolled out paratha on. Wait for 30 seconds while the underside cooks; then flip it. Wait for another 30 seconds while the second side cooks. Now spread a few drops of oil or ghee on the top surface and flip it, to have the bottom shallow-fry in oil. A minute of this, now spread a few drops of oil on this surface and flip it again, letting it cook another 30 seconds. This way, each surface has been cooked twice, first roasted dry, then with oil, on the griddle.

Stack up the prepared parathas; enjoy them with some plain yogurt on the side. Greek yogurt is very popular nowadays, it would make a great dip for these.

I’m entering this in the Family Foodies challenge for May, which is to do with frugal eating. Perfect! Minds knitted together across the interwebs…that’s what blogging is all about.

This is hosted over at Bangers and Mash and Eat Your Veg…this is a link to the May challenge. May the cheapest skinflint win!


A slab of bread rolls — laadi pav


Pav

Pav

Most people are only dimly aware of this but the Portuguese colonized India long before the British, and hung on till long after. Because of their influence, a particular yeasted bread called pav spread all around Bombay and became very much part of the culture of the city. (A word on that shortly.) Now pão in Portuguese simply means ‘bread’. In India, we have a pretty fraught relationship with yeast breads, as in, we didn’t get around to rising breads much. Most of the use of wheat flour is for flat breads. It’s not that risen breads are not popular in India — they are, very much so. But they come from the European influence, and have always remained a bit foreign. By that I mean that hardly anyone makes risen breads at home. When I was a kid, if one wanted pav, one had to resort to bakeries.

Irani restaurants

By iranichaimumbai (http://creativecommons.org/licenses/by-sa/2.0), via Wikimedia Commons

In the old days, most of the bakeries in Bombay were run by the Iranis, as part of tea-houses called Irani restaurants. They were pretty unique establishments, run by Zoroastrians who escaped Iran around the 1920’s. For me, it is impossible to think back to any neighborhood in South Bombay without thinking of the corner Irani restaurant that served it. The Iranis were foreigners and the rigid customs of Hinduism meant nothing to them. The food they served was mostly Irani cuisine but also had a touch of Europe.

Their clientele looked like the city itself. There were Christians and Parsees, taxi drivers and street workers, middle-class office workers and retirees. For a few rupees you could hang out for hours under the high ceilings, the drone of the fan overhead, read the morning newspaper that was still warm from the press, sit on the wooden colonial-style netted chairs at glass-topped tables in peace while you ate your breakfast.

They were not fancy. Customer service was a bit…brusque. This post has an entertaining story about that. Tea inevitably got poured into the saucer to be drunk. Breakfast was variations on pav. Maska pav is bread and butter. Brun maska pav is hard brown bread with butter. Akuri pav is pav bread with scrambled eggs. And so on.

If you want to further explore the old world of Irani restaurants, here are some websites with pictures and wonderful stories. The Heritage Institute page on it, and one from a website called Irani Chai.

Street food

The Irani restaurants are sadly on their way out. Many have turned into beer bars, one into a McDonalds. If they are around, they have survived by expanding their menus to include dosas and Chinese. But pav bread remains as popular in the city as ever. It fuels much of the manual labor that goes on in the city from the early hours to way past midnight.

I guess this is the appropriate time in this post for me to start referring to the city as Mumbai. People say that no one starves in Mumbai. To eat a decent, wholesome meal, you don’t need to own a kitchen or a stove or even own a pair of shoes. Every street corner has some food stall or the other. Many serve meals centered on pav. Plates and cutlery are completely unnecessary. Food is simply handed to you or may be wrapped in a newspaper.

One is vada pav, which is mashed potato deep-fried in a besan batter, served inside a pav, with garlic chutney. Another is pav bhaji, which is a mashed mixture served with pav with tons of butter. For 50 rupees you can fill your belly with an excellent, pure vegetarian, wonderfully-spiced meal. People, please realize how wonderful this is. The Odd Pantry will showcase all of those recipes eventually.

But one has to start with pav.

Laadi pav

The particular version of Portuguese pão that we in India latched onto looks like a grid of bread buns stuck together at the edges into a slab (‘laadi’). To me the word ‘laadi’ sounds a bit mechanical or construction-related, so it is quite endearing when it is used for bread. Looks a lot like a dinner roll that is available all over America.

But look, this is different. I’ve tried to recreate my favorite street food snacks at home using a standard dinner roll, but the results are terribly disappointing. This is because store-bought dinner rolls have more than a hint of sweetness and that simply does not go with the savory flavors of street food. It totally ruins it, in fact. They often don’t use real butter and one absolutely needs real butter.

This recipe of pav has no sugar whatsoever. None. You don’t need any. And real butter. Just try it.

Flour and yeast

Flour and yeast

Pour water in and stir

Pour water in and stir

Shaggy mass

Shaggy mass

Shaggy mass with butter poured on

Shaggy mass with butter poured on

Pav dough

Pav dough

Divided dough

Divided dough

Further divided dough

Further divided dough

Pav rising

Pav rising

Pav risen

Pav risen

Laadi pav

Ingredients
  • 3 cups bread flour (I used King Arthur, substitute with all purpose or maida in India)
  • 1 teaspoon instant yeast. This is also available in most stores as bread machine yeast.
  • 3/4 teaspoon salt
  • 2 tablespoons unsalted butter
Method

Have the flour in a large bowl. Sprinkle in the yeast and stir it in. Then sprinkle in the salt and stir that in. Add 1.25 cups room temperature water and gently stir to moisten all the flour and make a shaggy mass. Cover and go do something else for 15-20 minutes.

Melt the butter — I use the microwave for this. But make sure it is not sizzling, it needs to be just melted. Pour the butter over the flour mixture. Now give it a good kneading, for about 5-7 minutes. The dough will be smooth and shiny.

Cover with plastic wrap and leave it aside at room temperature to rise for 1.5-2 hours. My room temperature is around 70°F. In India, room temperature will be a lot higher, so I would leave it under a fan or airy window.

In 1.5-2 hours, it will have doubled. Gently take the dough out, and using a pastry cutter, divide it into 12 rolls. The way I do this is to first divide in half, then each of those into halves to make 4 quarters, and each of those into 3 to make 12.

Each roll must be shaped like this: take the dough in hand and start by rolling it into a pouch, press down the center point with your thumbs and keep rolling more and more of the bun into the pouch. You are sort of trying to make a stretched balloon with the outer surface. Pinch the seam of the pouch shut. Cover with oil and lay seam-side down on a cookie sheet. Each roll is to be place half inch away from its neighbors in a grid.

Let it rise for another hour. The rolls will have risen into each other and gotten connected. Bake in a 425°F oven for 15 minutes. If you like, brush with butter right away when they come out.


FB-f-Logo__blue_29 pinterest_badge_red Google+ twitter-button-small

Country mouse and city mouse – buckwheat pancakes

IMG_0768

Some time ago I hiked up some hills around Lonavla with a friend. We were out having fun, well-prepared with our water bottles and GPS watches and clothes made of modern fabric that is apparently made from gasoline. Our feet were shod in lightweight sneakers that made the shards of rocks underfoot all but disappear.

Incredible views on all sides of us. Buddhist cave carvings from centuries ago ahead of us.

There we ran into a farmer coming downhill on the same trail as us. No gasoline-fabric for him. He had on his airy dhoti around his waist that he probably wore no matter what the situation. A light cloth wound around his head protected him from the sun. Thin as a rake, he walked on those hills as though he didn’t think about it too much, just did it.

I felt weirdly embarrassed. This man naturally belonged here, while we were interlopers from our fat happy internet-savvy world and we clearly didn’t. And he wore no shoes! Shards of rock or not, he was barefoot and scarcely concerned by it. At that moment my shoes happened to pinch a toe or two, and I thought to myself — if the farmer can go without shoes, perhaps I can too. Maybe the rocks are not as bad as they look.

So I tried walking barefoot, hanging the shoes from my neck by their laces. I couldn’t go four steps without hurriedly getting them back on again. Oh, the shooting pain! Tens of jagged rocks at any point poked right into my soft soles.

Marginal environments

As I watched the farmer keep his steady pace down the hill, I realized that although this man had probably never seen a computer keyboard in his life, he had mastered this marginal, mountainous environment and knew secrets about it we didn’t. He fit in here, while the only way we could was to drag paraphernalia from our fat happy internet-savvy world into it.

So…ah yes, buckwheat. Buckwheat is the farmer. Buckwheat grows on mountains with gravelly soil and practically no nourishment and does it six ways to Sunday. It doesn’t need much but gives a lot. Secrets — yes, it knows a few. It scorns pesticides and actively dislikes being coddled with fertilizers. It will grow quickly, produce quickly in a short season from June to September, swamp out the weedy flimflam, laugh blithely about insect pests, and produce a non-grain grain that will feed you all the essential amino acids. Count them — nine — all amino acids essential to humans.

Why a non-grain grain? Because it is a tiny seed and used as a cereal and ground and used as a flour. But it does not come from a grass, as grains usually do. Walks like a grain, quacks like a grain, but is not a grain. As I have gone over before.

Buckwheat certainly has a whiff of the old world. It grows widely in the Himalayas and is used for rotis and gruel. In Japan it is used to make the famous soba noodles. Kasha and blini in Eastern Europe. Immigrants brought this grain to America and in the 18th century 20 times more acreage was devoted to buckwheat than is now.

Then came the use of fertilizer — one of the inventions that fuel our fat happy Internet-savvy generation, and with it crops like wheat and corn that want coddling; and buckwheat was edged out. Makes you wonder what all that buckwheat was being used for, doesn’t it?

Buckwheat pancakes

Undoubtedly a big proportion of the buckwheat flour went into pancakes, given how delicious they are. In our family we were introduced to them via the hippie sensibility of Santa Cruz, where my husband lived for four years. Now they are a weekend staple. They go with maple syrup, but remember to use good, natural, golden maple syrup from the sap of maple trees, not the fake sticky one that comes from corn.

Dry ingredients:
  • 1.5 cups buckwheat flour
  • 1/2 cup white whole wheat flour
  • 1.5 teaspoons baking soda
  • 1 teaspoon salt
Wet ingredients:
  • 2 cups buttermilk
  • 2 eggs
  • 1/4 cup unsalted butter
  • almond oil for cooking
Method:

Stir together the dry ingredients in a large bowl.

IMG_0740

Meanwhile crack the eggs into a separate bowl and whisk. Then whisk in the buttermilk. Melt the butter and whisk that in as well.

IMG_0739 IMG_0745 IMG_0748

Now that the wet and dry ingredients are separately ready, it is time to combine them. Pour the wet into the dry. Stir gently. Most lumps (almost all) should be gone. The consistency should allow it to pour; you might find you need to add water. I usually add about half a cup.

IMG_0758

To cook, I have a large non-stick griddle on highish heat. (‘High-ish’ is the point between medium-high and high). We found that butter smokes too much so we use almond oil for cooking. It has a high smoke point and a nice aroma. A tablespoon of oil for each batch of six pancakes works nicely. Spread the oil all over. Pour six ladle-fulls on like shown, each should be about four inches wide. All told you will get about 20 such pancakes.

IMG_0759 IMG_0761

The time to flip each is when several bubbles have arisen and popped; and the edges look set. Flip and cook on the other side for 30 seconds to 1 minute; it will softly rise in the meantime.

IMG_0762 IMG_0763

Here is our nice pile of pancakes. City mouse (wheat flour) meet country mouse (buckwheat).

IMG_0766


My Parathas turned Purple

IMG_0940

I have a huge amount of respect for nutrition scientists. But one can sense that in food, they have met a worthy adversary.

Carbohydrate, fat and protein

WHO Food pyramid

WHO Food pyramid

There were the days when they confidently issued proclamations about ‘food pyramids’ that could be rendered in the colors available in a child’s crayon pack. There was carbohydrate, fat, and protein. Various experiments were performed on unsuspecting dogs and rats that led them to believe that out of the three, protein was the one true nutrient.

Then came sailors and prisoners who were given protein enough, but were afflicted with swollen gums, purple spots, and finally, death. This disease was called scurvy. This disease had been known since the Roman times, and had often been treated with herbal cures such as lemon juice. Another time, a sailor stepped ashore and ate some cactus fruit, and found that it had curative properties too.

The vitamins

So what was it about lemon juice and cactus fruit that had the magical property to cure scurvy? Surely, they thought, since scurvy was a disease of ‘putridness’, whatever that means, and clearly, acid cuts ‘putridness’, it has got to be the acid in lemon juice that does the trick. So they began dosing sailors with diluted sulfuric acid and vinegar, to no avail. This acid treatment went on pointlessly for years, apparently, until a doctor named James Lind had a forehead-smacking moment and realized the sulfuric acid was doing more harm than good.

James Lind feeding citrus fruit to a scurvy-stricken sailor aboard HMS Salisbury in 1747 (Artist: Robert A Thom)

It was through such nightmarish means that scientists were forced to accept that the complexity of nutrition went beyond the big three of fat, carbohydrate and protein, and the ph dimension of alkaline and acid. By the early twentieth they had identified nutrients that were given the name ‘vitamins‘ which meant ‘force of life’, or something. Vitamin C cured scurvy while Vitamin B cured beri beri and pellagra; others were discovered too.

So food science climbed up the ladder of complexity, but you can tell how many nutrients they expected to find in food, because they started naming them after the alphabet. There may be ten, there may be twenty, surely it would not go beyond A through Z, right? They found 13 vitamins.

Phytonutrients

The farther one goes, the farther behind one gets. Now they have identified so many nutrients that this layperson (me) has lost all hope of catching up.

Phytonutrients‘ is the name used to describe all kinds of nutrients available only through plants. They help plants perform all their planty duties: fight germs, fight aging, fight toxins, stay alive, in other words. They give the plants their colors; their smells; their pungency. When we eat plants, we get the benefit of these chemicals too, for surprisingly similar functions.

Now there is a type of phytonutrient that is a pigment that gives plants a purple color (anthocyanins). There is tons of tantalizing research about how beneficial these pigments are for us. There is evidence from folk medicine — hibiscus has been used for liver dysfunction, while bilberry has been used to cure night-blindness. There is evidence from the test-tube that the purple pigment prevents the growth of cancer cells. There is evidence from tests on rats that the purple aids in cardiovascular health.

The pigments have antioxidant properties, so that is one reason why they might have so many benefits. But scientists are now alive to the dangers of accepting the simple explanation. These pigments belong to a set of 4000 other compounds called flavonoids; plants use all of them in concert to perform various functions through their lives. So it is not just this or that chemical that provides this or that benefit; it might be any of the 4000 thousand put together that does it. So it isn’t the purpleness itself; it is the army of its cousins working together in the plant.

That makes sense — plants do not live on vitamin supplements. They use whatever they’ve got in whatever combination they can, to do the things they need done. If we eat those plants, we ingest those chemical complexes and gain similar benefits.

We have come a long way from the time scientists dosed sailors with vinegar. Now one can imagine them shaking their fist and saying, ‘Just — just go eat purple food.’

Well, that’s easy.

My purple parathas

I love stuffing cauliflower or potato into rotis to make parathas. Eating them with plain yogurt is soul-satisfying. But on this day, I made them purple.

Ingredients for the roti:

  • Have a look at this recipe (Rolling the Roti) and make as much as you need. I made 2 potato parathas and 8 cauliflower ones = 10 rotis total.
  • Oil or ghee as needed.

Ingredients for potato filling (for 2 parathas):

  • 1 medium purple potato
  • 1 – 2 tablespoons finely chopped onion
  • 1 tablespoon finely minced cilantro
  • 1 small green chili sliced, or substitute with half a teaspoon red chili
  • 1 teaspoon chaat masala
  • Salt to taste

Ingredients for cauliflower filling (for 8 parathas):

  • About 4 cups purple cauliflower florets
  • An inch of ginger, minced fine
  • 1 – 2 green serrano chilies
  • 1 tablespoon oil
  • 2 – 3 teaspoons chaat masala
  • 3/4 teaspoon salt
  • Half a teaspoon cumin seeds (optional)
  • Sprinkle of asafetida (optional)

Method for potato filling:

Microwave the potato until it is soft. Mash it, peel and all. Mix in the other ingredients, squeeze it into a sort of dough, and divide into two disks. The filling is ready, each disk will go into one paratha.

IMG_0932 IMG_0933

Method for cauliflower filling:

Grate the cauliflower, mince the ginger and chili. Heat the oil in a large thick-bottomed pan on medium heat. When it shimmers put in the asafetida and the cumin. When they sizzle put in the ginger, chili, and grated cauliflower. Stir to coat with oil. Add the salt and the chaat masala. Raise to heat to nicely dry the cauliflower. It is very important to get the cauliflower to be as dry as possible, or it will make your life hell while rolling out the parathas. When it is dry enough, turn off the heat and let it dry.

IMG_1022 IMG_1023 IMG_1024 IMG_1025 IMG_1026 IMG_1027

Method for composing the parathas:

Roll out a roti about 6 inches in diameter. Place the right amount of filling in the center. For the cauliflower it is about 3 heaped tablespoons, for the potato filling it is about a 2 – 3 inch disk of potato. Gather up the edges of the roti and give it a squeeze. Flatten the pouch into a disk and start rolling it flat with the filling inside.

IMG_0934 IMG_1028 IMG_0935 IMG_0937

While rolling parathas the ever-present danger is that the filling will come squeezing out like toothpaste out of a tube. One must learn to avoid that. One way is to use a very gentle hand while rolling — you don’t want a few long, weighty rollings, instead many quick, darting, gentle rollings. Use dry flour as needed to patch up holes.

The ideal paratha, when rolled out, has such a thin roti cover that one can see the filling peeping out in various places, but it doesn’t actually fall out. Keep your eye on that ideal.

Meanwhile have a cast-iron griddle or tawa going on a medium-high flame. Slap a prepared paratha on. After 30 seconds, the top surface will seem a little set. Flip it over. Wait 30 seconds. Now spread a bit of oil or ghee over the top surface and flip it over for another 30 seconds. Repeat. In total, each side has been cooked dry twice, then cooked with oil twice.

IMG_0938 IMG_0939

While one paratha is cooking, did you think it was time to stand around and have a coffee break? No, my dear, get busy rolling out the next one. When one gets practiced one can have two griddles going at once.

IMG_1031

Have it with some plain yogurt on the side, nothing else is needed.

Feeding the husband’s habit

Husband's habit bread

Husband’s habit bread

Several years ago, poking around google looking for an oat bread recipe, I found that an unknown denizen of the Internet had put up a good-sounding recipe under the name of ‘Habit Bread‘. I made it that very day. My husband, who is a big fan of oat breads (he has his toasted with almond butter), said that I had aced it on the first try.

Since then, this loaf has become a standard in our family. Like with every other recipe I have made modifications — I call my version the Husband’s Habit Bread. It is so much part of my husband’s weekly routine that I try to have a loaf sliced and frozen at all times.

Here is a trick to storing loafs of bread, specially of this dense variety. One thing I have found is that the freezer works great, but unless one wants to thaw the entire loaf at once, it is better to pre-slice it. Then you can pull out one slice at a time.

Go ahead, pull one out. What? You can’t?! You can’t because all the slices stuck together when they froze?

Exactly. That’s why I put sheets of parchment or waxed paper in between each pair of slices before I freeze them. Put all the slices thus separated in a freezer bag, squeeze out as much air as you can from it, bind it tightly and put it in the freezer.

Husband’s Habit Bread

This recipe makes one 9″x5″ loaf.

Wet Ingredients:

  • 1 cup dry rolled oats
  • 1/4 cup unsalted butter
  • 2 tablespoons honey
  • 1/2 cup corn polenta
  • 1/2 cup dry milk
  • 1 teaspoon salt
  • 2 cups water

Dry Ingredients:

2 cups whole wheat flour (I use King Arthur’s premium whole wheat)

1 cup bread flour

2 teaspoons instant yeast

Method:

Combine all the wet ingredients together into a pot and bring to a gently boil. Stir nicely to get it all to combine, paying special attention to breaking up the dry milk lumps. Once it comes to a boil, turn off the heat and wait for it to cool.

IMG_0186 IMG_0188 IMG_0189

The unknown denizen of the Internet who is the originator of the Habit Bread recipe mentions that a bowl of cooked oatmeal is notorious for holding onto heat and that is true. It takes a while for this mixture to cool to lukewarm. At the same time, you don’t want to wait too long, because then the mixture will turn into a giant lump and the bread will not mix very well. I have found through trial and error that this time period is about half an hour; but test before using.

Meanwhile combine the dry ingredients in the bowl of a mixer; if you choose to knead by hand, just combine in a large bowl. Stir the flours with a fork. Put the (lukewarm) wet ingredients in and stir with the dough hook for about 3 – 4 minutes until the dry ingredients are moistened. You may find you need to add up to 1/4 cup extra water while kneading. Leave it covered with a plastic wrap for about 10 to 20 minutes.

Come back to it; by this point due to the autolyse process the dough will be much easier to knead into a smooth ball.

Turn on the mixer with the dough hook for another few minutes or so; first the dough will come together into a shaggy mass. I like to finish kneading by hand until maximal smoothness.

Cover with oil and let it rise at room temperature in an oiled bowl for about 2 hours. It should double in volume.

IMG_0190 IMG_0192 IMG_0193

Take it out of the bowl, flatten it gently into a rectangle and roll into a loaf, while taking care to tuck the ends in. Squeeze the seam shut all the way across to seal it. Oil the shaped dough and put into a 9 inch by 5 inch loaf pan, also oiled. Cover with a plastic wrap and let it rise at room temperature for an hour to an hour and a half more.

This is a pretty dense bread, and it is quite a job for the wheat flour gluten to lift up the great heft of the oats and the corn polenta. Plus we are using a large percentage of whole wheat flour, the bran in which tends to counteract the lift of gluten. So this bread is not going to win any light-and-airy contests. By the time it has peeked over the rim of the loaf pan, it is probably done rising.

IMG_0194 IMG_0195

Bake in a 350 F oven for 55 minutes. An instant-read thermometer inserted into the meat of the loaf should read 200 F. Take it out of the oven and let it cool on a rack for an hour before slicing into it. Thank you, unknown denizen of the Internet.

IMG_0196

Beasties in my batter

My mother always said that South Indians are much smarter than the rest of us simpletons because they eat a lot of urad dal. This is a bean I have mentioned before. It is alternatively called black gram or Vigna Mungo; this is what it looks like:

Vigna mungo, black gram, urad dal: whole on the left, split and dehusked on the right.

Vigna mungo, black gram, urad dal: whole on the top, split and dehusked on the bottom.

It is closely related to the more well-known moong dal (mung bean), they are both in the Vigna genus, which means they are about as closely related as…say…the polar bear and the grizzly bear to each other. Urad dal, though, has a blacker husk, and white (not yellow) underneath.

Even though this bean is eaten as a dal all over India, its most interesting use is in the fermented cakes and crepes of South India — idlis and dosas. In order to ferment it, the lentil is first soaked and ground thoroughly, and mixed with rice batter.

Fermentation of the Lactic Acid type

Let’s take a little digression into what fermentation does to the batter.

Fermentation

Fermentation

  • The mixture is kept warm, and you know what happens when you leave something out of the fridge — a whole jungle gets started in it.
Jungle of beasties

Jungle

  • Creatures like lactic acid bacteria, yeast, and bacteria that like to breathe air. They do battle, and one-by-one, are felled. The air-breathing bacteria (we know them as ‘contaminants’) are killed off right away, while soaking. The yeast also goes nowhere (unless you cheat by adding commercial yeast, which basically sends reinforcements to the yeast faction). The salt kills off many other weaklings.
  • What wins out is a certain lactic acid bacteria called Leuconostoc mesenteroides; and it brings a lactic acid bacterium friend, called Streptococcus faecalis.
Leuconostoc mesenteroides

Leuconostoc mesenteroides

  • These guys get busy stuffing their faces with your batter. They mostly gorge on the sugars and starch.
  • You know what happens when creatures eat — they produce stuff. All right, let’s get graphic — they excrete. One thing they produce is lactic acid, which is responsible for the pleasantly sour taste of idlis and dosas. Another thing they do is pass gas — in this case, it is carbon dioxide. This gas — CO2 — which is also responsible for the bubbles in bread, soda and beer — makes the batter rise and become fluffy. The cool kids call this ‘leavening’.
CO2 bubbles

CO2 bubbles

  • They also somehow increase the amount of vitamin B1, B2 and B3 in the batter.
  • Even though beans and dals of all types are really good for you, they also come with a bit of a sting in the tail — they have some ‘anti-nutritional’ properties which prevent your body from absorbing the goodness. Well, fermentation reduces those bad things.
  • One of the anti-nutritional properties of beans are those that cause you to…you know…flatulate. So the beasties in your batter are helping you from doing that too much, which is a good thing.

So now I’m thinking that my mother was wrong…it is not just urad dal that makes you smarter; it is the little beasties that ferment it.

Idli / dosa batter

Ingredients:

  • 1 cup urad bean, whole, skin on (I used whole grain to add that extra bit of nutrition to it).
  • 2 cups uncooked white rice (I used basmati but a short or medium grain white rice would work as well or better).
  • (in general a 1:2 ratio or dal to rice works well; you can experiment with 1:3, but don’t alter it more.)
  • 2 teaspoons salt (lactic acid bacteria finds salt very congenial, unlike yeast).

Method:

Rinse the dal and rice once in plain water and drain. Now leave them to soak in very generous quantities of filtered, room temperature water, separately. You must leave them for at least six hours; but I let them soak for more than twelve.

IMG_0016 IMG_0033

At the end of this time, the rice will have almost doubled, while the beans will have almost tripled. The black gram beans will have become lighter into a green, as seen below:

Black gram (urad dal), soaked

Black gram (urad dal), soaked

Now it is time to grind them separately. I used my trusty blender. This is not the ideal choice, because there is a chance the blades get overheated and kill the beasties. The ideal would be a stone grinder (also known as a wet grinder). Maybe someday I will make the big bucks and spring for one of those. In the meantime, I slum it with my blender (that I got for free from American Express). I have never had a problem.

Let’s do the rice first. I drained it, and added a cup of fresh filtered water along with it. Blend it for about 4 minutes, with breaks. The end result will be a thick white liquid. When you squeeze some between your fingers, you should feel tiny grit, which is the ground up rice. You are not trying to get this to be perfectly smooth. Tiny grit is what you are looking for. Empty it out into a very large bowl, that will be used for rising.

Next let’s do the drained dal. This time you will need to add a cup and a quarter of water to the blender. Blend for about 4 minutes, with breaks. The batter this time will be fluffier and not as watery. When you feel it with your fingers, it should feel smooth, not gritty.

IMG_0036

Black gram (urad dal) batter mixing with rice batter

Pour the dal batter in along with the rice batter. Add 2 teaspoons salt. Mix it with your hands; this is one of those instructions that every South Indian mother imparts to her children; as far as I am aware, no scientist has tested why this is so. The beasties are already on the bean, so it isn’t that. Could it be that this step imparts warmth? In any case, using your clean (but not sanitized) hand, gently stir the batter to combine. Leave it covered in a corner in your kitchen.

Now. I left it at room temperature in San Francisco, but the ideal is room temperature in South India, which would be in the nineties Fahrenheit. So if you like, you can leave it in the oven to rise, with either the oven light on to create warmth, or, after turning on the oven to about a 110 F and turning off. In a warm oven with the light on, this will take 12 hours.

Room temperature of about 70 F worked fine for me, but it did take longer.

In about 12 hours I raised the lid to take a whiff — oof! Wet socks, toe jam, belly button cheese…not sure what else it reminded me of. Clearly, my batter had developed a yeast infection. Be not squeamish, ye of little faith! Put the lid down and keep going.

Now I am not sure if this is typical, but it sure smelled like the batter went through a yeast infection phase on its way to a proper lactic acid bacterial infection. It could be that because I do so much bread in my kitchen (including sourdough) that the little yeasties are floating about just dying to get their naughty little hands into stuff.

IMG_0043

Risen idli/dosa batter

Risen idli/dosa batter

In any case, within about 24 hours of rising, I certainly smelled some of that lactic acid goodness — it smelled sour. It had risen to almost double the original size. The batter was ready.

Idli cakes

Ingredients:

  • 3 cups idli batter from above (this will make one dozen)
  • Idli steamer which usually comes with 12 perforated cups
  • some oil

Method:

Rub a bit of oil on each of the idli trays. Pour about a quarter cup of batter on each. Now place it in a pot with water to about a couple inches already at a boil; cover, turn it down to a simmer, and steam the cakes for about 12 minutes with the lid on.

IMG_0053 IMG_0054 IMG_0055 IMG_0057

Idlis are great with any manner of chutney on the side, or sambhar (dal made out of pigeon peas and its characteristic spice blend).

Dosa crepes

Ingredients:

  • 1 cup batter (this will make about 4 decent sized crepes)
  • 4 teaspoons oil

Method:

Thin out the batter with about a third to half again as much water. So if you start with a cup of water, use between a third of a cup to half a cup extra water. Basically, the batter should flow easily, much like crepe batter.

Heat a wide nonstick pan on medium high heat. Spread about a teaspoon of oil around. Now, we pour about a third of a cup of thin batter and spread it.

Spreading dosa batter into a nice thin layer is an art form. Here is what you need to know.

  • You don’t have to have a thin layer. But the thinner you spread it, the more crisp. Until you achieve that pinnacle of thinness, crispiness and paperiness — paper dosa.
  • If you pour batter on to a hot pan, it will immediately congeal and instead of spreading, you will get a rubbery mass. So the pan needs to be hot while cooking, but cool while pouring on. Traditionally people have used the onion trick — rub half a cut onion on the pan to cool it down. I used the French way of lifting it off the flame as I pour the batter on.
  • To spread it, people have traditionally used a spiral motion — take a flat ladle and spread the batter around with its bowl in a spiral fashion. Once again, I used the French method of tipping the pan this way and that to spread it.

In some places, the batter will be spread so thin that it is lacy.

IMG_0058 IMG_0060

Cover with a lid and cook on high heat for about three minutes. Or four. At this point, the underside will definitely look brown and crisp. If you try to lift it off, the crepe will easily peel off; even the thin lacy parts. You can cook it on the other side if you like but it is not strictly necessary.

Lacy, crisp edges of dosa after I took a bite

Lacy, crisp edges of dosa after I took a bite

Dosa can be eaten with similar accompaniments as idli; chutneys, sambhar; or really any manner of vegetable or meat viand. The South Indian restaurant standard is to make a wrap with a potato preparation inside.

Enjoy, and thank you beasties!