King Julienne

King Julien

King Julien

King Julien is a strange character in the Madagascar series of movies. The talented Sacha Baron Cohen does his voice, and gives him an Indian accent, even though he is a native of the Madagascar island. He is a fun-loving narcissist, a ring-tailed lemur who counts bush babies among his subjects.

Odd? Yes, he is very funny, and very odd, which makes him a good mascot for the odd pantry.

This recipe, which basically consists of a number of julienned vegetables (particularly cabbage) is in honor of King Julien. I guess since it features cabbage you could call it a coleslaw which derives from Dutch koolsla and basically means cabbage salad. The dressing here is not mayonnaise-based, which gives it a lot more sharpness than the usual coleslaw.

Oddly sharp coleslaw

Ingredients

  • A scant 4 cups of shredded purple cabbage
  • A scant 4 cups of shredded arugula, loosely packed
  • Half a cup of green beans, microwaved or blanched, and julliened
  • Half a cup of firm apple, julliened
  • 1 tablespoon pinenuts
  • 1 tablespoon julliened ginger (Optional. This makes it really sharp, and if you are into that, you will love it)
  • Salt to taste
  • Half a teaspoon crumbled oregano
  • 3 – 4 tablespoon extra virgin olive oil
  • 1 tablespoon red wine vinegar or balsamic vinegar

Method:

IMG_0692 IMG_0695 IMG_0700 IMG_0698 IMG_0697 IMG_0693

Collect all the vegetable ingredients, nicely julliened. Toss them around in a large salad bowl. Add pinenuts, salt and oregano and toss some more. Now add olive oil and the vinegar and toss yet again.

You can eat it right away but the flavor does develop a little more if you wait fifteen minutes or so.

And you know here is a new idea…try eating it with chopsticks. Failing that, use your fingers.

Oddly sharp coleslaw

Oddly sharp coleslaw

Taro the terrible escapes again

Taro chaat

Taro chaat

…with some excellent results. I have before made note of taro root‘s scruffy appearance and its delectable nature. In this appetizer from my Sindhi childhood, taro shines with a few well-chosen accompaniments. This dish can go as a side with any Indian meal, or have it in the evening during a chaat and tea session.

Taro chaat

Ingredients:

  • 2 or so medium-sized taro tubers
  • 4 tablespoons tamarind chutney
  • 1 tablespoon finely chopped onion
  • 1 tablespoon minced cilantro leaves
  • Quarter teaspoon salt
  • Quarter teaspoon red chili powder
  • Half a teaspoon cumin seeds

Method

Rinse the taro and microwave it for about 5 minutes. Now it will be softened inside. When it cools, peel it to reveal the creamy white flesh. Cube it into quarter-inch wide cubes and save in a bowl.

Put in the cilantro and onion. And one is supposed to ‘layer the salt’ so go ahead, add enough salt for this amount of ingredients and stir. This will be about a quarter of a teaspoon but use your judgment.

IMG_0805

Now put in the prepared tamarind chutney. Now. A slight digression about tamarind chutney is forthcoming.

You can make tamarind chutney the easy or hard way. The hard way uses the dried pods of tamarind, either peeled and made into a block, or the pods themselves. Either way this method requires a lot of soaking and squeezing with your fingers to get the pulp out. So I tend to use a shortcut method — tamarind paste is the one thing I do buy prepared from the store. I use tamarind paste, and this is a good recipe for tamarind chutney using the paste. If you want, you can add a couple dried dates, chopped fine.

Roast the cumin seeds in a hot, dry pan for a minute or two, till they turn a shade darker, and grind to a rough powder in a clean coffee grinder or a mortar and pestle.

Top the tamarind with the red chili powder, and the cumin powder, stir well, and you are done.

This makes enough for one person as a largish side, but is easily multiplied. Oh — and if you don’t possess tamarind or have a special hatred for it, you could substitute with a similar amount of lime juice.

Wondrous bread

Dear Reader, I am aware that not all visitors to my blog are foodies. Some of you want your daily bread and water and to not be bothered to put all manner of unfamiliar pastes and blocks in your mouth (“just try one bite!”) I have non-foodies in my family, and I get you. I really do.

And when it comes to bread, the non-foodie likes the square sliced white bread. I do too! Sliced white bread is a neutral substrate for any kind of sandwich. Cube it and turn it into croutons. Toast it and butter it. Batter-fry it. Dip it in soup. The shape is predictable, even, easy to cut into little squares or triangles. This kind of bread is a workhorse.

In India we grew up with white bread of this variety:

WibsLogo

But as with many things, the primary innovation of making a square loaf, preslicing it and packaging it in waxed paper was American. It was a Wonder! And in case you need prodding to feel sufficiently celebratory, here, I will help:

It was a Wonder_Bread_logo.svg!

Sliced bread was invented in the 1920’s by a man named Otto Frederick Rohwedder. Not only did he come up with a bread slicer but also the idea of wrapping them in waxed paper to keep the slices fresh. After an initially doubtful populace, sliced bread began to fly off the shelves.

Pretty soon households were addicted to sliced white bread; that created its own problems. They became malnourished; the government had to insist that vitamins and minerals be added to the bread. Also, people began to forget what bread was supposed to taste like. Over the decades, the ‘bakeries’ where the bread was made turned into ‘factories’: the taste suffered, but nobody noticed. The product still flew off the shelves; ever more convenient, ever cheaper to make, sell, buy; it lasted longer and longer in our pantries. Until we ended up with this:

Wonder bread ingredients from http://theysmell.com

Wonder bread ingredients from http://theysmell.com

But never forget that the original soft white sandwich loaf really is wondrous. Easy to slice — not so crusty that the knife sends bread shards shooting into your eye. Not so soft that the knife mangles it with one gash. Easy to use for any kind of sandwich. And delicious.

Wondrous Bread

This recipe is from King Arthur Flour: Classic White Sandwich Bread. You should click the link for instructions and background but I’m repeating the entire recipe here.
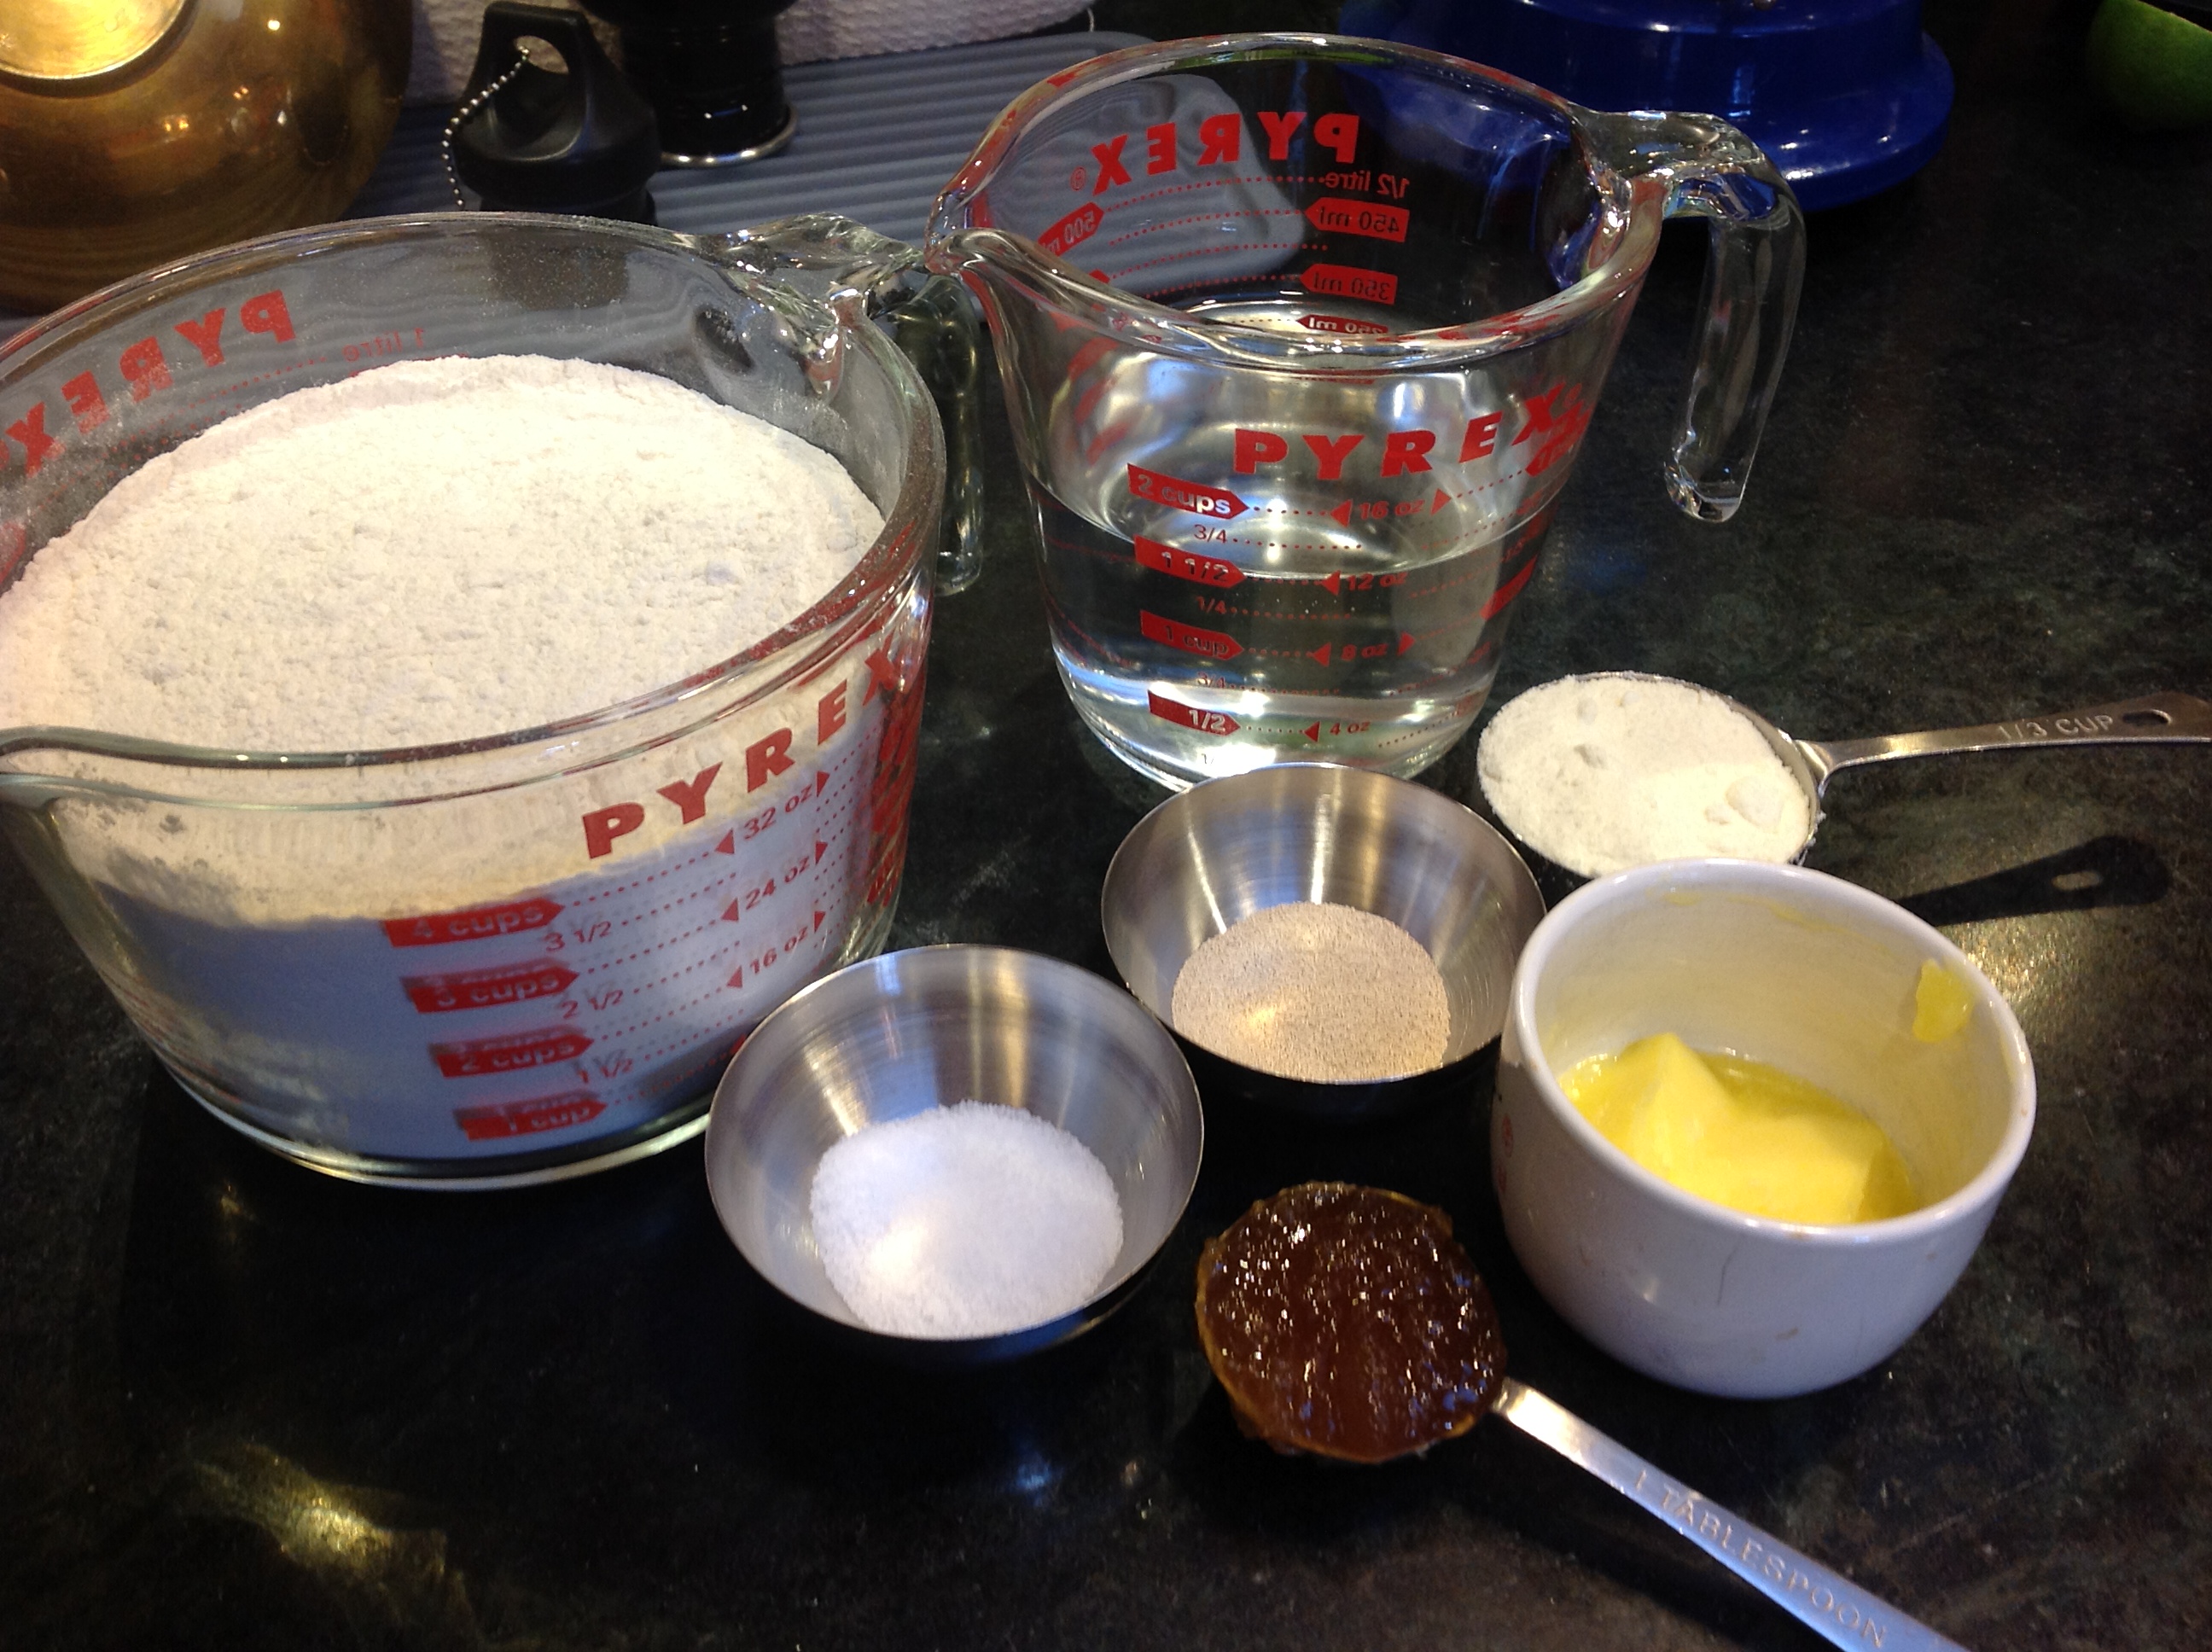
Dry Ingredients:

  • 4 cups unbleached all purpose flour
  • 1/3 cup dry milk powder (unsweetened)
  • 2 1/4 teaspoon instant yeast

Wet Ingredients:

  • 1 tablespoon honey
  • 1 3/4 teaspoon salt
  •  2 tablespoons soft butter
  • 1 1/2 cup water

IMG_0639

Method:

Mix the dry ingredients in the bowl of a stand mixer with a dough hook attachment. Mix the wet ingredients separately (no need to get it super combined). Make a well in the dry ingredients and pour the wet stuff in.

IMG_0641 IMG_0643

Stir with a dough hook until it sort of comes together in a shaggy mass. Cover with plastic wrap and leave it aside for about 10 minutes. Come back, run the mixer at this point for about 5 minutes until it comes together into a rough dough, like this:

IMG_0647

At this point, I like to finish kneading by hand, until it becomes a smooth dough like this:

IMG_0648

How do you know when you have kneaded enough? This is a trick I learnt from the book The Bread Baker’s Apprentice by Peter Reinhart. Take a little marble-sized ball of dough. Spread it as thin as you can into a little sheet, gently. If you are able to tease the dough into a translucent sheet (light should be able to shine through) without breaking it, you are there. If it breaks off into chunks rather than become a translucent sheet, you are not there and need to knead further. This is called the windowpane test.

Windowpane test

Windowpane test

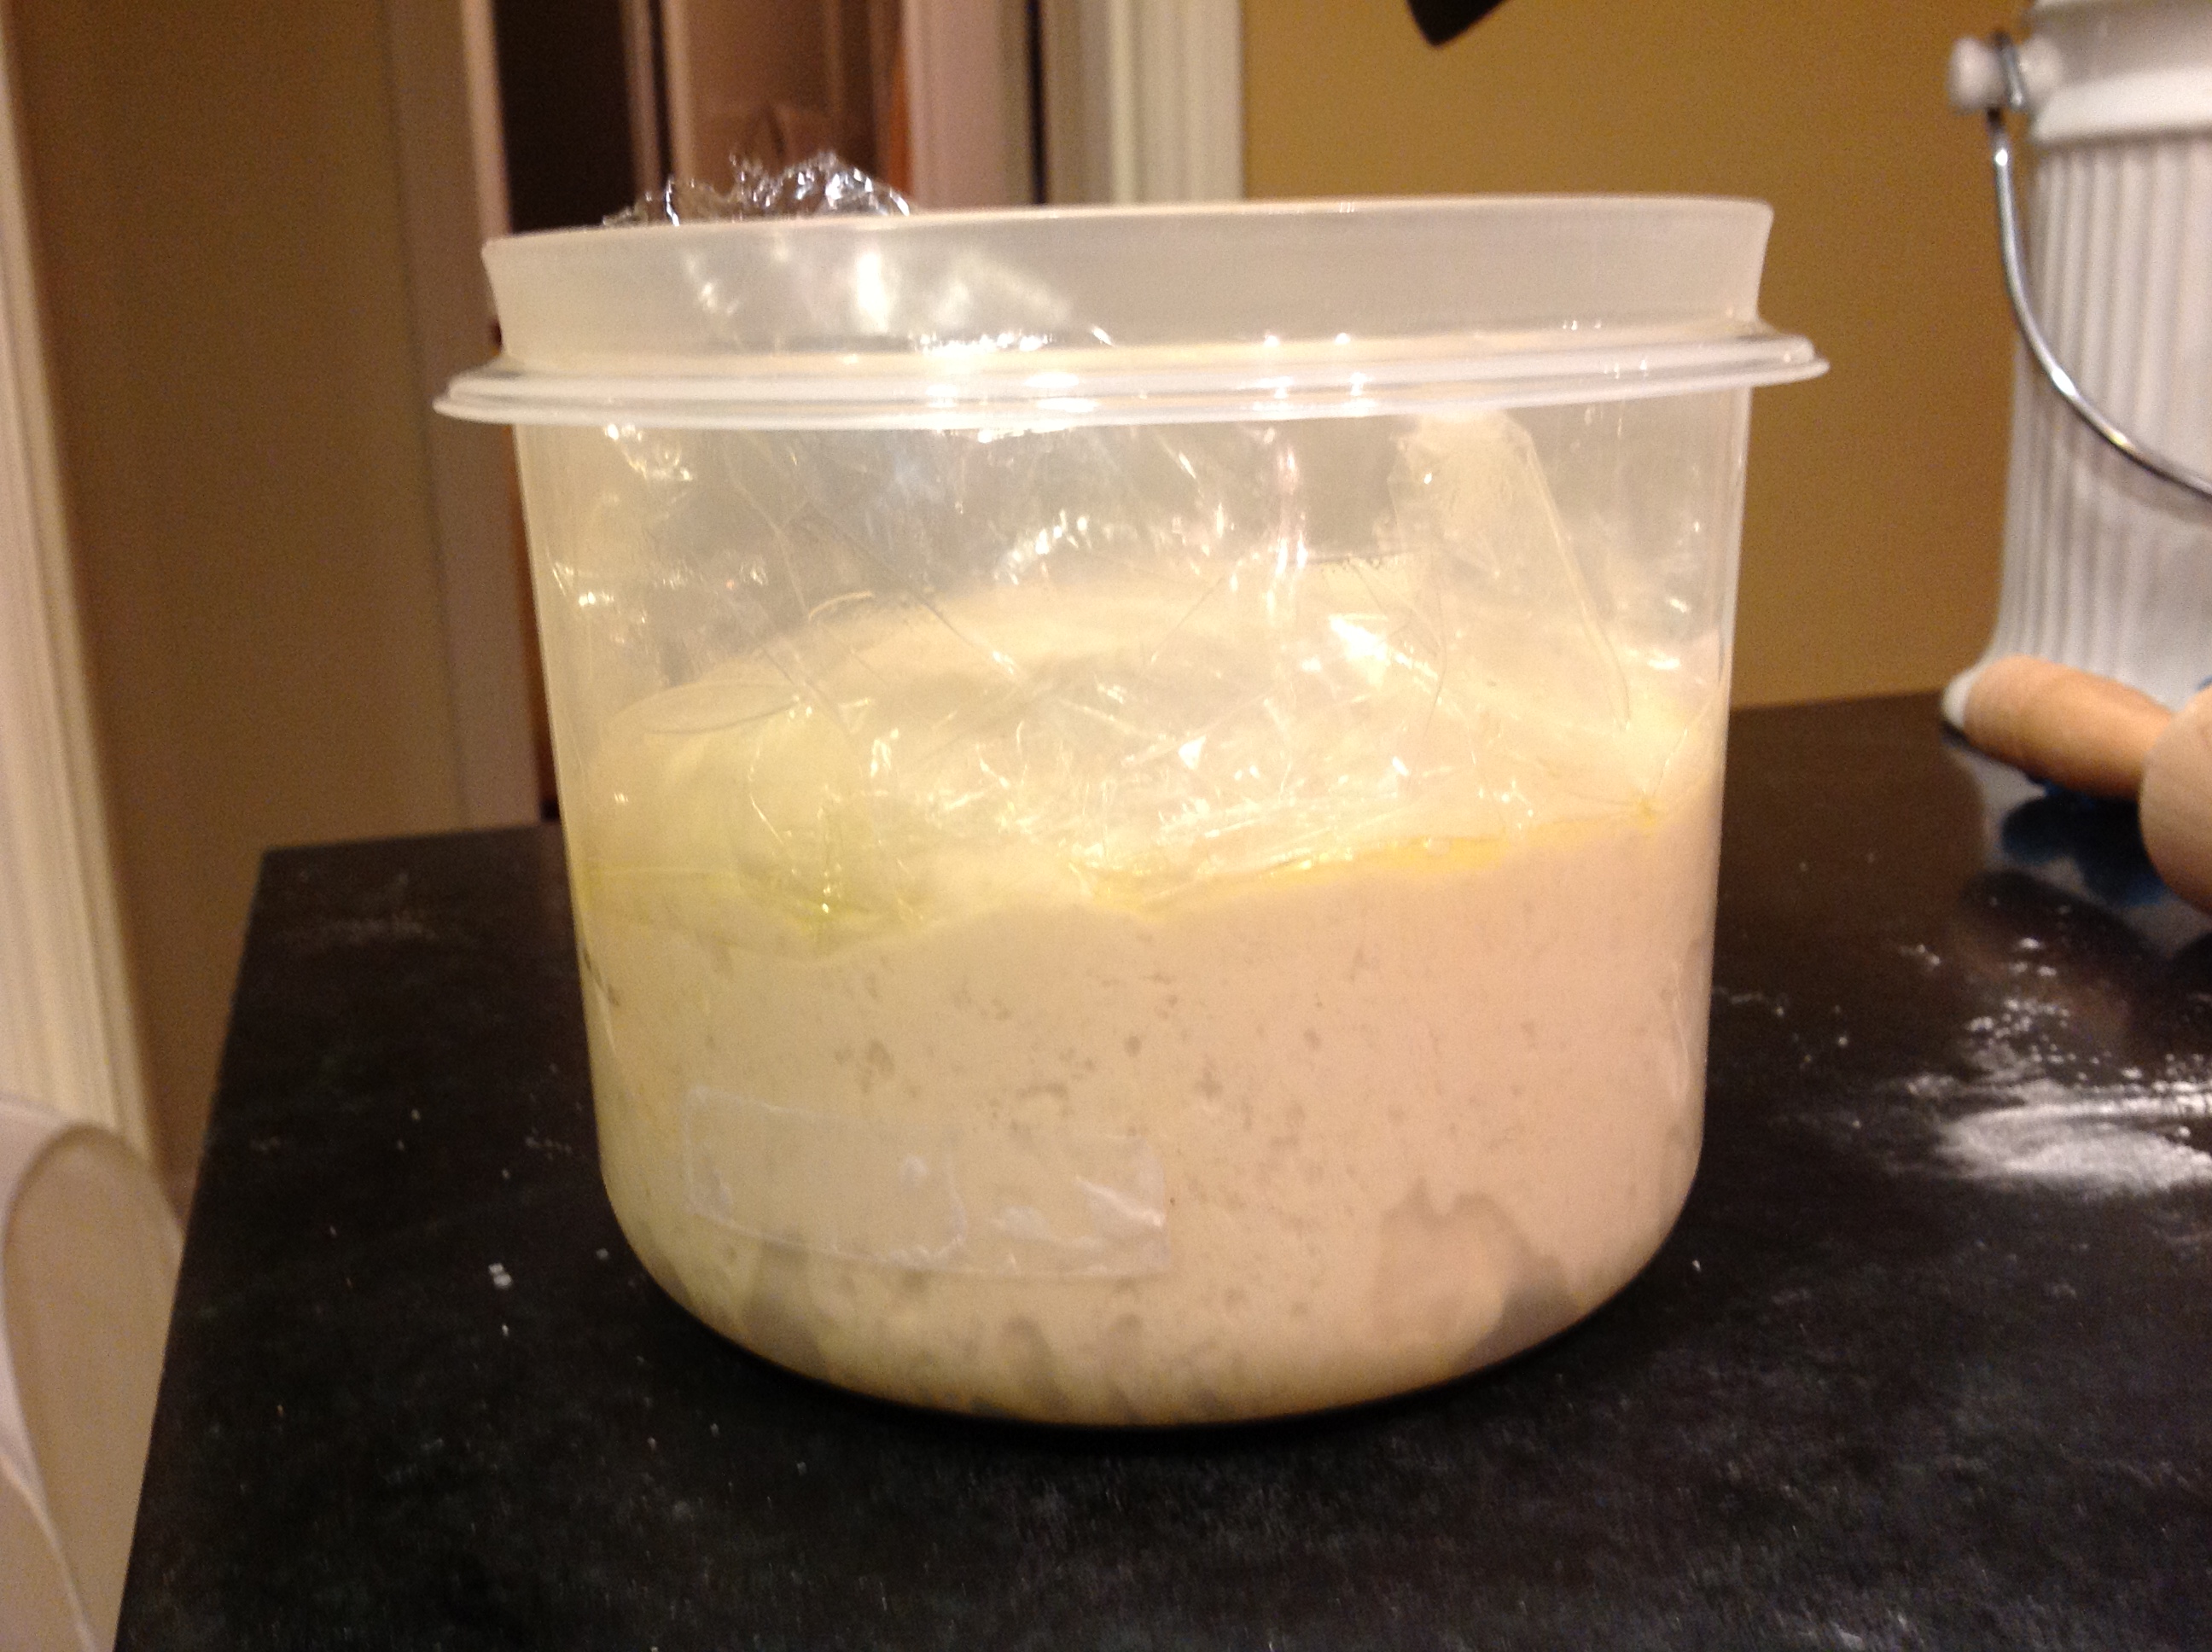
OK. Oil the dough to keep it from drying out and put it in a large container to rise. I usually mark the level at which it is with a sticky tape. Leave it at room temperature until it doubles. This will take about 2 hours.

IMG_0656 IMG_0660

Now comes the shaping. The loaf needs to go into a 9″ by 5″ loaf pan. Form the dough into a rough rectangle, and start rolling it into a log from the long side, gently pressing the seam closed as you go. Take care to tuck in the ends as you roll. The shaped loaf should have its seam closed everywhere, almost like a zipped up sleeping bag.

IMG_0662 IMG_0664

Place it into a greased loaf pan and cover with a plastic wrap. In an hour or 90 minutes the loaf will have risen to an inch above the rim. Now it is ready to go into an oven.

IMG_0669 IMG_0667

Preheat the oven to 350 F. When it comes to temperature the loaf pan goes in (without the plastic wrap, please!)  Bake the bread for 35 – 40 minutes. Around the middle of the cooking time, turn the pan 180 to allow it to cook evenly on all sides, and, tent it with aluminium foil to prevent it from browning too much.

IMG_0671 IMG_0674

When it is done, allow it to cool in the pan with some airflow under it, then take it out and slice it. There! sliced white bread.

IMG_0678 IMG_0675

A case of two mistaken identities and some yumminess

When I first came to this country I saw this fruit:

Kiwi

Fruit No. 1

And I thought it was this fruit:

chickoo

Fruit No. 2

Ha! I was wrong. Fruit No. 2 is actually the chikoo, also known as sapodilla, also known as — bear with me while I blind you with science — Manilkara zapota. It is native to Central America but grows in great quantities in India. It looks like this inside:

chickooCut

and the flesh tastes like a dryish banana. To eat it, you peel off the thin brown skin and eat the brown flesh. Not bad to taste, but my mom made me eat them a lot and I still recoil from the poor chickoo for that reason. Don’t let me dissuade you from trying this excellent fruit, though; it will lower your cholesterol and blood sugar while being the cause of some yumminess. Do yourself a favor and buy some if you see them being sold anywhere, but I do have to warn you, the seeds look suspiciously like cockroaches.

OK. On we go.

The other day I saw this berry-like fruit being sold at farmer’s market:

kiwiberry6oz

Berry No. 1

I thought it was an unripe version of this berry. Naturally I bought it:

Berry No. 2

Berry No. 2

Ha! Wrong again. Berry No. 2 is Jamun. I know jamun well. It terrorized my tongue many a time with its tingly astringency. I never thought I would ever crave that nasty fellow, but I do now — now that I can’t have it. Jamun’s correct name is Syzigium cumini. It is native to India but has become a weed in various places such as Hawaii and Florida. Apparently it has also spread around Brazil, and Brazilian birds have developed a taste for it; I think it is because they don’t have much of a tongue to terrorize.

That leaves Fruit No. 1 and Berry No. 1. First clue — they are cousins.

Clearly Fruit No. 1 is no mystery. It is the kiwi. We usually identify it with Australia (perhaps the name has something to do with it?) but the kiwi is actually native to China. It is rather new to the wider world, having just become known around the twentieth century; since then it had a rash of branding and re-branding — a problem that only a modern fruit could have. It went from being known as yang tao, to Chinese Gooseberry, to Melonette, to Kiwi.

Kiwifruit has brown fuzzy skin and looks, yes, quite melony inside, like this:

KiwiCut

So what the heck is Berry No. 1? Inside, it looks like this:

kiwi berry

kiwi berry

That’s right! Berry No. 2 is a kiwi berry. Fruit No. 1 and Berry No. 1 are close cousins. Both belong to the Actinidia genus. This is closer than belonging to the same family; in other words, the kiwi and the kiwi berry are about as closely related as the lion and the tiger to each other (both belong to the Panthera genus).

Eating the kiwi berry was a satisfyingly schizophrenic experience. Tastes just like a kiwi inside, but there is no need to peel it, the skin is edible and remains so when it ripens fully. A wash-and-wear kiwi! Excellent.

The doofus

Somebody stop me I feel a thesis coming on. It is about this vegetable:

Kaddoo

Kaddoo

This is not the kind of vegetable that one expects paens to be written about. It is found anywhere that vegetables are sold in India; and being India, that could be a basket at a railway platform or a sheet laid out on the sidewalk:

vegetable market

vegetable market selling kaddoo and other things

A vendor sorts vegetables next to a railway track as a train passes by, in Dhaka on September 10, 2012. (Andrew Biraj/Reuters)

A vendor sorts vegetables next to a railway track as a train passes by, in Dhaka on September 10, 2012. (Andrew Biraj/Reuters)

Sidewalk vegetable seller from suvisworld.wordpress.com/

Sidewalk vegetable seller from suvisworld.wordpress.com

It is known to me and other Sindhis as ‘kaddoo’. It is so devoid of glamour that if you call someone a ‘kaddoo’ you may as well call them a doofus. But don’t underestimate it, because the kaddoo has mystique. For one thing, it is one of the oldest cultivated plants in the world. Humans have been eating it for ten thousand years. Recently some stands of wild kaddoo were discovered in Zimbabwe, which is probably where it originated. News of the cultivated kaddoo seems to have spread like wildfire, from Africa to Asia to the Americas; the kaddoo discovered America before Columbus.

Check out its pretty flower:

Kaddoo flower

Kaddoo flower

Like other plants from the Cucurbitacae family (squashes, melons and gourds), it is a vine and climbs by means of tendrils. Kaddoo flesh is pale, watery and very mild. Some would say boring. It cooks down to become squishy and somewhat gelatinous. The skin is thin and pale green, but one does have to peel it before cooking. The seeds of the young fruit are quite edible.

Calabash

Calabash

So where is the mystique? I knew that kaddoo is also known as lauki, bottle gourd, opo or dhoodhi, but I didn’t know that it also goes by the romantic name of Calabash. In India we mostly eat this as a young vegetable, when its peel and seeds are rather soft. But apparently when it ages, the peel hardens, the flesh dries up, leaving a sort of bottle behind; In this form, it is called a calabash. It has been used by old cultures as a vessel, or even as a musical instrument. Apparently the fact that the size of these gourds roughly matches the size of the human head gives it its resonant qualities.

Sitar parts

Sitar parts

SitarKaddoo

Musical instruments, hmm…what kind? Some tribal folksy thing no doubt, that street performers play and bystanders throw change at? Sure…but also, think Ravi Shankar and the sitar. The calabash is used for the shell of the deeply buzzy and resonant sitar…the main resonating chamber of which is called…wait for it…the kaddoo.

QED.

Kaddoo koftas in gravy.

kaddoo koftas

kaddoo koftas

Ingredients:

  • One large kaddoo, peeled, quartered and seeded
  • Quarter cup besan
  • Half a teaspoon coriander powder
  • Some sprinkles red chili powder
  • One teaspoon aamchur
  • Salt to taste
  • 4 – 5 tablespoons oil
  • One recipe of browned onion tomato gravy

Method

Grate the kaddoo quarters. Salt it with about a teaspoon of salt and mix it with your fingers. Leave the grated kaddoo aside for about half an hour; during this time the salt will draw out most of the moisture.

IMG_0618 IMG_0619

Now you can do the rather tedious task of squeezing out the water from fistfuls of kaddoo my means of your hands. Save the water, it has some kaddoo-ness and we will use it later.
IMG_0629 IMG_0630

Meanwhile start off the process of making the browned onion tomato gravy. When it calls for water (at the end) use the kaddoo water, would you please? Lets not waste it.

The volume of the grated kaddoo will have much reduced, and it will be dry. Put in the besan and the dry spices. You do not need more salt. Mix it with your oiled fingers; it should now be amenable to form patties. Form about 6 patties and leave them side by side on a plate.

IMG_0633 IMG_0635

Panfrying them is next. Heat a non-stick pan with oil about an eighth of an inch deep. When nice and hot, put in the patties with liberal gaps around, and sort of flatten them. Let them cook for 5 – 7 minutes or until they brown at the bottom; flip them, some more oil perhaps, and cook for another 5 minutes.

The patties are ready, all that is needed is to slip them into a nicely simmering pot of the browned onion gravy.

IMG_0636 IMG_0637

And you are done. This dish goes very well with rotis/chapatis.

Browned onion-tomato gravy — let’s get this over with

Browned onion tomato gravy

Browned onion tomato gravy

Sindhi food has a ton of recipes that start with first making a browned onion-tomato gravy, then putting in whatever edible goodies you find in the fridge that day.

Browned onion gravy can make anything taste good. Those left over hard-boiled eggs from a week ago? Throw them in. The unidentifiable pulpy vegetable with the brown spots? Cut out the brown spots, throw it in, heat it through, and gloat. Lentils, beans of all descriptions, chicken, dumplings that are fried, dumplings that are boiled, in they go. Call them meatballs or call them koftas, throw them in. You could make a giant batch of the gravy, freeze it in meal-sized portions, thaw and add stuff to it — there you go, your main meal for dinner.

In fact this gravy is such a magician that it is a bit of a cop-out for an aspiring master chef, and makes me reluctant to use it too often. Think about it — if you are a doctor, how respected would you be if your advice for every ailment is — ‘take two aspirin and call me in the morning’? It might work but it is too easy. But this is still an indispensable skill to have in your Indian cooking repertoire, so let us take our two aspirin and learn to do this right.

Browned Onion-tomato gravy

Start with reading this recipe — how to caramelize onions. That is going to be our first step. This recipe makes enough for a base for the main meal for 2 – 4 people.

Ingredients:

  • One medium-large onion, chopped fine, or sliced thin.
  • One large or two small tomatoes, roughly chopped.
  • 3 – 4 large cloves garlic, minced
  • Half inch piece of ginger, minced
  • 1 – 4 serrano chilies to your heat tolerance, sliced
  • Half a teaspoon whole cumin seeds
  • Half a teaspoon coriander powder
  • Quarter teaspoon turmeric
  • Half a teaspoon salt
  • 2 – 3 tablespoons oil

Method:

Heat oil in a wide thick-bottomed pan. When it shimmers put in the cumin seed; when that sizzles, the onion and caramelize it.

Onions, garlic, IMG_0622 IMG_0623 IMG_0624

At this point add the ginger, garlic, chili, and let them cook on medium heat for a couple minutes. Now put in the tomato. Sprinkle some salt over. The thing about the tomato is that is has to liquefy, then mostly dry up. First, the combination of the heat and the salt will make it release its liquid. Then, cook some more on that wide-open pan of yours, and the liquid will evaporate. The remains of the tomato will combine with the caramelized onion to create a rough paste.

IMG_0627 IMG_0628

Browned onion tomato gravy

Browned onion tomato gravy

At this point the dry powders can go in. Give them a stir, and then put in some water; the amount depends on what you are trying to use the gravy for, anywhere from half a cup to a cup.

Bring the water to a boil, and let it simmer for about 5 – 7 minutes.

The gravy is basically done. But you can take it into multiple directions from here:

  • run it through a blender to get a smoother sauce
  • add some cream or milk to make it creamy
  • or add a cashew puree to make it creamy that way
  • add garam masala, extra chili in the form of red chili powder, cumin powder, or other spice mixture of your choice
  • or use it as is.

Soap chutney

Green chutney

Green chutney

Only after I first came to these foreign lands as an adult did I realize that there existed people who hated cilantro. I could not conceive of this. In India this deeply cut leaf of the coriander plant tops each meal and many spice pastes are centered around it. It is so commonplace that you would have to stop eating to avoid it. It is commonplace as water. Perhaps not that much. It is as common as…ah, say, soap?

Soap.

Yes, soap. People who intensely dislike cilantro all agree that it reminds them of soap. This is incredible to me. I’m a reasonably clean person, people, and I have had many close encounters with soap. Daily, you might even say. I have eaten cilantro by the fistful. At no time have I had the urge to rub the leaves onto my hands, nor to bite into the bar in the shower.

Soap? What to make of this?

Just to be complete, let us first consider the possibility that there is a secret society of cilantro haters who have secret meetings where they collude on what smell they will all agree cilantro reminds them of. That is a definite possibility, but I’m missing what the motive might be here.

The other possibility is that yes, indeed, cilantro has a secret life where it dabbles in cosmetics.  Because the few people who don’t mention soap, say that cilantro reminds them of lotion.

There is a scientific basis for this. There are fragments of fat molecules called aldehydes; the ones found in soap are same or similar to the ones found in cilantro. As this New York Times article by Harold McGee explains, people from cultures that are used to cilantro have learnt from an early age to tamp down the soapiness of cilantro in favor of the herbal and pungent smells.

Which brings us to cilantro chutney. I for one, adore the smell of cilantro so much that the question for me is: how much cilantro flavor can I pack into each cubic inch? The simplest way to do this is by making a paste.

Green Chutney

Green chutney was a staple in my household. There was always a steel tin of this condiment in the fridge. In earlier days our cook used a grinding stone, something like this:

Stone grinder

Stone grinder

Then the Industrial Age dawned in our household and then we used a blender, the picture of which I do not need to show you.

This chutney is great as a spread on bread, or as a side to all kinds of Indian snacks.

Ingredients:

IMG_0613 IMG_0611

  • 1 bunch of cilantro, rinsed and roughly chopped, including soft stems
  • Anywhere from 1 to 8 serrano chilies, depending on your heat tolerence
  • Half a teaspoon salt or to taste
  • For sourness, 2 teaspoons of lime juice or 1 teaspoon tamarind paste (optional)
  • Half a bunch fresh mint, leaves only (optional)
  • 1 – 2 cloves garlic (optional)
  • Half an inch piece of ginger, peeled and sliced (optional)
  • A cubic inch of onion (optional)
  • Half a teaspoon sugar (optional)

Method:

As you might have noticed there are a number of optional ingredients. Just the first three will give you a serviceable green chutney, but the addition of the others will enhance the flavor in their own unique ways. I particularly recommend adding onion, because onion has this unique characteristic (like salt) to bring out the flavor of the other ingredients, while not overstating its own. A good team player, is our onion.

Put everything into a blender with only the water that clings to the leaves from rinsing, and hit go. Maybe add a tablespoon more water but limit this. You might need to stop, stir, and go a few times, but eventually the blades will catch; and you will have your green chutney.

Rustic ginger-garlic paste with optional green chili

I have a bone to pick with most ginger garlic pastes — one normally uses a blender to make them, so one needs a simply giant amount of ginger and garlic to make the blades go, and, one has to use water to make it slushy.

IMG_0546 IMG_0551

But who wants slushy ginger-garlic paste while cooking? And, who wants a simply giant amount of paste situated in the fridge, week after week, slowly oxidizing, and stinking up the air each time you open the fridge?

I often resort to the blender method, but I do believe this method is way superior — here we use the mortar and pestle. Aside from looking decorative, you make only as much as you need, and seriously, it doesn’t take that long.

No precise ingredients in this one. Use as much as you think you will need.

Step 1: Peel, destem and chop ginger, garlic, and chili. No need to go super fine.

Step 2: Place all ingredients in the bowl of a mortar (or is it pestle? I can never remember).

Step 3: Sprinkle with a bit of salt and wait a few minutes. Salt has three functions here. If you use kosher or sea salt, it will add a bit of roughage, all the better to grind with. Second, salt draws out moisture, and once again, this helps the grinding. Third, salt actually starts to cook certain foods. You can notice this specially with garlic — raw garlic has a sharp and aggressive taste; but if you salt it for a few minutes, it mellows out considerably, just like it does with cooking.

Step 4: Pound away with the pestle (or the mortar, I can’t remember which is which). It will not be a super smooth paste, but that’s where the rustic charm comes in.

Sookha aalu, Indian home fries

All right, Americans, I will admit it, you are better at naming recipes than us Indians. The dish called ‘sookha aalu’ which is made in different guises all over India means nothing but ‘dry potato’. Descriptive, yes, but lacks a certain punch.

Some American marketing geniuses

American marketing geniuses

Then the American marketing geniuses come in, and decide that any recipe name is improved by bunging in the word ‘home’. And on top of that, they came up with the word ‘fries’…. “Guess what guys, we won’t include the word ‘potato’ at all…a light touch…a bit of indirection.”

Genius! Home fries. My point here is that India has legions of most excellent sookha aalu recipes and really they are almost exactly what people in America recognize as home fries, except with Indian spices. Here is my version, and it is most delectable.

Sookha Aalu, Indian home fries

Ingedients:

  • 1 large red potato or 2 medium or several small.
  • salt to taste
  • half a teaspoon mustard seeds
  • half a teaspoon red chili powder
  • half a teaspoon coriander powder
  • 1 teaspoon dry mango powder (aamchur) or substitute with lime juice
  • 2 tablespoons oil

Method:

Rinse the potato and remove the eyes. Microwave it for 5 minutes or so, or long enough to almost cook it right through.

When it comes out of the microwave, wait till it is cool enough to handle, and cut it into pieces. First, Do Not Peel. If you do you will regret it. The crisped up peel is definitely the most appealing part of this dish.

Next, think about the shapes of the pieces. You could do cubes, if that is your fancy. Don’t make them bigger than about half an inch in width. Or you could do slices, about eighth of an inch thick. Either way works, but choose a method and stick with it, unlike me, I chose slices, then switched to cubes, then had a bit of a hodge podge.

Heat oil in a non-stick pan. When it shimmers put in the mustard seeds. When they pop put in your cut up potato. Stir them around on medium-high heat. Sprinkle salt over in two stages — once, after you have tossed the potatoes with the oil, and next, after  a few minutes, and more stirring.

IMG_0556 IMG_0558 IMG_0559 IMG_0561

You will see them begin to crisp and brown in a few minutes. Keep stirring once in  a while, and cook in all for about ten minutes. Towards the end of cooking time, sprinkle on the chili powder, the coriander powder and the dry mango powder. Adjust for salt and you are done.

Introducing the Eggnach

Eggnach with roti

Eggnach with roti

My People — the Sindhis — have made a lot of contributions to world culture, but I must say this ranks as an important one. Sindhis discovered that spinach and eggplant, when cooked together, meld well, marry well, and make a tasty nutritious brew.

Not only is this technique explored in the very famous Sai Bhaji, but in this rather less well-known dish as well. It goes well with rotis, but would go on the side of rice very well too, if you have some plain yogurt on the side. A very nice accompaniment would be yellow rice — cooked with some garlic, salt and turmeric powder (recipe forthcoming).

I found this recipe in this book and as usual made some modifications.

The Eggnach — eggplant and spinach dish

Ingredients:

  • 1 bunch spinach
  • 1 regular-sized eggplant
  • 1 medium tomato or 2 small ones
  • 4-5 cloves garlic
  • half and inch piece ginger
  • 2 serrano chilies or several smaller birds-eye chilies
  • half a teaspoon coriander powder
  • half a teaspoon cumin seeds
  • half a teaspoon red chili powder
  • salt to taste
  • 2 tablespoons oil
  • 1 tablespoon ghee (optional)

Method:

Rinse and chop the vegetables.

IMG_0547 IMG_0548 IMG_0549 IMG_0550


Chop the garlic, ginger and chili. Give them a pounding in a mortar and pestle after sprinkling a bit of salt on it to add a bit of roughage and to draw out moisture.

IMG_0546 IMG_0551

A note about salt: it draws out moisture! This is an incredibly useful fact that helps out in various ways. In this case, I pound it with a bit of salt, so that the paste self-makes itself, without adding even a splash of water.

Salt also pre-cooks food as it draws out the moisture, at least that is how I think of it. If you mince garlic, and salt it, in 10 minutes you will see that it has turned mushy and wet, and by the way, the taste of the garlic will not be as aggressive as when it is raw.

So anyway, getting back to our job. Pound those guys to get them to paste up. You don’t need to go the extra mile, just a simple smashing will do.

Heat oil in a thick-bottomed pot. When it shimmers, throw in the cumin, red chili powder and coriander powder. Now enters the garlic/ginger/chili paste. Let it sizzle. Now in tumble all the vegetables, chopped. Salt them, stir them around, cover, and cook for 15-20 minutes on medium first, then, when it comes to a boil, on medium-low.

IMG_0553 IMG_0554 IMG_0555 IMG_0557

Everything you have in there is quite mashable by this point. So attack it with a potato masher or simply the back of your spoon.

IMG_0560

Eggnach mashed

If you like, top it with a teaspoon of ghee, and possibly a sprinkle of lemon juice, and you are done.