Soap chutney

Green chutney

Green chutney

Only after I first came to these foreign lands as an adult did I realize that there existed people who hated cilantro. I could not conceive of this. In India this deeply cut leaf of the coriander plant tops each meal and many spice pastes are centered around it. It is so commonplace that you would have to stop eating to avoid it. It is commonplace as water. Perhaps not that much. It is as common as…ah, say, soap?

Soap.

Yes, soap. People who intensely dislike cilantro all agree that it reminds them of soap. This is incredible to me. I’m a reasonably clean person, people, and I have had many close encounters with soap. Daily, you might even say. I have eaten cilantro by the fistful. At no time have I had the urge to rub the leaves onto my hands, nor to bite into the bar in the shower.

Soap? What to make of this?

Just to be complete, let us first consider the possibility that there is a secret society of cilantro haters who have secret meetings where they collude on what smell they will all agree cilantro reminds them of. That is a definite possibility, but I’m missing what the motive might be here.

The other possibility is that yes, indeed, cilantro has a secret life where it dabbles in cosmetics.  Because the few people who don’t mention soap, say that cilantro reminds them of lotion.

There is a scientific basis for this. There are fragments of fat molecules called aldehydes; the ones found in soap are same or similar to the ones found in cilantro. As this New York Times article by Harold McGee explains, people from cultures that are used to cilantro have learnt from an early age to tamp down the soapiness of cilantro in favor of the herbal and pungent smells.

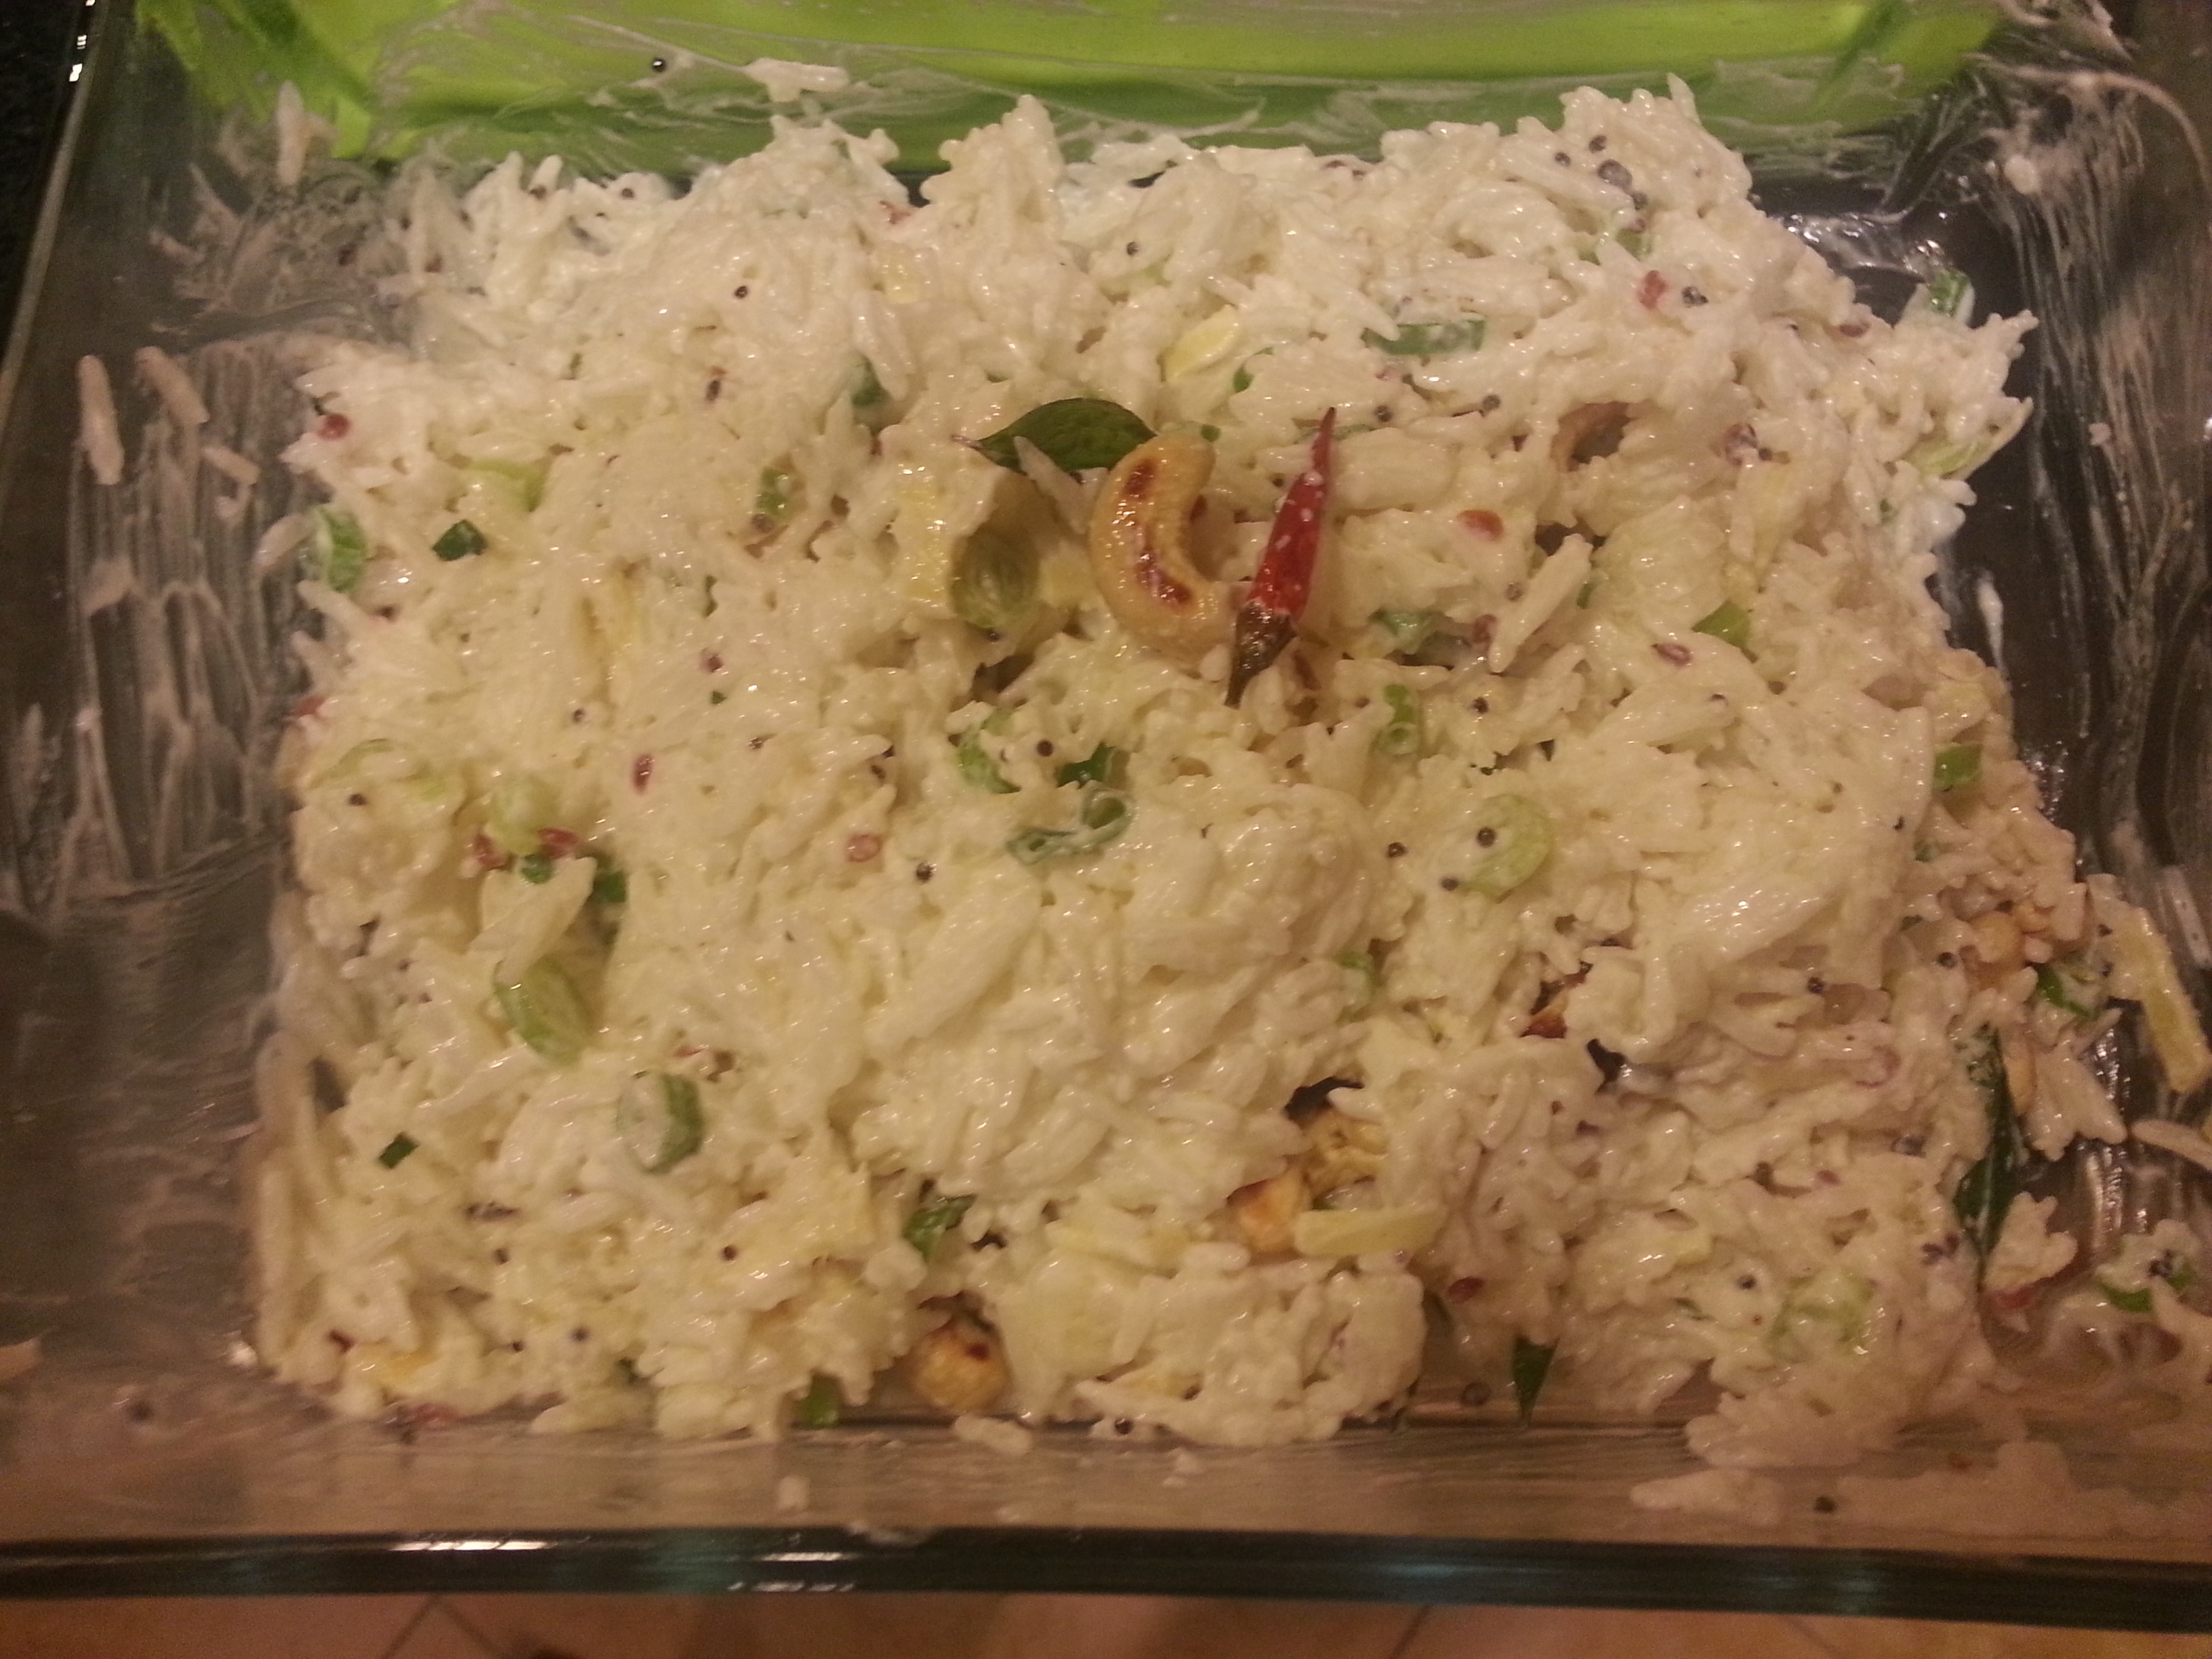
Which brings us to cilantro chutney. I for one, adore the smell of cilantro so much that the question for me is: how much cilantro flavor can I pack into each cubic inch? The simplest way to do this is by making a paste.

Green Chutney

Green chutney was a staple in my household. There was always a steel tin of this condiment in the fridge. In earlier days our cook used a grinding stone, something like this:

Stone grinder

Stone grinder

Then the Industrial Age dawned in our household and then we used a blender, the picture of which I do not need to show you.

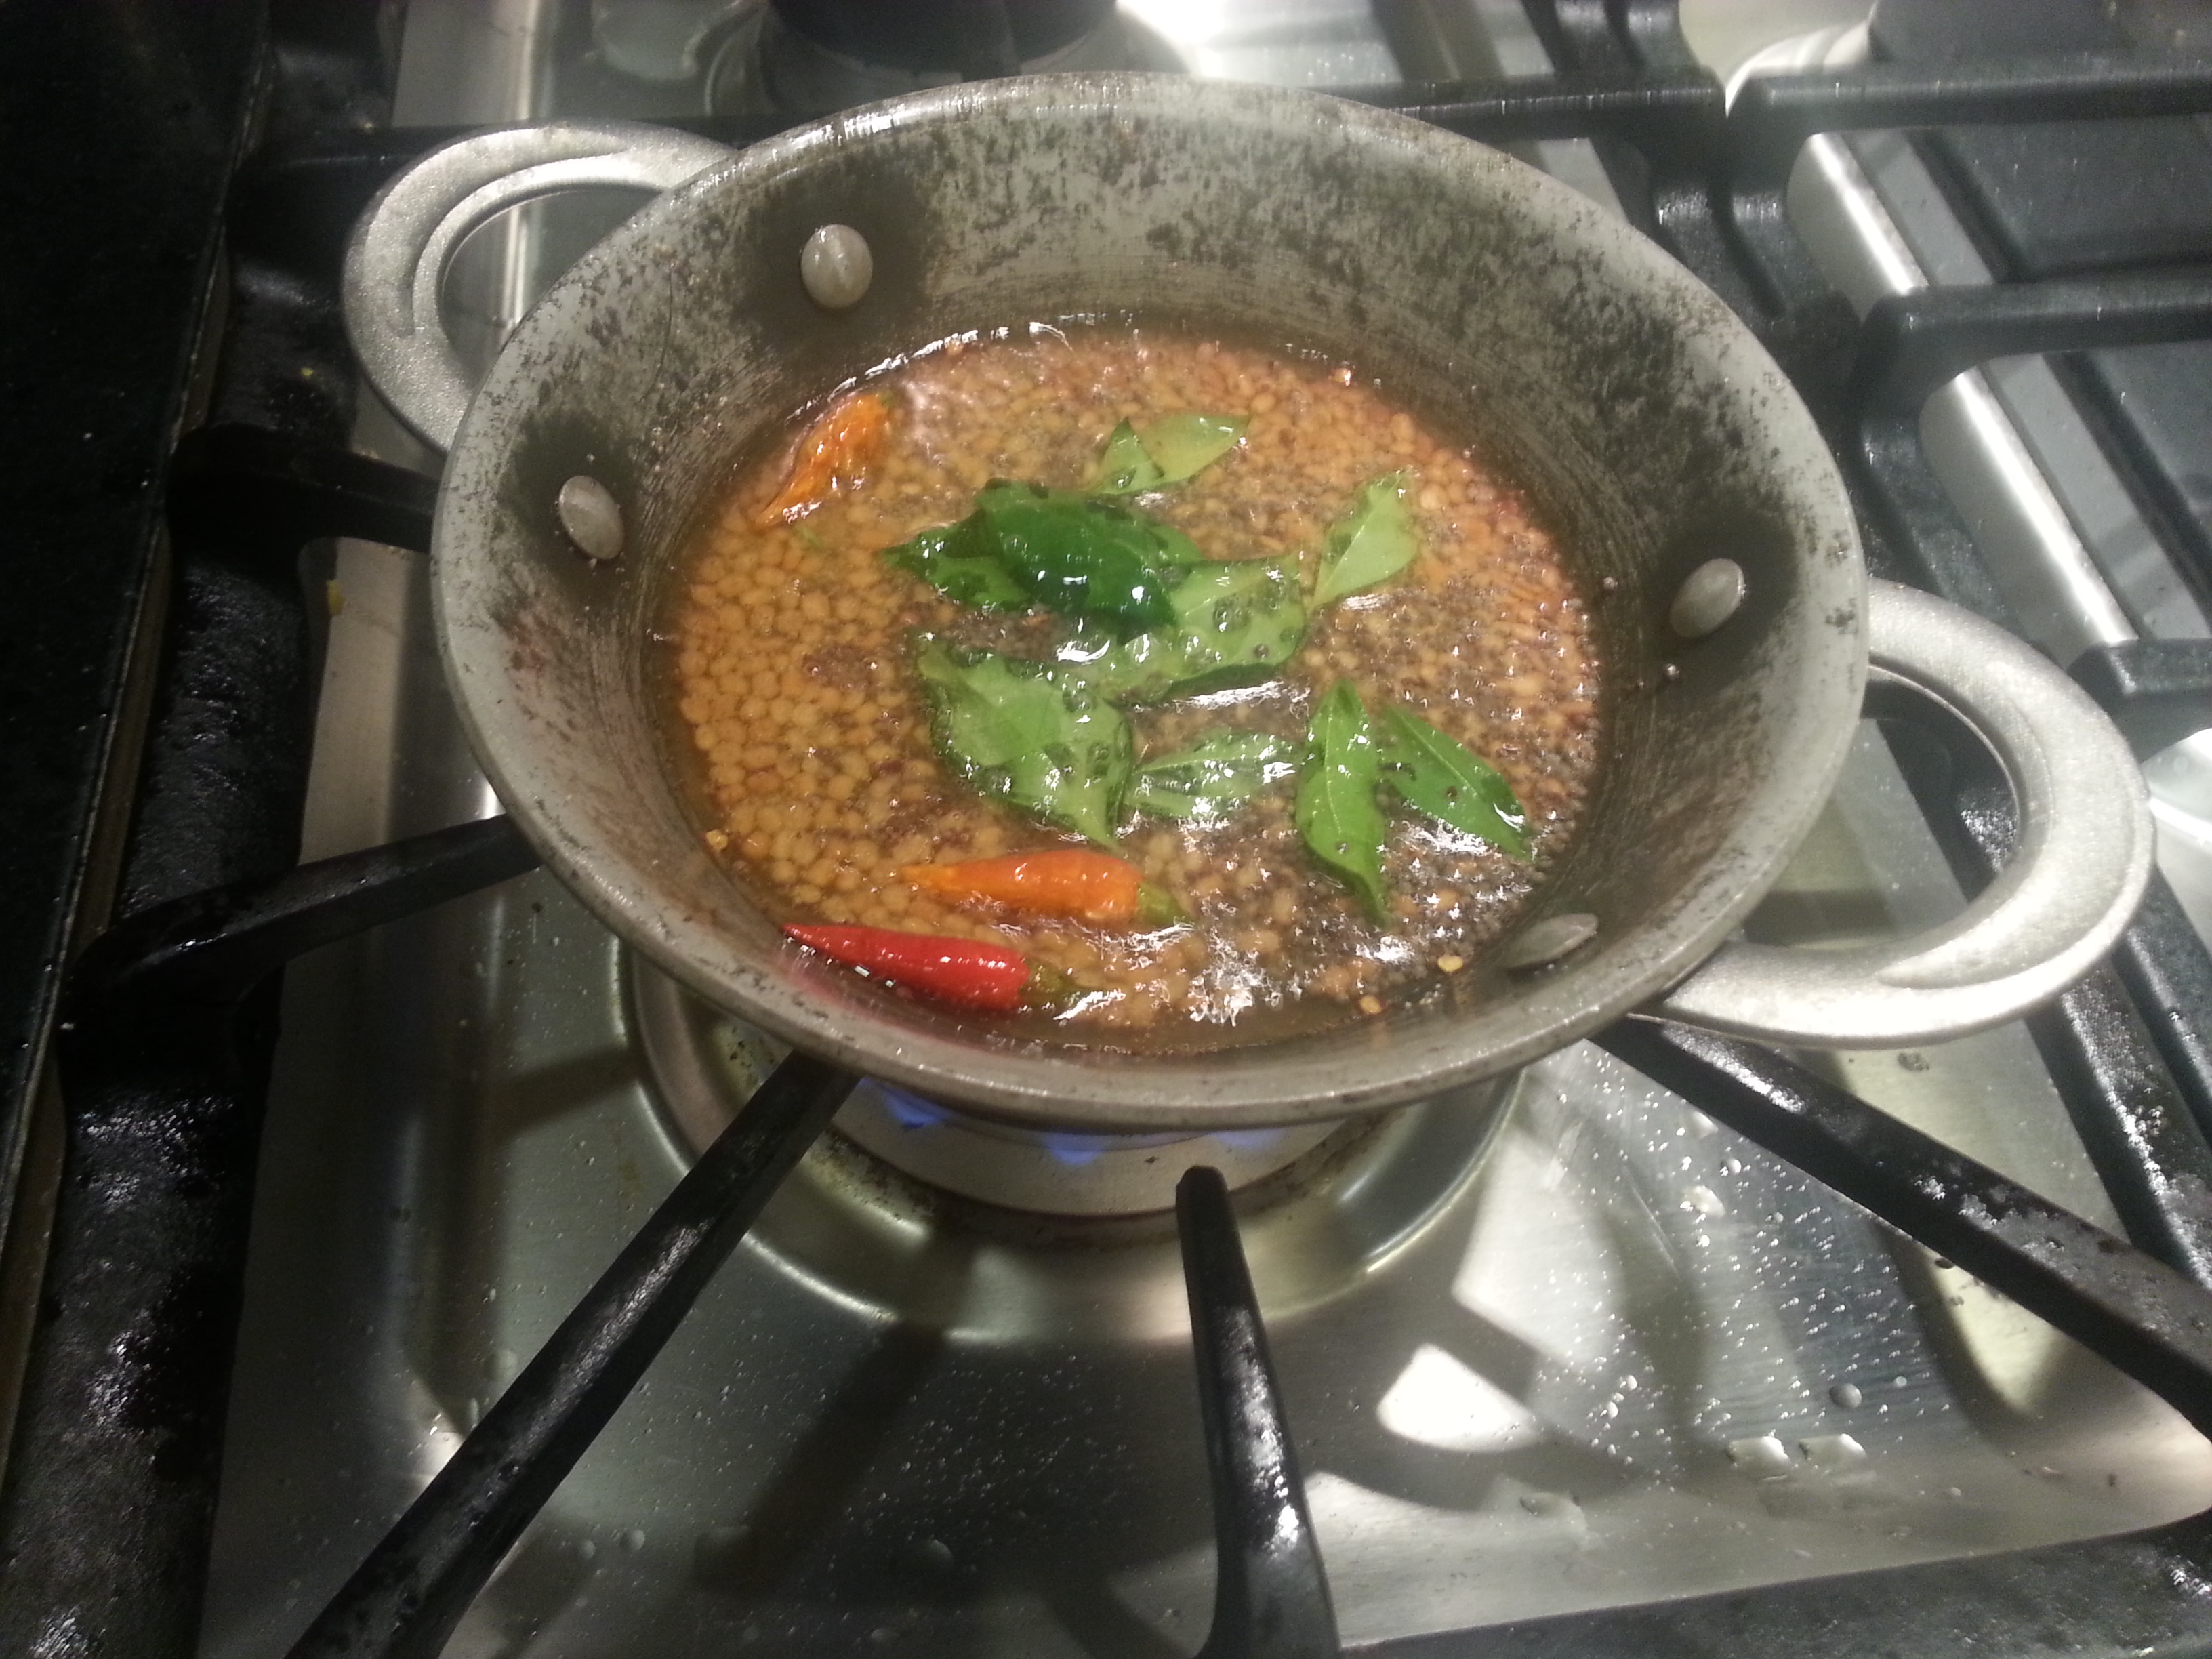
This chutney is great as a spread on bread, or as a side to all kinds of Indian snacks.

Ingredients:

IMG_0613 IMG_0611

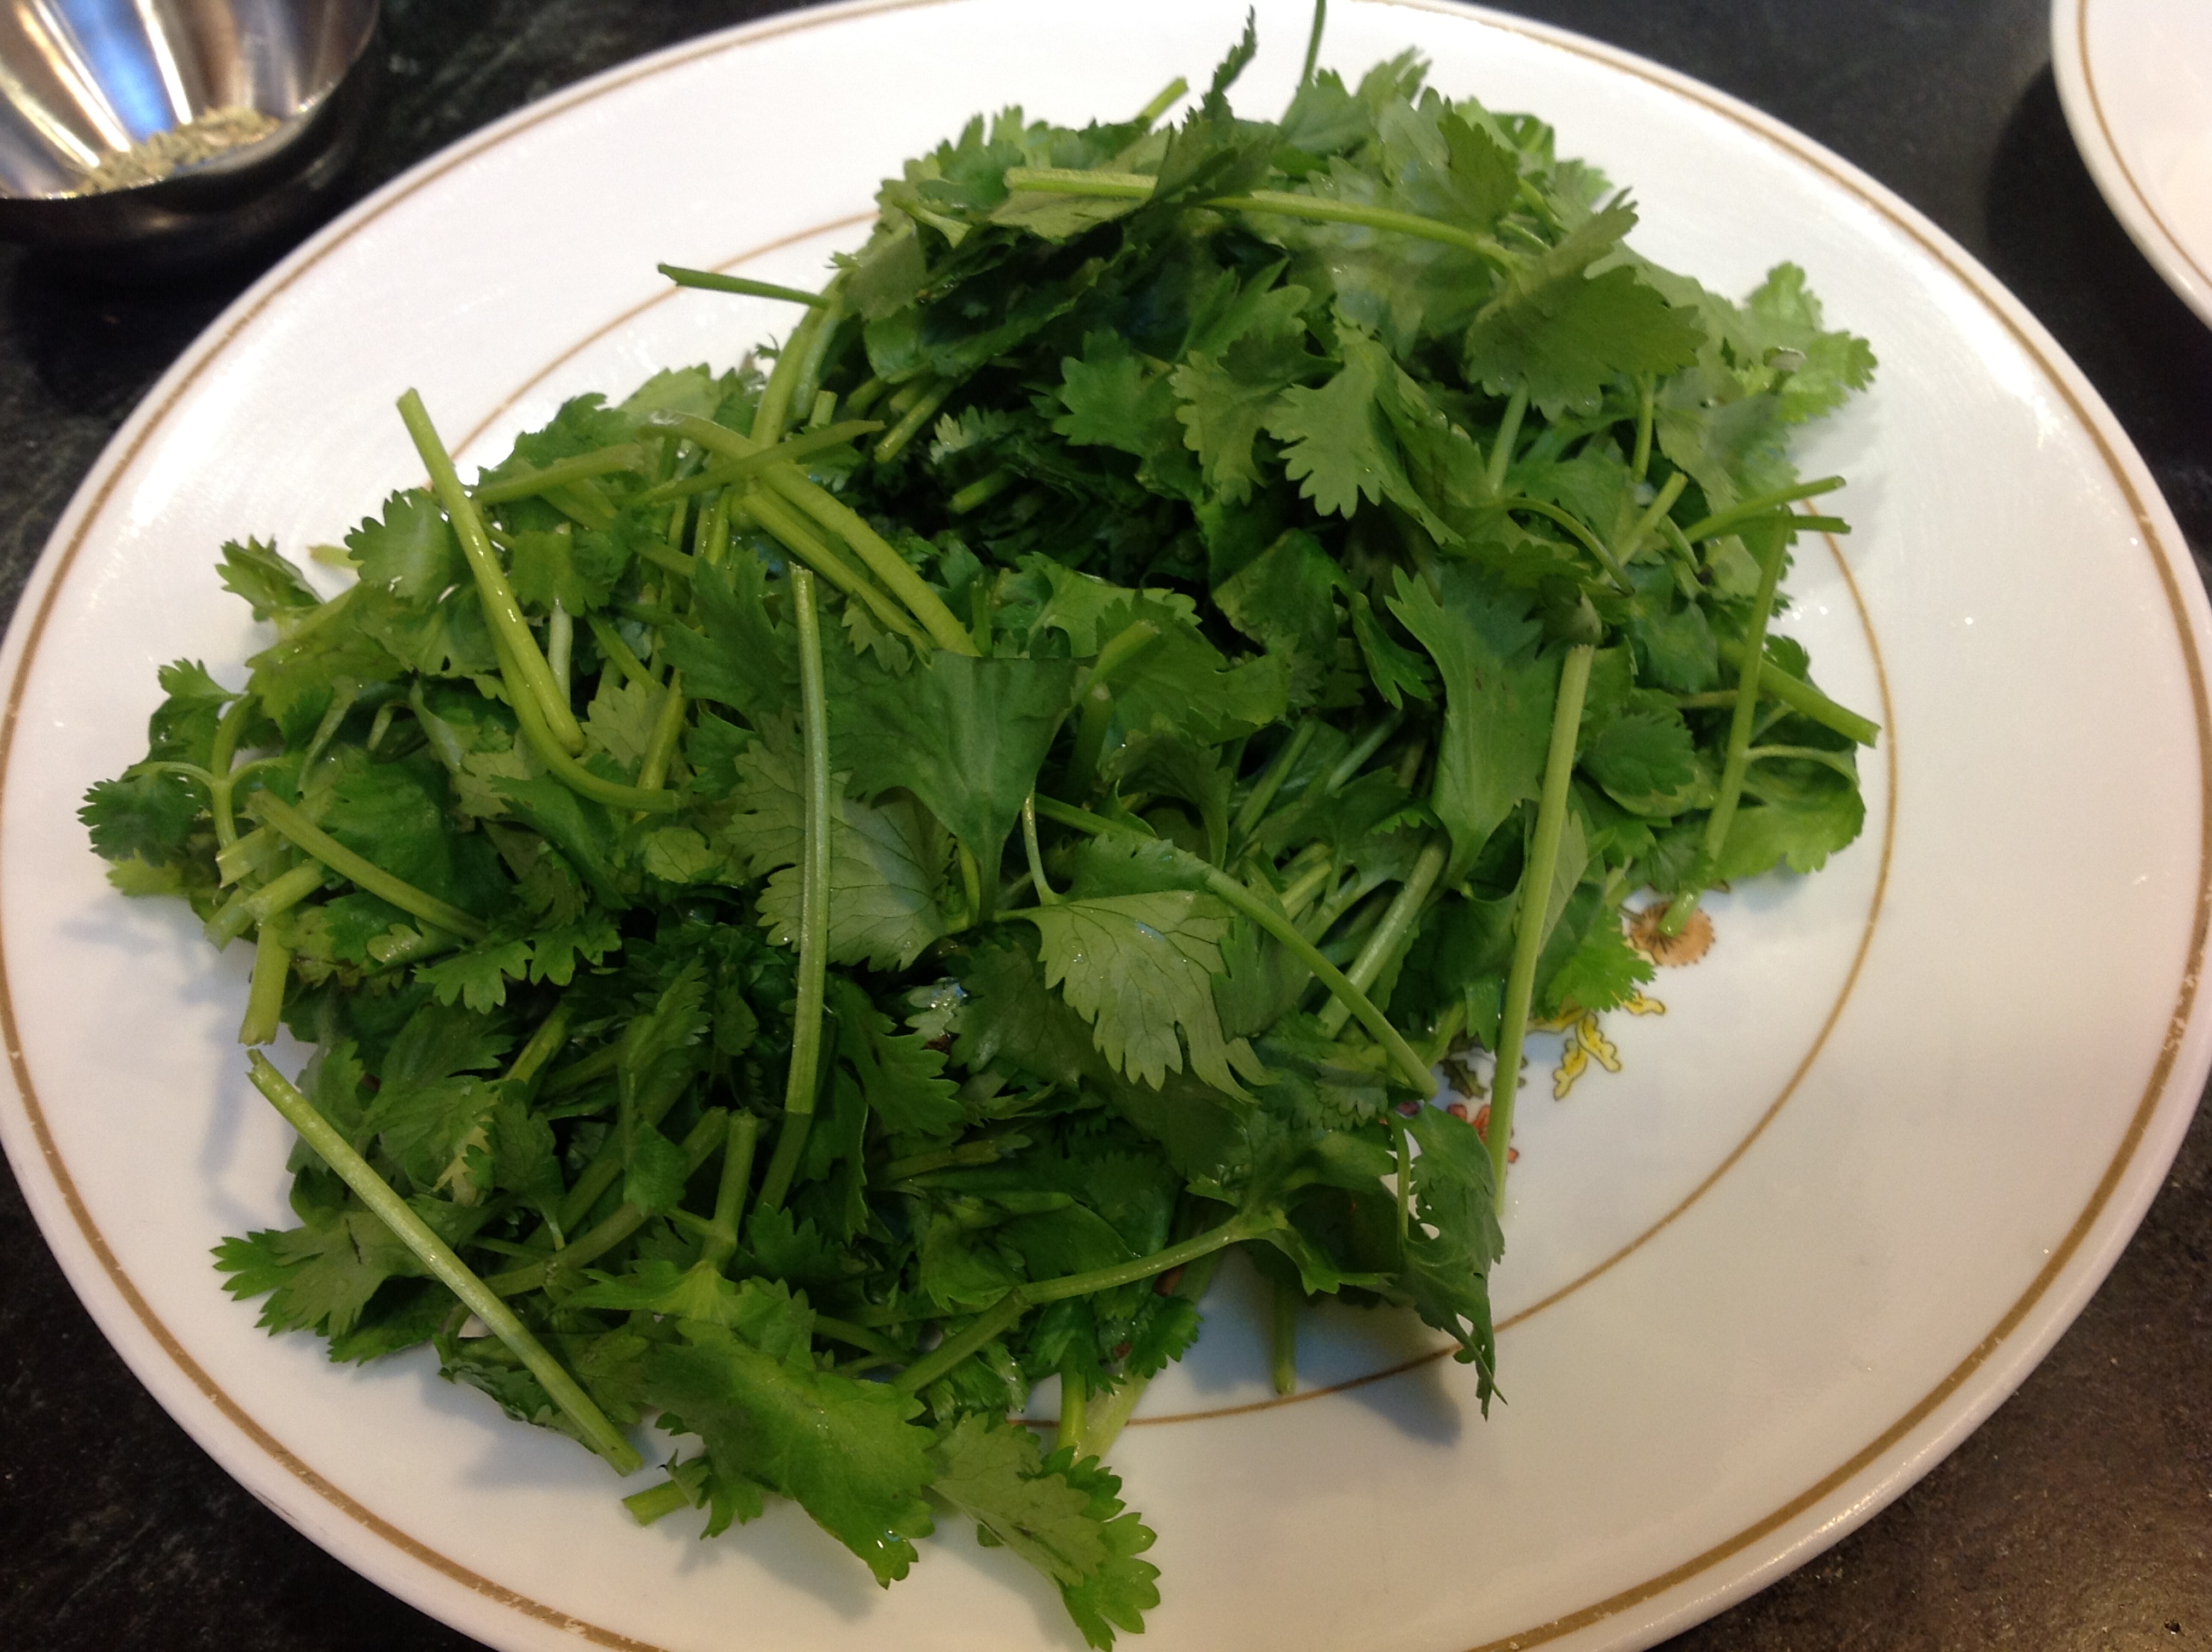
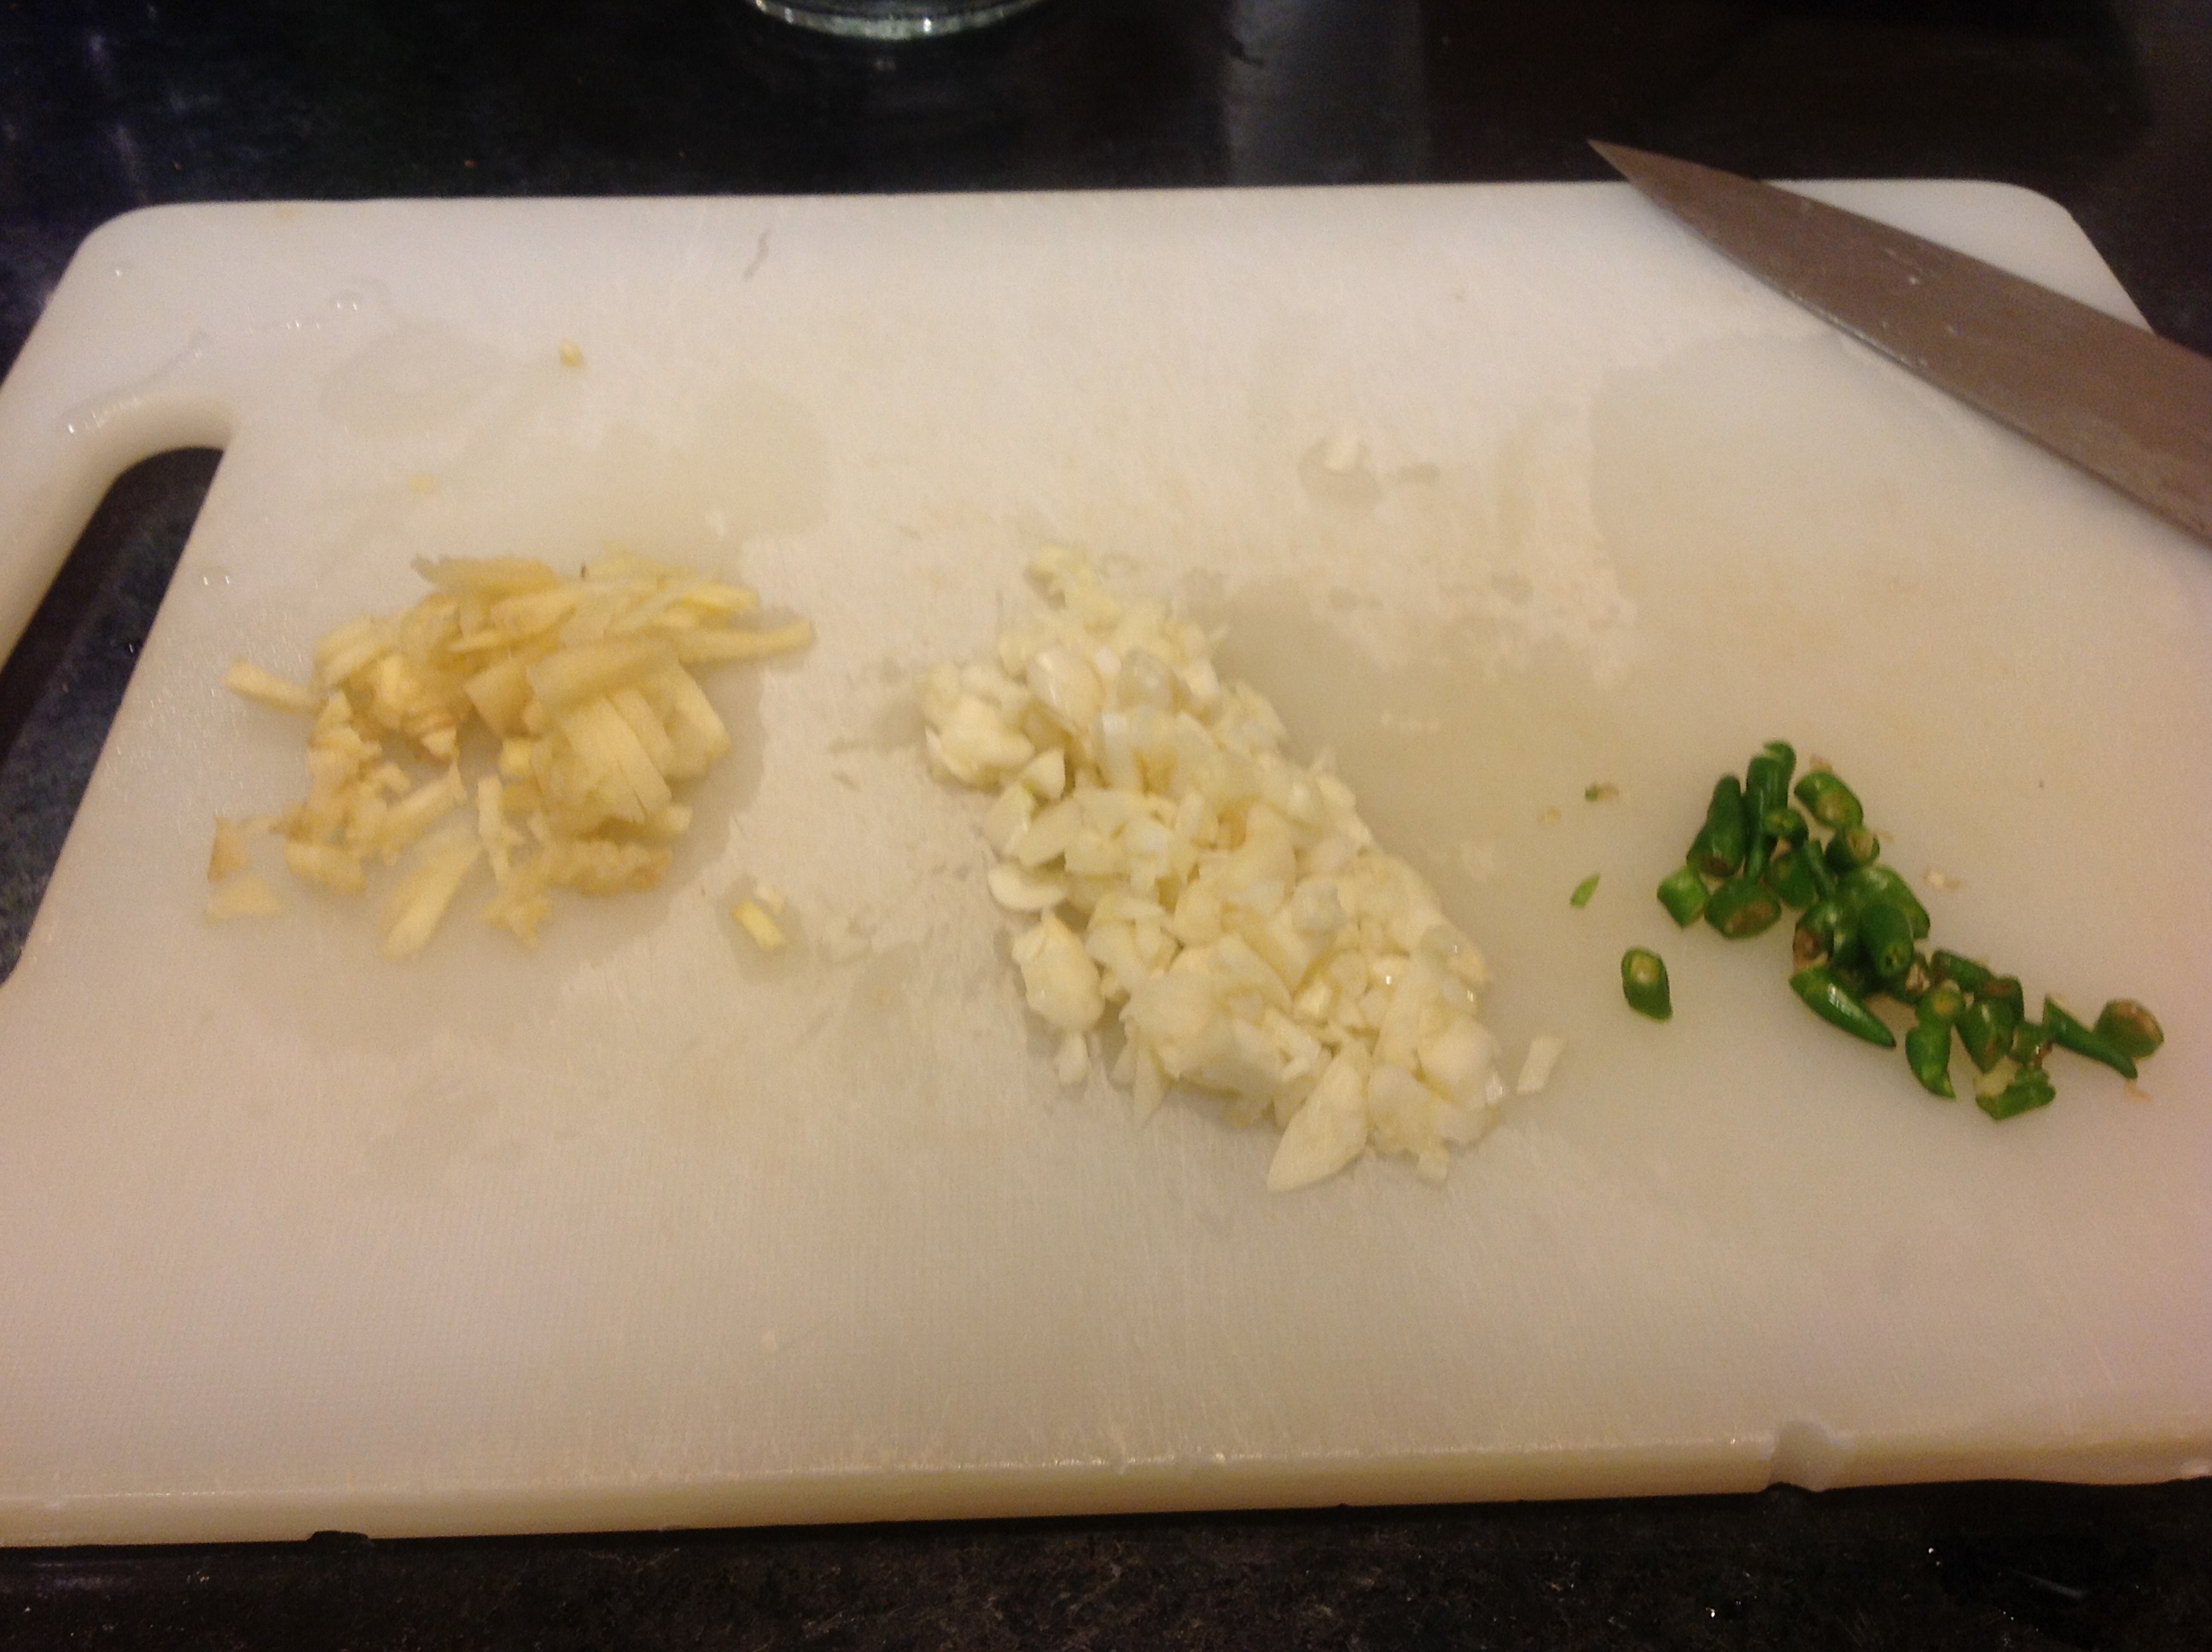
  • 1 bunch of cilantro, rinsed and roughly chopped, including soft stems
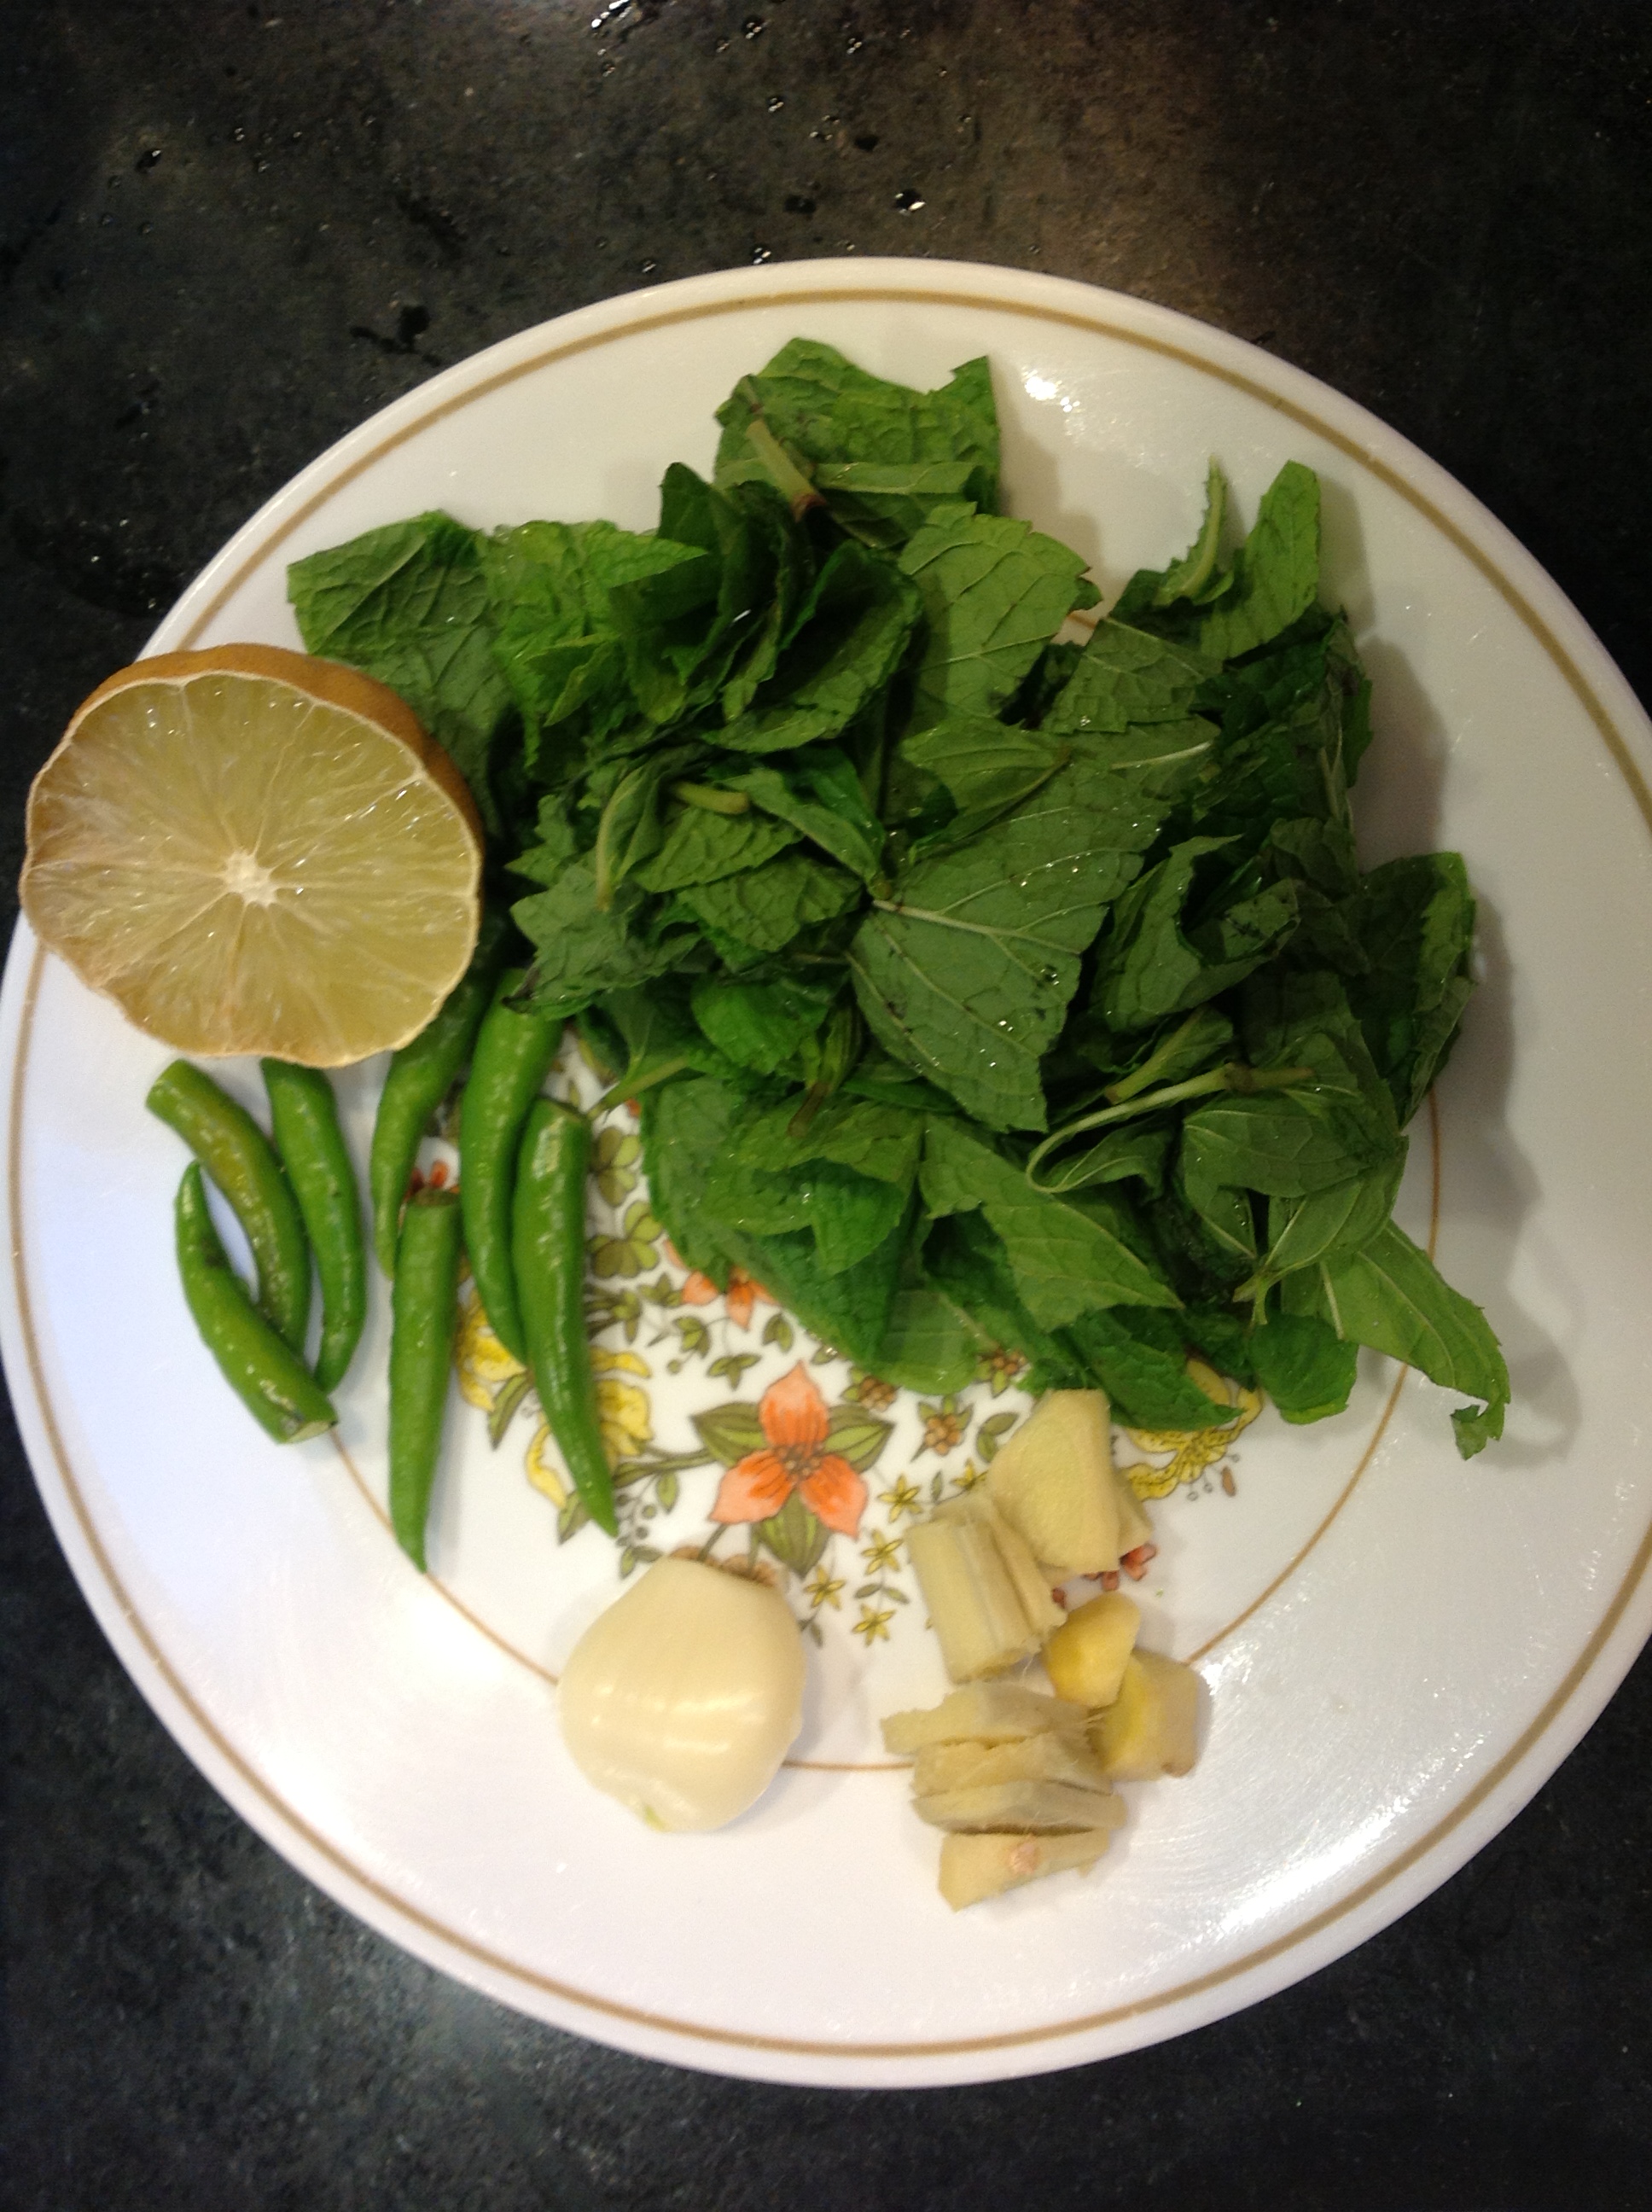
  • Anywhere from 1 to 8 serrano chilies, depending on your heat tolerence
  • Half a teaspoon salt or to taste
  • For sourness, 2 teaspoons of lime juice or 1 teaspoon tamarind paste (optional)
  • Half a bunch fresh mint, leaves only (optional)
  • 1 – 2 cloves garlic (optional)
  • Half an inch piece of ginger, peeled and sliced (optional)
  • A cubic inch of onion (optional)
  • Half a teaspoon sugar (optional)

Method:

As you might have noticed there are a number of optional ingredients. Just the first three will give you a serviceable green chutney, but the addition of the others will enhance the flavor in their own unique ways. I particularly recommend adding onion, because onion has this unique characteristic (like salt) to bring out the flavor of the other ingredients, while not overstating its own. A good team player, is our onion.

Put everything into a blender with only the water that clings to the leaves from rinsing, and hit go. Maybe add a tablespoon more water but limit this. You might need to stop, stir, and go a few times, but eventually the blades will catch; and you will have your green chutney.

Interestingly encrusted salmon

IMG_0608

Salmon crusted with cracked black pepper is IN. Open a fancy restaurant, add that dish to your menu, and watch your cash register spin. But what is a few cracked peppers? I pooh-pooh it. Wait, I must catch a breath from laughing. I give you — salmon encrusted with the most interesting crust in the world.

Black pepper does make an appearance. Coriander seeds do as well. And also — that paragon of savoriness — urad dal (Vigna mungo), the platinum-blond lentils that turn red when roasted. Throw in some lemon juice and you have a meal. The fame of this recipe has spread far and wide throughout my home since I came up with it.

The most interestingly encrusted salmon in the world

Ingredients for the spice powder:

  • Half a tablespoon whole black pepper
  • One tablespoon whole coriander seeds
  • One tablespoon skinned and split urad dal

Ingredients for the meal:

  • 3/4 lb salmon steak or fillet
  • salt to taste
  • One tablespoon olive oil
  • Juice of half a lemon or to taste

Method:

IMG_0591

To make the spice powder we need to first roast the seeds. Heat a small thick-bottomed pan on medium heat. Put in the black pepper and coriander seed in one batch. Stir occasionally. In a couple minutes a few will start to pop (stand back). Empty the seeds into a small bowl.

IMG_0592 IMG_0594

Next, in the same pan, in goes the lentil. Stir once in a while to ensure even roasting. These will take longer but in a few minutes will redden. Take them off the heat into the same bowl.

IMG_0595 IMG_0597

Wait a few minutes for the spices to cool, then grind them up in a clean coffee grinder. The salmon crusting spices are ready. You can save the excess in a clean spice jar, nicely labeled and dated. You will thank yourself later.

IMG_0600

Next let’s prepare the fish. For us, dinner for two consists of a three-quarter-pound fillet or steak of salmon, but feel free to use as much fish as you need. Start the oven at 425 F to preheat.

Place the fish in an oven-safe tray. Make a few deep cuts with a sharp knife. Sprinkle salt to taste. Now spread olive oil over the fish, then lemon juice, taking care to drive some of the salty, oily, lemony mixture into the deep cuts you just made (now you don’t need to wonder why you made them).

IMG_0602 IMG_0604

Next comes the spice powder. I use it liberally to coat the fist. Perhaps a tablespoon and a half for a piece this size? The point is really to cover the flesh.

Goes into the oven next. I give it 20 minutes in a 425 F oven, and it comes out medium-well. Your mileage may vary.

This goes very well with patty-pan squash mashed (squashed?) but the recipe for that will come later.

The Tahoe gratin

Tahoe Gratin

Tahoe Gratin

We spent labor day in a rented cabin in the Tahoe region. We had a state of the art kitchen at our disposal, a warm cozy evening for dining in, a few vegetables in the fridge, but no spices whatsoever. What’s an Indian cook to do?

Gratin!

I love gratins — the creamy cheesy crusty casseroles. I was first introduced to gratins in an strange fashion — a pure vegetarian Gujarati restaurant in Bombay had a ‘Vegetable Au Gratin’ on the menu and it was delicious. Restaurants in India have this strange quirk where the advertised cuisine hardly matters — a South Indian dosa restaurant will have an entire Indian Chinese menu, and throw in a club sandwich as well. They don’t seem to believe in specialization of cuisine.

Sort of like the proprietor here at The Odd Pantry you say? Hmm.

At any rate, this is a pure vegetarian gratin, and it is built in layers of potato, cauliflower and corn…all vegetables with distinct flavors that nevertheless that have a certain savoriness that unites them.

The Tahoe gratin

Ingredients:

  • 1 large red potato or 2 medium
  • Half a head of cauliflower
  • Half a pound bag of frozen corn kernels
  • One and half cup milk
  • 1 – 2 tablespoons butter
  • 1 – 2 tablespoons whole wheat flour (same amount as butter)
  • salt to taste
  • A 2″ by 2″ by 2″ block of good sharp cheddar cheese

Method:

In this dish I precook all the vegetables to minimize and equalize the gratin baking time. The other principle I follow is to salt each layer on its own.

First, the potatoes. Slice the potato as thin as you can get them (eighth of an inch). Put them in a pyrex container, add salt enough for the potatoes, and submerge them in half a cup milk. Microwave for 2 – 3 minutes and then set aside.

IMG_0578 IMG_0579

Next the cauliflower. Slice the florets into quarter inch thick slices, put them in a bowl, add some salt, and once again, microwave for 2 – 3 minutes and set aside.

IMG_0580

Next the corn. Same routine — put in a bowl, add salt enough for the corn, and microwave. With the frozen corn all we are trying to do is thaw them.

Vegetables are ready. Let’s make the bechamel sauce. Heat the butter in a small pot. When it melts, add the flour and stir, stir, stir on gentle heat. It will foam and bubble and perhaps turn a shade darker. Now put in the milk. Stir with your wooden spoon for dear life as you slowly pour the milk in. You may need to resort to a whisk, the idea is we are trying to not have any lumps. Keep the heat gentle. You can also pour in any extra milk from the potato cooking bowl. Once all the milk has gone in, and the mixture is smooth, you can up the heat and bring to a boil. Add salt enough for this sauce.

IMG_0581 IMG_0582 IMG_0584

Once it comes to a boil, turn it off after a minute. We are ready to compose the layers. In a flat baking dish, first layer in the potato slices, trying to keep even thickness. Next put on the cauliflower florets in a layer. Next the corn. Now pour the bechamel sauce all over the vegetables, pushing and prying with a spatula to get it everywhere.

IMG_0583

Cut the cheese up into tiny cubes. Cover the top of the casserole with cheese. Cover with foil and bake for 45 minutes at 425 F. In the last 10 minutes, take the foil off to get it to brown. If you want more of a brown crust, stick it under the broiler for 5 extra minutes.

IMG_0585 IMG_0587


Here are some other ideas for other vegetables to add to the mix: peas, leeks, roasted zucchini.


Yogurt Rice — an iterative approach

Yogurt rice

Yogurt rice

A precept that is big in the software engineering world (my other life) is that development should happen in phases, but each phase should be releasable as a full-fledged product.

This precept was very much on my mind as I made yogurt rice for dinner the other evening. I’ll tell you why.

Now yogurt rice (otherwise known as curd rice; mossaru anna in Kannada, daddojanam in Telugu, bagala bath in Tamil) is a South Indian recipe that I hadn’t even heard of till adulthood. But had I ever eaten yogurt rice? Of course! Every single day of my tender young life I had yogurt rice for lunch. Yogurt rice with cauliflower, yogurt rice with ketchup (don’t ask), yogurt rice with papad, yogurt rice with sookha aalu, yogurt rice with pickles. If you pierced my veins you would probably have had thick and pulpy yogurt rice squirt out.

Sorry about that image. Here’s the point I’m trying to make. Short of the fancy ‘yogurt rice’ recipe with every bell and whistle, simply mixing yogurt with rice achieves a serviceable product. While being quite ricey and quite yogurty and cooling, it is its own thing with a very distinctive fragrance. That is your first iterative product — simply mix yogurt with rice. But we are getting ahead of ourselves.

Iteration 1: Mix it up

20130909_195135

Cook about a cup of long-grained rice with some salt. Let it cool a bit, break lumps with your fingers, then mix in about a cup of plain yogurt nicely. You are done with your first product. This is a great accompaniment to any spicy vegetable dish or pickle. Or heck, dot it with ketchup, scoop up a dot in each bite, but don’t tell people this idea came from me.

Iteration 2: Salad it up

20130909_195512

Now for the second iteration we throw in some crunchy salady ingredients to brighten the flavors. Imagine luscious smooth cooling yogurt rice with the occasional crunchy freshness, perhaps a couple in each bite. Chop up 2-3 scallions, greens and all; and perhaps a quarter of a deseeded cucumber into tiny cubes, and mix it into the yogurt rice.

Iteration 3: Spice it up

Yogurt rice is soothing and cooling. Perhaps too cooling and too soothing? We need to add some sweet, sweet pain. This calls for heat from two sources: green chilies, and ginger. Thinly slice one serrano chili, or a few smaller bird’s eye chilies, or one jalapeno. Also slice half an inch piece of ginger into strips. Mix those into the rice. Still in keeping with the salad theme, we do not cook these last ingredients but keep them fresh.

Iteration 4: Season it up

20130909_195703 20130909_200126

Now lets add a tadka. For the non-Indians, ‘tadka’, ‘vaghaar’ or ‘baghaar’ is a very standard method of finishing up many, many recipes: heat a bit of oil or ghee, throw in some whole or ground spices and / or aromatics, let them cook, and throw that seasoned fat into the dish and mix it in. So let us tadka the yogurt rice. Heat 2 tablespoons of oil in a little pan; when it shimmers, put in the following: a few sprinkles of asafetida; when it foams, put in a teaspoon of deskinned udid dal; when they start to turn reddish, put in a teaspoon of mustard seeds; when they pop, put in about 6 curry leaves. When they shrivel, it is time to turn off the heat and mix it into the rice.

Iteration 5: Fancy it up

What is expensive, nutritious and will allow you to charge 50 cents more for this dish? Cashews! In the same pan as the seasonings, put in a drop more oil, and put in a quarter cup whole cashews to roast. Once they darken in various places, turn off the heat, and mix it into the rice.

Iteration 6: Sweet touch it up

Now for the kicker — the last step that I didn’t even know about when I made this dish, but was told to me by my friend Rashmi after: put in about a quarter cup of pomegranate kernels and mix it in to distribute evenly throughout the rice. Can’t wait to try the 6th iteration of this dish the next time I make it!

Creamy tomato korma with 2 jewels

Tomato korma

Tomato korma

My favorite Indian restaurant dish has always been the navratan korma. Creamy and subtly flavored, it is traditionally made with nine separate ‘floaters’ that make up the nine jewels (nav=nine, ratan=jewel). The problems with replicating this dish at home are many and various:

  1. I can never bring myself to put in the sheer amount of butter and cream needed in this recipe
  2. my grinds are never as smooth and as fine as in restaurants
  3. the nut kormas that I have made are, shall we say, lacking in flavor
  4. I never have nine things, all together, in the fridge at the same time, to use in the korma
  5. It goes well with naan but I don’t have a tandoor, so I need a recipe that will go well with rice or roti

Did you think this was going to be just a litany of my troubles? No, Dear Reader, I have found a good substitute! Here it is. A poor man’s korma with two jewels instead of nine, and a creamy tomato base instead of whatever they use. Feel free to up the jewel count when you make this at home. Feel free to take any other ‘Julia Child’ steps, such as peeling and seeding the tomato for a smoother sauce. I certainly didn’t but I’m rustic that way.

Creamy tomato korma with 2 jewels

Ingredients:

IMG_0564[1] IMG_0565[1] IMG_0572[1] IMG_0568[1]

  • 2 tablespoons ginger-garlic-chili paste
  • 2 cups tomato puree, made by simply halving about 5 tomatoes and giving them a spin in the blender
  • 1 bay leaf
  • 2 black cardamoms
  • 4 green cardamoms
  • 1 small stick cinnamon
  • 4 cloves
  • 2 tablespoons ghee
  • 1 tablespoon dry fenugreek (methi) leaves or half a bunch fresh
  • A pinch of nutmeg, grated
  • Salt to taste
  • quarter cup heavy cream or milk
  • Jewel #1: half a pound of paneer, cubed into small cubes
  • Jewel #2: Big handful frozen peas
  • (other possibilities: chopped pineapple; cashews; green beans, in inch-long pieces; carrots, cubed; cauliflower florets; slivered almonds; bell peppers)

Method:

Heat the ghee in a thick-bottomed pot on medium heat. When fully melted, throw in the whole spices — the cloves, cardamoms, cinnamon, bay leaf. They need to cook for a minute, then in goes the ginger garlic paste. Let it sizzle and look ‘cooked’ which is one step before looking ‘browned’. At this point put in the tomato puree and an additional cup of water.

IMG_0566[1] IMG_0567[1]

Bring this mixture to a boil and let it roil away gently for about 10 minutes. It will reduce some and its lusciousness will be greatly enhanced. At this point add the salt, fenugreek leaves, and grate some nutmeg in. Let it cook to meld another five to seven minutes. All this cooking can be done at medium heat.

Tomato korma, the base is cooked

Now the jewels go in. There is no need to thaw the peas before adding them in. The peas can go in first, then the cubed paneer. If you have other ‘jewels’ that need to be cooked to fully enjoy them, I suggest you precook them by blanching or microwaving, with some salt, before popping them into the sauce to finish off.

IMG_0573[1]

In any case my jewels did not need much cooking. Once the peas thaw they are quite done, and the paneer just needs heating through. This happened in another few minutes.

What is a korma without cream? So just before serving, lower the heat, add the quarter cup of cream and gently stir in, adjust for salt, and serve with some nice long-grained rice.

IMG_0574[1]


(This recipe is one of the 1000 found in this book.)

Rustic ginger-garlic paste with optional green chili

I have a bone to pick with most ginger garlic pastes — one normally uses a blender to make them, so one needs a simply giant amount of ginger and garlic to make the blades go, and, one has to use water to make it slushy.

IMG_0546 IMG_0551

But who wants slushy ginger-garlic paste while cooking? And, who wants a simply giant amount of paste situated in the fridge, week after week, slowly oxidizing, and stinking up the air each time you open the fridge?

I often resort to the blender method, but I do believe this method is way superior — here we use the mortar and pestle. Aside from looking decorative, you make only as much as you need, and seriously, it doesn’t take that long.

No precise ingredients in this one. Use as much as you think you will need.

Step 1: Peel, destem and chop ginger, garlic, and chili. No need to go super fine.

Step 2: Place all ingredients in the bowl of a mortar (or is it pestle? I can never remember).

Step 3: Sprinkle with a bit of salt and wait a few minutes. Salt has three functions here. If you use kosher or sea salt, it will add a bit of roughage, all the better to grind with. Second, salt draws out moisture, and once again, this helps the grinding. Third, salt actually starts to cook certain foods. You can notice this specially with garlic — raw garlic has a sharp and aggressive taste; but if you salt it for a few minutes, it mellows out considerably, just like it does with cooking.

Step 4: Pound away with the pestle (or the mortar, I can’t remember which is which). It will not be a super smooth paste, but that’s where the rustic charm comes in.

Sookha aalu, Indian home fries

All right, Americans, I will admit it, you are better at naming recipes than us Indians. The dish called ‘sookha aalu’ which is made in different guises all over India means nothing but ‘dry potato’. Descriptive, yes, but lacks a certain punch.

Some American marketing geniuses

American marketing geniuses

Then the American marketing geniuses come in, and decide that any recipe name is improved by bunging in the word ‘home’. And on top of that, they came up with the word ‘fries’…. “Guess what guys, we won’t include the word ‘potato’ at all…a light touch…a bit of indirection.”

Genius! Home fries. My point here is that India has legions of most excellent sookha aalu recipes and really they are almost exactly what people in America recognize as home fries, except with Indian spices. Here is my version, and it is most delectable.

Sookha Aalu, Indian home fries

Ingedients:

  • 1 large red potato or 2 medium or several small.
  • salt to taste
  • half a teaspoon mustard seeds
  • half a teaspoon red chili powder
  • half a teaspoon coriander powder
  • 1 teaspoon dry mango powder (aamchur) or substitute with lime juice
  • 2 tablespoons oil

Method:

Rinse the potato and remove the eyes. Microwave it for 5 minutes or so, or long enough to almost cook it right through.

When it comes out of the microwave, wait till it is cool enough to handle, and cut it into pieces. First, Do Not Peel. If you do you will regret it. The crisped up peel is definitely the most appealing part of this dish.

Next, think about the shapes of the pieces. You could do cubes, if that is your fancy. Don’t make them bigger than about half an inch in width. Or you could do slices, about eighth of an inch thick. Either way works, but choose a method and stick with it, unlike me, I chose slices, then switched to cubes, then had a bit of a hodge podge.

Heat oil in a non-stick pan. When it shimmers put in the mustard seeds. When they pop put in your cut up potato. Stir them around on medium-high heat. Sprinkle salt over in two stages — once, after you have tossed the potatoes with the oil, and next, after  a few minutes, and more stirring.

IMG_0556 IMG_0558 IMG_0559 IMG_0561

You will see them begin to crisp and brown in a few minutes. Keep stirring once in  a while, and cook in all for about ten minutes. Towards the end of cooking time, sprinkle on the chili powder, the coriander powder and the dry mango powder. Adjust for salt and you are done.

Introducing the Eggnach

Eggnach with roti

Eggnach with roti

My People — the Sindhis — have made a lot of contributions to world culture, but I must say this ranks as an important one. Sindhis discovered that spinach and eggplant, when cooked together, meld well, marry well, and make a tasty nutritious brew.

Not only is this technique explored in the very famous Sai Bhaji, but in this rather less well-known dish as well. It goes well with rotis, but would go on the side of rice very well too, if you have some plain yogurt on the side. A very nice accompaniment would be yellow rice — cooked with some garlic, salt and turmeric powder (recipe forthcoming).

I found this recipe in this book and as usual made some modifications.

The Eggnach — eggplant and spinach dish

Ingredients:

  • 1 bunch spinach
  • 1 regular-sized eggplant
  • 1 medium tomato or 2 small ones
  • 4-5 cloves garlic
  • half and inch piece ginger
  • 2 serrano chilies or several smaller birds-eye chilies
  • half a teaspoon coriander powder
  • half a teaspoon cumin seeds
  • half a teaspoon red chili powder
  • salt to taste
  • 2 tablespoons oil
  • 1 tablespoon ghee (optional)

Method:

Rinse and chop the vegetables.

IMG_0547 IMG_0548 IMG_0549 IMG_0550


Chop the garlic, ginger and chili. Give them a pounding in a mortar and pestle after sprinkling a bit of salt on it to add a bit of roughage and to draw out moisture.

IMG_0546 IMG_0551

A note about salt: it draws out moisture! This is an incredibly useful fact that helps out in various ways. In this case, I pound it with a bit of salt, so that the paste self-makes itself, without adding even a splash of water.

Salt also pre-cooks food as it draws out the moisture, at least that is how I think of it. If you mince garlic, and salt it, in 10 minutes you will see that it has turned mushy and wet, and by the way, the taste of the garlic will not be as aggressive as when it is raw.

So anyway, getting back to our job. Pound those guys to get them to paste up. You don’t need to go the extra mile, just a simple smashing will do.

Heat oil in a thick-bottomed pot. When it shimmers, throw in the cumin, red chili powder and coriander powder. Now enters the garlic/ginger/chili paste. Let it sizzle. Now in tumble all the vegetables, chopped. Salt them, stir them around, cover, and cook for 15-20 minutes on medium first, then, when it comes to a boil, on medium-low.

IMG_0553 IMG_0554 IMG_0555 IMG_0557

Everything you have in there is quite mashable by this point. So attack it with a potato masher or simply the back of your spoon.

IMG_0560

Eggnach mashed

If you like, top it with a teaspoon of ghee, and possibly a sprinkle of lemon juice, and you are done.


Simple dal series – Part 3, tuar dal with spinach

(Part 2 of this series is here.)

Here is the pigeon-pea, which has nothing whatsoever to do with pigeons, except that they are both full of protein:

Pigeon pea, tuar dal

Pigeon pea, tuar dal

Tuar dal

Tuar dal

And here is some dementia-fighting spinach:

Spinach

Spinach

And this is what you get when you marry them: spinach dal.

Spinach dal

Spinach dal

Eat enough of this, and you will be lifting weights while remaining completely undemented. But that’s not all. Spinach is a good choice to put into any dal, because it melts in, rather than remain in bits. Whether your intention is a soupy dal or more of a porridgy one, spinach fits right in.

Spinach with tuar dal

Ingredients, for boiling:

IMG_0533[1] IMG_0535[1]

IMG_0539[1] IMG_0540[1]

  • Half a cup tuar dal (dehulled and split pigeon peas)
  • spinach — one bunch (use half a bunch if you want it more yellow than green)
  • 5-6 cloves garlic, smashed
  • 1-2 serrano chilies
  • half a teaspoon turmeric

Ingredients, for seasoning (all of these are optional, but do try to use at least one spice):

Seasoning spinach dal

Seasoning spinach dal

  • 1-2 tablespoon ghee
  • sprinkle of asafetida
  • half teaspoon mustard seeds
  • half teaspoon cumin seeds
  • half teaspoon fenugreek seeds
  • half teaspoon or to taste red chili powder
  • salt to taste
  • Half a lime or lemon squeezed

Method:

Rinse and soak the dal in hot water for an hour or more. It will double in volume, or more. Put the drained dal in a thick-bottomed pot along with the turmeric, garlic, and chili. Add two and half cups water and bring to a boil.

Now. I say this with every dal recipe but it bears repeating. When dal first comes to a boil it will froth up with the rage of a volcano. Let it do so while the pot is uncovered. This way you can watch and the foam is not likely to end up on your burner. Once the foam has spent itself, partially cover, turn it down to simmer for an hour and half.

In the middle of cooking time, put in the washed and chopped spinach. Cover and cook on until the dal grains are soft. Give the soupy stuff a whisk with a whisk or a swoosh around with one of these, a mandheera. Add salt and keep it on a low simmer.

Spinach dal before seasoning

Spinach dal before seasoning

Now for the seasoning. Heat the ghee on medium high heat. By the way this is one dish where I do recommend ghee rather than oil because it enhances the flavor in a very nice way. Of course oil would work too.

When the ghee is completely melted, throw in the seasonings in this sequence: first, the asafetida and the red chili powder; then the cumin seeds; when they sizzle, the mustard seeds; when they pop, the fenugreek seeds. Don’t cook these longer than about 10 seconds, because they will turn bitter if so.

Turn off the heat and pour into the dal. Stir, stir, stir. Simmer for a few minutes to meld the flavors. Squeeze some lemon/lime juice to it to brighten the flavor.

I love this dish with rice but other people recommend rotis. I never would, so there.

IMG_0544[1]

Rice with spinach dal