Roasted fennel

I have no idea why I planted so much fennel. We don’t much care for it in salad, and although my daughter loves chomping on the seeds, I’m not going to let it go to seed, because it is a noxious weed in California. So why did I do it? There’s all the fennel, waving in the breeze (hi fennel!) that I have to do something with.

fennel 012

Last afternoon I pulled out one entire plant, mostly to allow the mint hiding under the fronds to get some some sun. Cut out the leaves and the roots, and this is what I was left with: 3 bulbs.

fennel 001

Don’t they look like three buddies? The short and stout one, the tall and skinny one, and the one right in the middle? Slice them up an eighth of an inch thick, and you end up with this:

fennel 002

I love how pretty the insides are — the symmetrical petal shapes that emanate out of the center. I focused on one particularly pretty slice below:

fennel 004

This is one of those recipes where I wasn’t sure what I was going to do until I had done it. I knew baking in an oven was involved, salt and olive oil too. So I started with that. Rub a few teaspoons of XVOO all over them with your fingers. Sprinkle with some salt to taste. Then, squirt a few squirts of lemon around. Now for juicy vegetables roasted in this way where one expects some browning, some crunch on top is desirable. I went with cracked coriander seeds (just pulverized a bit, not ground up completely); and, scanning the pantry shelves, I saw almond meal, so I used that as well. A teaspoon of cracked coriander sprinkled on top, and a teaspoon of almond meal spread around. This is what I ended up with.

fennel 009

Into the oven it goes. Set to bake at 425 F, for 20 minutes. This is what comes out:

fennel 011

In retrospect, I could have gone higher on the oven temperature, perhaps 450 F next time?

It made a very nice vegetable side for two. It would also be great on pizza or focaccia. The fennel was still a little sweet and crunchy on top. I loved the lemon but it does make it a little intense, so if one prefers less intensity in flavor one could leave it out.

Oh — and this recipe would be great with belgian endives — a similarly juicy and crunchy vegetable.

Healthy, natural granola

Most newbies to California eventually discover granola, as I did, years ago. Popularized by the hippie movement in the 1960’s, this mixture of crisp roasted oats, dried fruit and nuts is usually combined with yogurt and fresh fruit for breakfast. I first tried it at a cafe and loved it. Of course I tried to recreate it at home, and reached for the many, many, many varieties of packaged granolas in the grocery aisles. I got quickly disenchanted. Why? Let me count the ways.

1. Too sweet!

2. There’s always one ingredient I don’t like. Either it’s coconut; or dried raspberries paired with vanilla; or sesame seeds which I like, but not in this context; or chocolate, good lord.

3. Often stale. The oils used are often rancid.

4. Never tastes quite oaty enough. As my husband says, too much binder, not enough oats.

5. .Some granola makers want to ride on the ‘rustic appeal’ train and make it artificially clumpy, to replicate that homemade look, but honestly people, those clumps are hideous. I’ve had packages of granola that were nothing but clumps. Clumps hide sugar and salt bombs. Yuck.

So I finally decided to make my own and never looked back. The fresh, roasted smell of oats brightens up the kitchen on the mornings that I make it, and I have never had store bought granola that tasted quite that oaty.

Thank you Alton Brown! I first saw this recipe on his show Good Eats, but I have refined, simplified, and de-sweetened it (Americans like their food too damn sweet, even Alton Brown. We are not children people).

Here is the basic recipe, and please experiment by tossing it with fruit and nuts of your choice.

Step 1. Oats

ipad hijinks 025

I use 6 cups old-fashioned rolled oats from Quaker. Put 6 cups oats into a giant bowl.

Step 2: Basic flavoring.

Add one teaspoon granular salt and stir it around with your hands. Then add half a cup of almond oil, and a quarter cup good maple syrup. We use Grade B. Mix it very well with a spatula, until all the oats are shiny and covered.

Step 3: Roast.

ipad hijinks 026

Start oven at 250 F. Spread the oats on a roasting pan in a flat layer about a quarter inch thick. Let it roast for one hour and ten minutes. About 40 minutes into the cooking process, take out the tray, and stir the oats around to break clumps. Put the pan back in to complete the cooking process.

ipad hijinks 029

Once it is done, you have the opportunity to mix in dried fruit or nuts of your choice — some that we have tried are, currants; slivered almonds; flax seeds.

Wait till it cools and save in an airtight jar. It will keep for at least two weeks, never had a chance to keep it longer — we always finish it within that time.

Primer on caramelizing onions

At some point in their life, every able-bodied human will be called upon to caramelize onions. If you are Indian, this might happen three times in one evening. So let us learn to do this right.

Onions:

Let’s say you start with one yellow onion. Peel it and chop it. You do not want chunky pieces of onion. What you want is to maximize the cut surface area to expose more of it to the saute it is about to undergo. You can do this one of three ways: slice the onion paper thin; or first give it cross cuts with a sharp knife to produce a fine dice; or, get lazy and puree in a food processor with a few tablespoons of water. All methods work, but the wet purees will take a few minutes to lose their water, and only then will the onion start to caramelize. With the food processor, make sure to pull out a few chunks the blades inevitably leave behind and chop them by hand.

Saute:

Choose a thick-bottomed pan that will not allow the onions to burn. Stainless steel is best; Calphalon will work; you do not need Teflon. About three-four tablespoons of oil per medium onion is the proportion of oil you need. The flame should be medium-high at first. Be careful not to overfill the pot! If the uncooked onions come up halfway up the pot sides, they will steam instead of searing. Also, no lid needed.

Choices, choices:

Now, if you caramelize the Indian way, you will saute on medium-high for fifteen minutes or so, every few minutes giving the onions a vigorous stir. If you caramelize the Western way, you will turn the heat down to low after they first start sizzling, and keep the oil at a simmer for a good 45 minutes to an hour, only stirring every ten minutes or so. I think the Western way draws more sweetness out of the onions and is great when onions are the star of the show. In contrast, in Indian dishes, caramelized onions usually are the base for a spicy gravy.

Sprinkle of salt:

After they have started sizzling, I usually add a sprinkle of salt. This draws moisture out of the onions and helps them caramelize faster.

Proceeding:

As the onions cook, they will first get translucent, then the edges will start to brown. And their volume will shrink. There may be brown bits stuck to the pan as well; don’t worry about them! As long as you used a thick-bottomed pan that distributes heat well, this is fine. Remember, dark brown = good, black = bad. No doubt it is a subtle difference. But if you notice the edges turning black instead of brown, turn the heat down a bit. As it proceeds, it is wise to turn the heat down a bit anyway.

Finishing:

You can stop when you see some brown, or wait till you see mostly brown. It is a judgment call. The middles of the onion pieces will still be translucent till the end. If you want to scrape up the brown bits stuck to the pan, you can either wait till the next liquid comes in — whether it is tomatoes, yogurt, or other meat or vegetables — as they steam, the brown bits can be easily deglazed. If no further liquid is coming in, cover the pan for a few minutes, allow the onions to sweat, and the resulting liquid can be used to scrape them up.

The caramelization process:

After having done this a few hundred times, one might wonder — what on earth is going on? Well essentially the sugars in the onion oxidize and break down, browning occurs, and produce that familiar aroma. It is the same kind of caramelization process that is used while making creme caramel, otherwise known as flan; and a multitude of other desserts. Here is more information about it.
(Click here to find me on Facebook and here on Twitter.)

Sindhi party chicken

We hardly ever had chicken for dinner growing up in Bombay, but when guests were over for a dinner party, it was a must. While it doesn’t speak volumes for our creativity that  it was always the same recipe, it is certainly delicious. So here goes: the definitive Party Chicken.

This book about Sindhi cooking has something very similar in it under the heading of Seyal Chicken: The Essential Sindhi Cookbook.

Step 1: Purchase the chicken.

I usually buy thighs for this dish because they stand up better to stewing. Skinless; bone-in is better but you can go with boneless. Have the butcher cut each thigh in half. And do try to go to a meat store that sources from a farm that treats their animals with humanity. I went to Guerra Quality Meats in San Francisco, and they sell poultry from Mary’s Chickens from the Pittman family farm. Eight thighs should be good for 4 people.

Step 2: Aromatics:

Puree one large onion, 5 cloves of garlic, and an inch long piece of ginger together with a few tablespoons of water. There is no need to get a smooth puree, a fine mince is what one is looking for. If you’d rather chop by hand, be my guest.

Step 3: Oil and whole spices:

iPad 053

Use a pressure cooker if you have one. Heat about 3 tablespoons of oil on medium-high heat and put in the whole spices: 2 black cardamoms, 6 whole cloves, one stick of Indian cinnamon. You can also choose to put in some of the following: bay leaf; green cardamom; allspice. These will all work but give you a slightly different character. In a minute, put in the onion mixture. It will be very wet at first, but will slowly dry and caramelize. If you are new to browning onions, please read this post before continuing. Sorry, brevity has never been one of my strengths. So be it.

Above, you can see how much I started out with, after browning the onions, I ended up with this:

iPad 055

Step 4: In goes the chicken.

Put the chicken pieces in all at once, add some salt (more can come later), and 1 teaspoon turmeric. Stir to coat the chicken pieces with the spices and the oil mixture.

iPad 056

Now. This is important. We are not trying to sear the chicken. We are trying to get it to sweat out most of the liquid. In Western cooking, the standard technique is to quickly subject the surface of the meat to high heat; which creates a sear, and seals in the moisture keeping the meat moist. Not so in Indian curries. My mom taught me that one wants all the ‘chickeny liquid’ to be gone — so the idea is to keep cooking, stirring, pushing the pieces around; they will first become opaque as the protein is denatured; then, they will start to sweat and shrink. A luscious gravy will start to form around the shrunken chicken pieces. Keep it going for at least 20 minutes on medium heat.

Above, you can see how big the thighs were to start with, below is what I ended up with. This is with no additions, just the cooking of chicken, uncovered, stirring, for 20 minutes.

iPad 058

Isn’t the chicken going to be dry and leathery? No, because of the braising that is about to occur, which pulls moisture back in, but this time, it is Our liquid with Our spices, not the ‘chickeny liquid’.

Step 5: Liquid and stewing:

iPad 059

One can use chopped tomatoes; one can use a mixture of water and some vinegar; but I used yogurt. Take about a cup and a half of yogurt and first whisk it to break the curds. Put that into the pressure cooker along with some whole green chilies, stems removed, and a cut through the middle; some red chili powder; half a tablespoon coriander powder; and, importantly, salt to taste. Stir to submerge the chicken pieces, like so:

iPad 061

Cover and pressure cook for 15 minutes. If you don’t have a pressure cooker, cover tightly, bring to a boil, and simmer for about 45 minutes.

This is the braising process, during which the spiced liquid is both tenderizing and flavoring the meat. When you open the lid, you will see some of the oil separated, and the gravy is much darker:

iPad 063

Step 6: De-fatting and garnishing.

De-fat the gravy by scooping some of the oil off, if you like; pull out the whole spices with tongs, if you like; sprinkle some garam masala on top; garnish with minced cilantro.

Thepla — spicy flat bread from Gujarat

One of my themes in food is simplicity. Not only because I’m lazy, but also because I like to have each ingredient be meaningful, and not be drowned in a cacophony of flavors.

Few recipes are purer and more basic than the roti recipe. Whole wheat flour mixed with water, kneaded, rolled out, and roasted. Just two ingredients, and yet there is an infinity of variations on that theme.

Add a few ingredients, and a whole new set of possibilities open up. I first tried theplas when I was nine, and a classmates mom made a whole stack to share at school. What I remember is the strong flavor of asafetida (the ‘fetid resin’, or, the ‘devil’s feces’), along with some heat. Just a few additions, and yet, this is an entirely different meal than the basic roti.

Step 1: The flour mixture for one serving.

thepla and pulao 025

3/4 cup whole wheat flour (I use King Arthur’s premium whole wheat), half to one teaspoon asafetida, half a teaspoon turmeric, half a teaspoon or more red chili powder, a fistful of dry methi if you can’t acquire the fresh one, one quarter cup plain yogurt (I prefer Nancy’s plain whole milk yogurt, if not homemade), salt to taste. Knead into a taut dough.

Step 2: Roll out.

thepla and pulao 033

Using sprinklings of all purpose flour as a non-stick device, roll them into five-inch rounds on the counter or wooden board. A ball of dough about two inches in diameter will produce a round that large. Try to get it as thin as you can.

Step 3: Roasting.

Get your griddle nice and hot on a medium-high flame. The roasting follows the standard pattern: first side, about 30 seconds, until the dough turns a shade darker and small air bubbles start to appear; flip it. Second side, another 30 seconds, until the air bubbles combine and form a few large ones; spread a few drops of oil on the thepla and flip it once again; 30 seconds more, spread another few drops of oil, and flip it once more for the last time. So we have had four flips, and each side has been cooked twice, once with and once without oil.

This series of pictures shows the progression.

thepla and pulao 031

Next:

thepla and pulao 039

Next:

thepla and pulao 041

Next (and yes, I got it a little extra burnt):

thepla and pulao 045

Stack up the prepared theplas on a platter. A good accompaniment is a sweet mango pickle; yogurt is a standard too.

Here is my Sunday morning meal: theplas, yogurt, and some sour mango pickle.

thepla and pulao 047

Shishito (or padron) peppers with okra

You often see shishito peppers for sale in those little plastic boxes in grocery stores; they look so tempting, but it is often a struggle to know what to do with them. They are not hot at all, and take very well to grilling.The idea is that you pop the whole thing in your mouth and pull out the stem.

I have tried that method, and they were good, but not very versatile, being mostly suited as finger food or appetizer. What does one do with them when one isn’t having a party with a platter full of appetizers?

Well this simple recipe did the trick. It can go with any Indian meal, be a filling in a sandwich, be the vegetable side for a heartily seasoned piece of fish, etc.

I also got to use up the leftover okra in the fridge; and far from being filler, it went very well with the at once dark and bright flavor of the shishitos. In fact, I might have discovered a soul bond between these two vegetables.

Step 1: Wash, prepare and slice the vegetables.

seyal and shishito and oat pancakes 043

I used one pint box of the peppers and about the same amount of okra. Rinse and air dry the vegetables; take the stem tops off. Then, slice them into even-sized slices about half an inch wide.

Step 2: Dry-saute.

seyal and shishito and oat pancakes 046

I use the same method of dry-saute that I used in this recipe: A way with greens. That method quickly pulls the surface moisture off the vegetables, and sears them; and I believe seals the rest of the moisture in. If grilling is good, this is a facsimile and works in the same flavor profile. Don’t stop the dry-saute until you see many hearty brown spots and the vegetables look completely dry. Something like this:

seyal and shishito and oat pancakes 049

Step 3: Saute.

seyal and shishito and oat pancakes 052

Now comes the oil. I use pure olive oil for these high heat methods, because the smoke-point of extra virgin is quite low and would work better with a gentle simmering. Clear a spot in the pan, put in the oil, watch it shimmer instantly (because the pan is hot); then stir in the vegetables, thus giving them their first true saute. Now add salt to taste and keep the contents of the pan moving every minute or so. The saute process lasts about five minutes.

Step 4: The seasoning.

I chose a simple, simple seasoning method for this recipe, that hardly betrays its Indian origins. Use two kinds of heat — a healthy amount of black pepper, and some red chili powder. Either could be skipped. I also added a teaspoon of dry mango powder (aamchoor). Most pantries don’t have this, so some squirts of lime juice would work too. Stir for half a minute, while still on a hot pan; then turn off.

We had it with rotis, but it could go with rice and dal, be fabulous in a raita once the vegetables have cooled; or insert them between two slices of focaccia with some avocado, lettuce and cheese.

Seyal bread — the panzanella of Sindh

Bread usually goes stale before it starts to rot or mold. And therein lies a whole category of recipes.

When bread goes stale it becomes dry, leathery and unpalatable. Although it seems like the bread is losing water, apparently there is no net loss of water or intake of water from the outside air — it is just that some starch starts to crystallize, drawing water in from the surrounding bread substance. To some extent, this process can be reversed by warming the bread. This book — On Food and Cooking: The Science and Lore of the Kitchen — has a great explanation of the staling process.

Frugal housewives have always looked for ways to revive that unpalatable brick. Some methods take it all the way to dryness, like croutons and breadcrumbs. Others soak it in liquid. One famous example is panzanella, the Italian bread salad made out of stale bread chunks. Another from Sindh is seyal bread. This is a method of cooking bread with spicy liquid that is often eaten for breakfast.

To get started, cut your stale bread into chunks about and half an inch all around so you have an idea of how much substance you are trying to rescue. I love French bread in this recipe, or leftover rotis, but not enriched sliced breads that have some sugar in them — but that is a personal preference.

seyal and shishito and oat pancakes 010

For the amount of bread shown above,  I used:

half an onion, chopped but not too fine; 3 big cloves garlic, minced; one serrano chili, minced; and two medium tomatoes, chopped. For spices, about half a tablespoon of ground coriander, and half a teaspoon ground turmeric. Add some red chili powder to up the heat if you like. Some salt to taste. And for garnish, lots of fresh cilantro, chopped fine.

Heat about two tablespoons of oil in a thick-bottomed pan. Put in the onion, garlic and chili at once and stir. The idea is to not let the onions caramelize, because that sweetens them, and this recipe is all about the savory. In fact, that is a commonality in all seyal recipes (one can seyal fish, meat, etc.) — that the onion is cooked till translucent, but not browned.

This will happen quickly, in about 3 minutes on medium heat. Now put in the tomatoes. At first juicy, like this:

seyal and shishito and oat pancakes 003

they will start to dry out in the heat (crush them with the back of your spoon to get them to release their juices sooner).

When most of the liquid is gone, put in your dry spices, the coriander and the turmeric and stir.

seyal and shishito and oat pancakes 005

They just need to combine and roast a bit.

seyal and shishito and oat pancakes 008

Now goes in about a cup and a half of water, and the whole mixture is brought to a boil. Let it roil for a few minutes, until it goes from looking like this:

seyal and shishito and oat pancakes 013

To looking like this:

seyal and shishito and oat pancakes 016

At this point, the cubed bread can go in. The mixture should now be salted, because one has an idea of the size of the meal.

seyal and shishito and oat pancakes 018

Stir the bread into the liquid to get it to absorb, garnish it liberally with cilantro, and look like this:

seyal and shishito and oat pancakes 021

Have the oven ready at 300 F. Cover the pot, make sure the liquid is simmering, and stick it in the oven to cook for 15 minutes. The last step can also be done on the burner with low heat, and in addition a heat reducer between the burner and the pan. Either way, you end up with a steaming pile of this:

seyal and shishito and oat pancakes 023

Now, don’t be turned off by its rustic look. Rustic it is, and frugal, but it is delicious; and at least for me, brings back lazy Sunday morning breakfasts with hot tea along with seyal bread.

Red chili powder with heat control

What one wants in a red chili powder is for it to be chock-full of that savory, papery chili flavor, but only as hot as one can handle. How to achieve that? The answer is so obvious in retrospect that I almost feel bad about writing it down, but honestly, it has taken me this long to come up with it, so I think it is worth putting down.

There are all kinds of dry chilies available in the market. Some are sweet, some are moderately hot, and some scream. The trick is to combine them. Here is a rough proportion:

seyal and shishito and oat pancakes 025

Here I have used 3 large aji amarillo chilies, which is a kind of not very hot Peruvian orange chili, dried; and I have used several of the dried cayennes, which are very hot. Ground up together, the larger ones will add a lot of flavor which harmonizes with the flavor and heat of their smaller cousins, to make a somewhat medium hot spice.

With chilies, by the way, a good rule of thumb is, the smaller the hotter.

Dry saute them in a hot pan for a few minutes, turning with tongs, until they are blackened. As they roast, they might make you cough, so turn up the hood if you have one, or else open windows. Turn off the gas when you have something that looks like this.

seyal and shishito and oat pancakes 027

OK. Handling these packets of multi-pronged heat carefully, remove the stems, and if you want, the seeds and ribs. I shake them off, but I am by no means scrupulous about it.

They are roasted so they will break easily. Put them into a spice grinder (I use a coffee grinder I save only for spices) and grind until you have a fine powder.

A few tablespoons powder is what I got, and I believe it will last for about four to five uses. To save, put it into a small glass jar and for god’s sake, label and date it! You will love yourself later.

seyal and shishito and oat pancakes 034

A way with greens

Greens 006

How does one cook greens? There are many, many ways to make an insipid, gray mess, and an equal number of ways to undercook them so one is chomping on fibrous stems, peeling them out of one’s teeth. Wouldn’t it be wonderful to have them nicely cooked, with a requisite amount seasoning, and maybe — dare one hope — a roasty flavor that you get when vegetables are delicately charred?

Yes, there is a way. The problem with throwing chopped up greens into a saute pan with oil is that they are usually so moist, that instead of being charred, they steam. Good in its way, but no comparison to that elusive charred flavor.

The secret of this recipe is that one dry-sautes the greens in a hot, flat pan, with no oil in it. Do that first, until the greens are bone-dry and starting to show brown spots on the stems at least. That is where the charred flavor is hiding. Once you see that, and smell the roasty aroma, put in your cooking fat, the salt, the spices, and there is no way to go wrong.

Step 1: Collect, wash, chop the greens.

An kind of medium-hearty greens would be ideal. What that I mean by that is, not collards — they probably take too long to cook. And not spinach or arugula, since they will turn to minimal slime in no time. That leaves the broad middle spectrum of kale, mustards, rapini, chard both red and white, and some older radicchios and endives if one enjoys a slight bitterness. I know I do. Nowadays some grocery stores (of the better kind) carry a braising mix, which is a smattering of greens too old to be salad. This way with greens is ideal for the braising mix.

Wash them nicely and chop into half-inch long strips.

Step 2: Dry-saute

Greens 008

Heat a wide, thick-bottomed pan on high heat. I use one of All-Clad’s saute pans, with a stainless steel interior. Calphalon will work but is not necessary, and do not use teflon. You don’t want non-stick, you want stick. The greens can go on the pan even before it has started heating up.

At first the greens will be piled high. Soon the layer at the bottom will start to wilt and shrink. Use tongs or those handy pincer-tools too turn them over every minute or so, until all the greens have had their tryst with the heat, and have wilted. The moisture from washing is also evaporating away. As they get to be bone-dry, they will start charring. If you used a cruciferous green (kale, mustard, rapini) you will start to smell that sulphuric smell of roasting broccoli, which I love.

Greens, when they are wilted:

Greens 010

Step 3: Oil and seasoning.

At this point, the pan is very hot, and any oil poured on it will immediately sizzle. Clear a little spot and put in a few tablespoons of cooking oil. Before sauteing the greens in it, put in your seasoning. There are various combinations that work well together.

1. Red chili powder and half an onion, chopped

2. Mustard seeds (half a tablespoon), garlic, red chili flakes

3. Just lots of black pepper, lemon juice on top

Once the seasoning cooks in the oil, all that is left is to stir the greens to coat them with the hot oil, add salt to taste and cover, while continuing the cook on a gentle flame for a few minutes until the greens are done.

Greens 016

Sindhi Besan Kadhi

Image

I’m convinced that every little province and village in India has their own variation on the common theme of a gravy made with chickpea flour, with their own specific set of spices, and their own means of adding sourness, sweetness, heat, and random floating stuff. Sindhis do as well. It would be more accurate to say that each region of Sindh had their own version, and my family’s version is more-or-less shared with other Hyderabadi Amils.

First things first. Chickpea flour, or besan, is the fine flour ground from channa dal. It is one of the most versatile ingredients I know of — it can be mixed into rotis, used like eggs to make omelets, thicken stews, deep-fried to make pakoras, and finally, cooked with liquid to make a thick gravy with a deep musky fragrance that can be poured over rice. That, my friends, in all its endless variations, is a kadhi.

A kadhi’s base is besan. There may be as little as one tablespoon for four cups of liquid, or as much as half a cup. There is a liquid — it is, after all, a gravy — which may be yogurt, buttermilk, water, or pureed tomatoes. The besan may be roasted in oil, or not. The spices often used are cumin seeds, asafetida, fenugreek; but any or all may be omitted or others added. There is usually a source of sourness. Sometimes the yogurt or pureed tomatoes suffice, sometimes tamarind is added. The musky flavor of besan goes well with sweet, so a small amount of jaggery is usually added. Sugar is fine too.

On to the main business: Sindhi kadhi.

Step 1: Mise en place and tempering

Image.

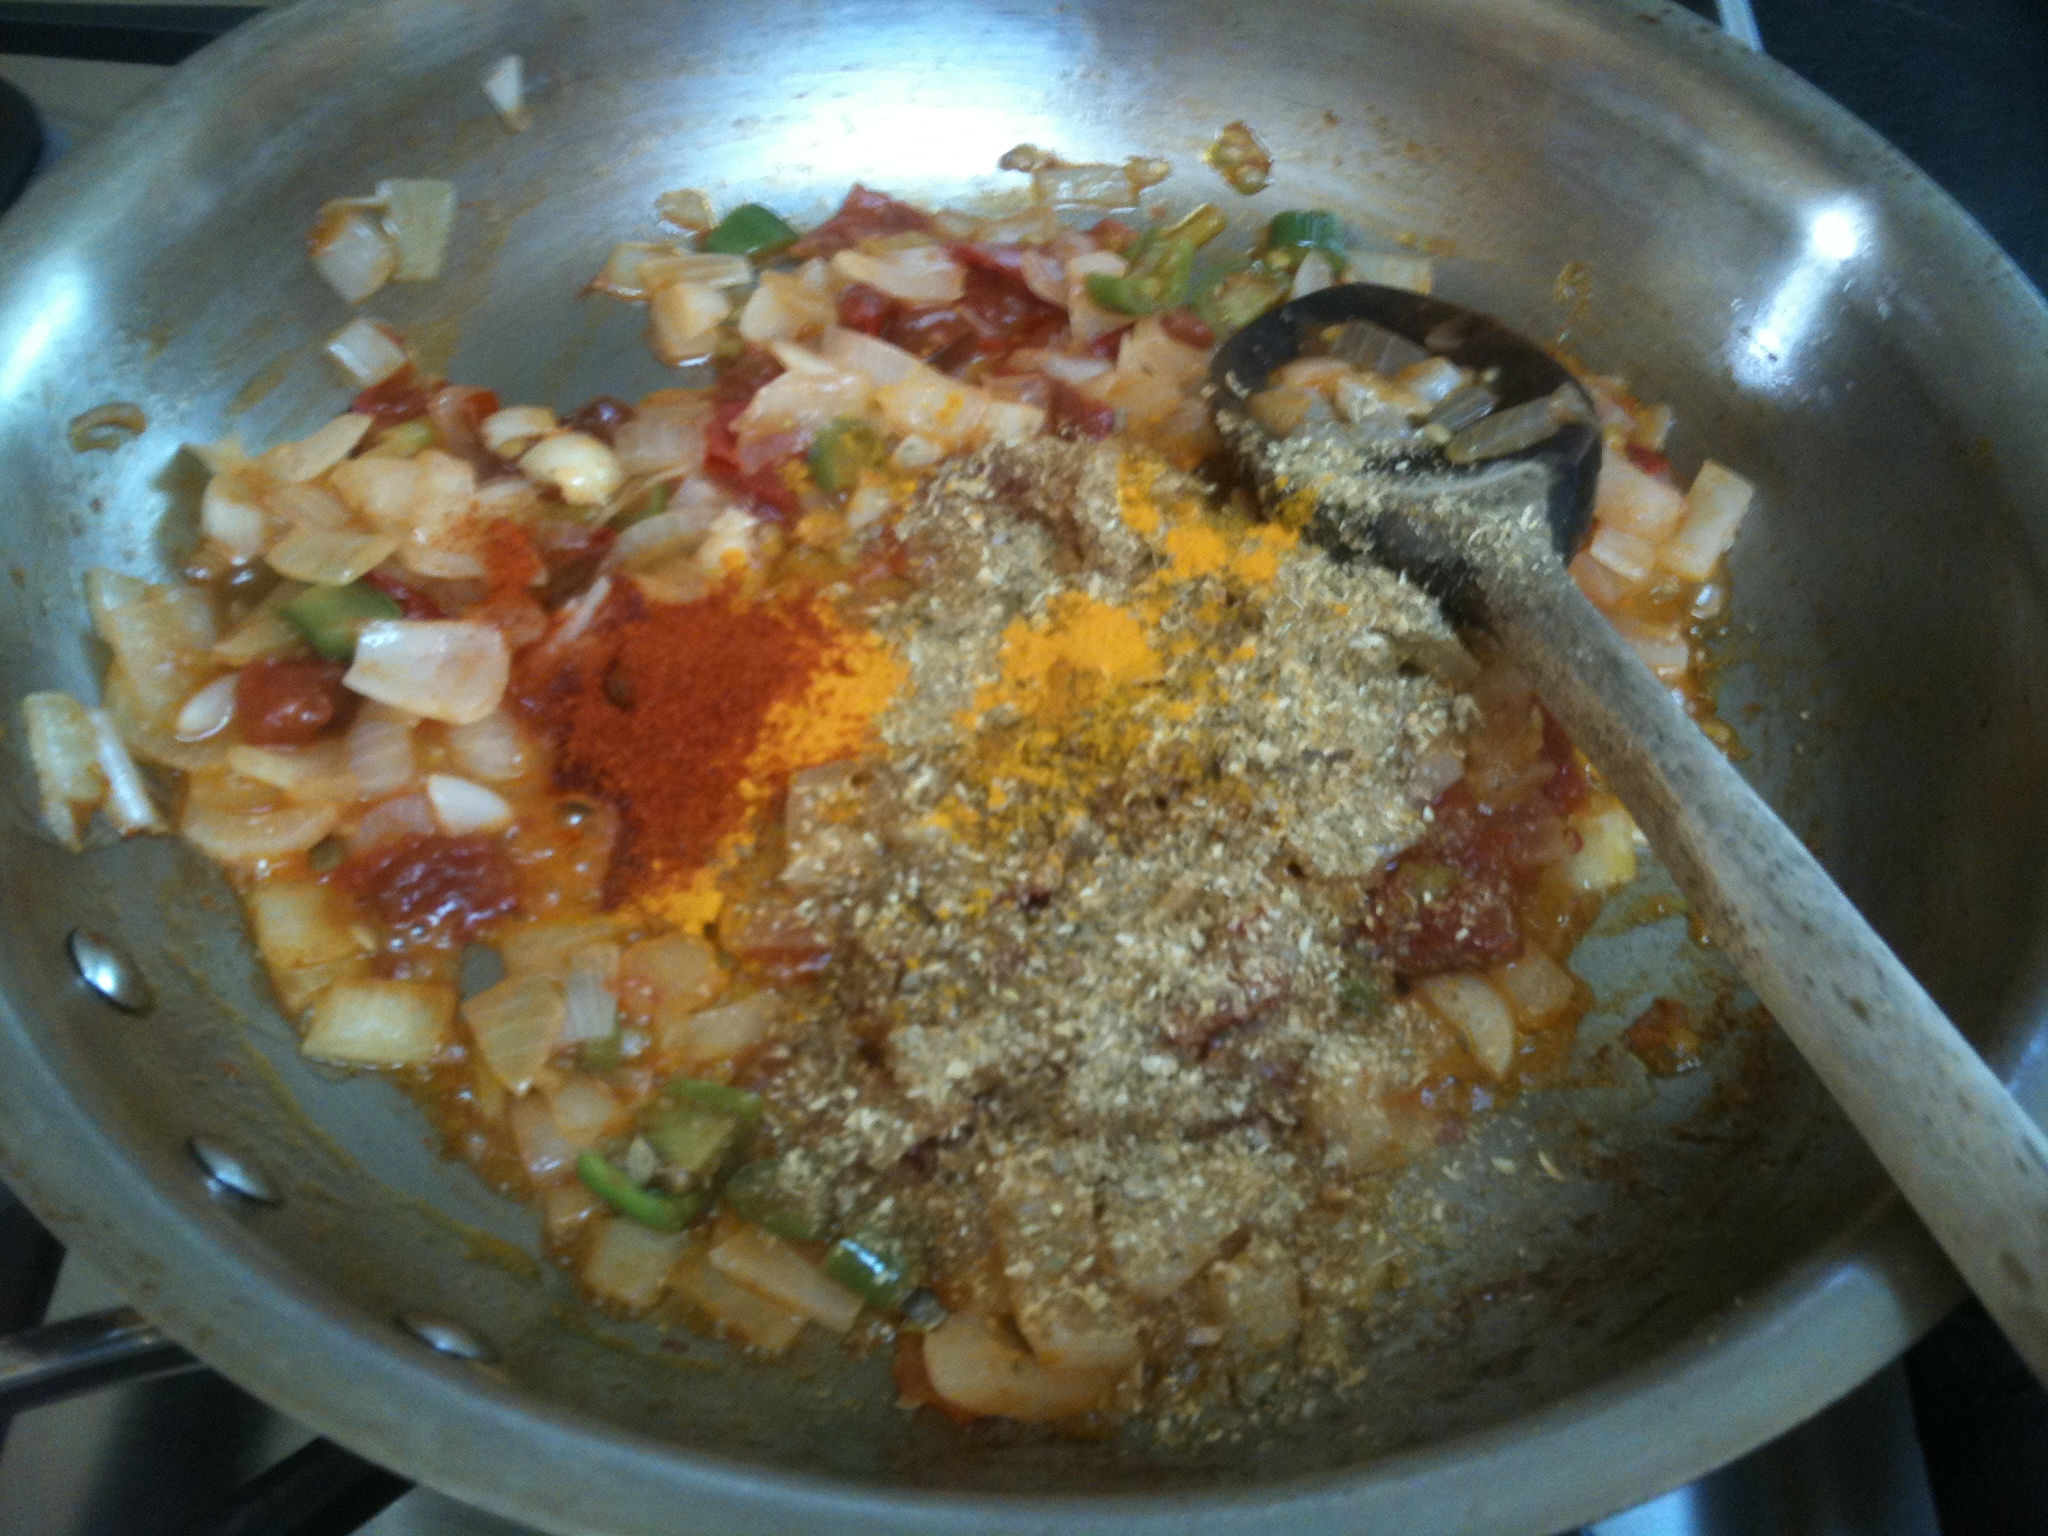
Collect your spices. Have your besan at hand with a half cup measure. Have your wooden spoon by your side. Put in about a quarter cup of oil in a thick-bottomed pot on medium high. If you have a pressure cooker, use that. When the oil shimmers, put in a sprinkling of asafetida and a half a teaspoon of red chili powder. Then, half a tablespoon of cumin seeds, wait ten seconds, and then half a tablespoon of fenugreek seeds. If you have curry leaves, put in about six of them. Minced ginger — half an inch piece — goes in next. If you want additional heat sliced serrano chilies can go in too. Stir for a minute. The oil has been seasoned.

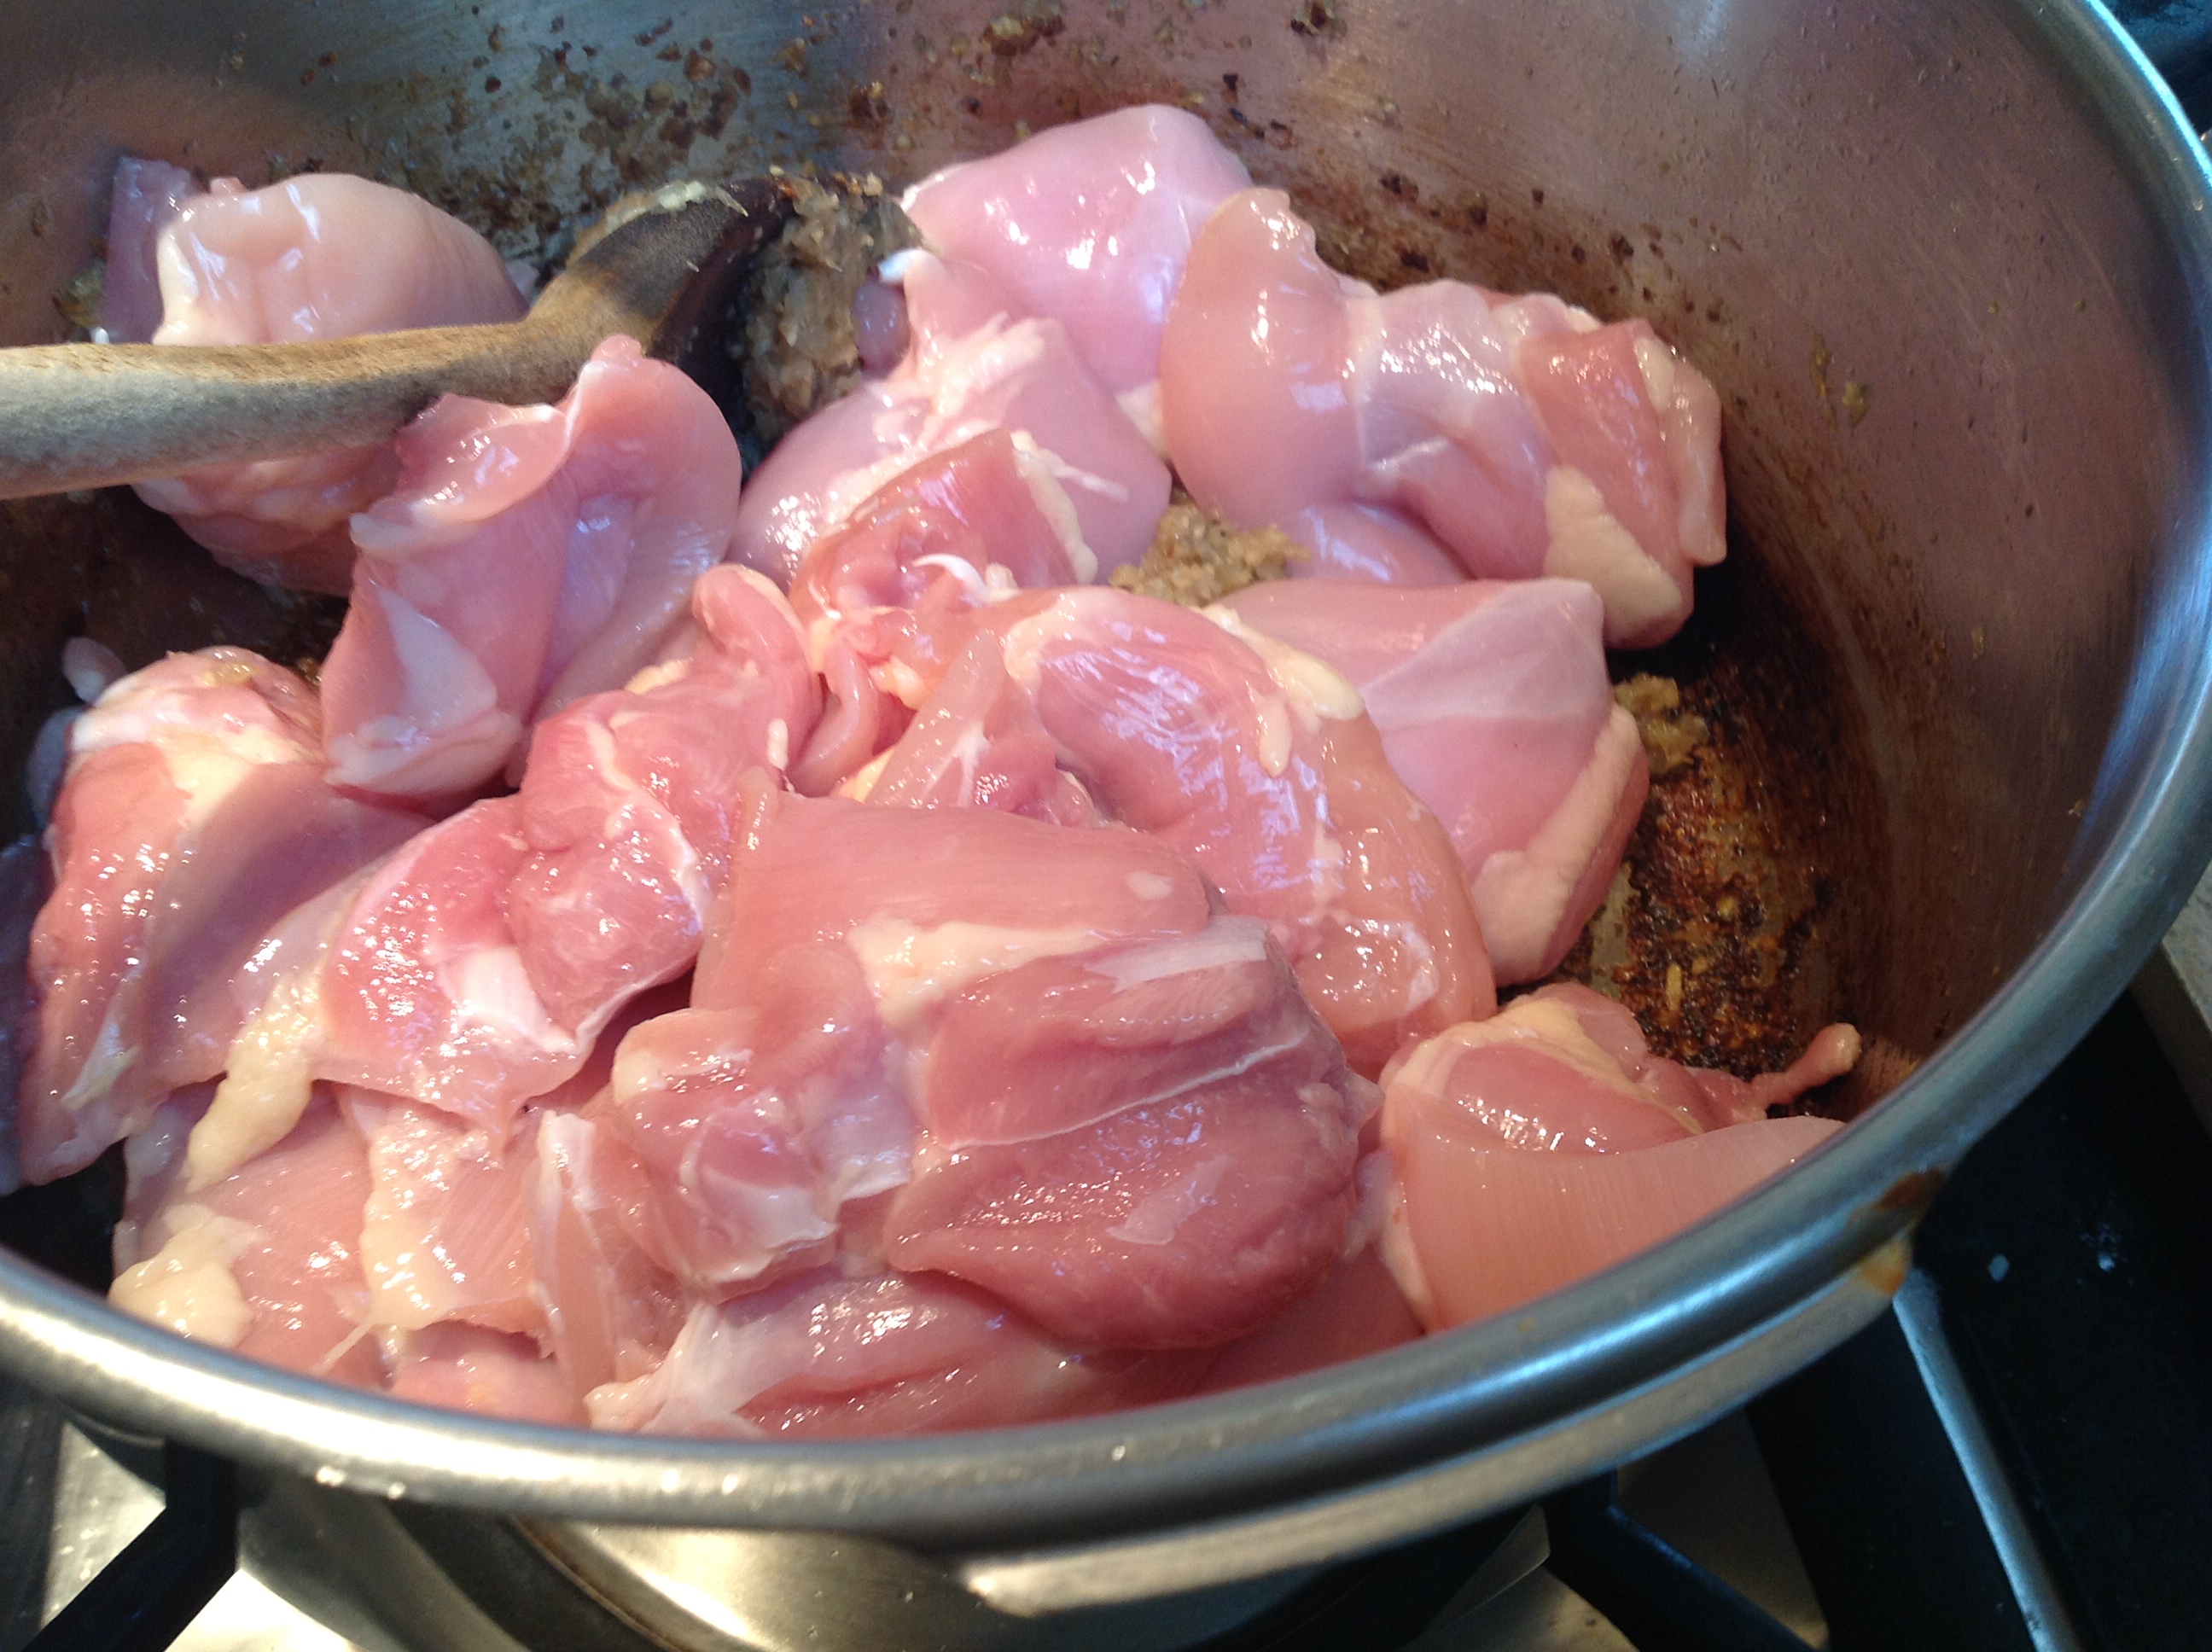
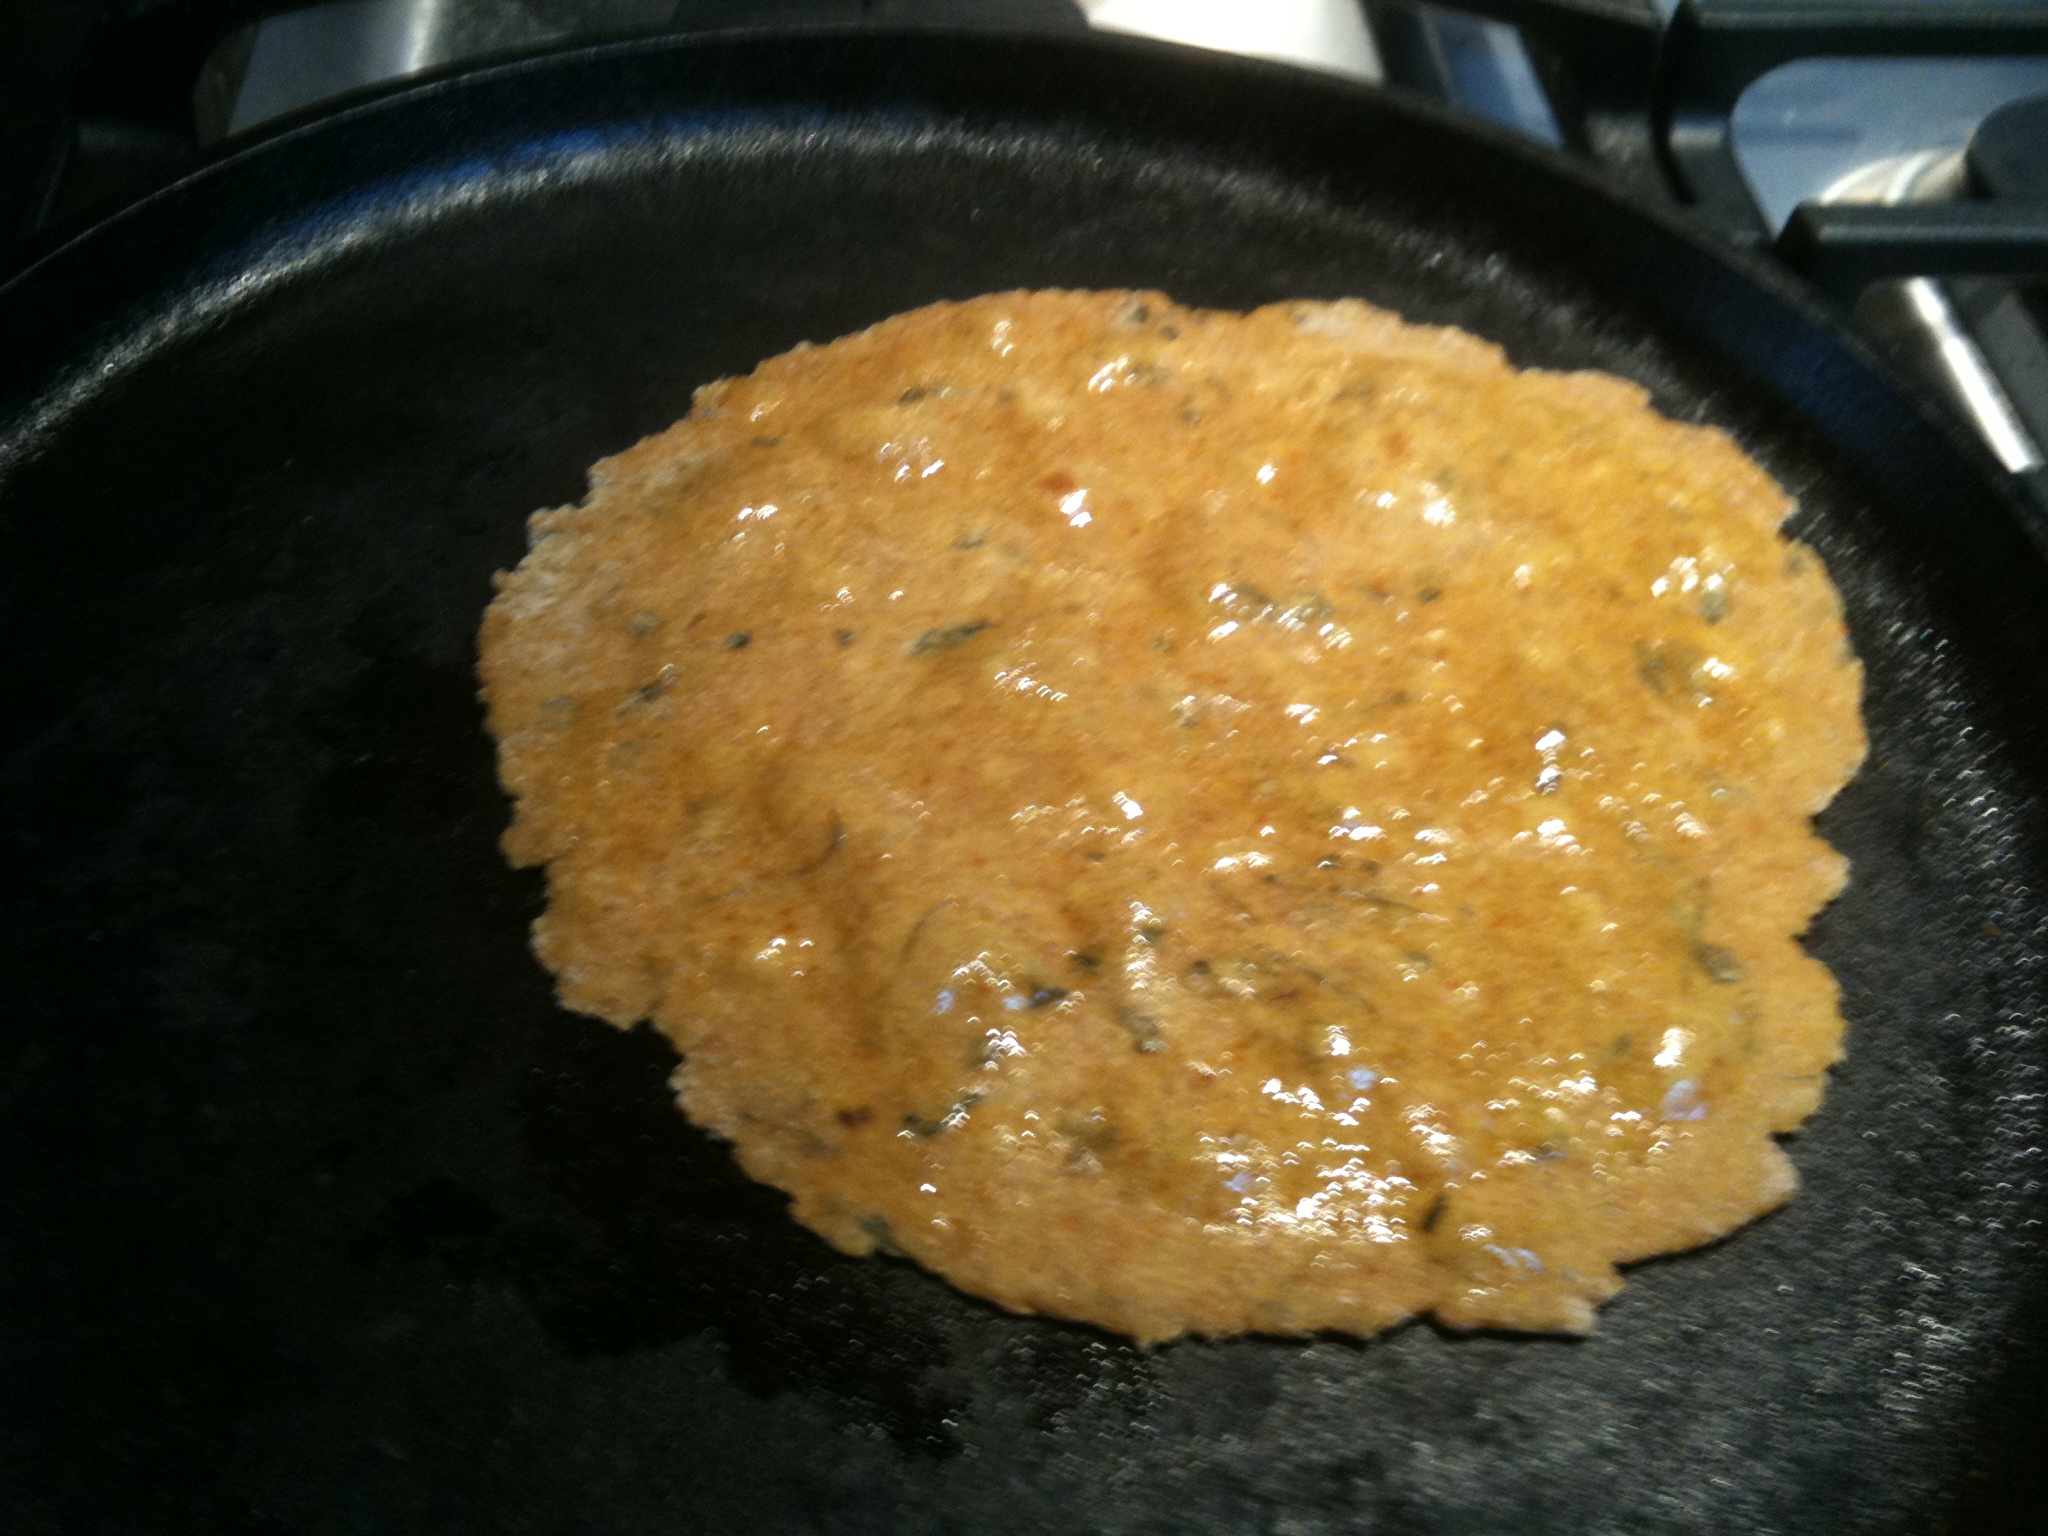
Step 2: Roasting the besan.

Image

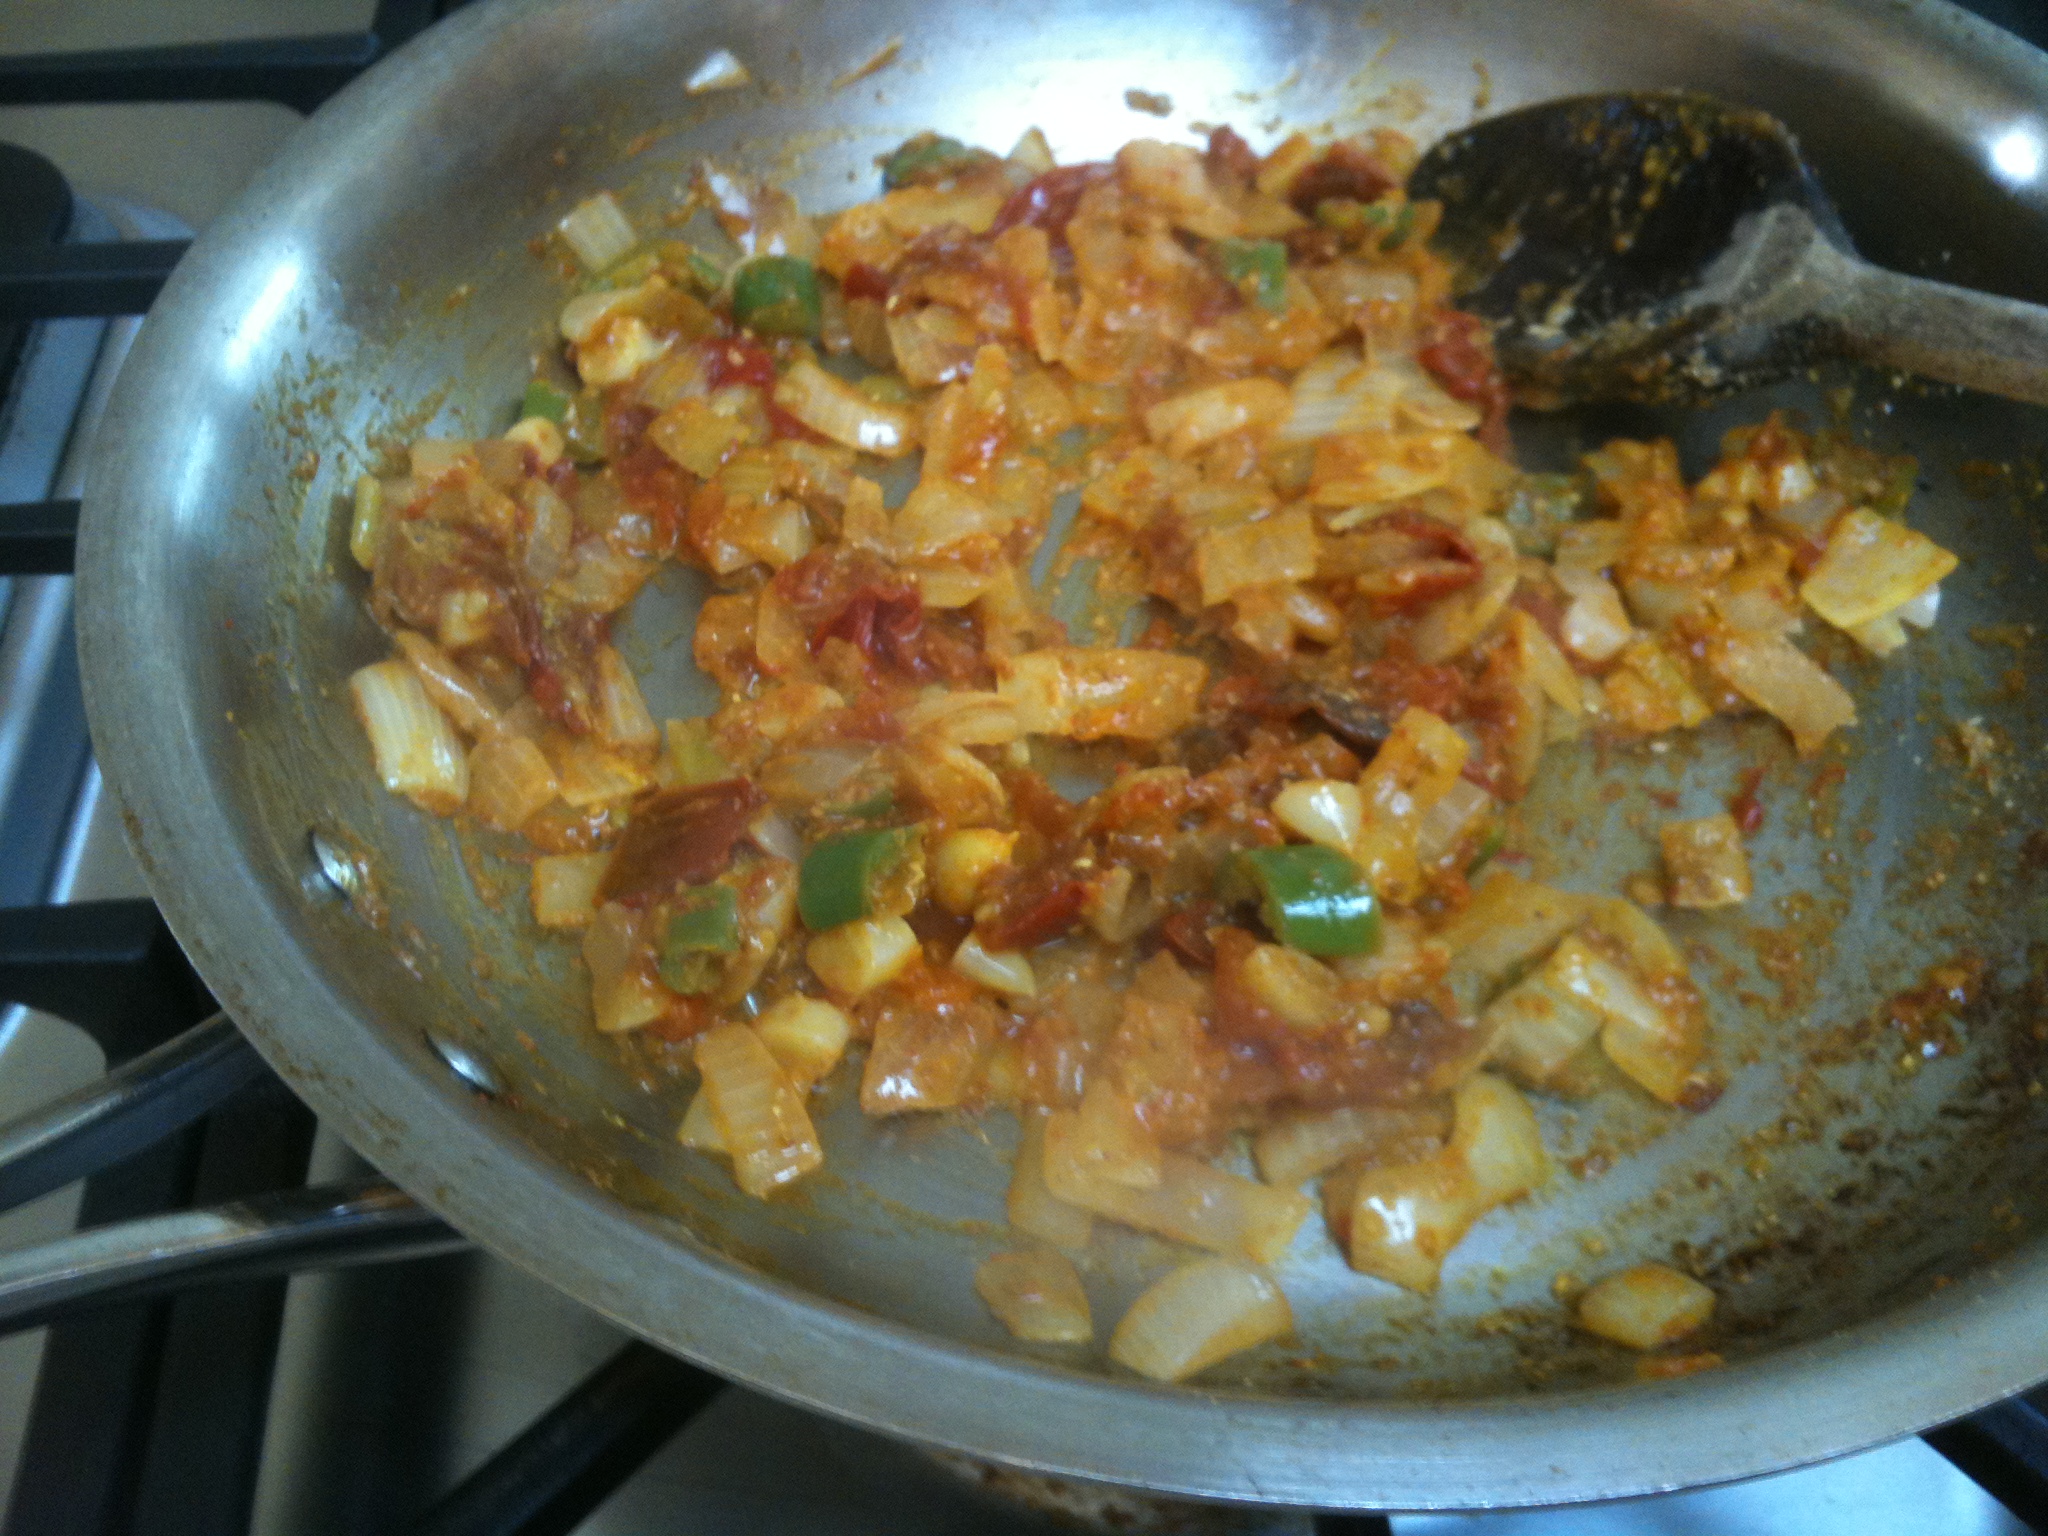
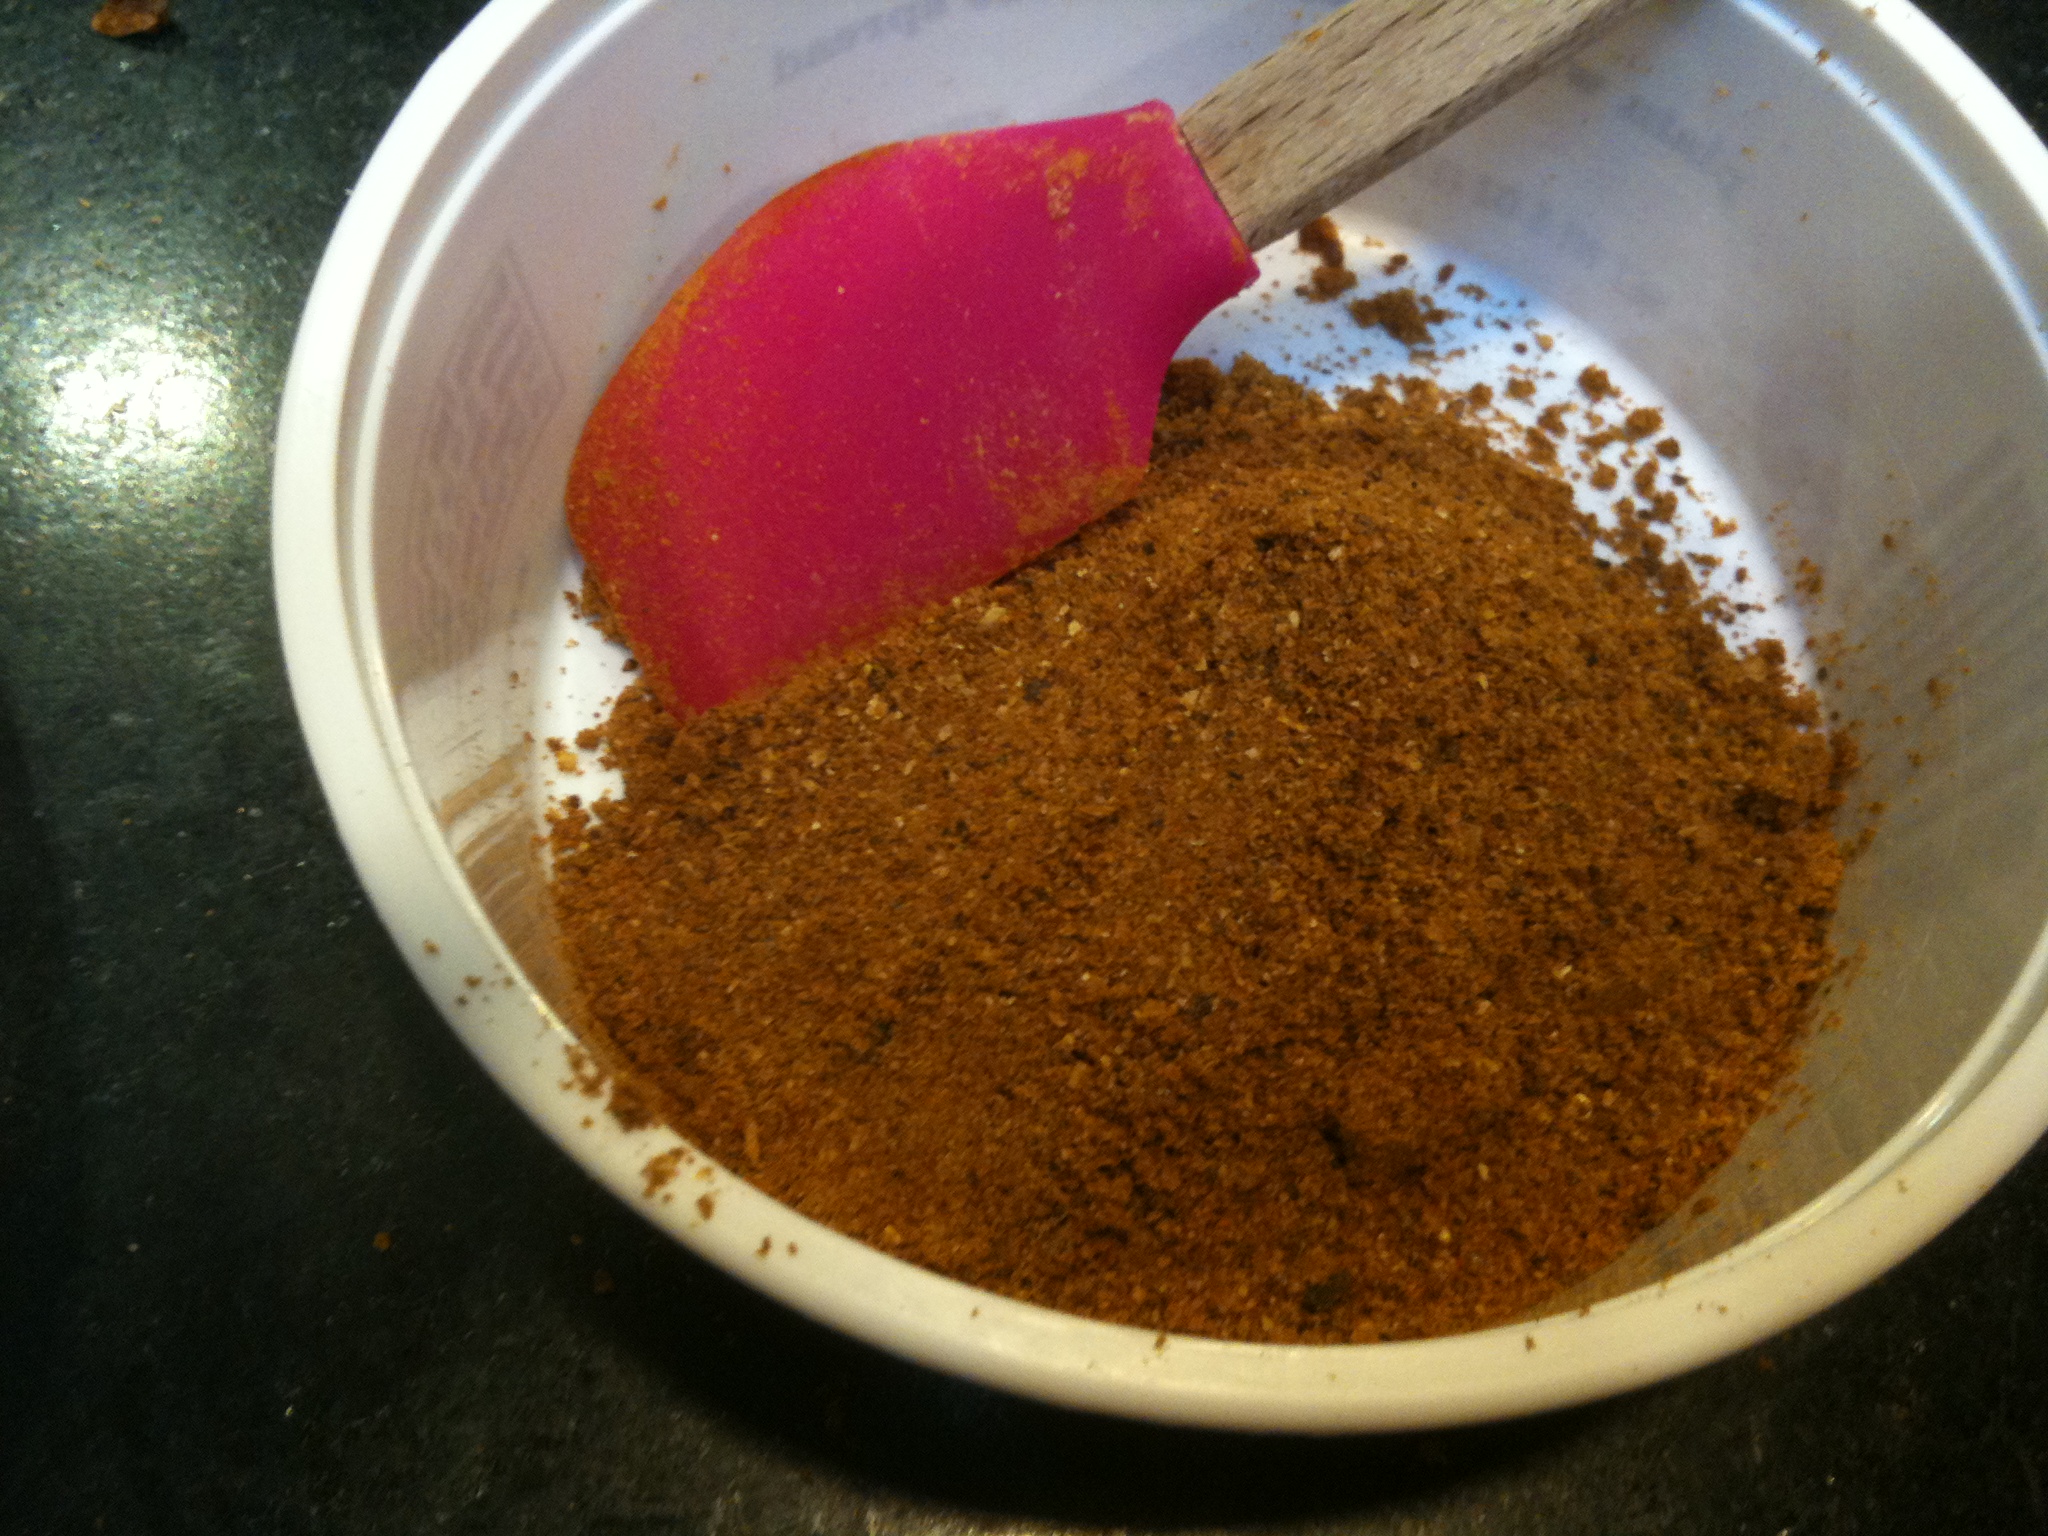
I use about half a cup of besan. I like the stuff. Lower the heat to medium-low. Put the besan into the oil and stir vigorously. It should look like the picture above — all the besan should be dissolved into the oil — if there is too little oil, you will have a hard time moistening all of the besan. In that case, add a few spoons more of oil. Gently sizzling, the besan will roast; you might notice a wonderful aroma of roastiness arising. Keep stirring. Keep this going for about seven minutes. It might darken a shade or two, but be careful not to burn it.
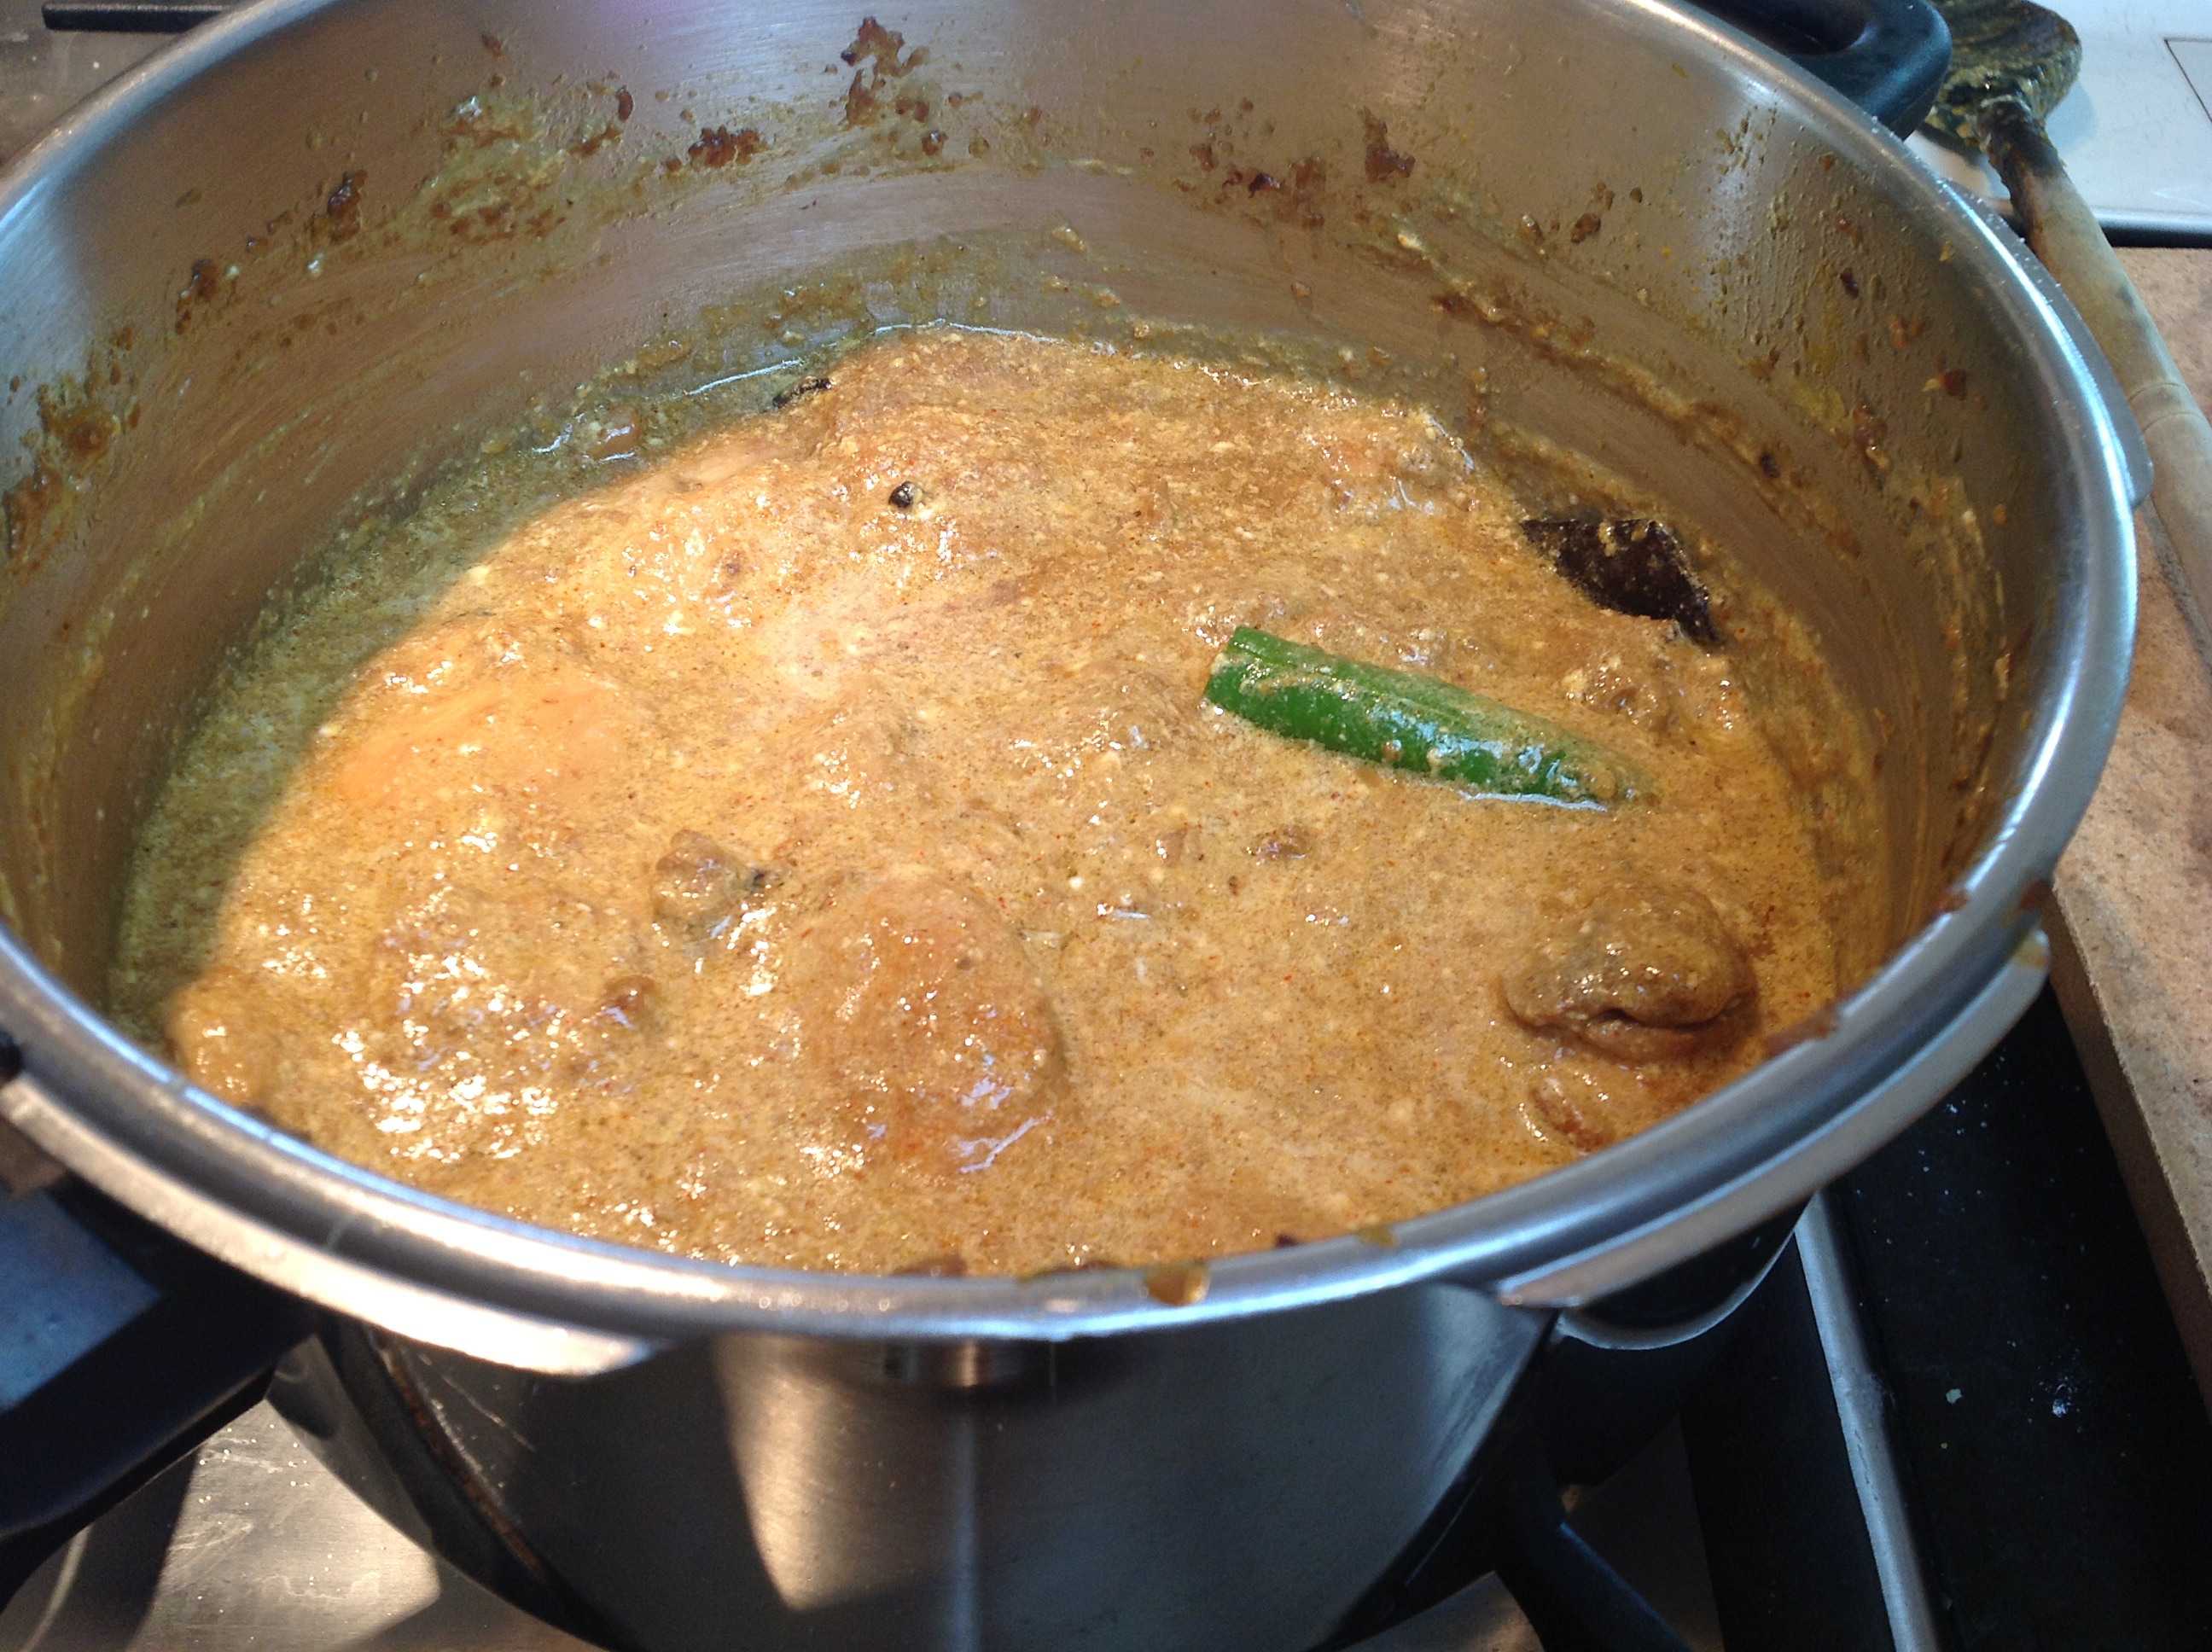
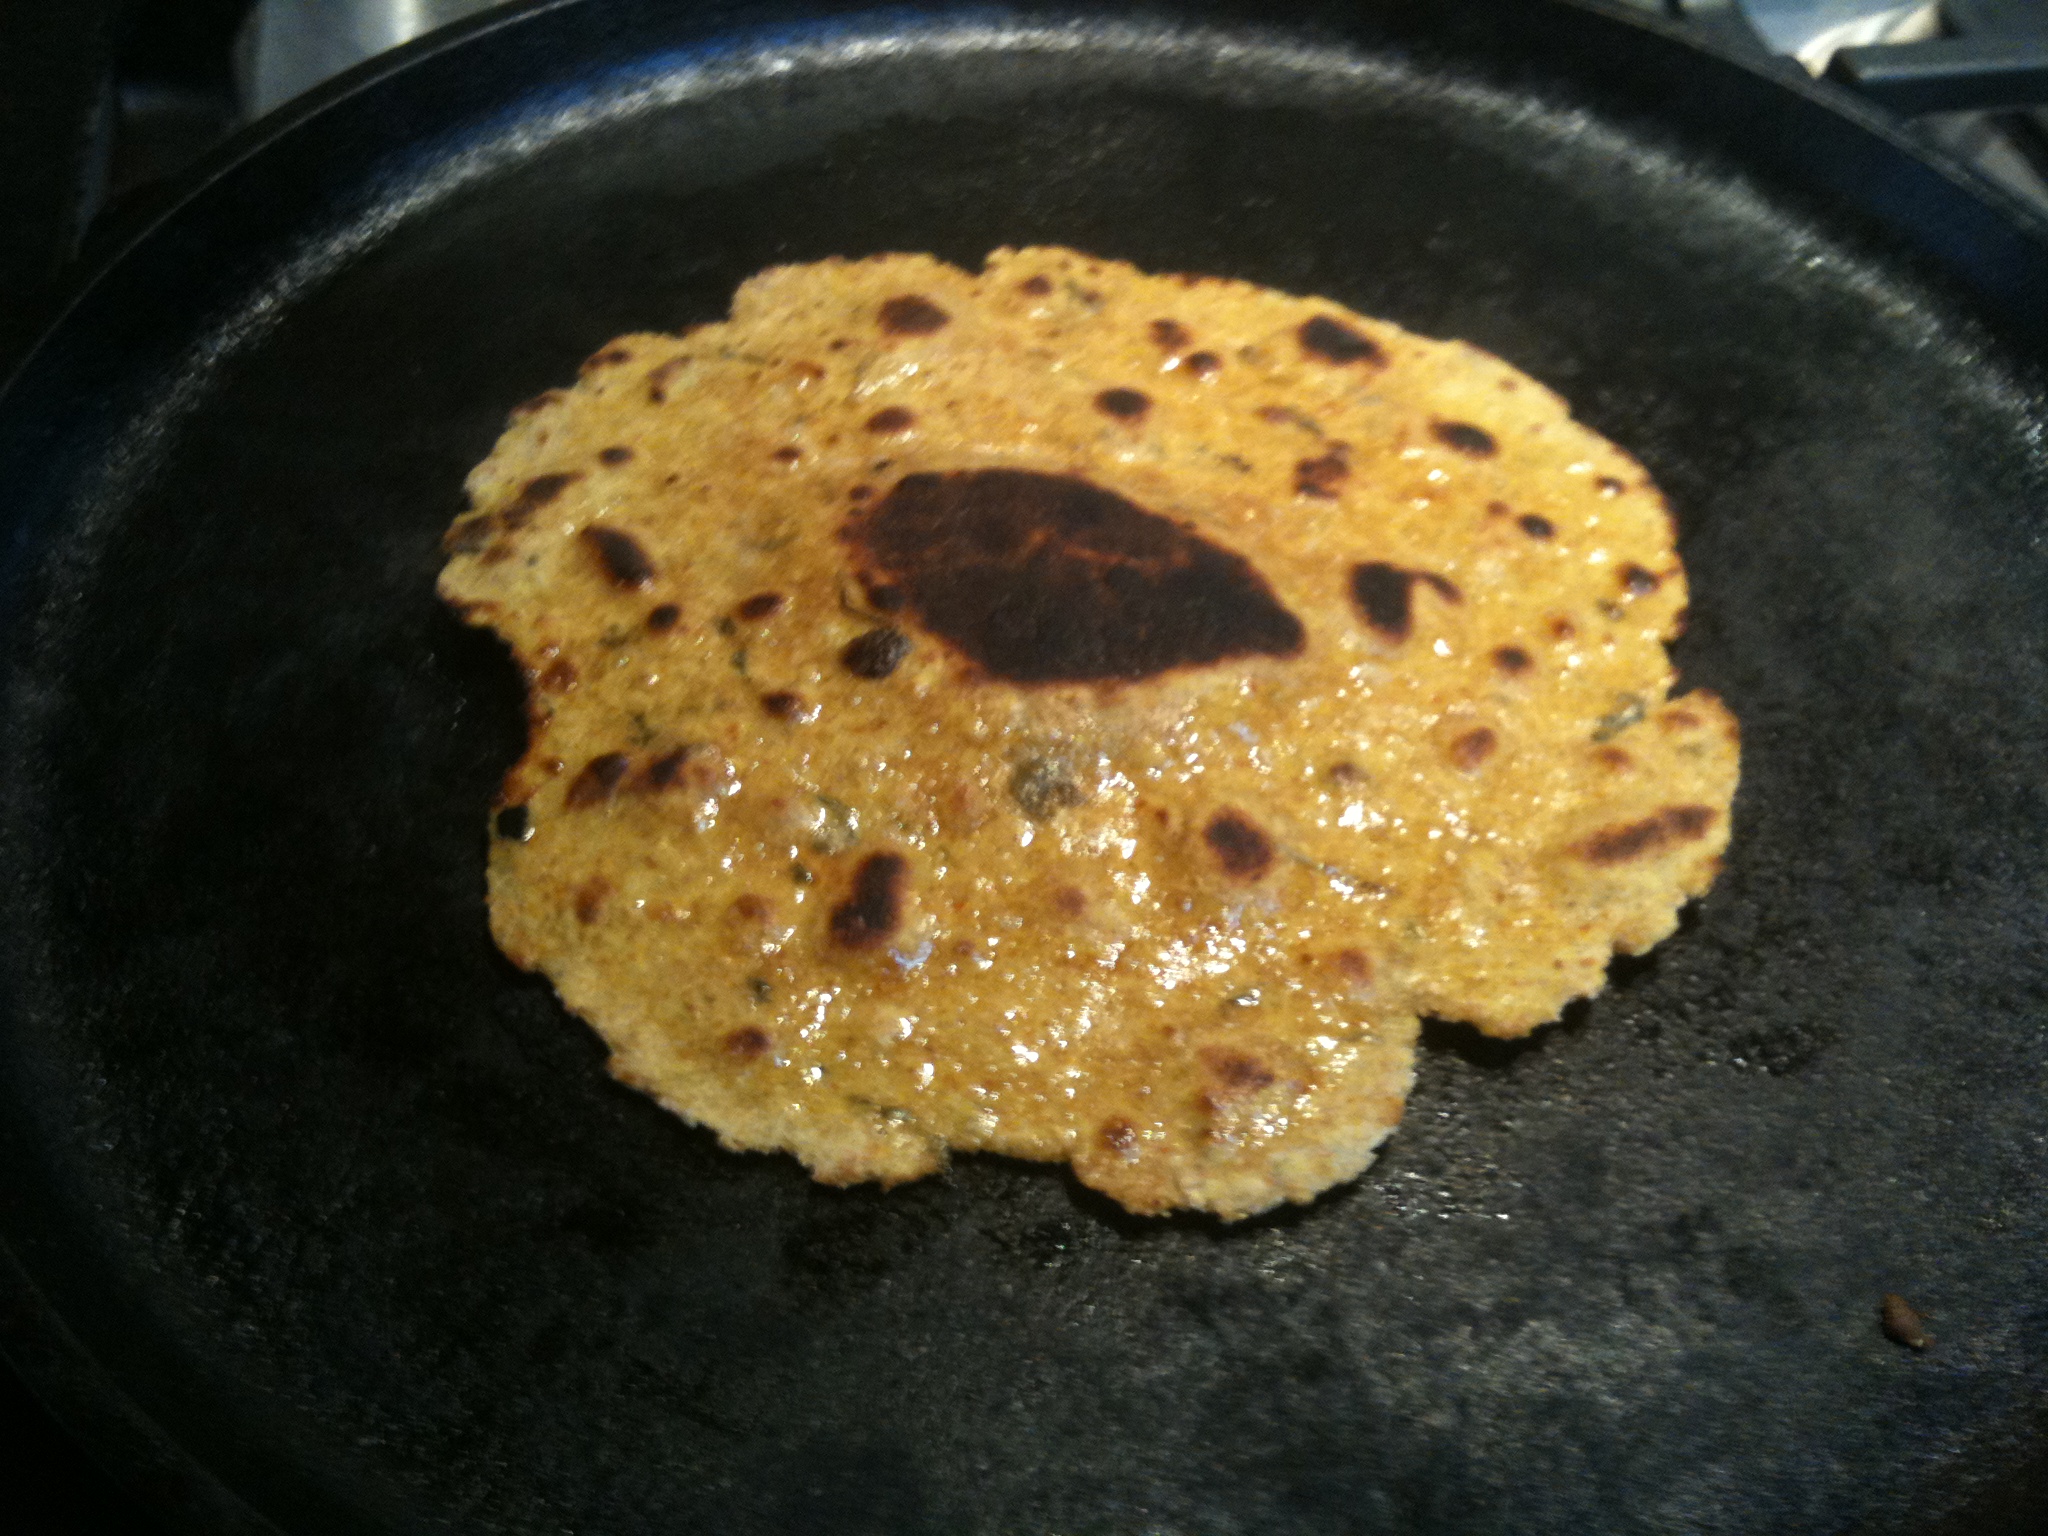
Step 3: water

Image

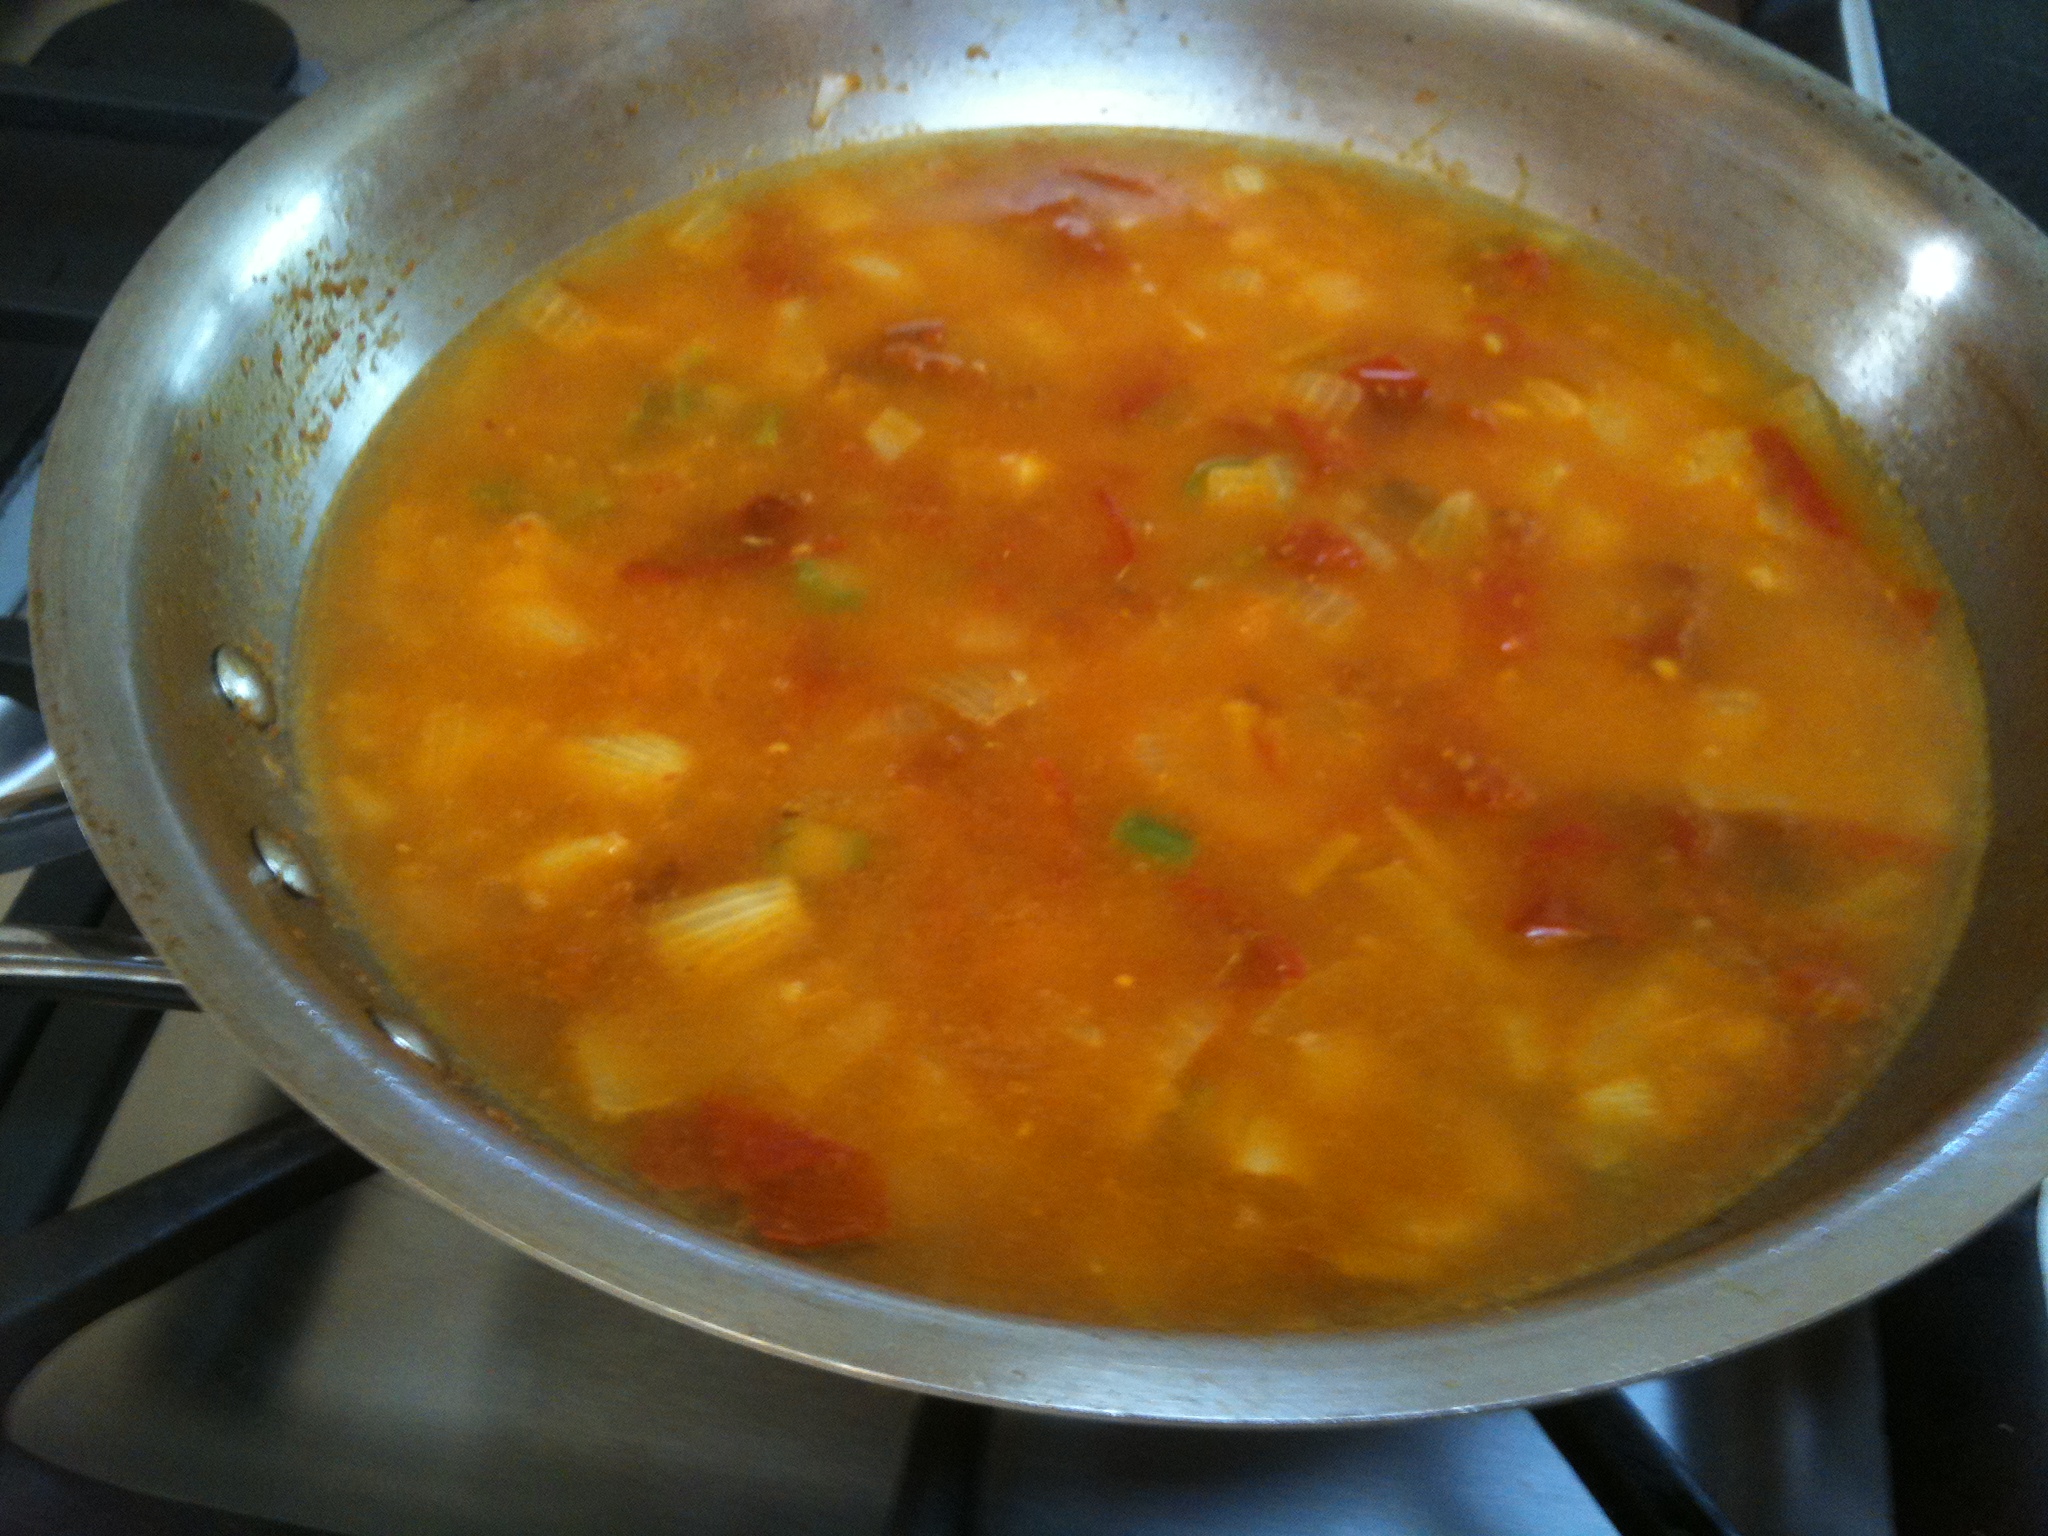
I use four cups of hot water, and stir vigorously to make sure there are no lumps. Sometimes I resort to a whisk. You can pour in the water all at once, or if you want to make a ritual out of it, do it bit by bit. I doubt it matters. Bring it to a boil, and keep it on a simmer for about 10 minutes. The smell of cooked besan will arise, it is heavenly. And, in about ten minutes, the gravy will thicken, and look like this:

Image

Step 4: Salty, sour and sweet.

Add your salt to taste, add a half teaspoon of tamarind paste, and a half inch piece of jaggery if you have it, otherwise a teaspoon of sugar.

Step 5: Floating stuff — the vegetables.

ImageNow each kadhi needs some kind of floating stuff that cooks with the gravy, and equally lends and borrows flavor. Many, many versions of kadhi use dumplings made out of — well, more besan. The Sindhi version chooses the healthier route of vegetables, known as vakhar. This is a generic term for all vegetables that are chosen to be the free floating blocks in one’s kadhi.

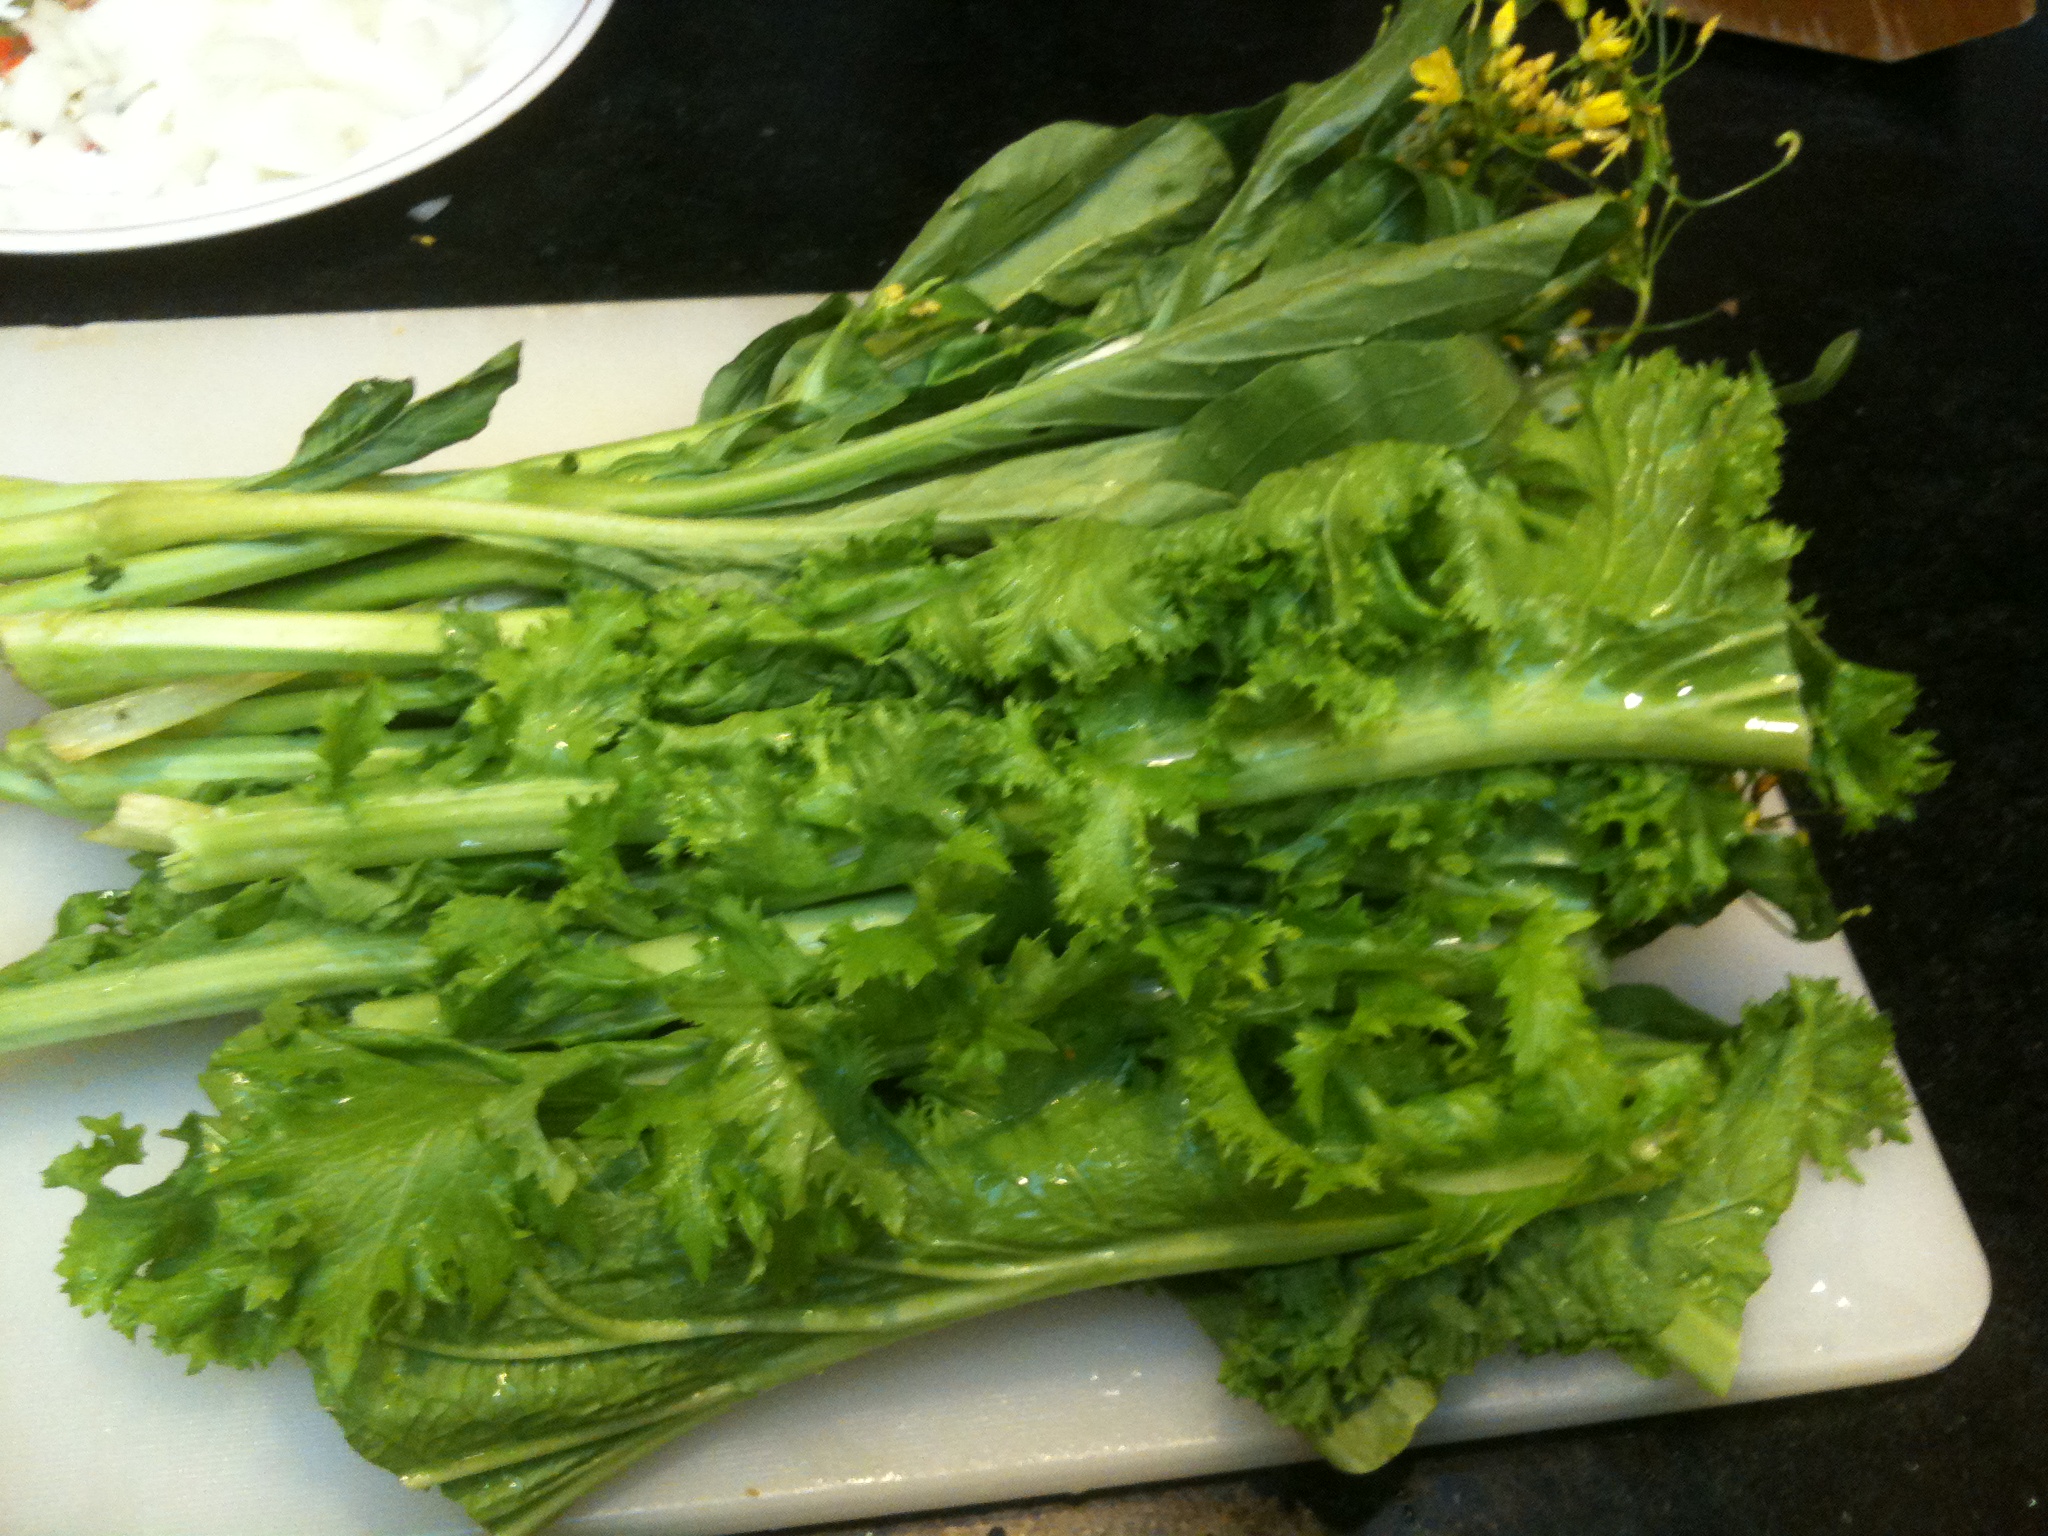
What to use? Of course, this is up to one’s taste and what one has in the pantry. But some commonly used vegetables are: cauliflower; french beans; okra; Indian drumstick (pods of Moringa oleifera); guar or cluster bean pods; young potatoes; tinda which is a type of gourd, easily substituted with zucchini; eggplant. Basically anything chunky and not too starchy can be used.

The key thing is that they must all be cubed into rather large cubes to avoid them melting into the sauce. Two-inch cubes is what one is aiming for. Cauliflowers in particular must be kept rather large because they turn mushy so easily.

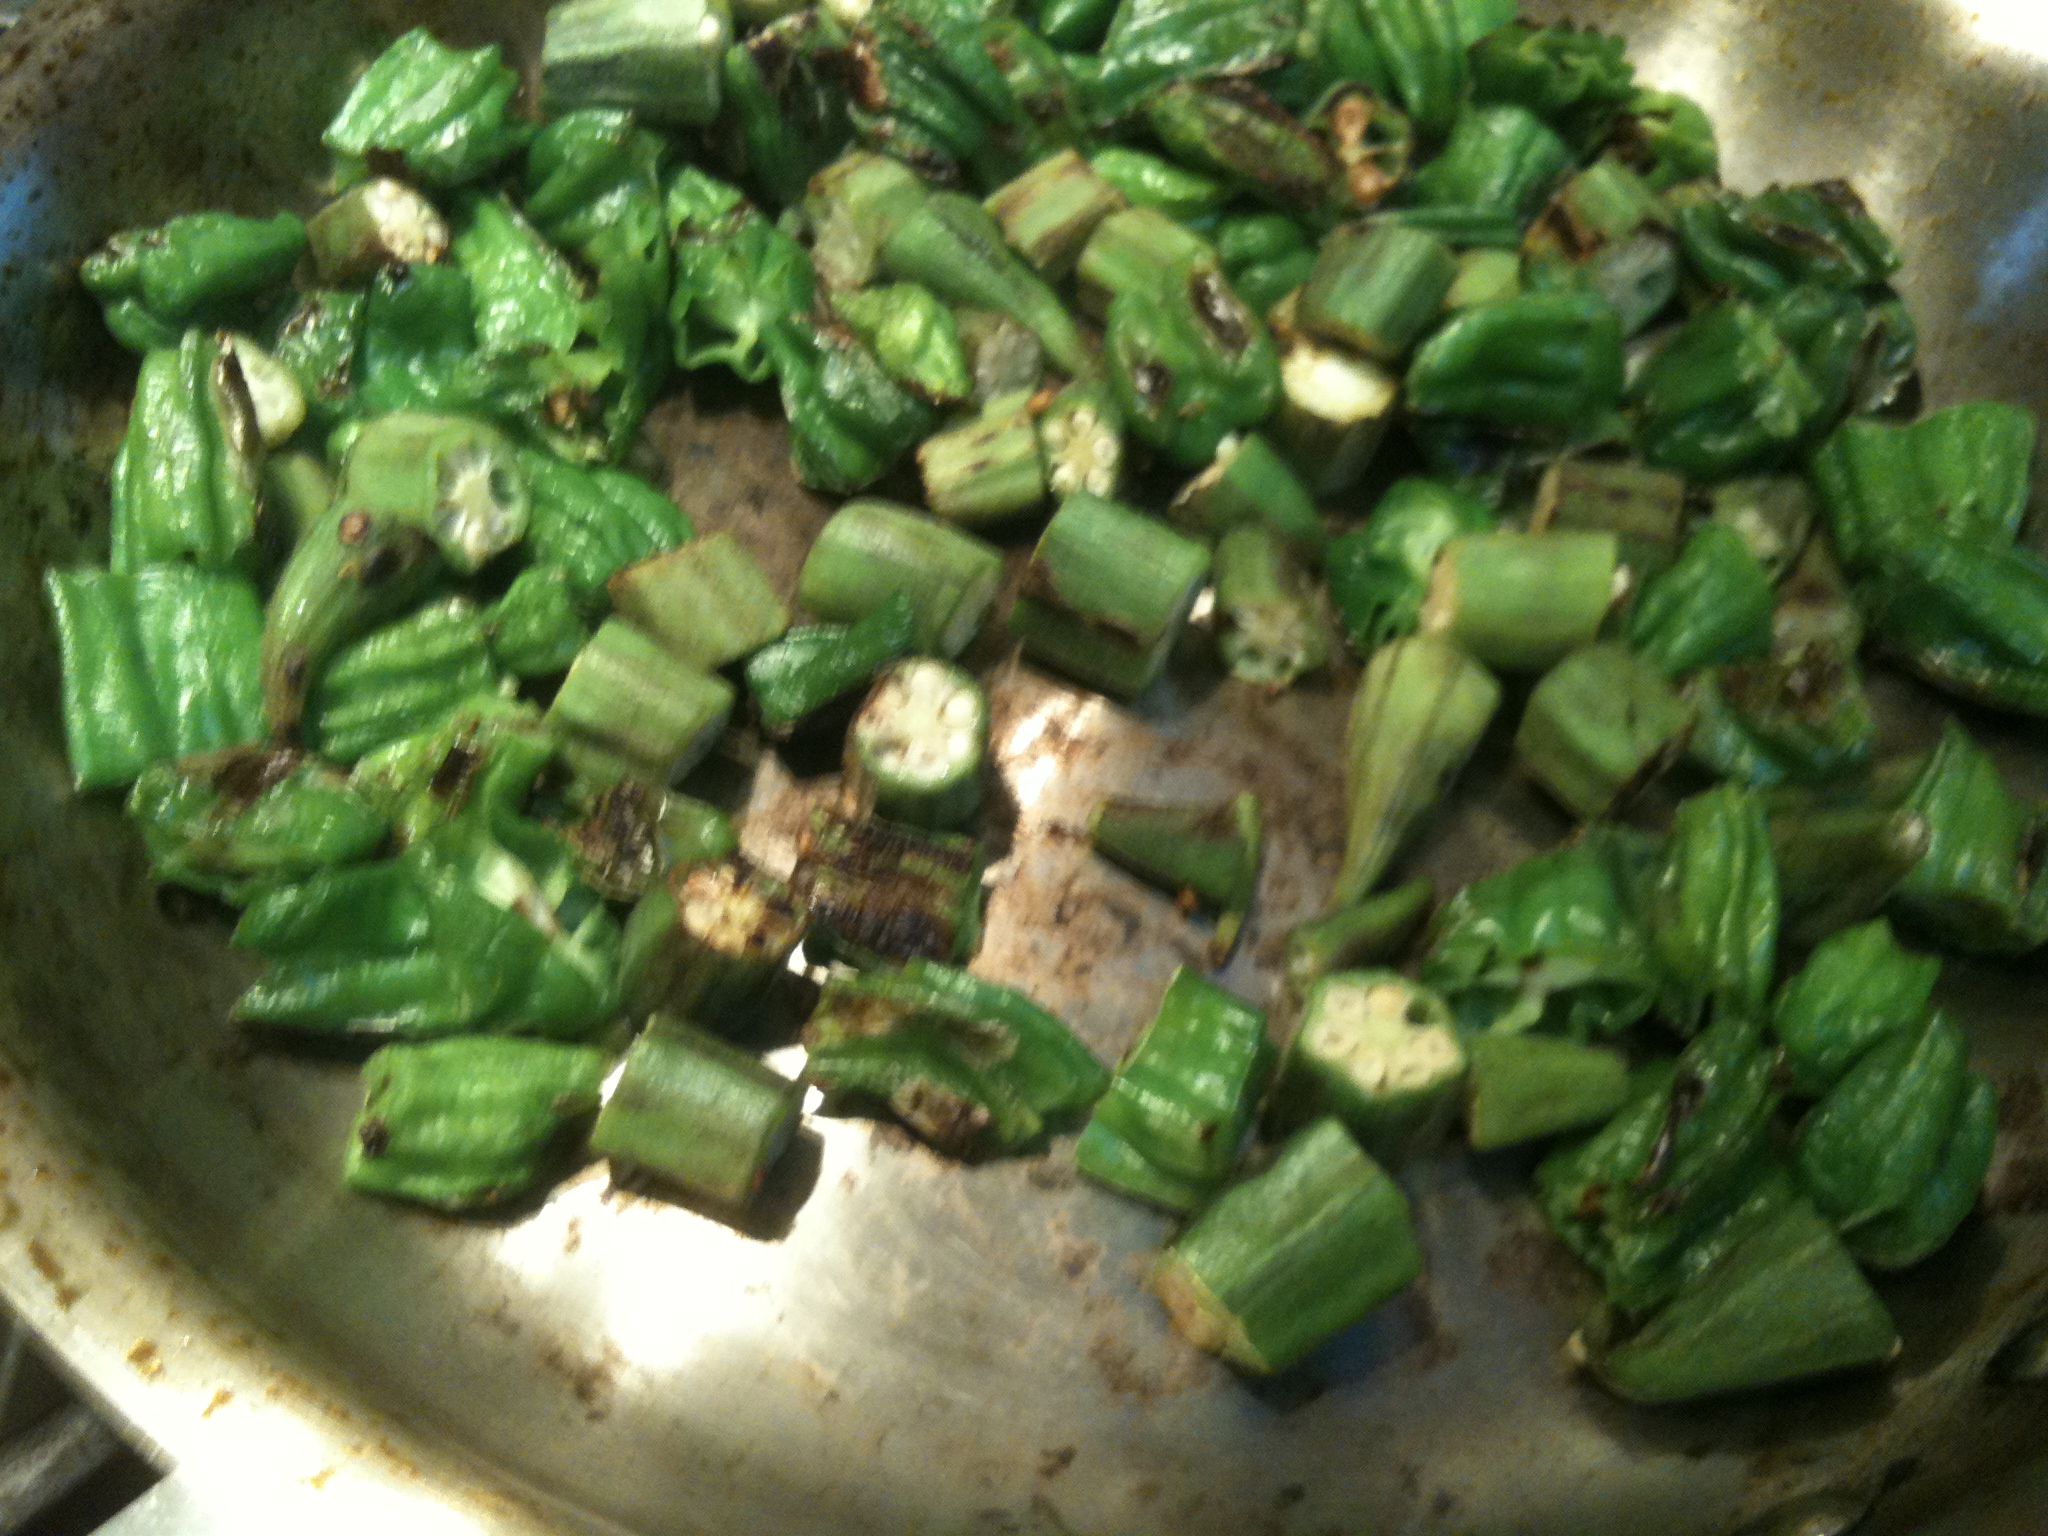
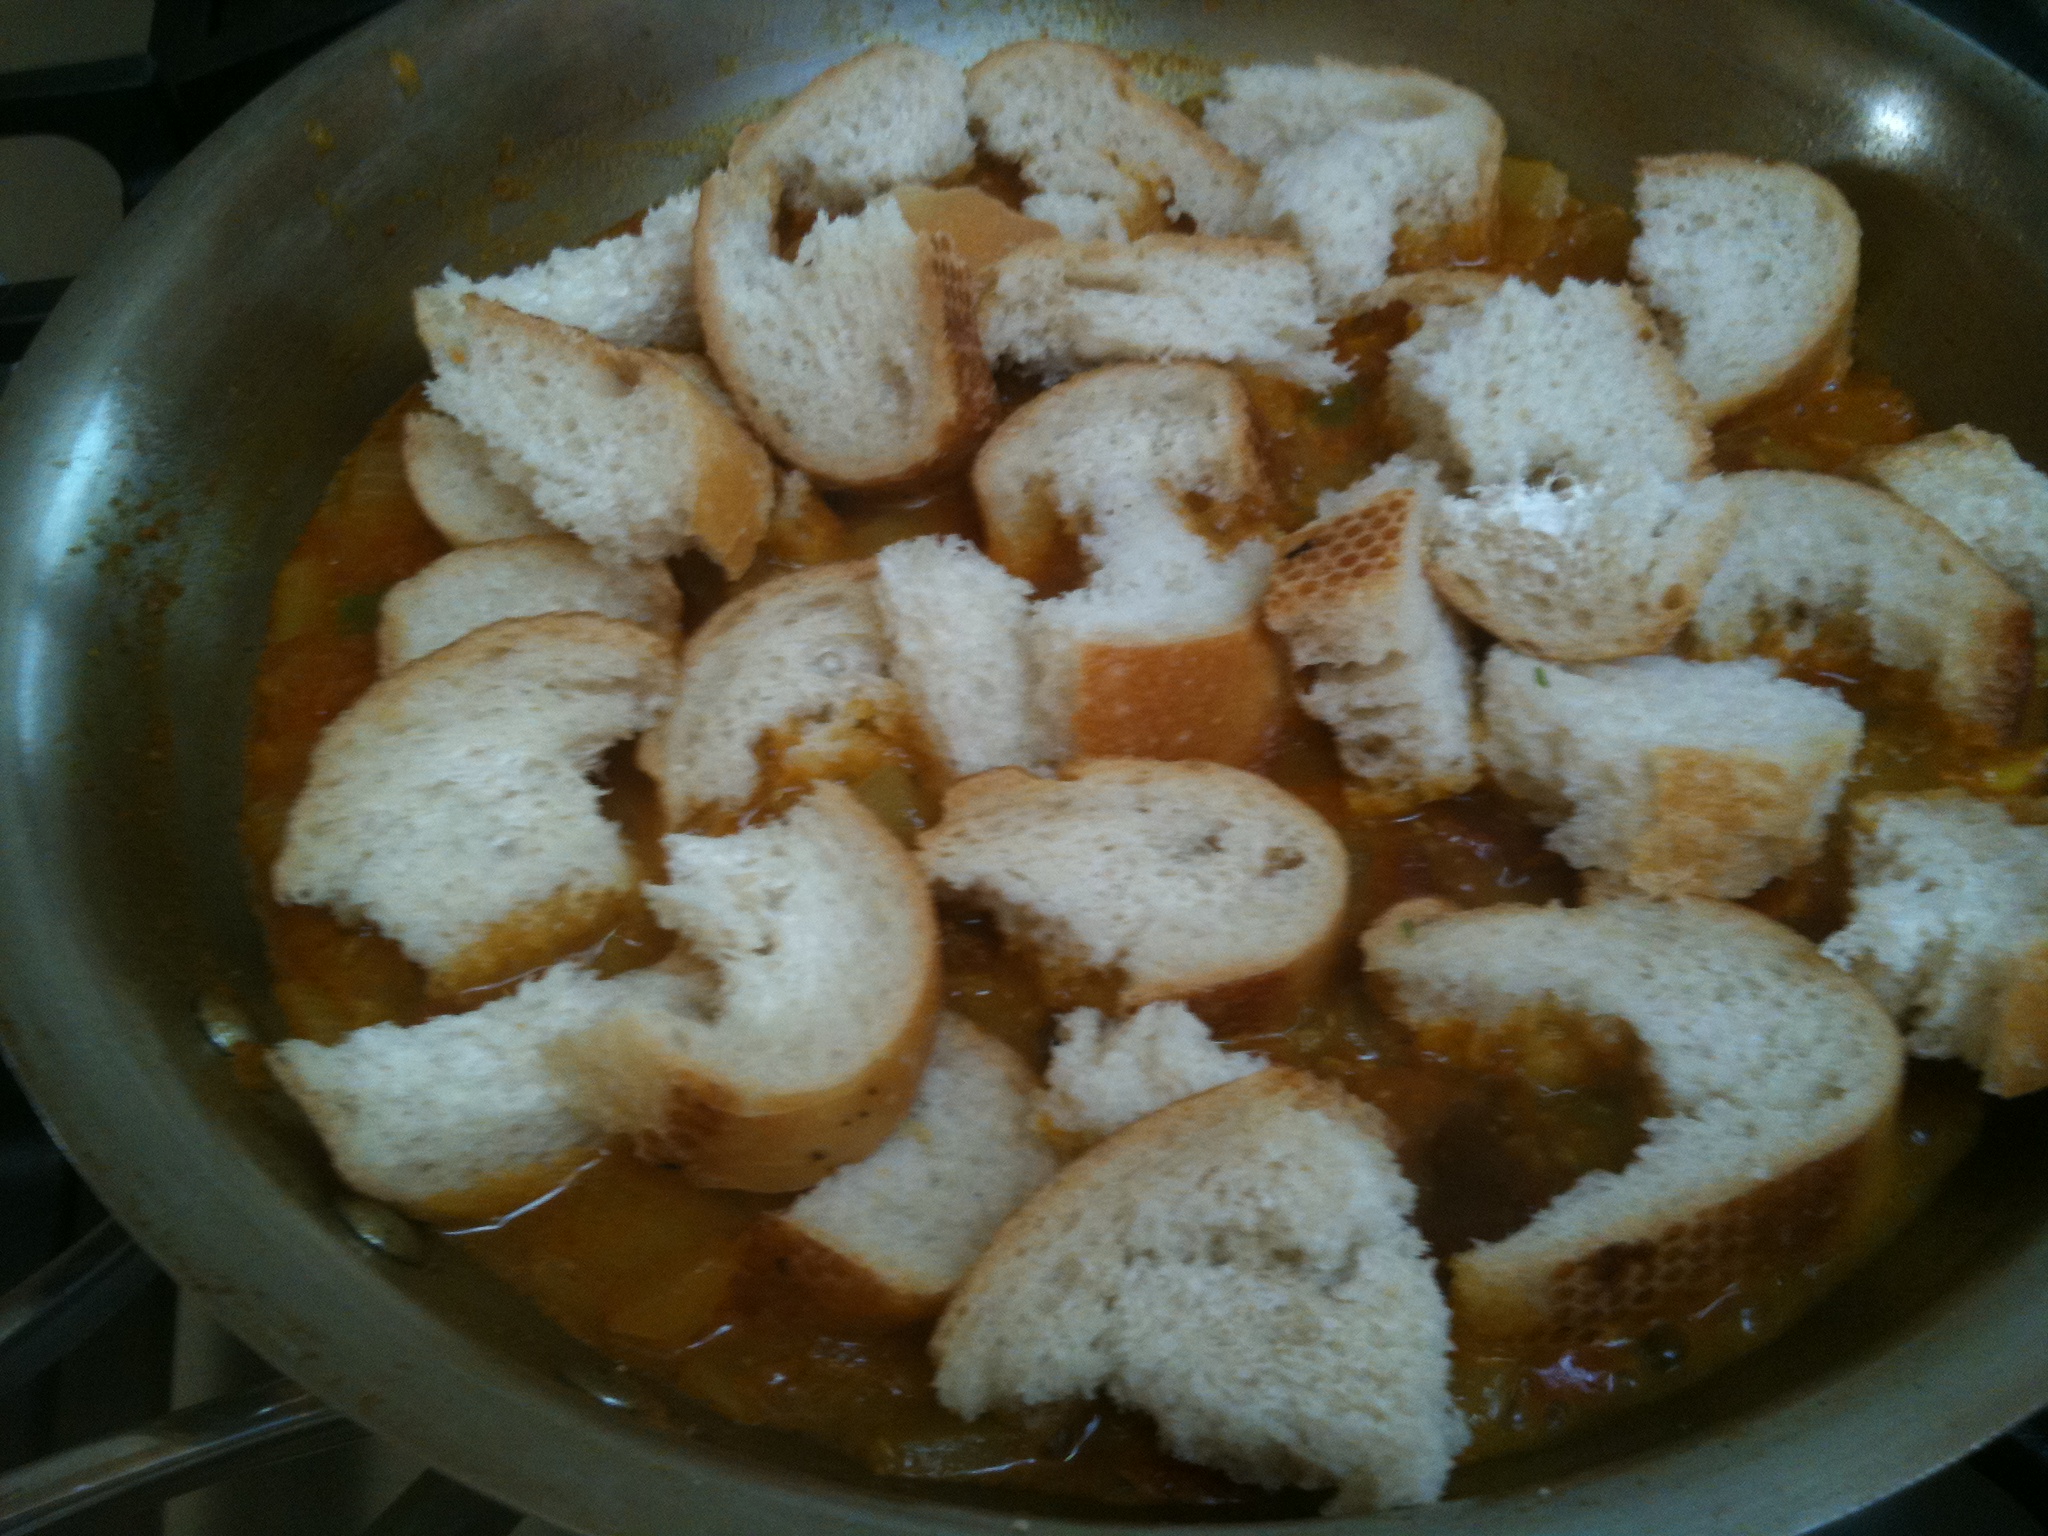
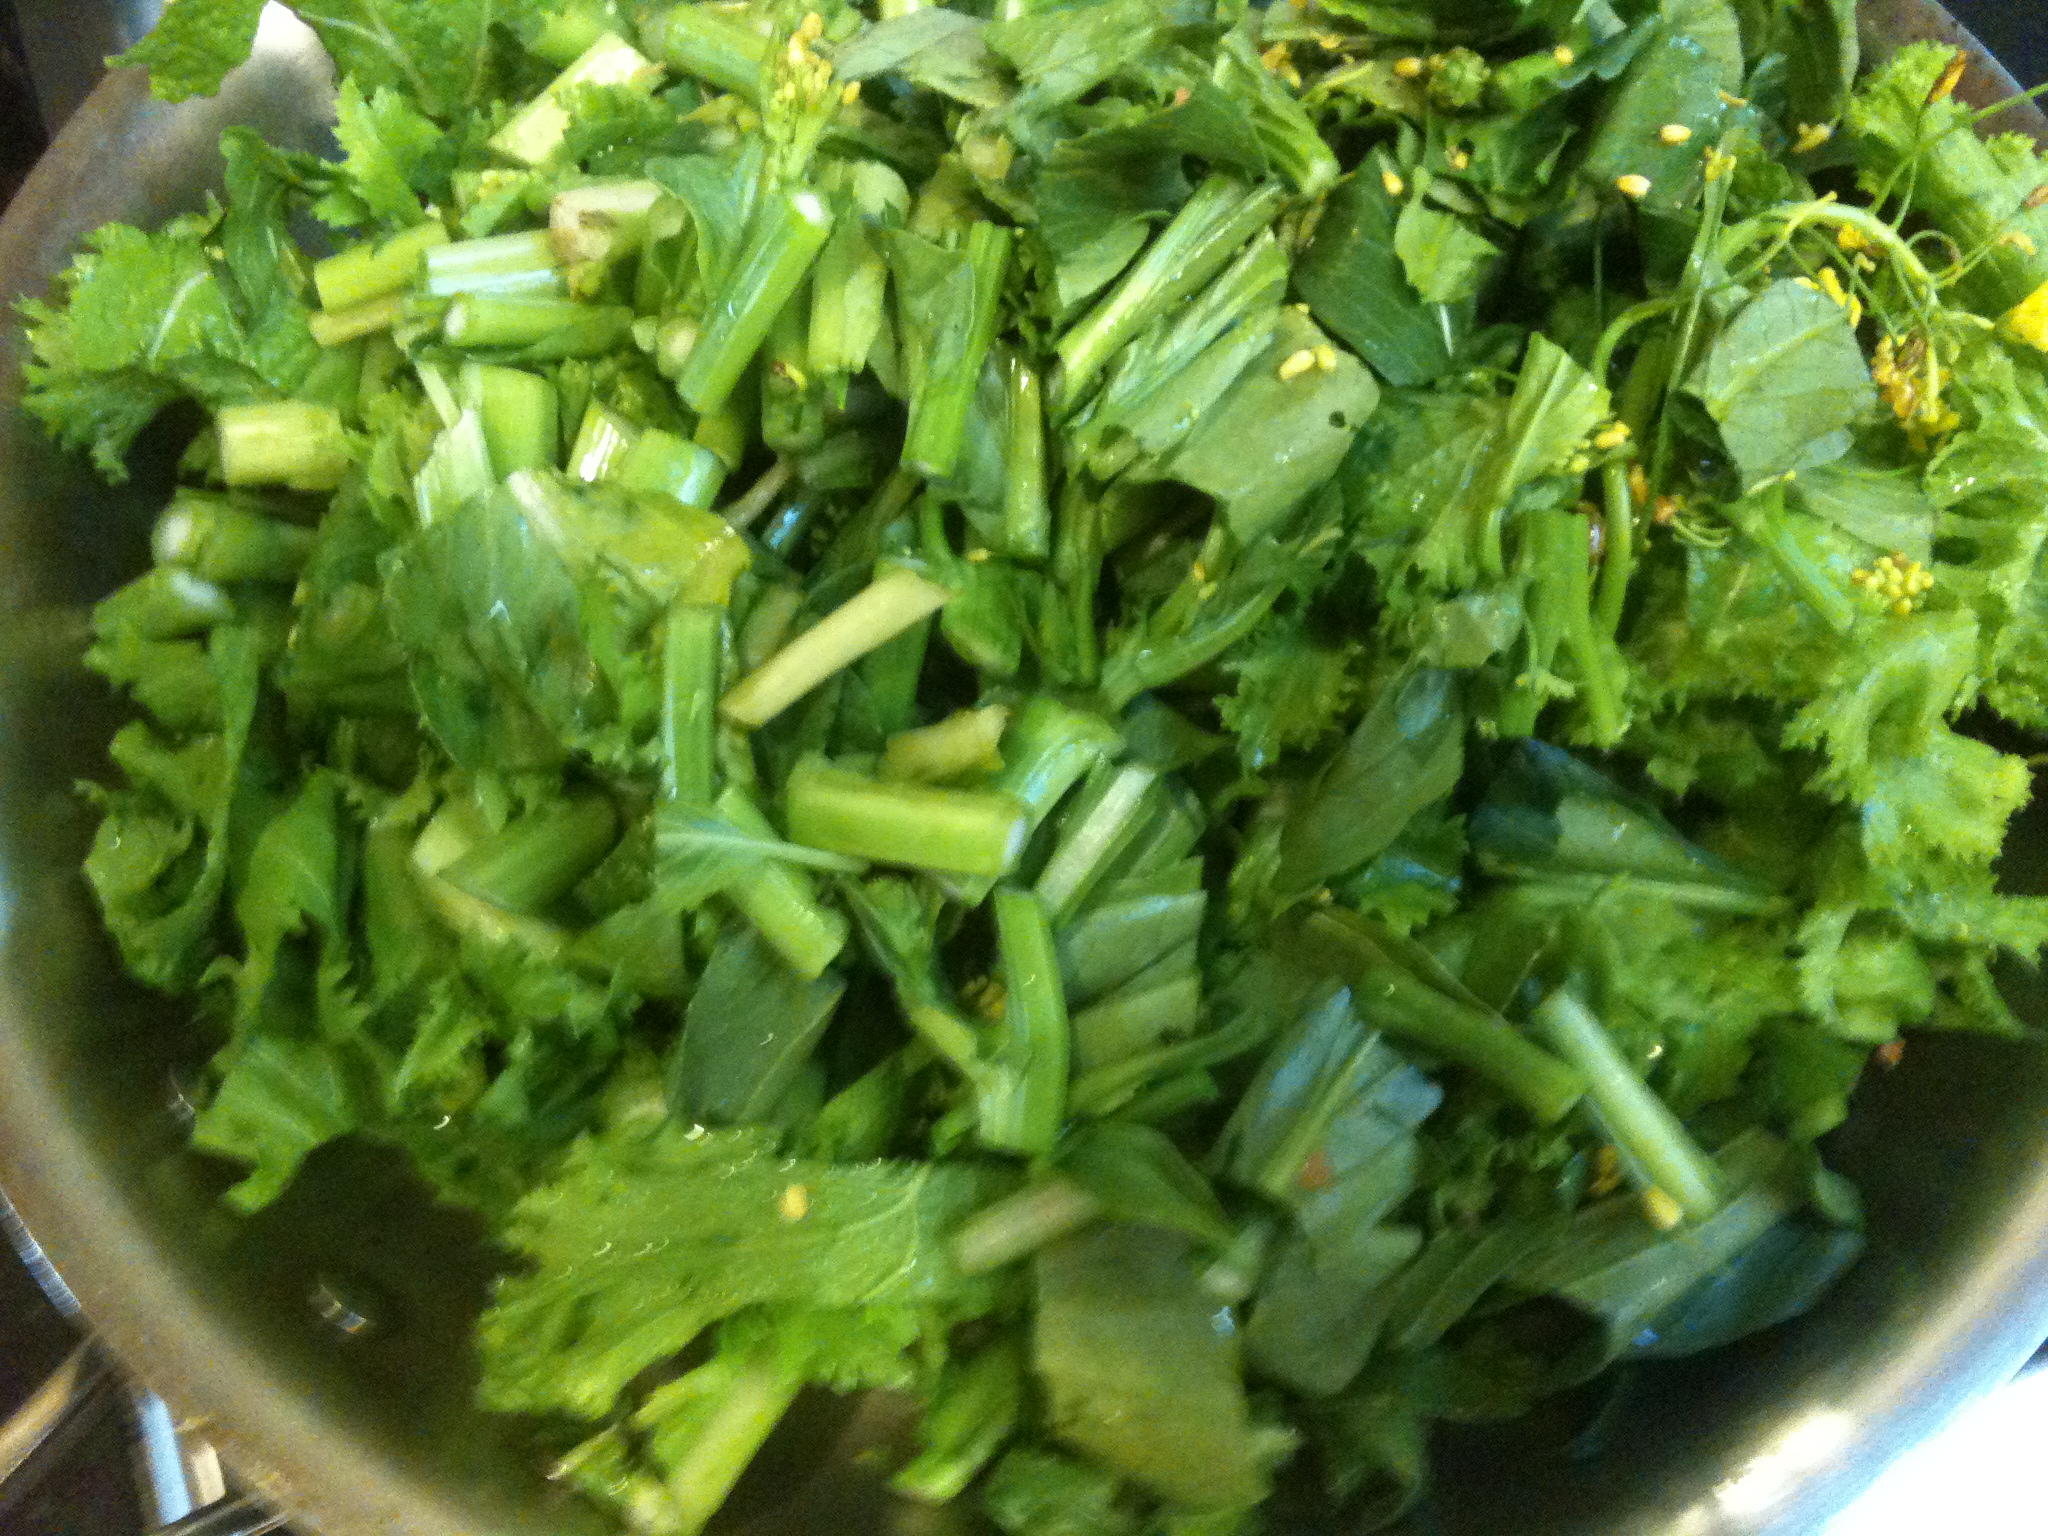
Anyway, a plateful of vegetables, in they go. Salt the vegetables separately in order to get your salt estimate correct. If you have a pressure cooker, cover, bring to a whistle, and pressure cook for exactly 5 minutes 30 seconds — I’m serious, that is the number you want. If you don’t, simply bring to a boil and simmer, half covered, for twenty minutes, and keep checking for done-ness of the vegetables. Remember — the besan, though it certainly needs its rawness cooked out of — has already been cooked enough. The rest is about the vakhar.

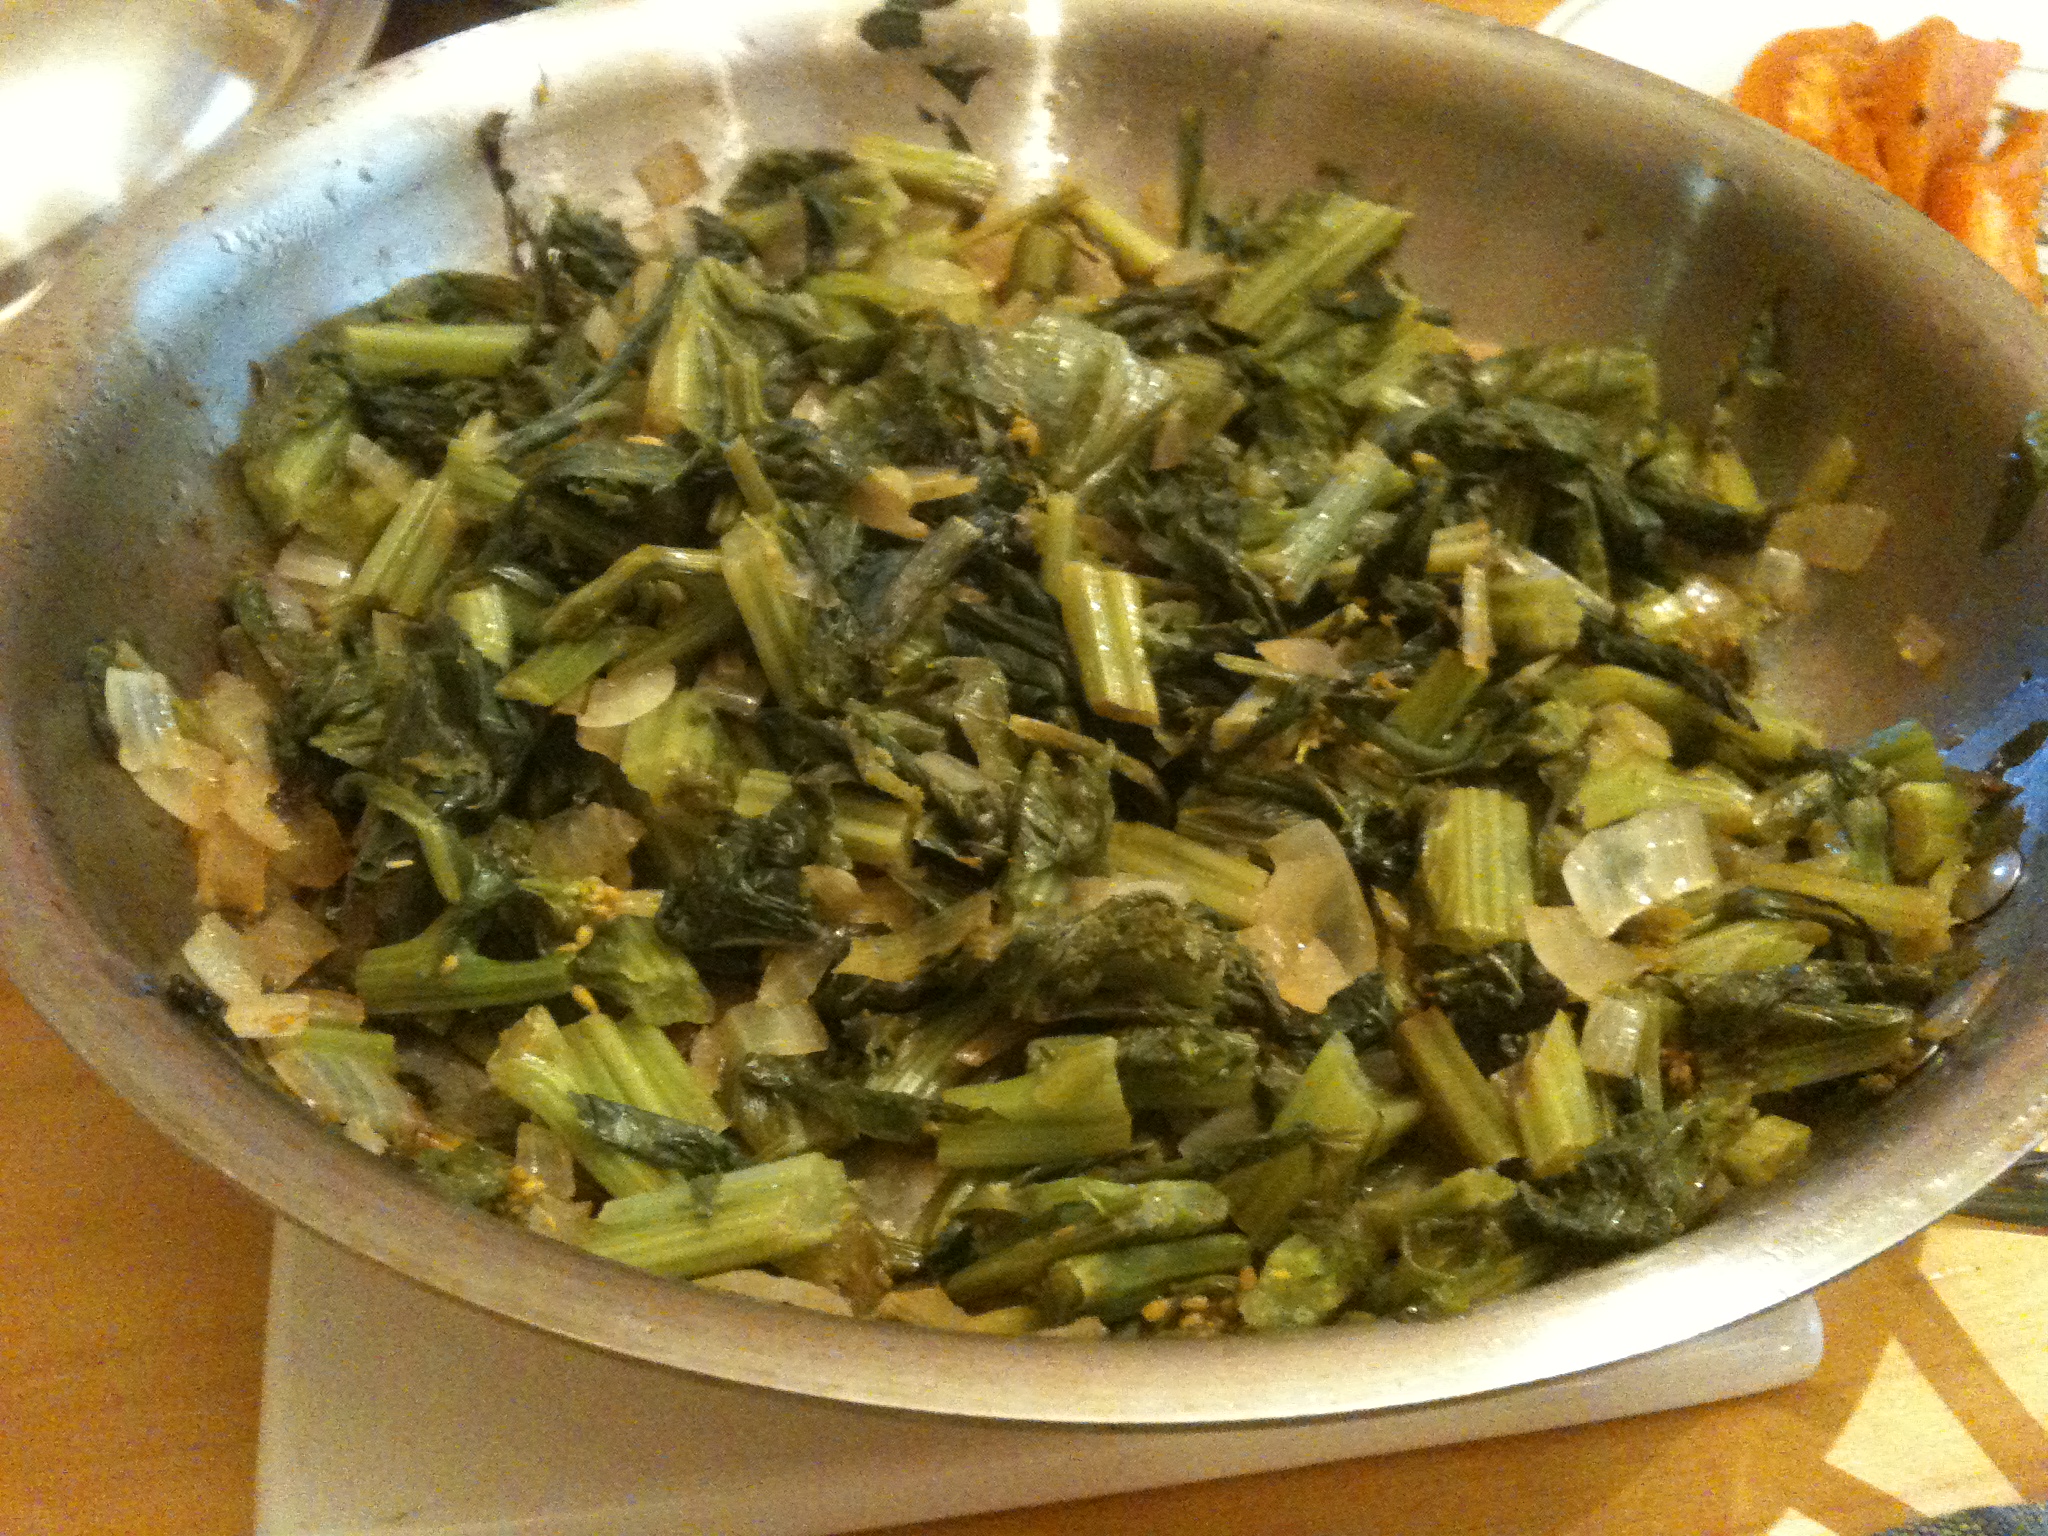
This is what they look like when they have first been put in:

sindhi kadhi 017

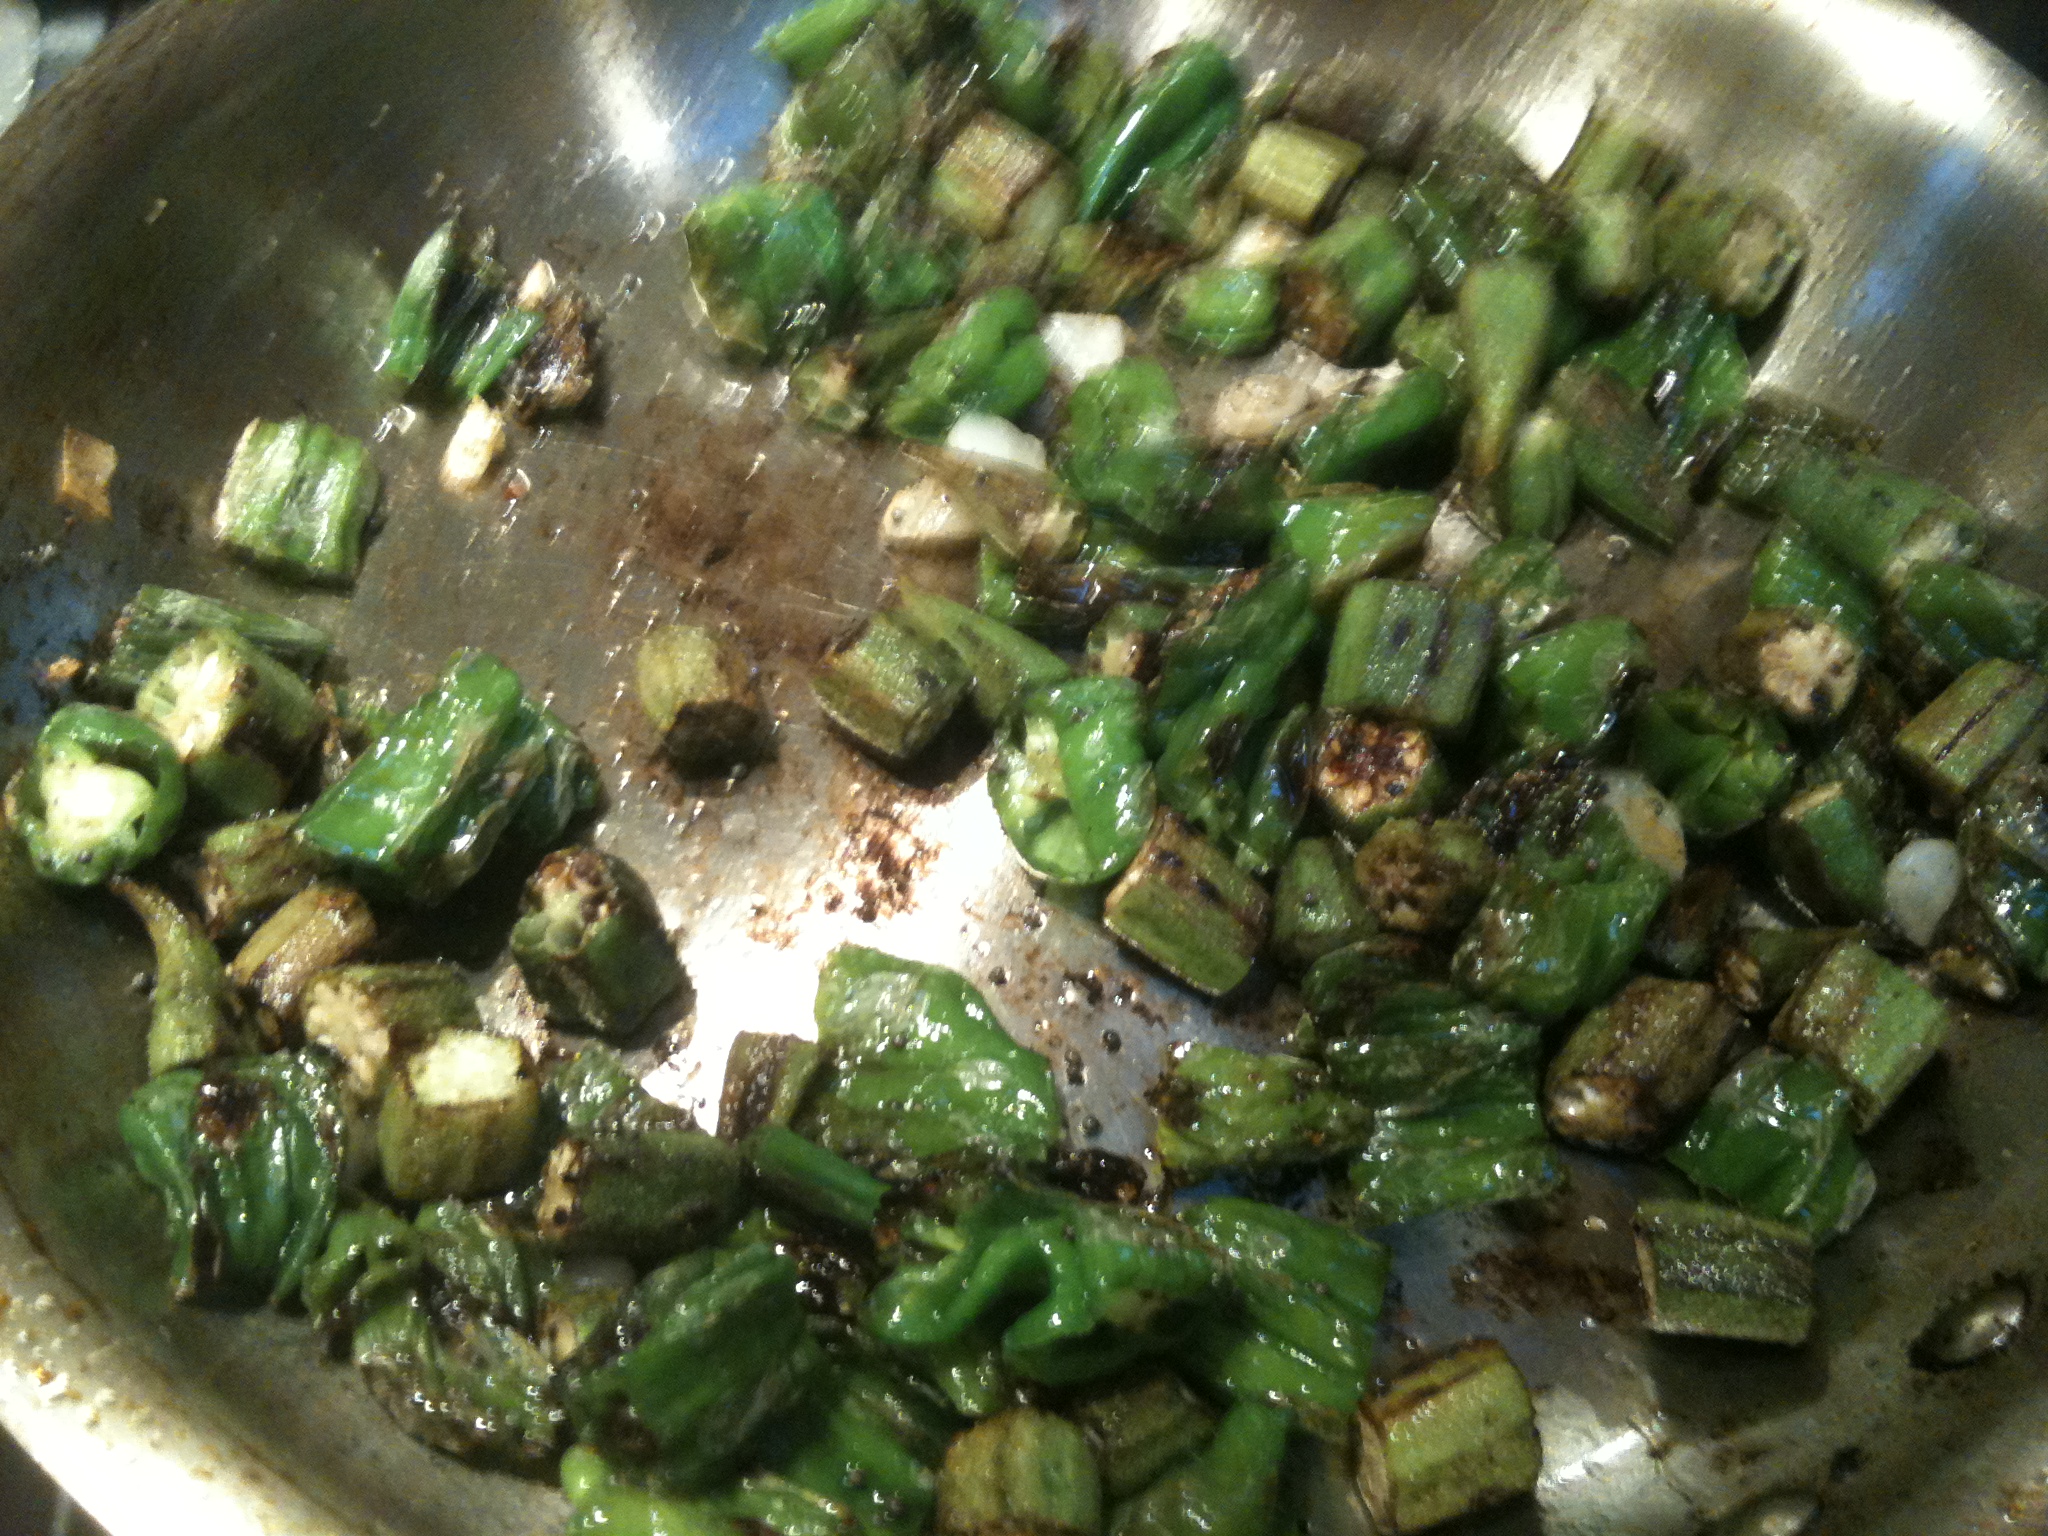
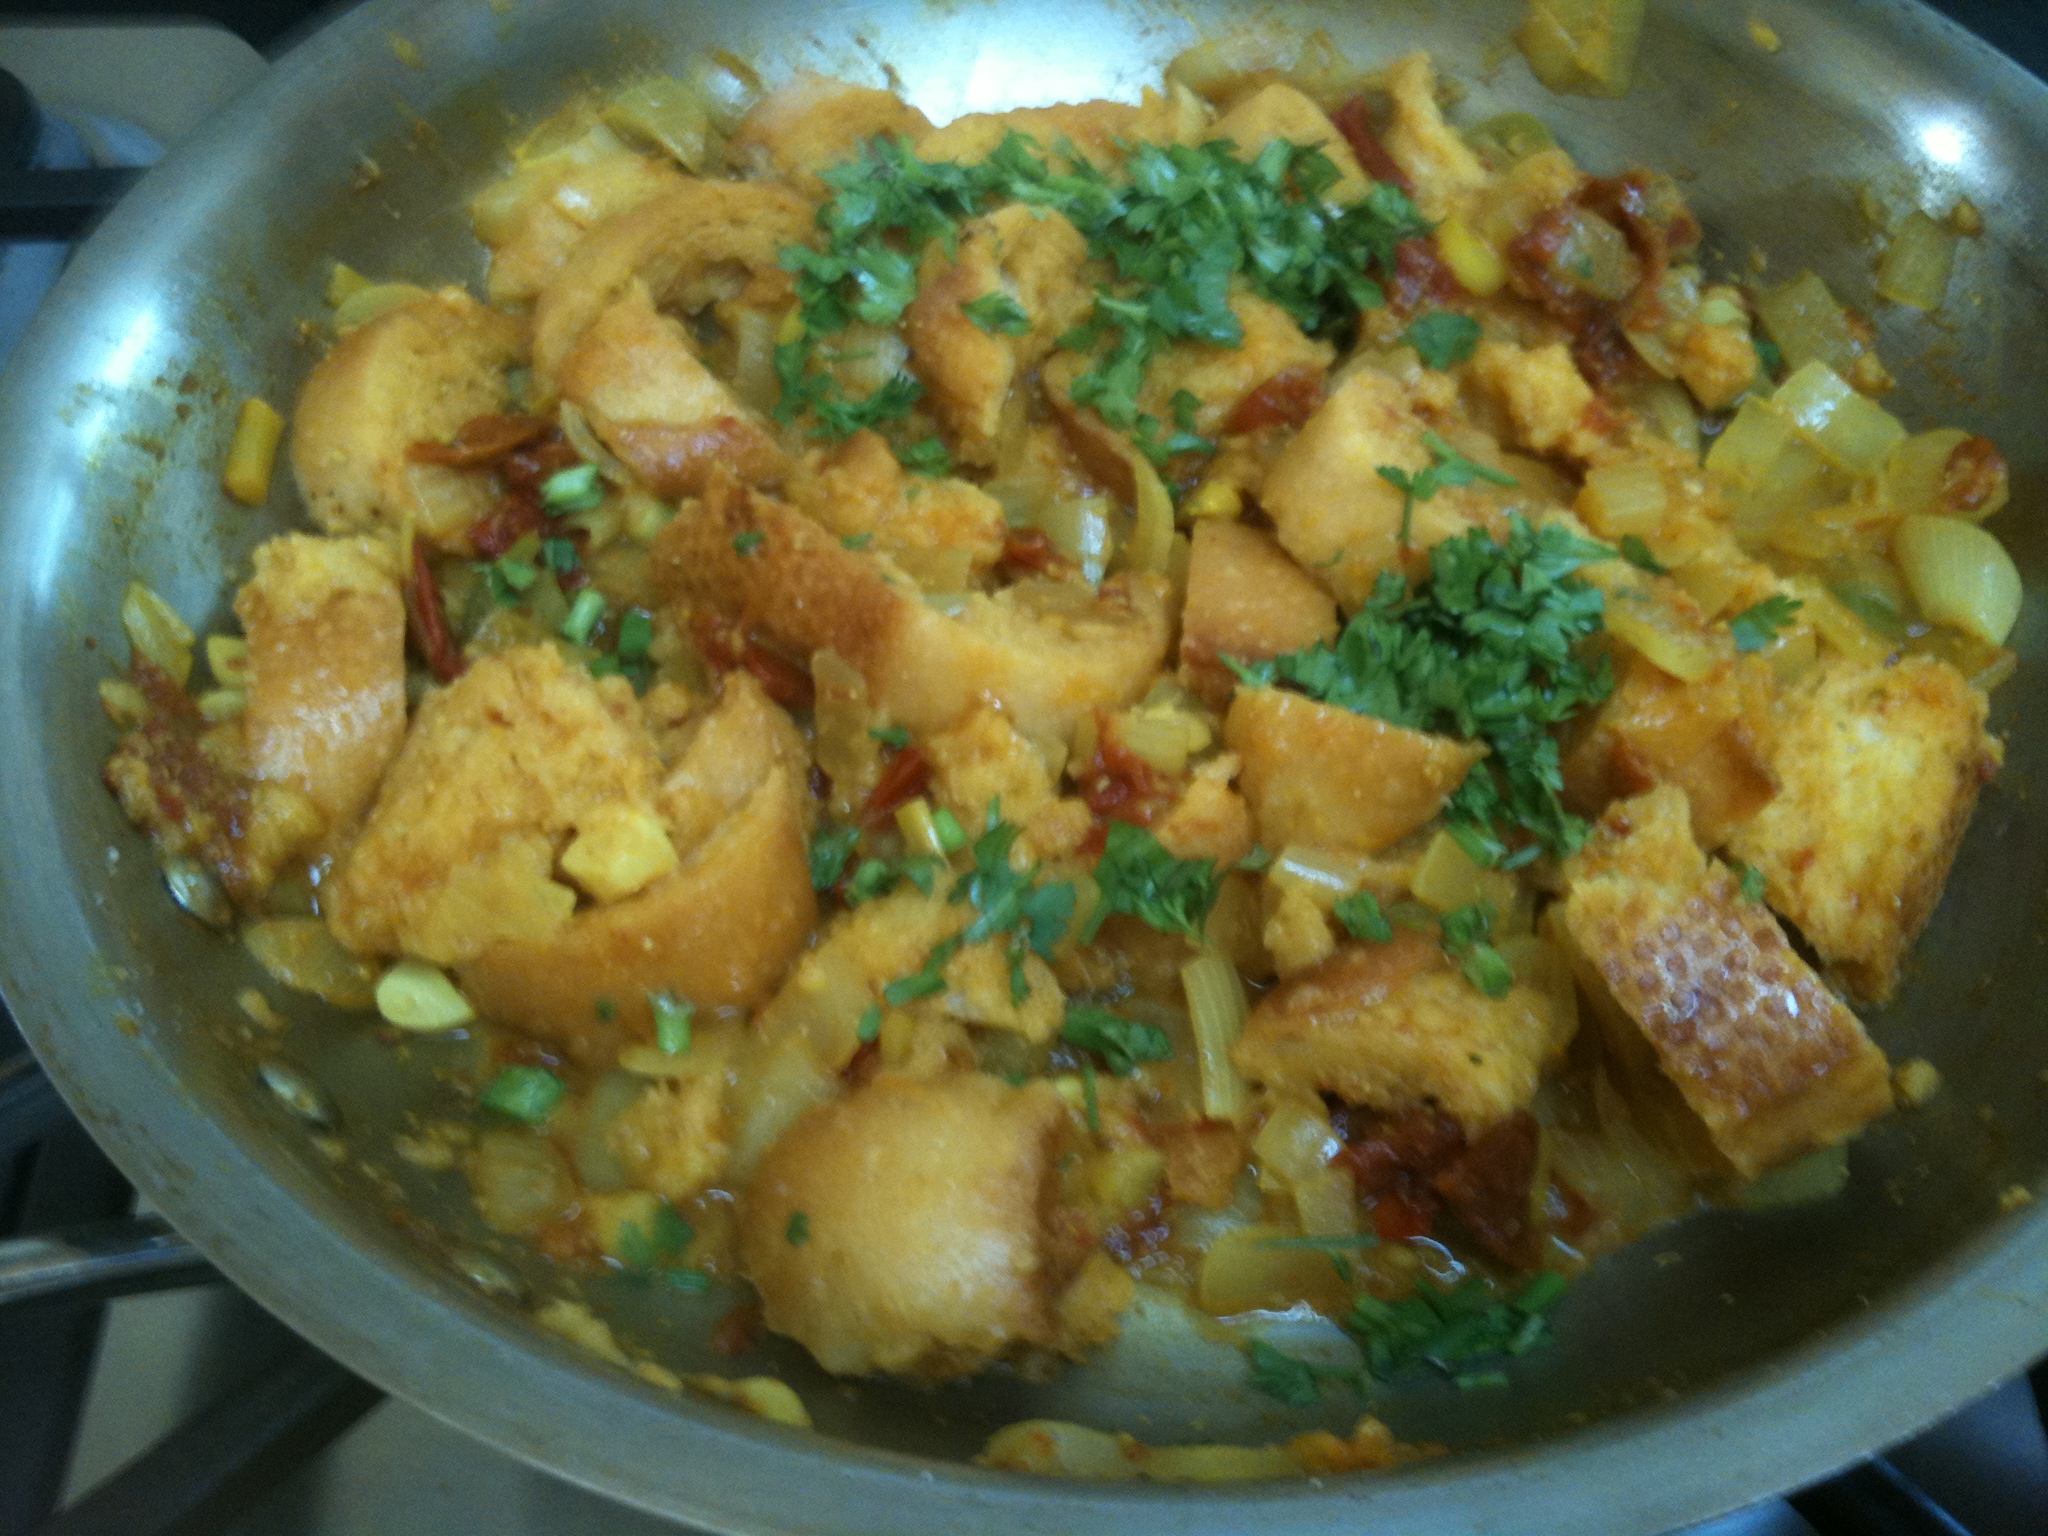
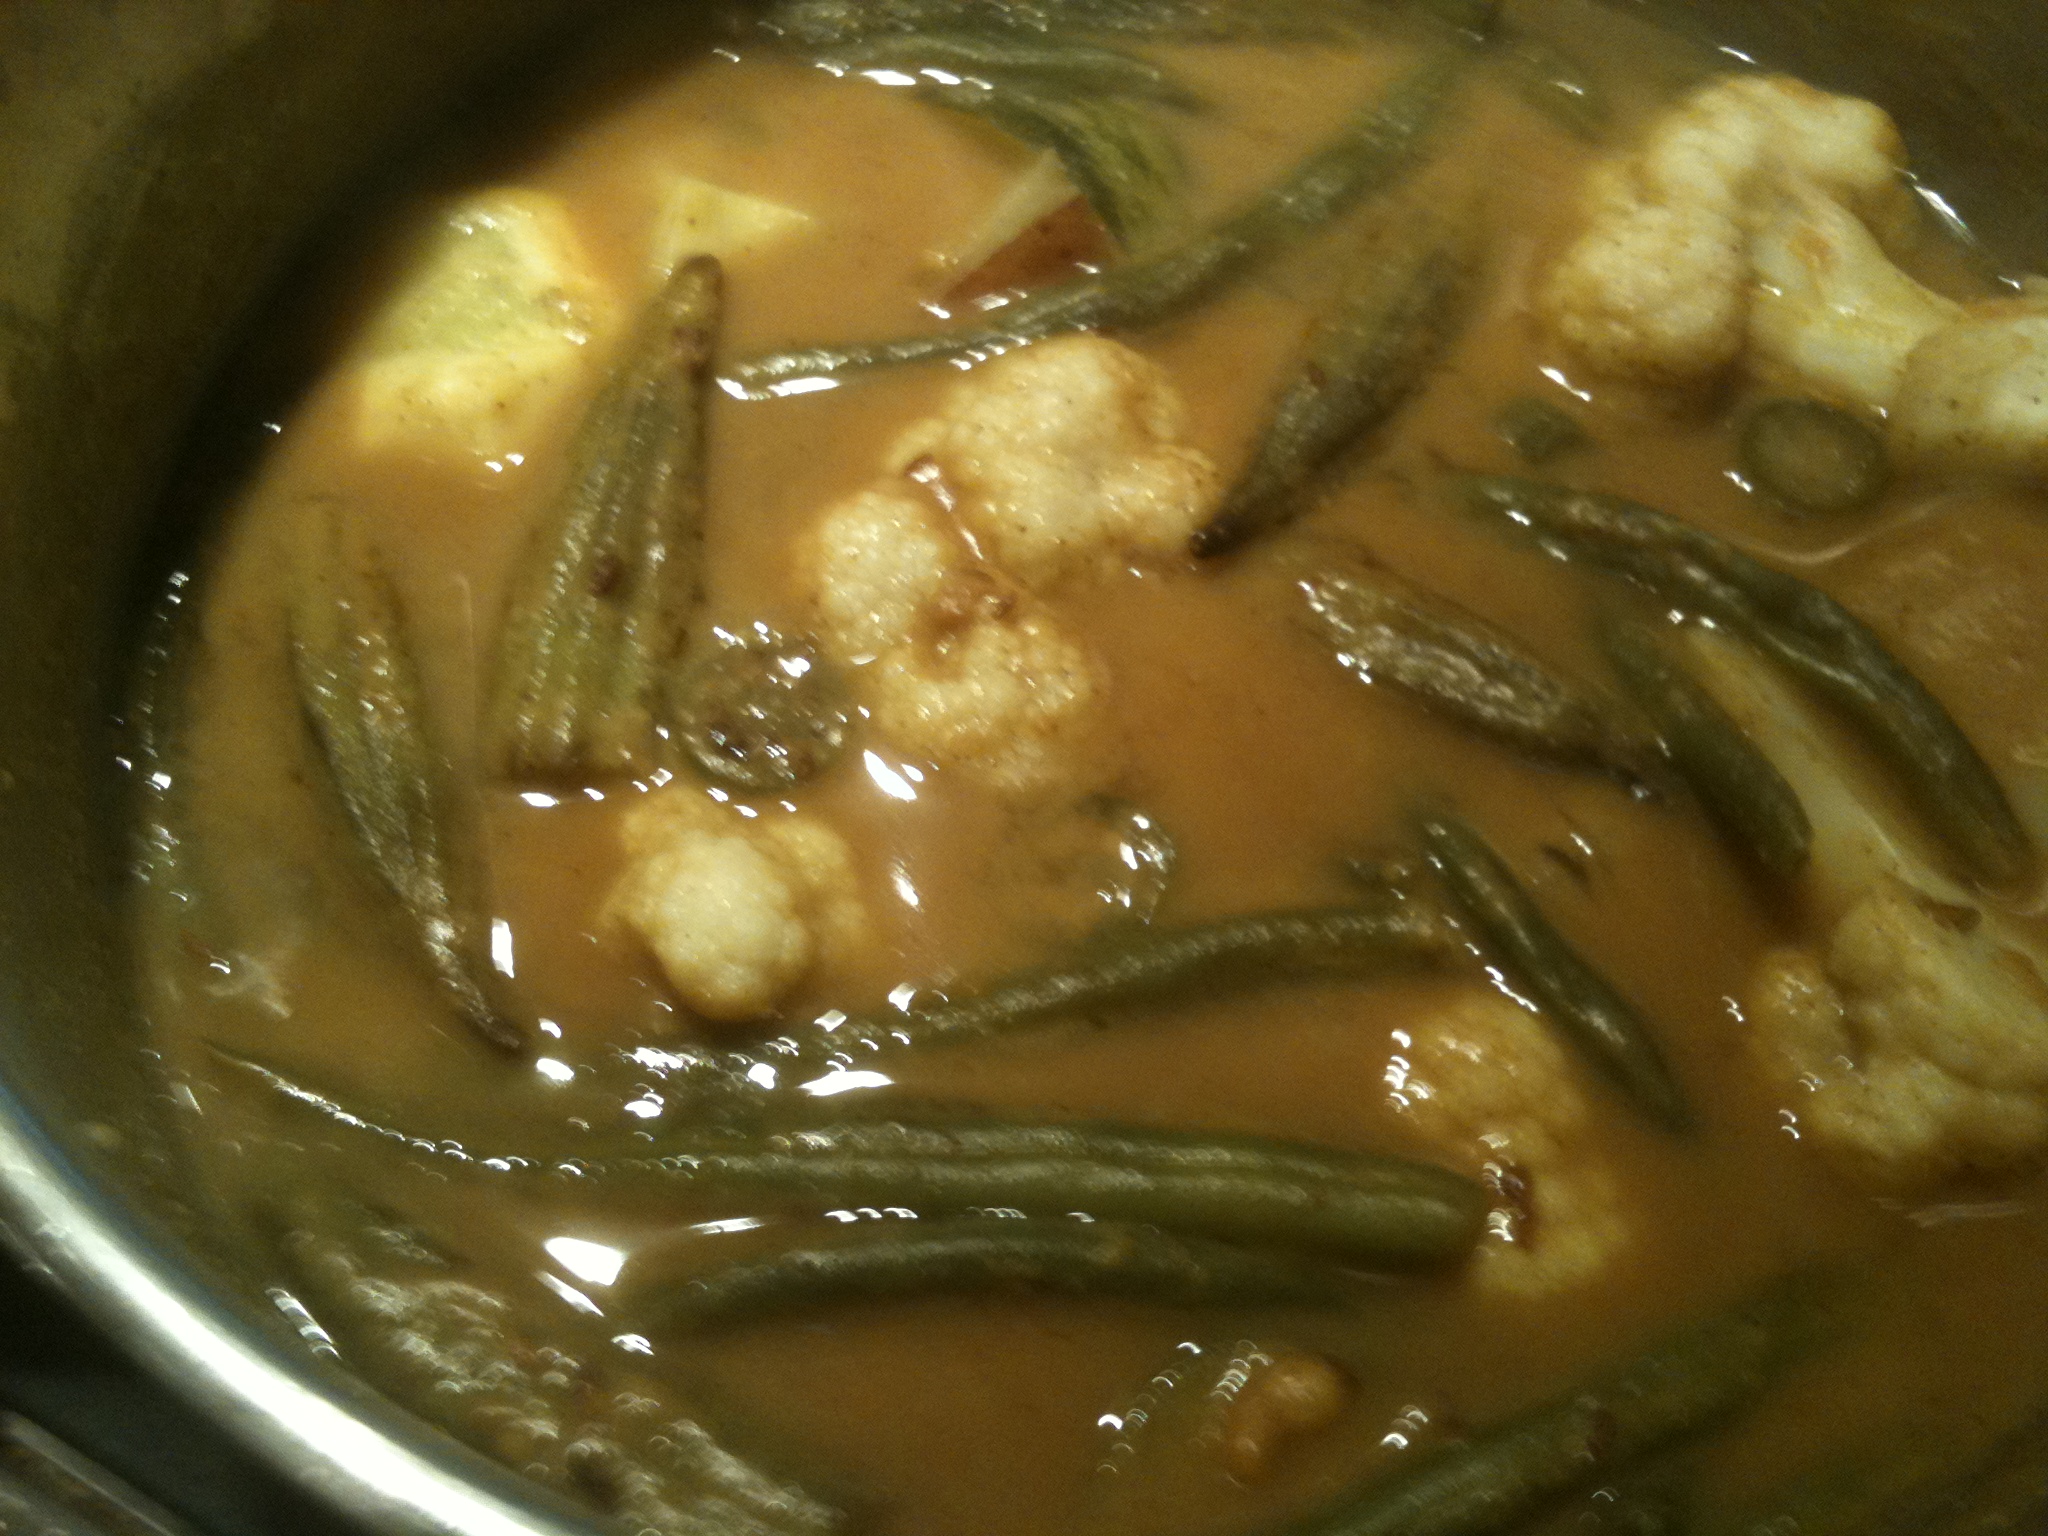
And after going through the pressure cooker, they will alter into this:

sindhi kadhi 021

Subtly different, but infinitely luscious. Enjoy with a plateful of long-grained white rice. Pour so much gravy onto the rice that you feel the need to use a spoon rather than a fork. Then you know you have hit the sweet spot.